This post may include affiliate links, which means I may make a commission on purchases made through these links at no additional cost to you.
Who out there has trouble throwing away any scrap of fabric, no matter how small or probably useless? I know I do! The only bits I can throw away without regret are the trimmed selvages. I have the hardest time getting rid of these nice little squares created by the method I use to create my rock climbing chalk bags and essential oil bags. I have all these beautiful 2" and 1.75" squares that are too small for anything, but look so perfect and pretty!
This project was created with all those little fabric scraps and stash of leftover bits in mind. By turning your fabric scraps into beads, you can both "bust your stash" and make something nifty!
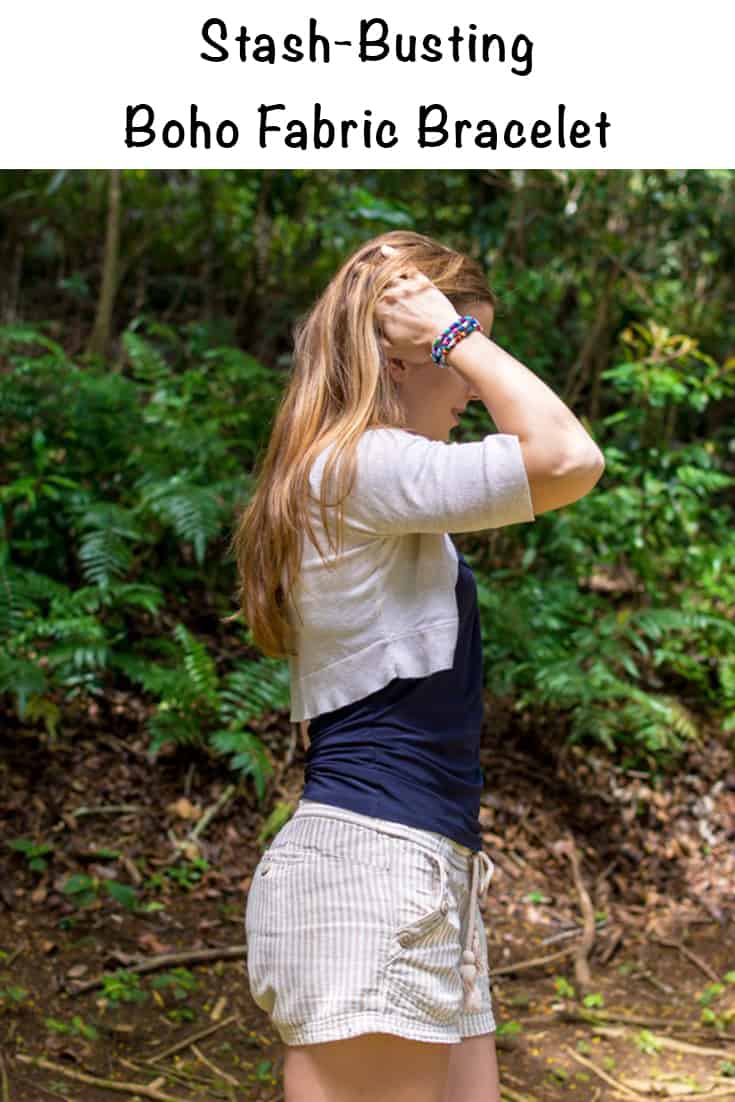
These boho style fabric bead bracelets are effortless to wear and are a fun casual summer project, perfect for those rainy days that keep you in when you'd rather be out! I hope you enjoy this boho cloth bead bracelet tutorial!

It's a good thing I did most of the work on a recent rainy day and only left taking "action" shots of the finished bracelets until the day before publishing this tutorial because my bicycle was just stolen! If I hadn't done so much work "ahead of time," I wouldn't have been able to post a tutorial today. Calling people, filling out police reports, being upset, etc. took several hours of my afternoon. The bike was still there when I got back from taking these pictures at 11:30, then it was gone when I left for my daily Post Office run at 1:30. Sad face. At least I was already planning to drive to the PO - when Papi Chulo is home I (used to) bike. I would have been even more frustrated if I'd suddenly found myself walking there with yesterday's orders!
I'll be totally honest with you - you're probably going to get glue all over your fingers, and making enough beads for more than one bracelet does take a little bit of time. Not a crazy amount of "active" time, but you have to wait for the glue to dry before you can make a bracelet. It is pretty easy, though, and if you're a crafter you probably already have everything you need on hand!
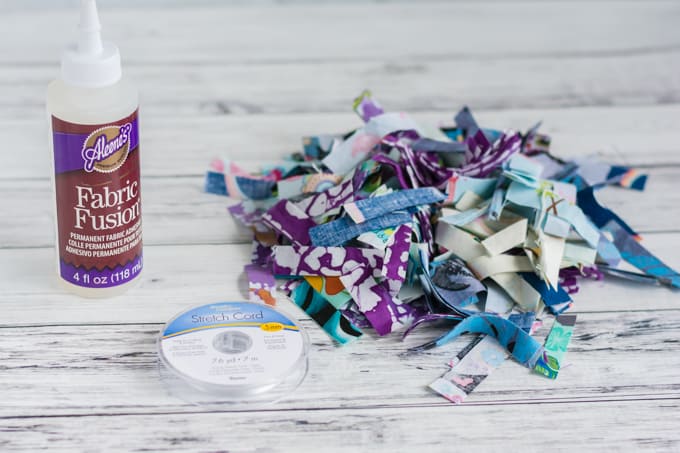
Supplies for making Boho Cloth Bead Bracelet
- Scrap fabric
- Fabric glue (I used "Fabric Fusion" for this project, but have since discovered that I actually prefer Original Tacky Glue)
- Rotary cutter, mat, and ruler (optional)
- Sharp scissors
- Stretch cord or stretchy string (I used .5 mm cord)
- Bamboo skewers
- A small piece of tape
This tutorial is written for a "bracelet," but you can just as easily make a necklace, instead! Or multiple necklaces - that will really bust your stash!
Boho Cloth Bead Bracelet Tutorial
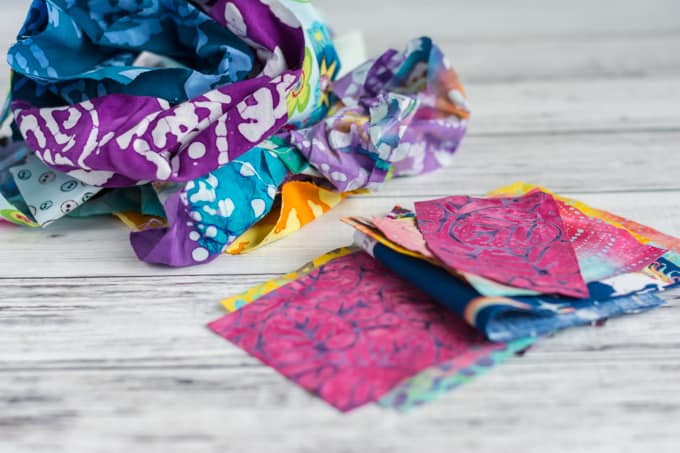
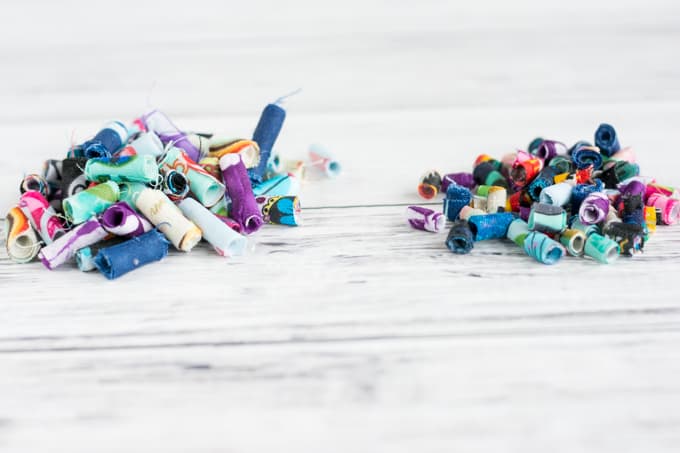
1. Gather up your scraps! If they're wrinkly, iron them. You want them to look like the front stack, not the back pile!
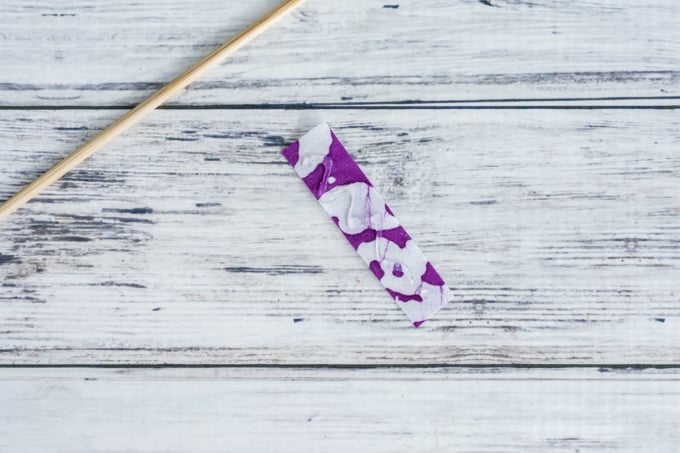
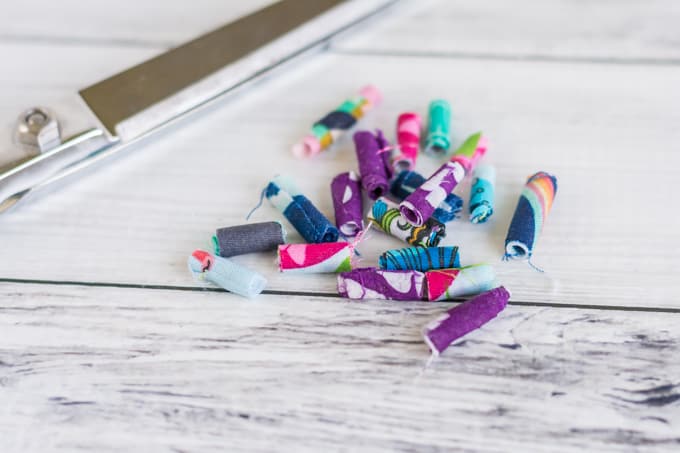
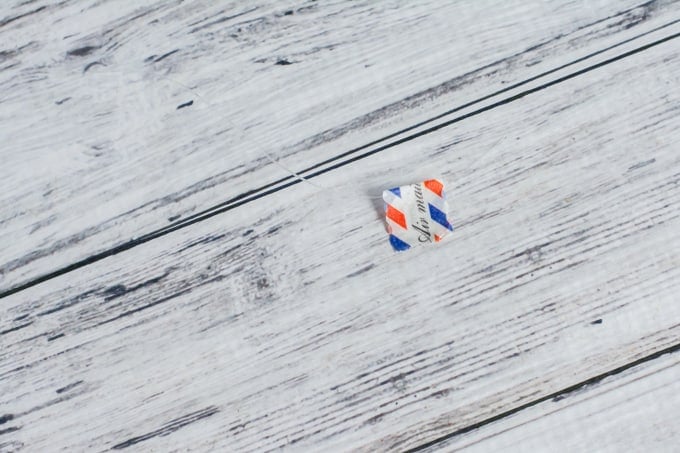
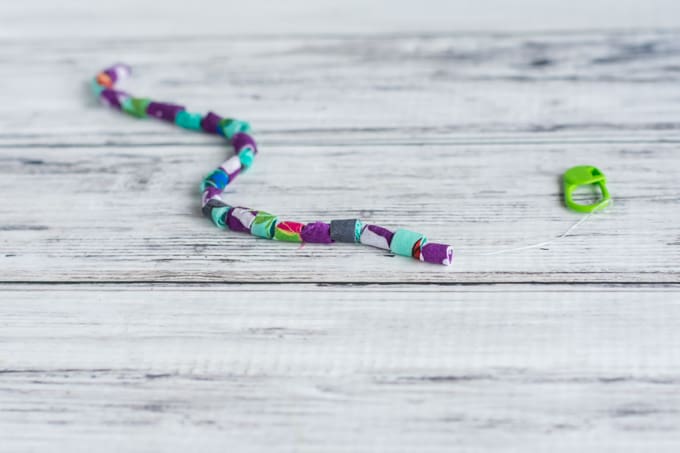
2. Cut your fabric into strips. I used my rotary cutting supplies and made pieces about ½" wide and 2-3" long. I experimented and discovered that narrow rectangles are way easier to cut than the triangles we usually associate with paper bead making and far easier to use. I eventually cut each rolled strip into two, or even three, beads. If you plan to cut your beads down, you'll get two beads from each fabric strip. Wrist sizes vary, but there are about two dozen beads on each of my bracelets, which means each one only used about 12 strips of fabric.
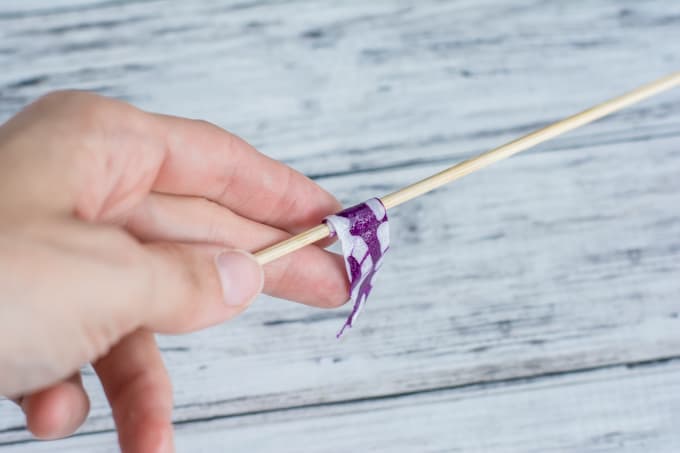
3. Get your skewer, glue, and a strip of fabric. You'll probably want a paper towel to wipe your hands on between beads, too!
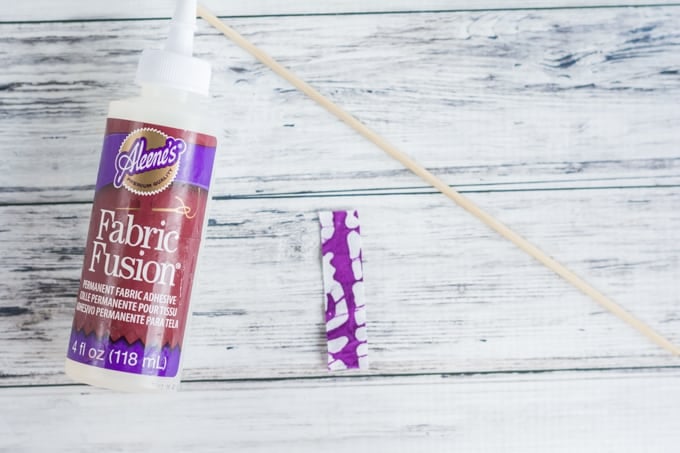
4. Apply a fairly generous line of glue on the "right" side of the fabric.
5. Spread the glue around on the front of the fabric, then rub a little along the "wrong" side at the end opposite from where you plan to start rolling the bead. Begin rolling the fabric strip around the skewer, but make sure not to wrap it too tightly or the bead won't slide off!
6. Finish wrapping the bead and smooth the end down. Add more glue, if needed.
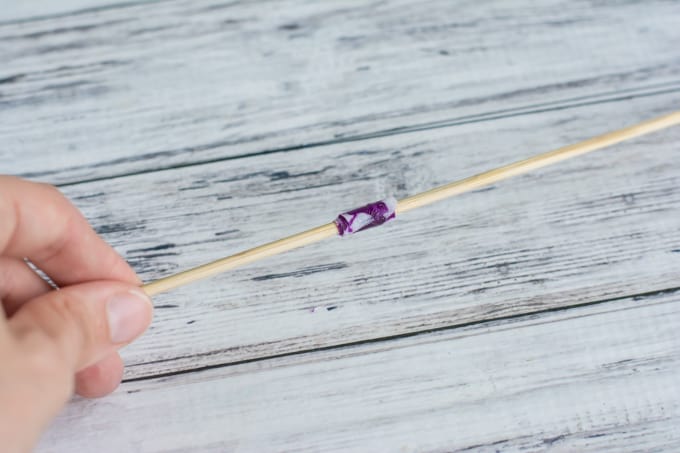
7. Slide the bead off the skewer and set it aside. Putting it on wax paper, a piece of plastic, etc can keep it from sticking to your table as it dries but, quite honestly, I just left my beads on the table and made sure to roll them around a couple times while they dried and none of the beads gave me trouble.
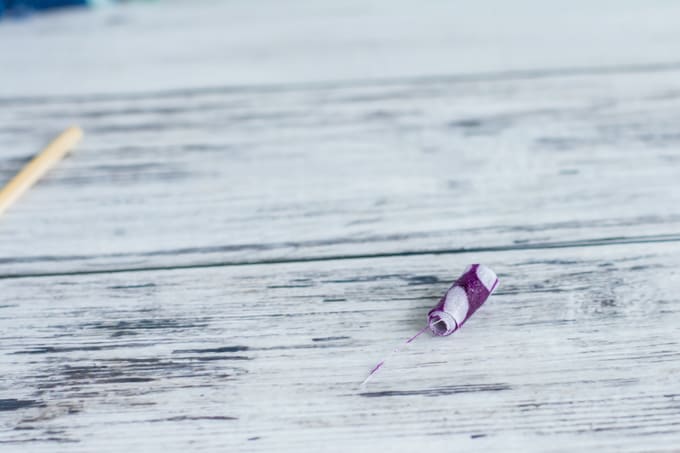
You will see little stringy bits on the edges of your beads. Don't worry about them right now - we will fix this after the glue has dried.
8. Keep on keeping on making beads and wiping/washing your hands as needed until you have at least half the number of rolled beads as you want finished beads.
9. Allow the beads to dry fully. They're usually okay to work with in a couple hours, but it depends on how much glue you used and what the weather is like (no, really!).
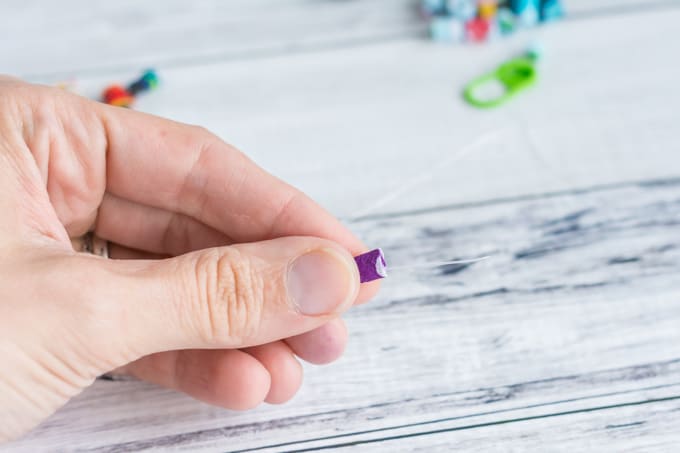
10. Use your scissors to trim away stringy ends, as desired.
11. Cut your beads in half, or even thirds, if you want. Make sure to cut the beads far "back" on the scissors - get each bead as close to the scissor's jaws as possible. The beads may become slightly flattened, but if they're fully dry you should be able to easy press them back into shape. The beads on the right in the photo below have been cut in half.
12. Cut a piece of stretch cord that's at least three inches longer than your wrist.
13. Fold a piece of tape around one end of the cord, or tie it around something like a locking stitch marker or safety pin. This will keep the beads from falling off as you work!
14. String your beads!
15. Once your bracelet is long enough, you're ready to tie it off!
Stretch cord is notoriously annoying to tie. The packaging that came with your cord will probably have some advice on how to secure it. I use a "surgeons knot," which is basically a square knot with an extra twist, then trimmed the ends, put a dollop of glue on the knot, and pulled the knot inside a bead so the glue would secure it in place.
Instead of posting photos for basically invisible stretch cord being tied into a knot, I made a video! This video shows how to roll the beads, cut them, string them, and how to tie off the stretch cord.
16. Make as many bracelets as you'd like - they're perfect for stacking! Then enjoy wearing them. =)
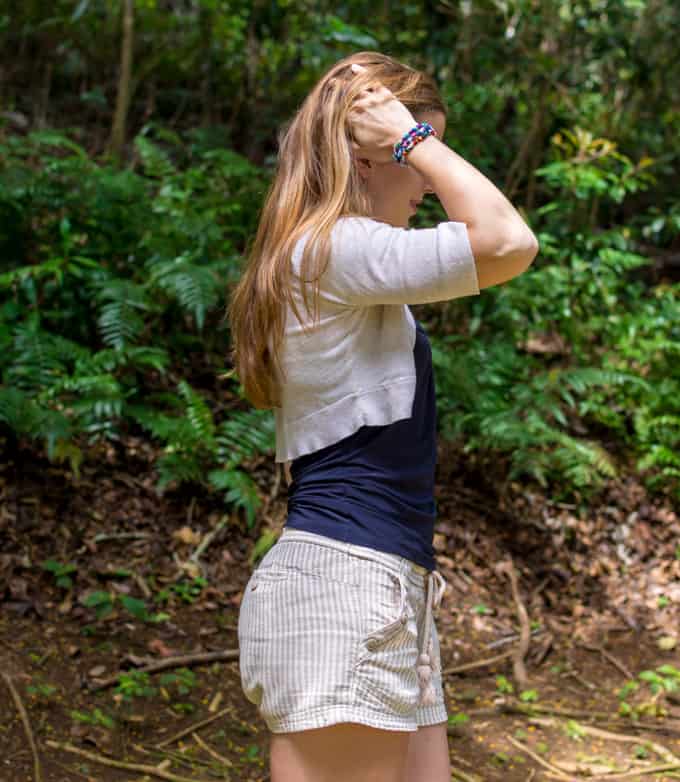
These fabric bead bracelets look just as great on you wrist while you fix your hair:
As they do when you get photobombed!
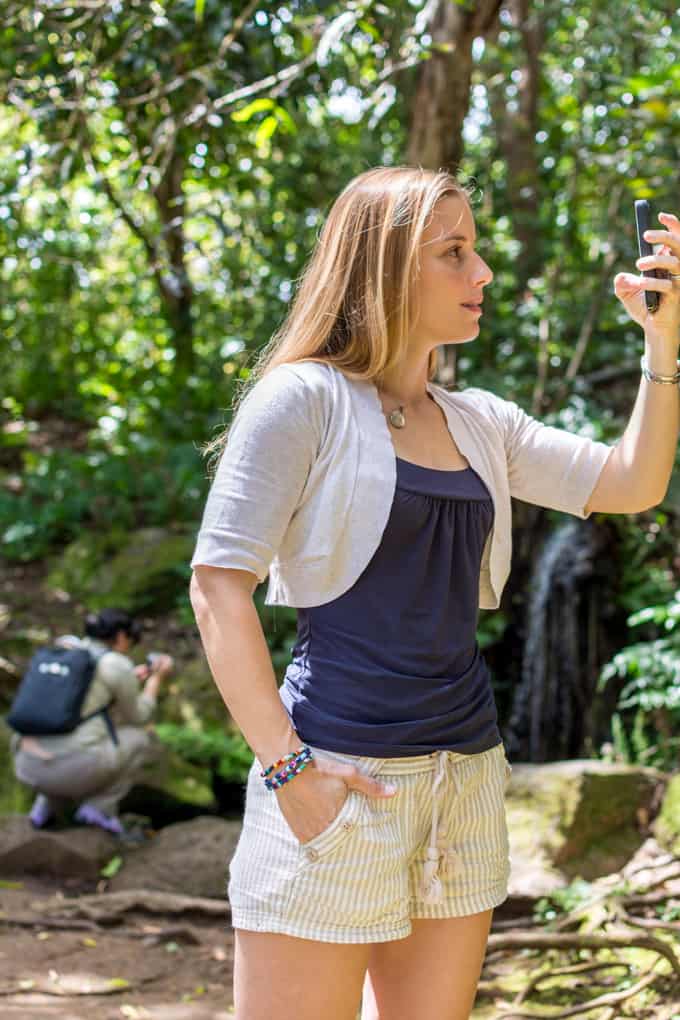
Okay, so that really isn't a bad photobomb because she's not between me and the camera, but she totally wasn't there when I checked my camera settings and then was there when I looked at the picture.
Because I know someone will ask about Mod Podge - I love Mod Podge as much as the next girl, but I can't really recommend it for this project. It will technically work, but it's an even bigger mess, doesn't dry as nicely, and leaves a sort of funny sheen on the fabric. I know because I made several beads with it as a test! Feel free to use whatever glue you like best, but Fabric Fusion or Original Tacky Glue are definitely my top picks for this project.
Did you ever make those paper beads? I'm pretty sure I did, but when I think about making beads as a kid I mostly remember this cool clay set with molds. You formed the beads around a dowel, put them in the molds, and then you could paint them once they hardened. Or, at least, that's the way I remember it! Did anyone else have one of these kits?
Jennifer Salvo
Thanks for your instructions. But I'm sorry to hear your bike was stolen. But your direction and video guide helped me so much. Which glue is best in this regard?
Natasha
Thank you - I never did get my bike back.
I used Fabric Fusion, the pictured glue, but in retrospect Original Tacky Glue probably would have been even better.
Robin
Hi! Really cute idea! Just wondering if they survive getting wet?
Natashalh
They sure should! That's exactly why I used the glue I did - it is washable after 24 hours. If you use Mod Podge or something, probably not. Just make sure to use a waterproof fabric glue and you should be good to go!