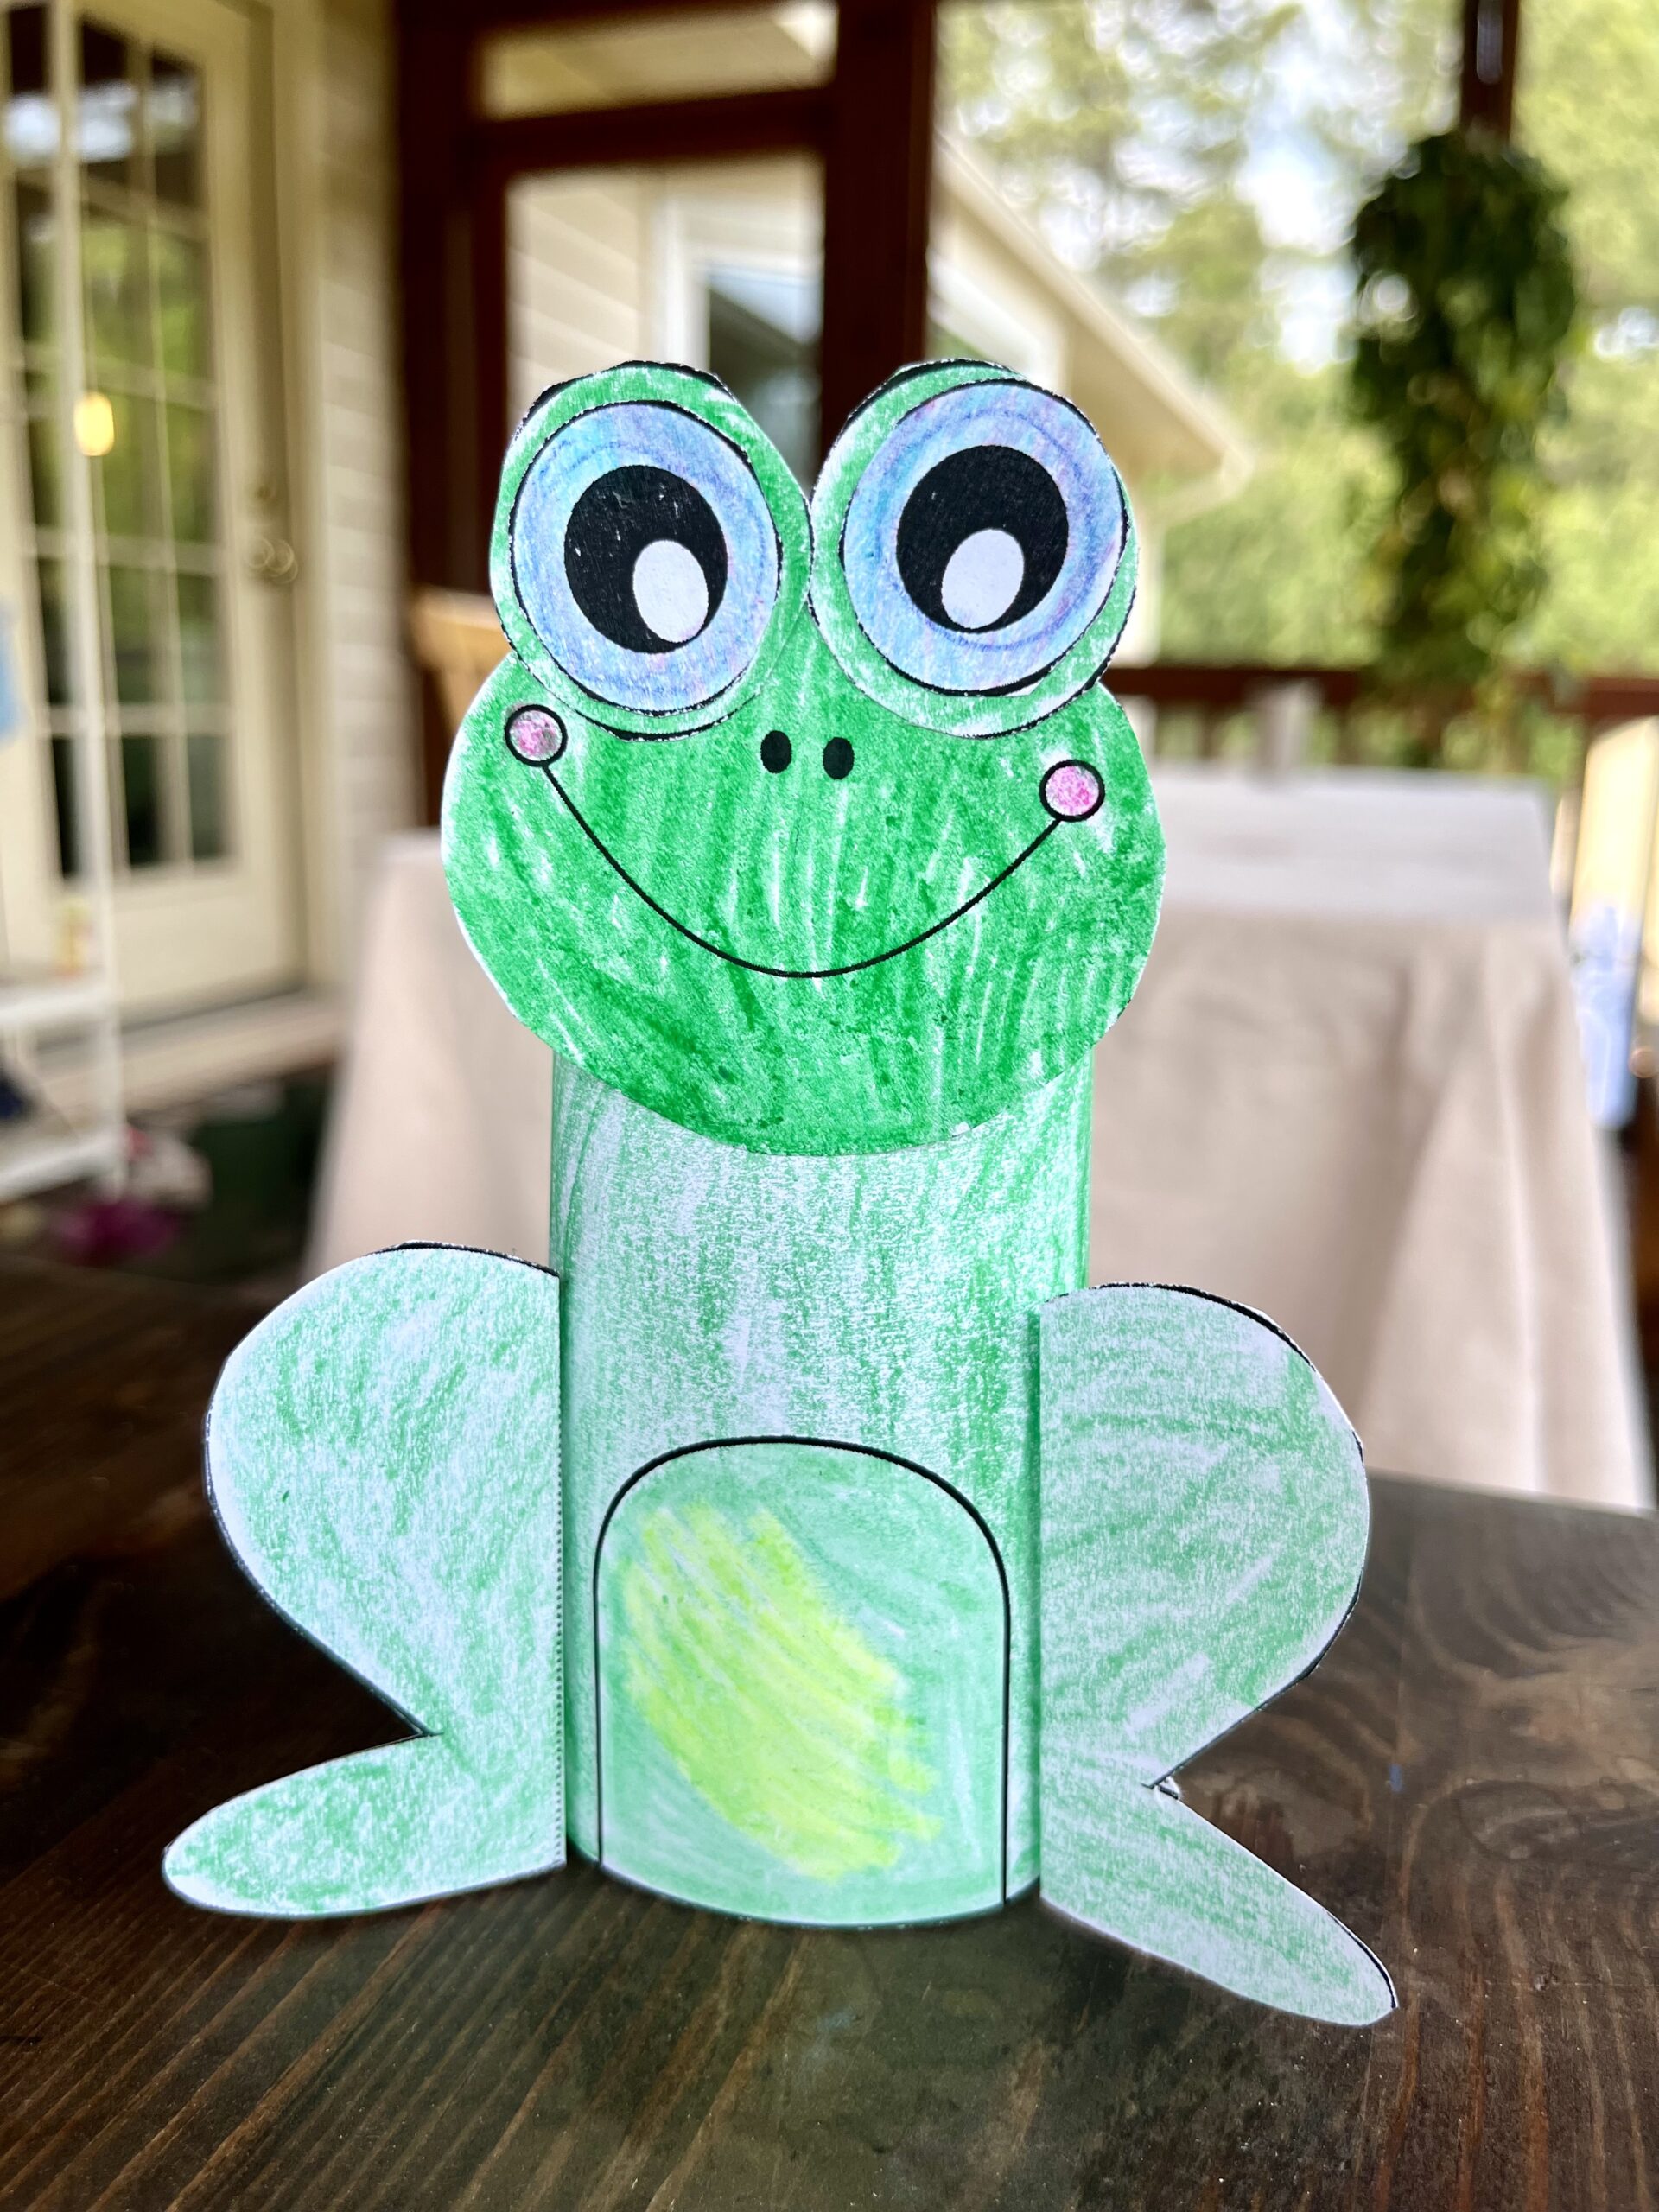
Whether you’re teaching a unit on pond life, celebrating spring, or just looking for a rainy-day activity to keep little hands busy, this 3D paper frog craft is a "ribbiting" good time!
This is a fun, but pretty easy, cut and paste craft that can stand up on its own. I hope your little learners enjoy!
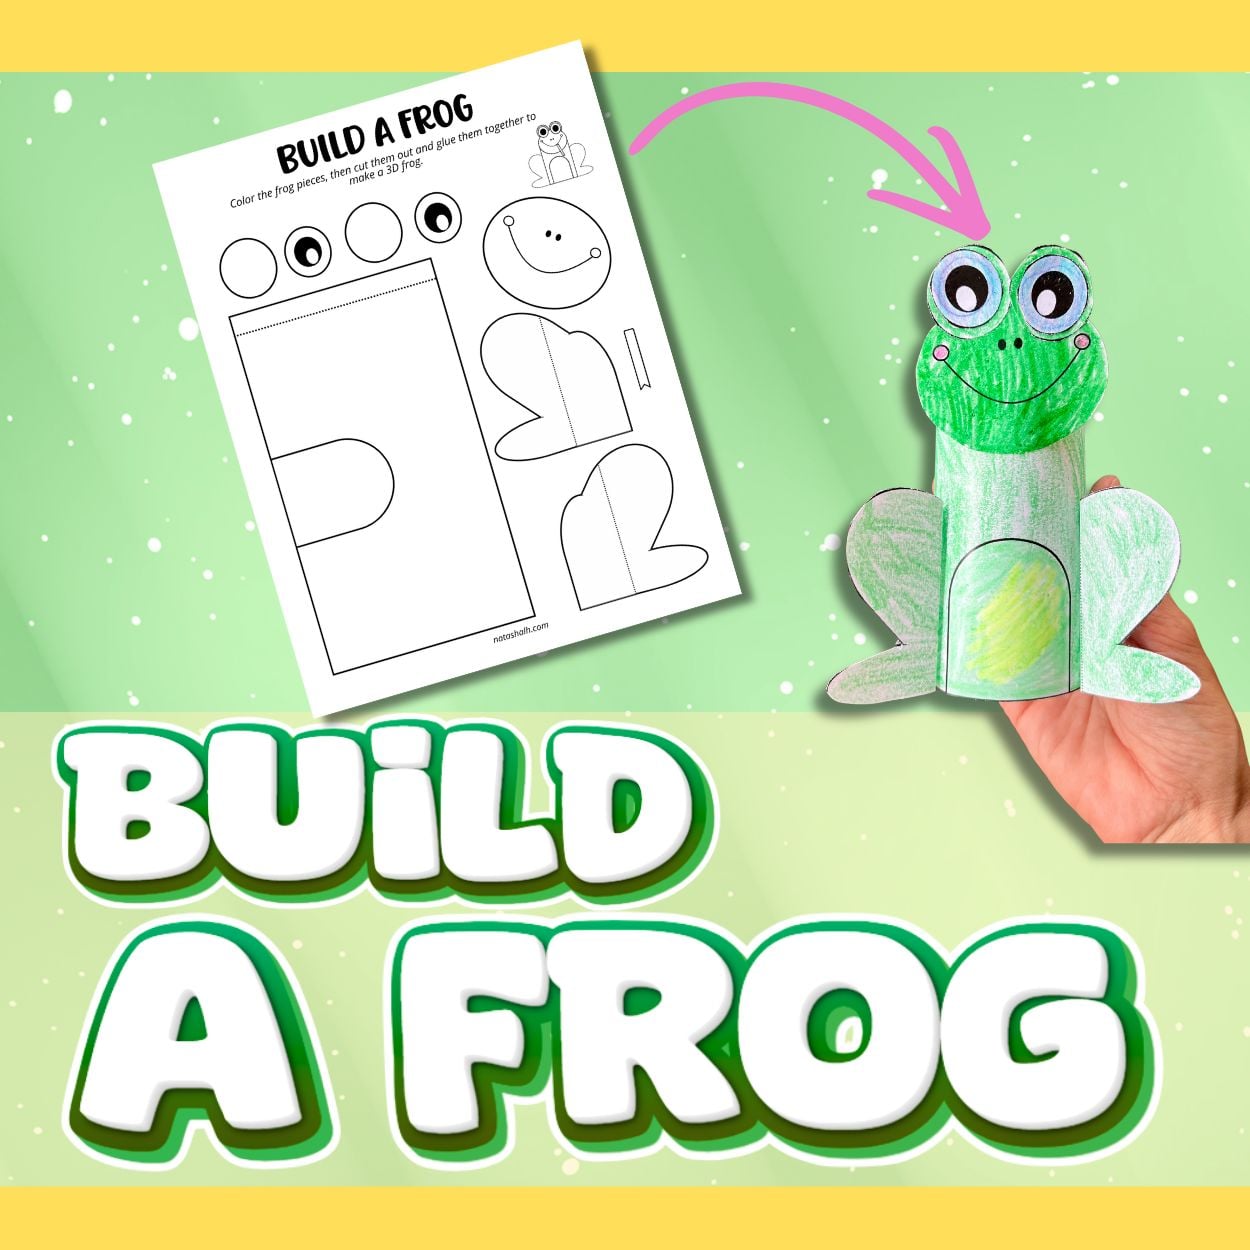
This 3D frog craft is perfect to go along with a spring lesson, pond ecosystem lesson, or a frog lifecycle lesson!
One of our favorite frog lifecycle books is How Does a Tadpole Grow with Eric Carle illustrations.

- Carle, Eric (Author)
- English (Publication Language)
- 10 Pages - 06/07/2022 (Publication Date) - World of Eric Carle (Publisher)
Why We Love Cut and Paste Crafts
As a parent or educator, you know that "craft time" is secretly "learning time."
While your kids are having fun with their glue sticks, they're working on some pretty heavy-duty developmental skills:
Fine motor control
Cutting along lines and maneuvering a pair of scissors is one of the best ways to strengthen those tiny hand muscles.
Hand-eye coordination
It takes a lot of focus to get that frog leg glued just in the right spot!
Following multi-step directions
This craft encourages kids to follow a sequence: color, then cut, then assemble.
Builds Creativity
Since this printable is in black and white, kids can choose to make a classic green bullfrog, a bright red poison dart frog, or even a rainbow-spotted fantasy frog!
Materials Needed
- The 3D frog printable (download below!)
- Paper and printer/copier access
- Crayons, markers, or colored pencils
- Child-safe scissors
- A glue stick (or school glue)
We get enormous packs of glue sticks because they always seem to go missing.

- Visible Application: Disappearing purple formula helps kids see where the glue is.
- Mess-Free: Applies smoothly and dries clear for a neat finish.
- Educator’s Choice: The #1 teacher brand, ideal for younger learners' crafting and projects.
(Eek! I forgot to attach his cute little tongue.)
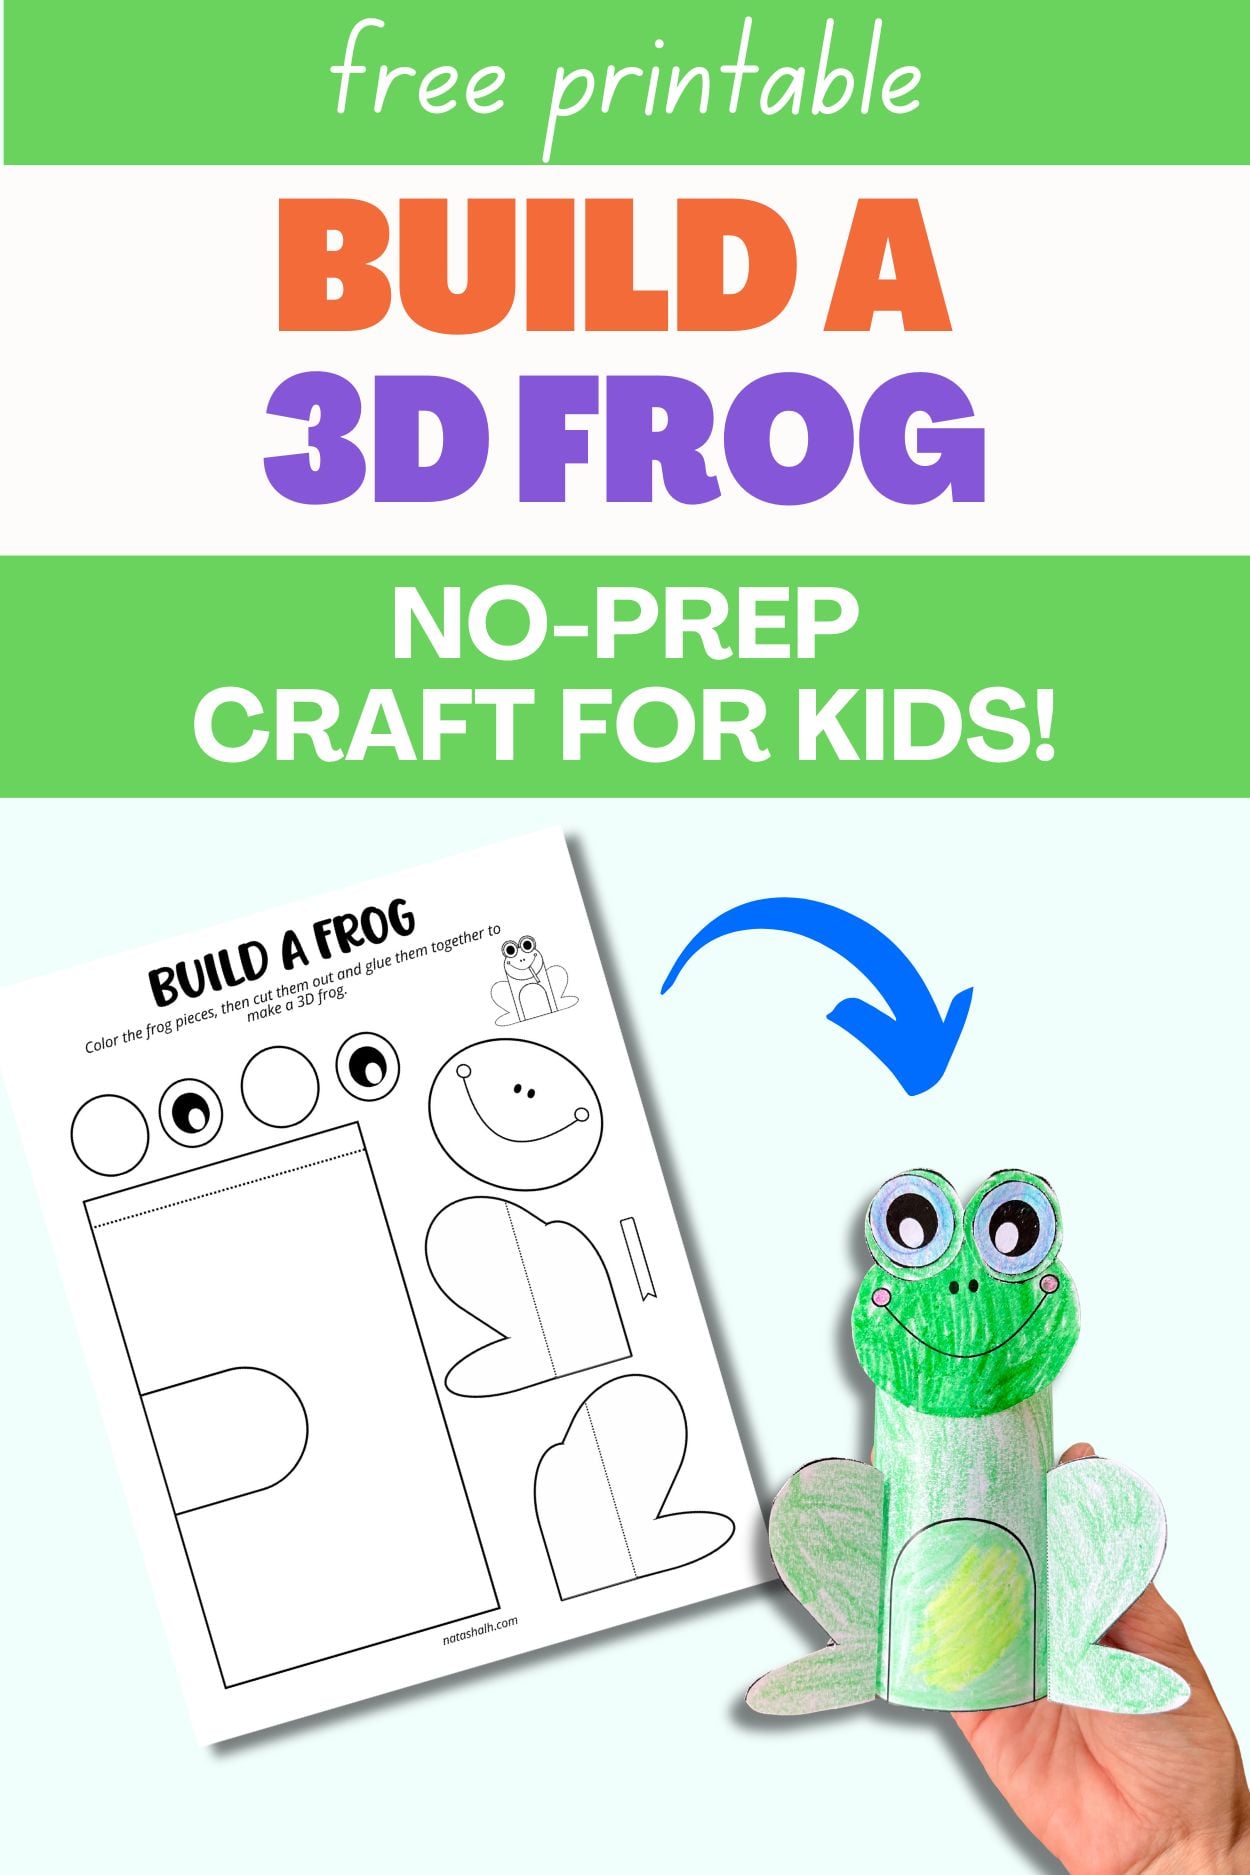
How to Make Your 3D Paper Frog
This project is simple enough for preschoolers with a little help, but engaging enough for elementary-aged kiddos to do independently.
I have step by step instructions and photos below, but I also made a quick video for you. The video includes spoken directions to make sure to put the sound on!
Watch the video here:
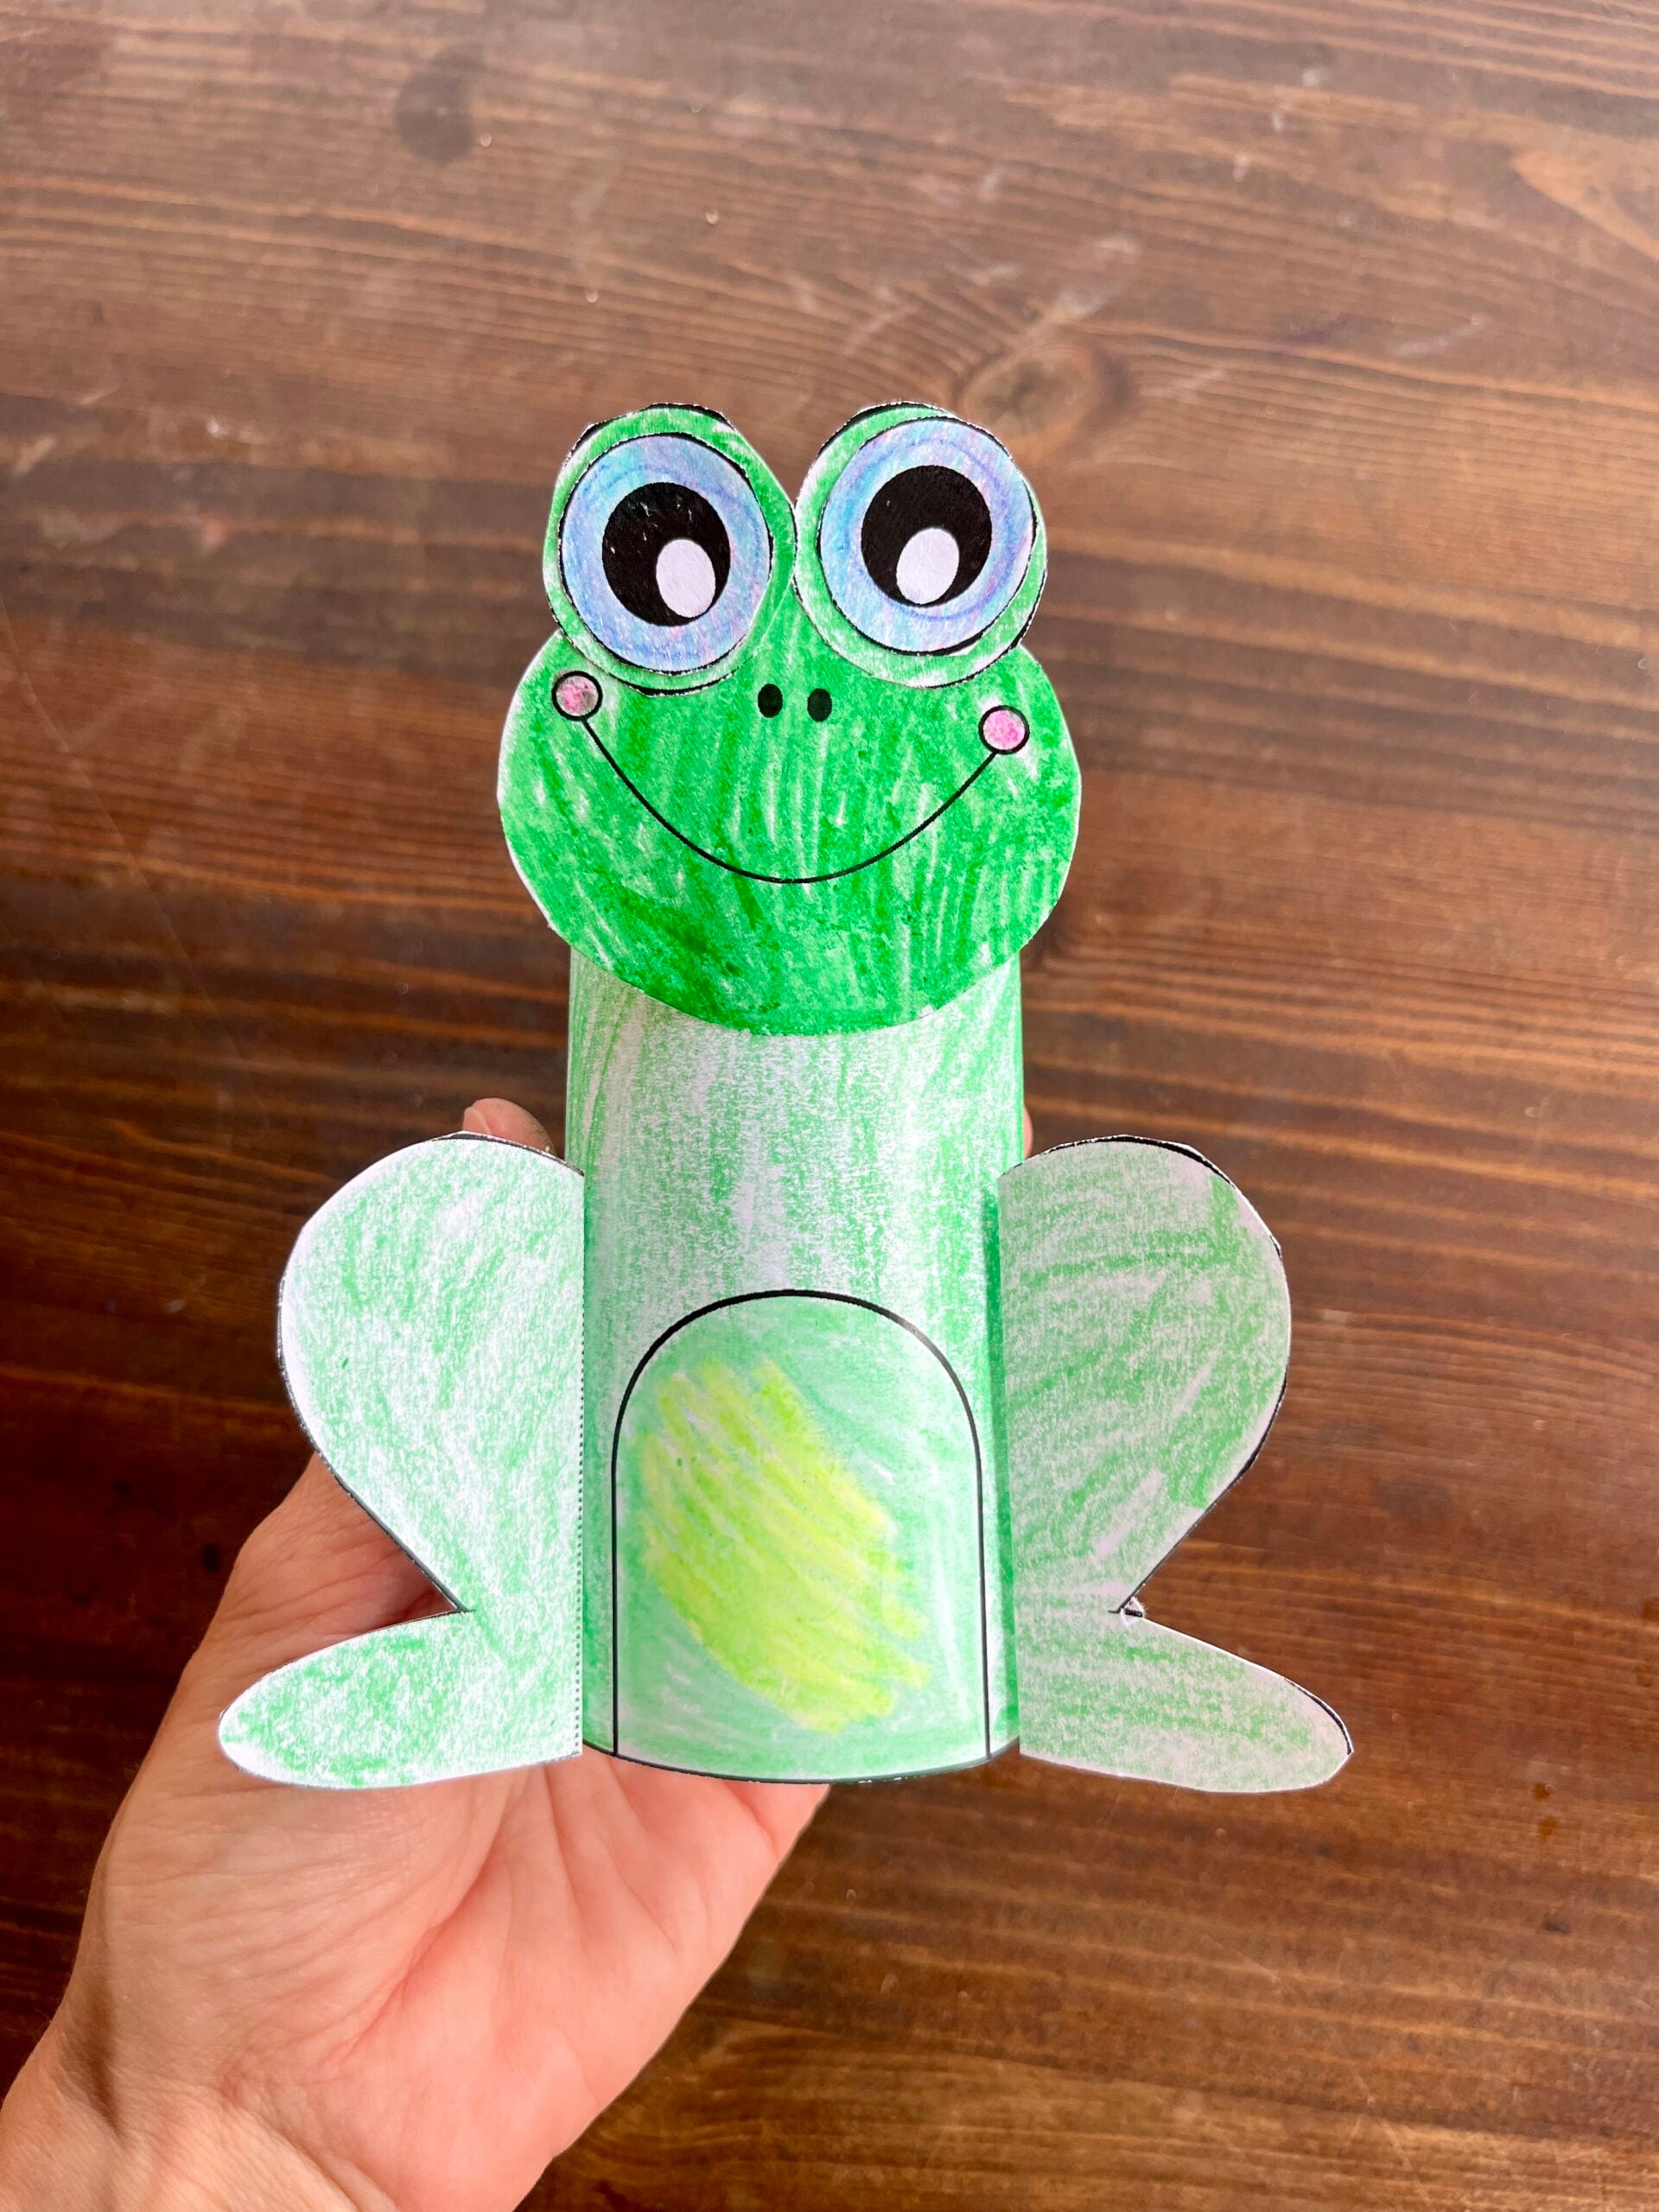
Step 1: Color Your Frog
It is much easier to color the frog before you cut it out! Encourage your little ones to add patterns, spots, or even a tiny crown if they want to make a Frog Prince.
Step 2: Cut Out the Pieces
Carefully cut along the outer solid lines of the frog's body and legs. If your child is still mastering scissors, you can cut out the difficult pieces and let them tackle the simpler shapes.
Step 3: Glue and Assemble
Glue the eye pieces together with the eyeball portion on the center of the "eye bump" part.
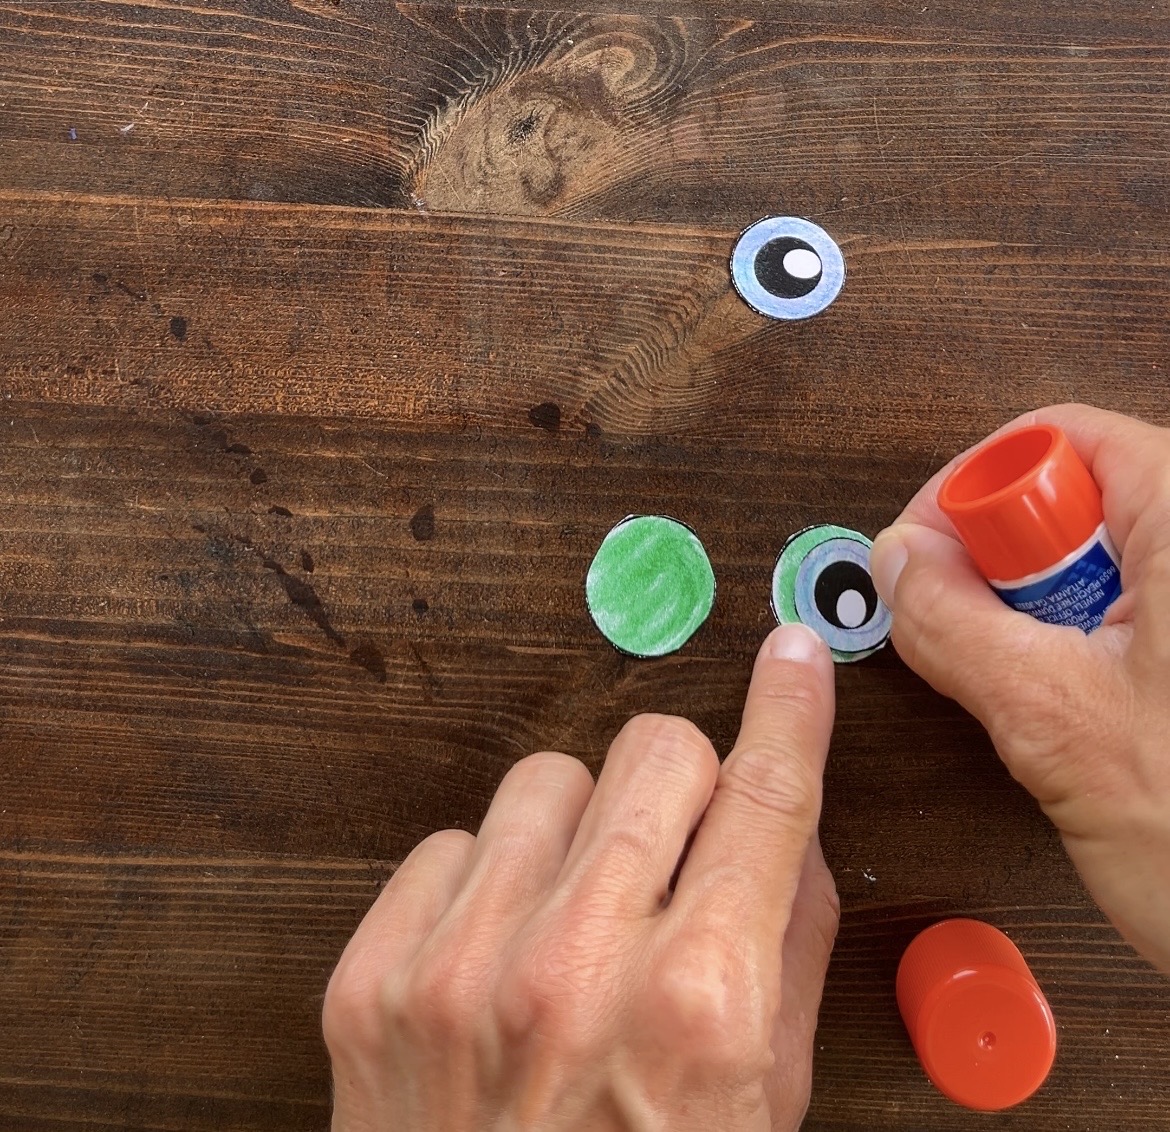
Glue the eyes to the top of the head.
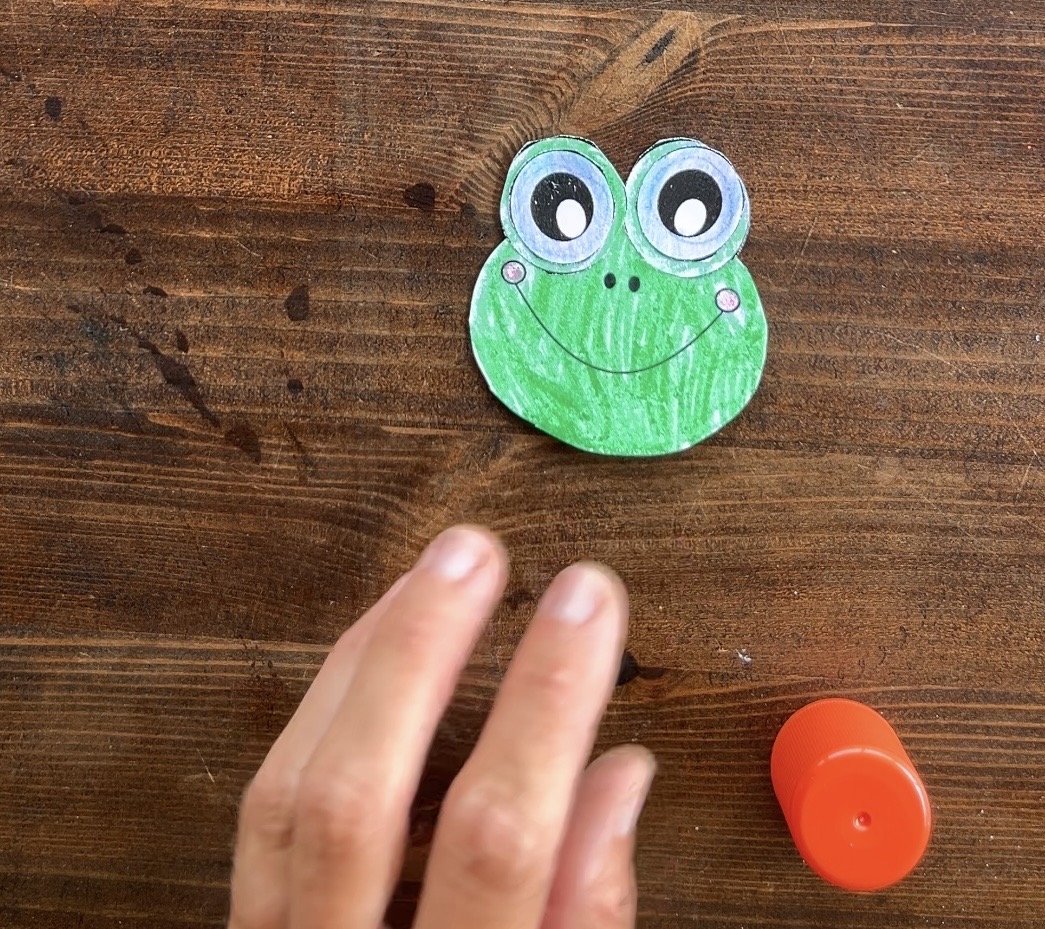
Don't forget to add the tongue! I forgot the tongue on mine.
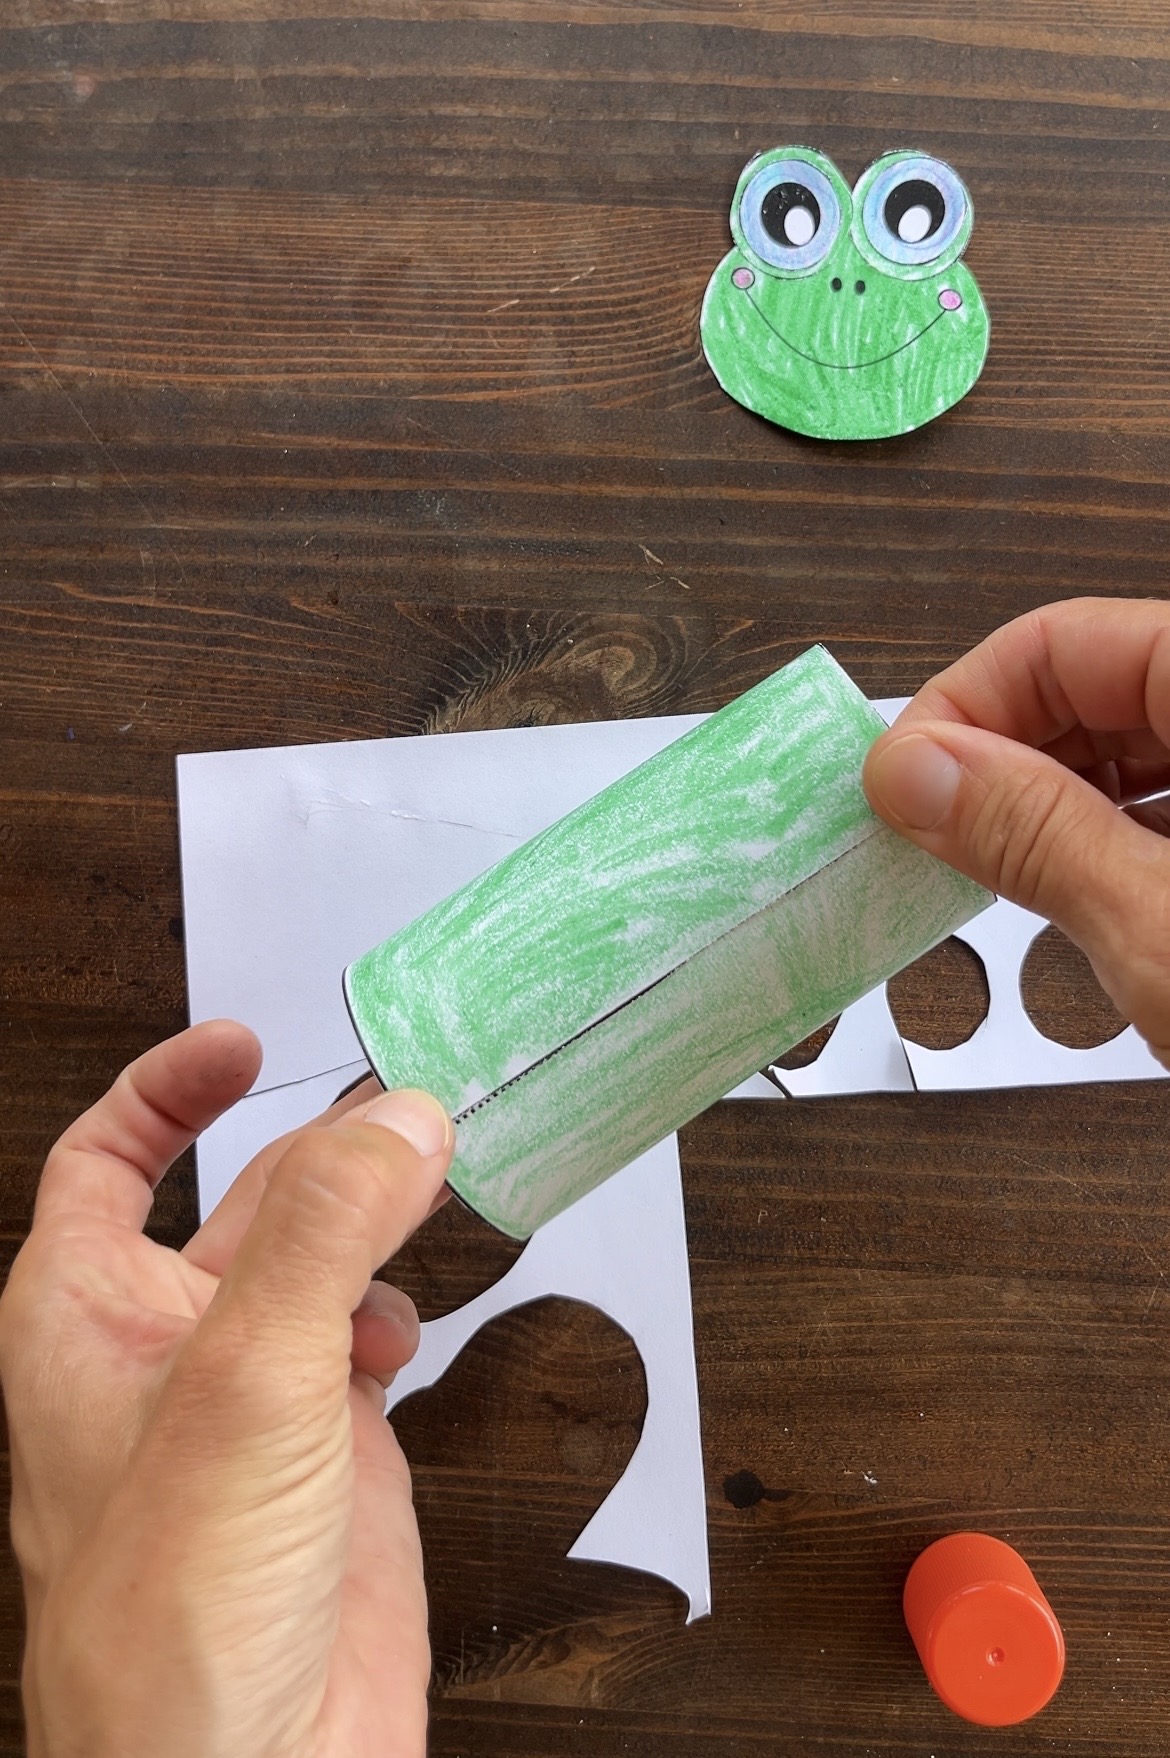
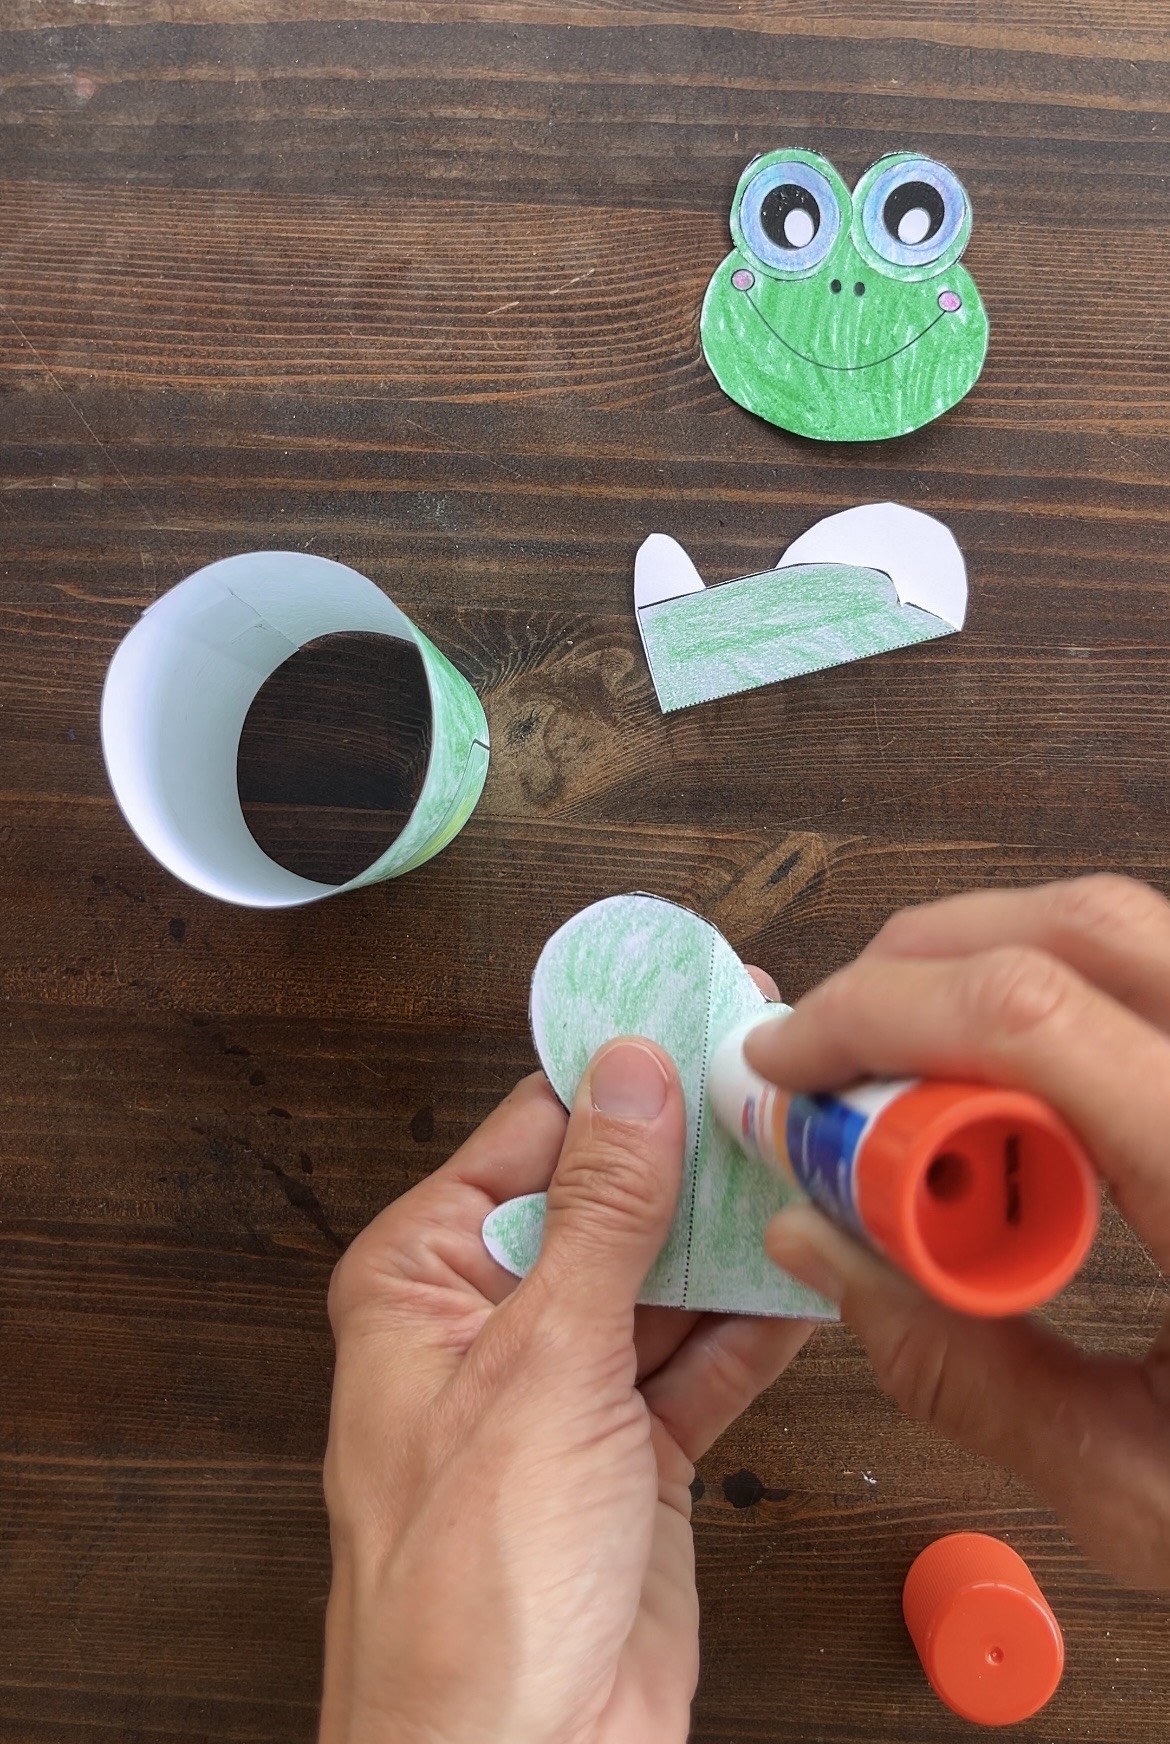
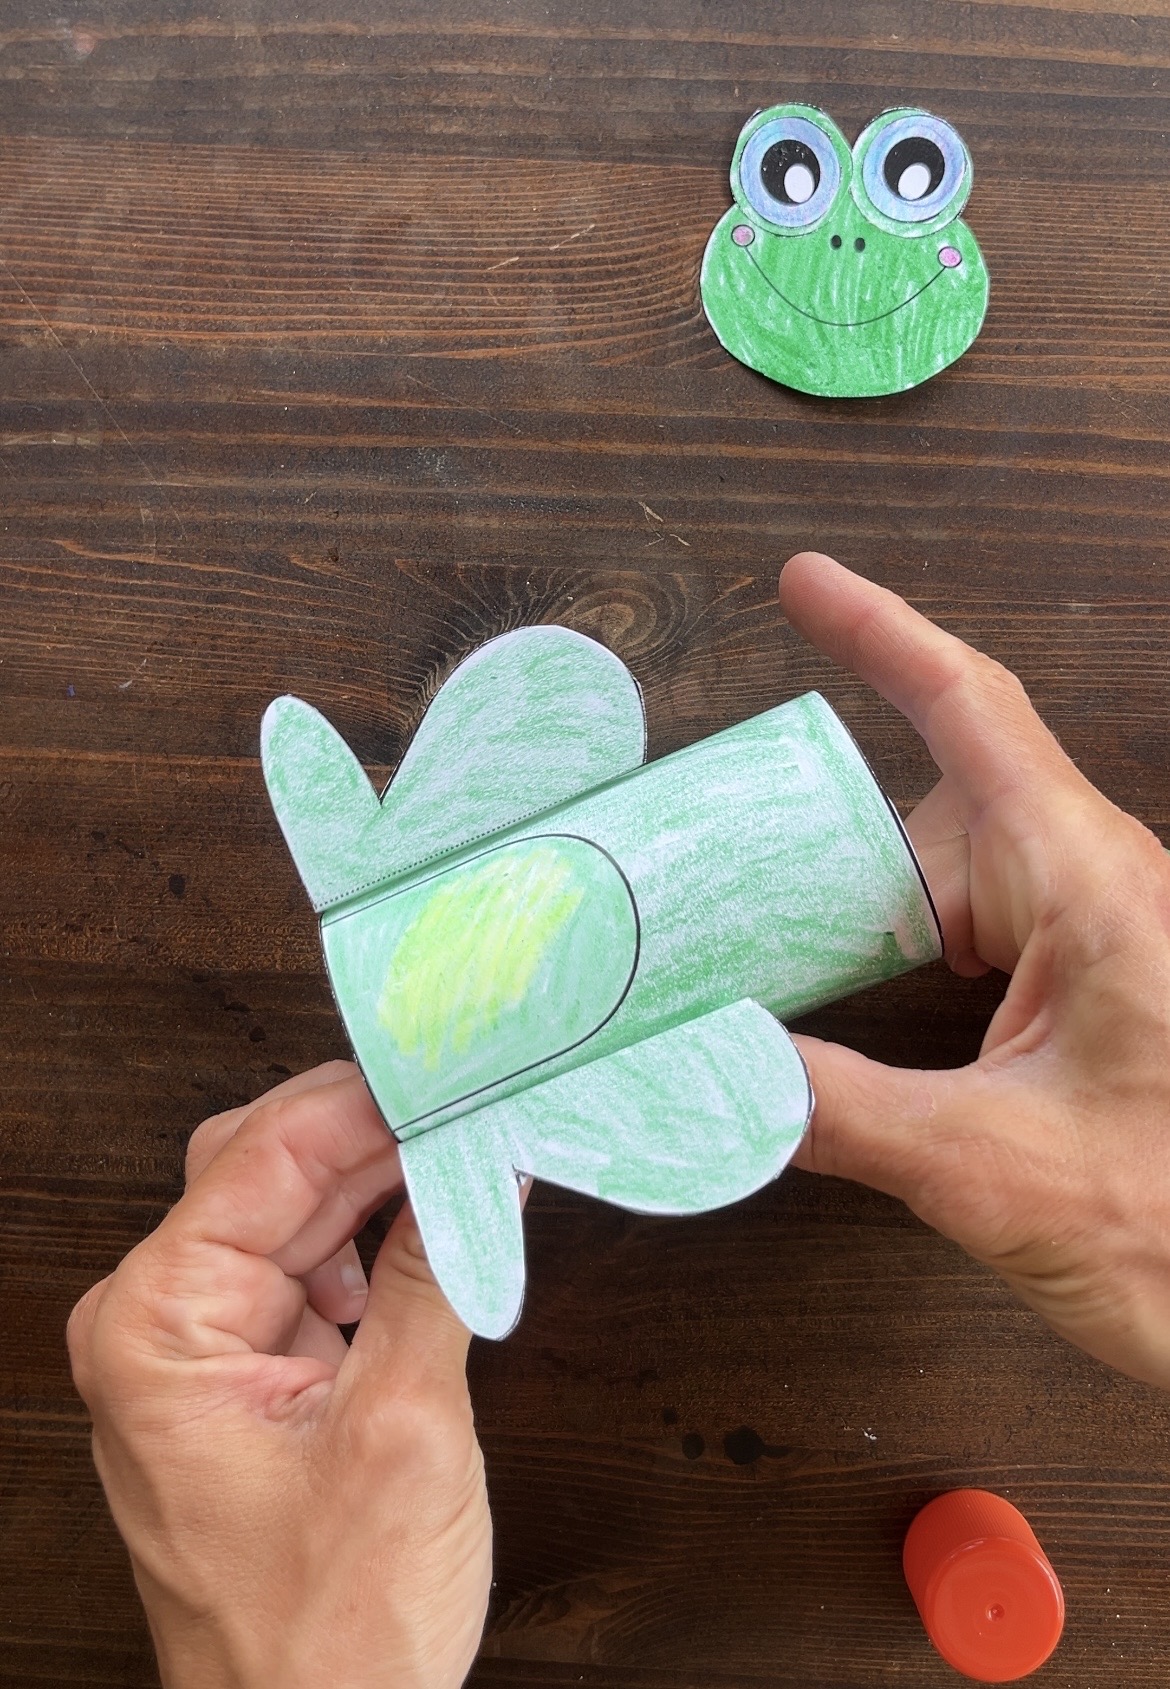
Apply glue along the "tab" portion of the body. Roll to form a cylinder and hold in place of for a few seconds so the glue can set.
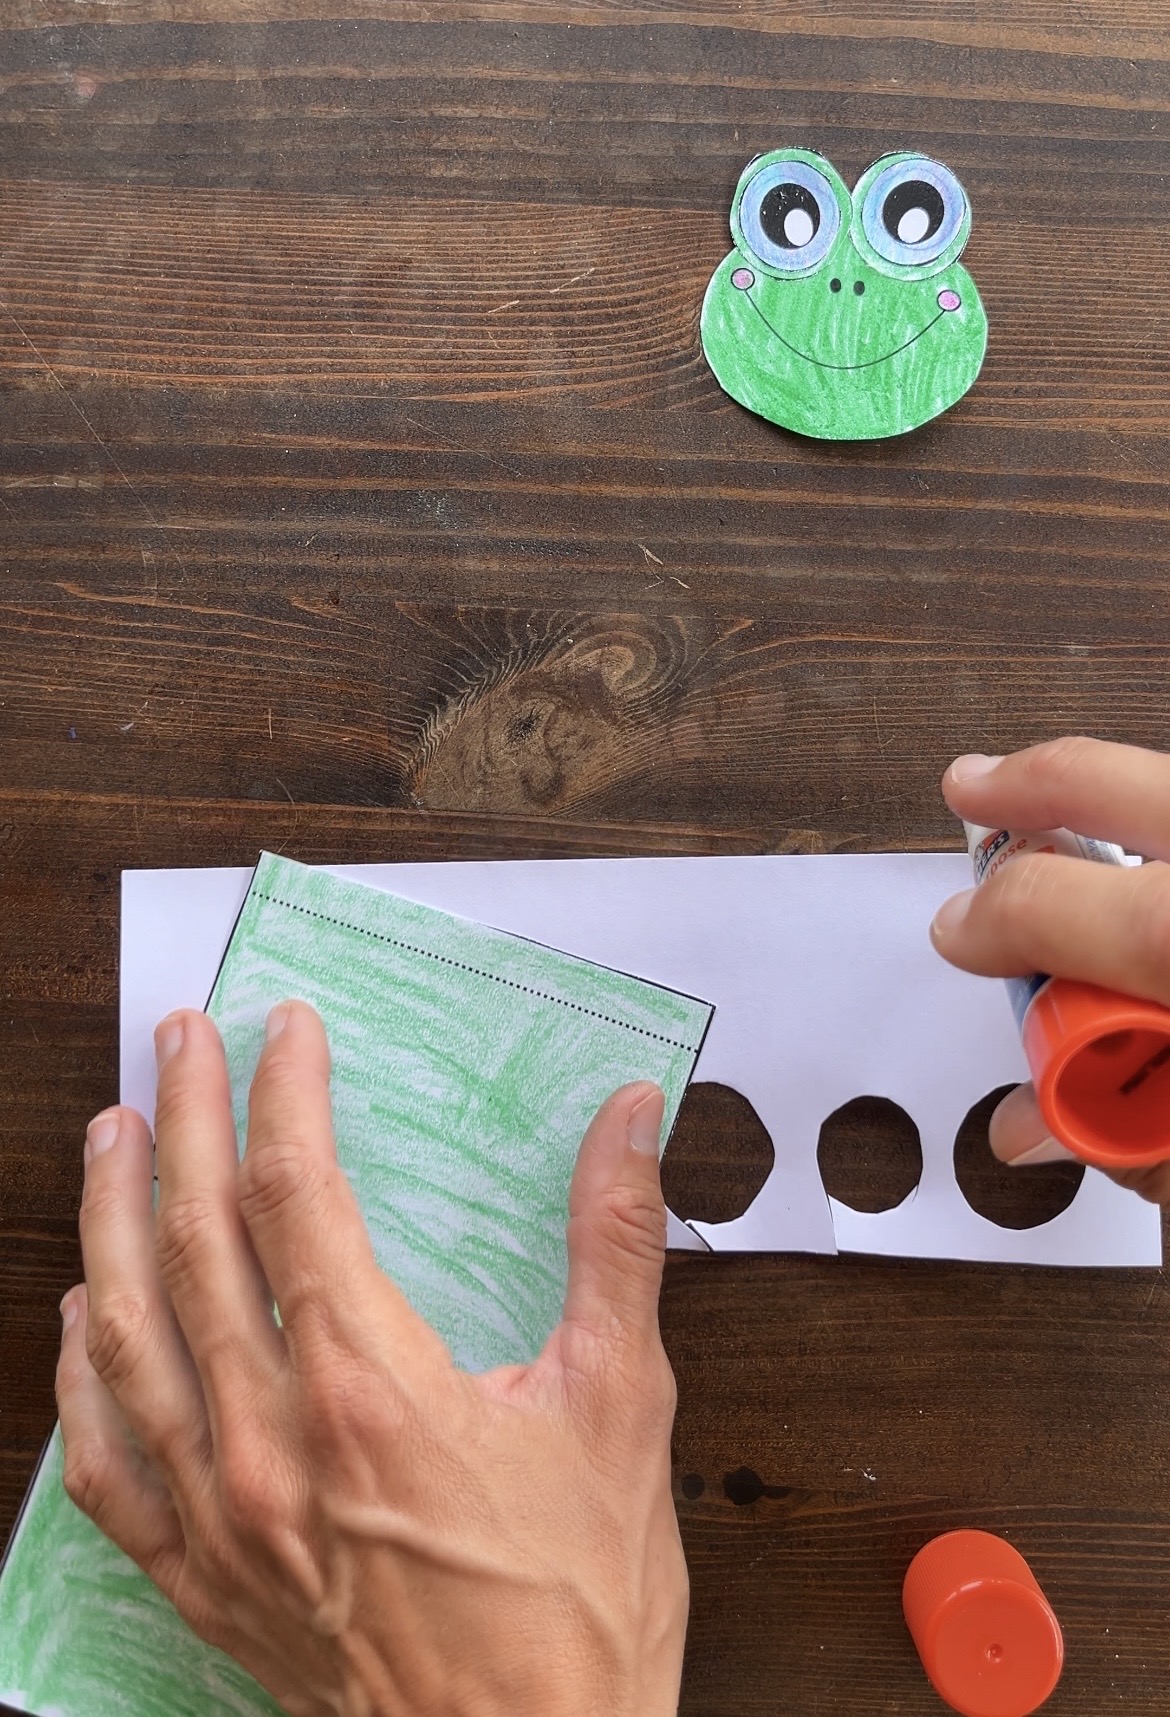
Fold the legs along the dotted lines.
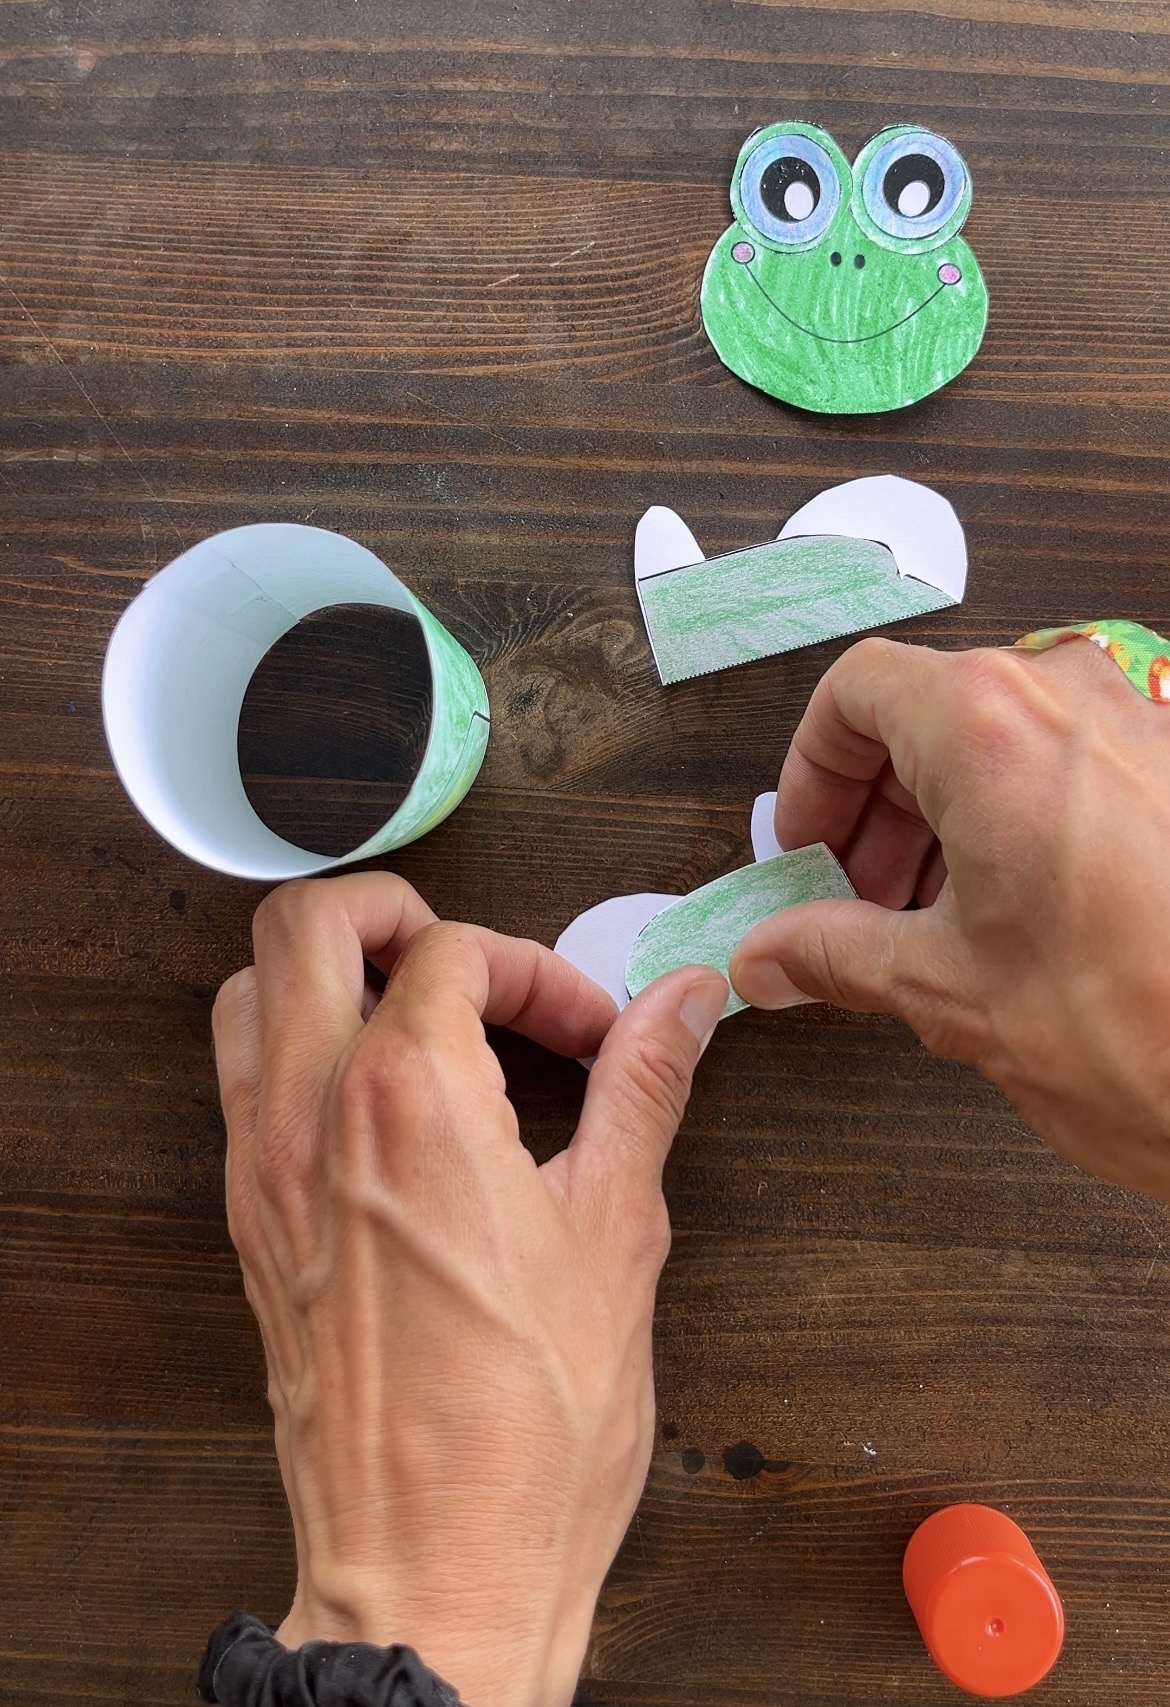
Glue one leg in place on each side of the frog's body. Make sure to hold for a moment.

Glue the face to the top front of the body.
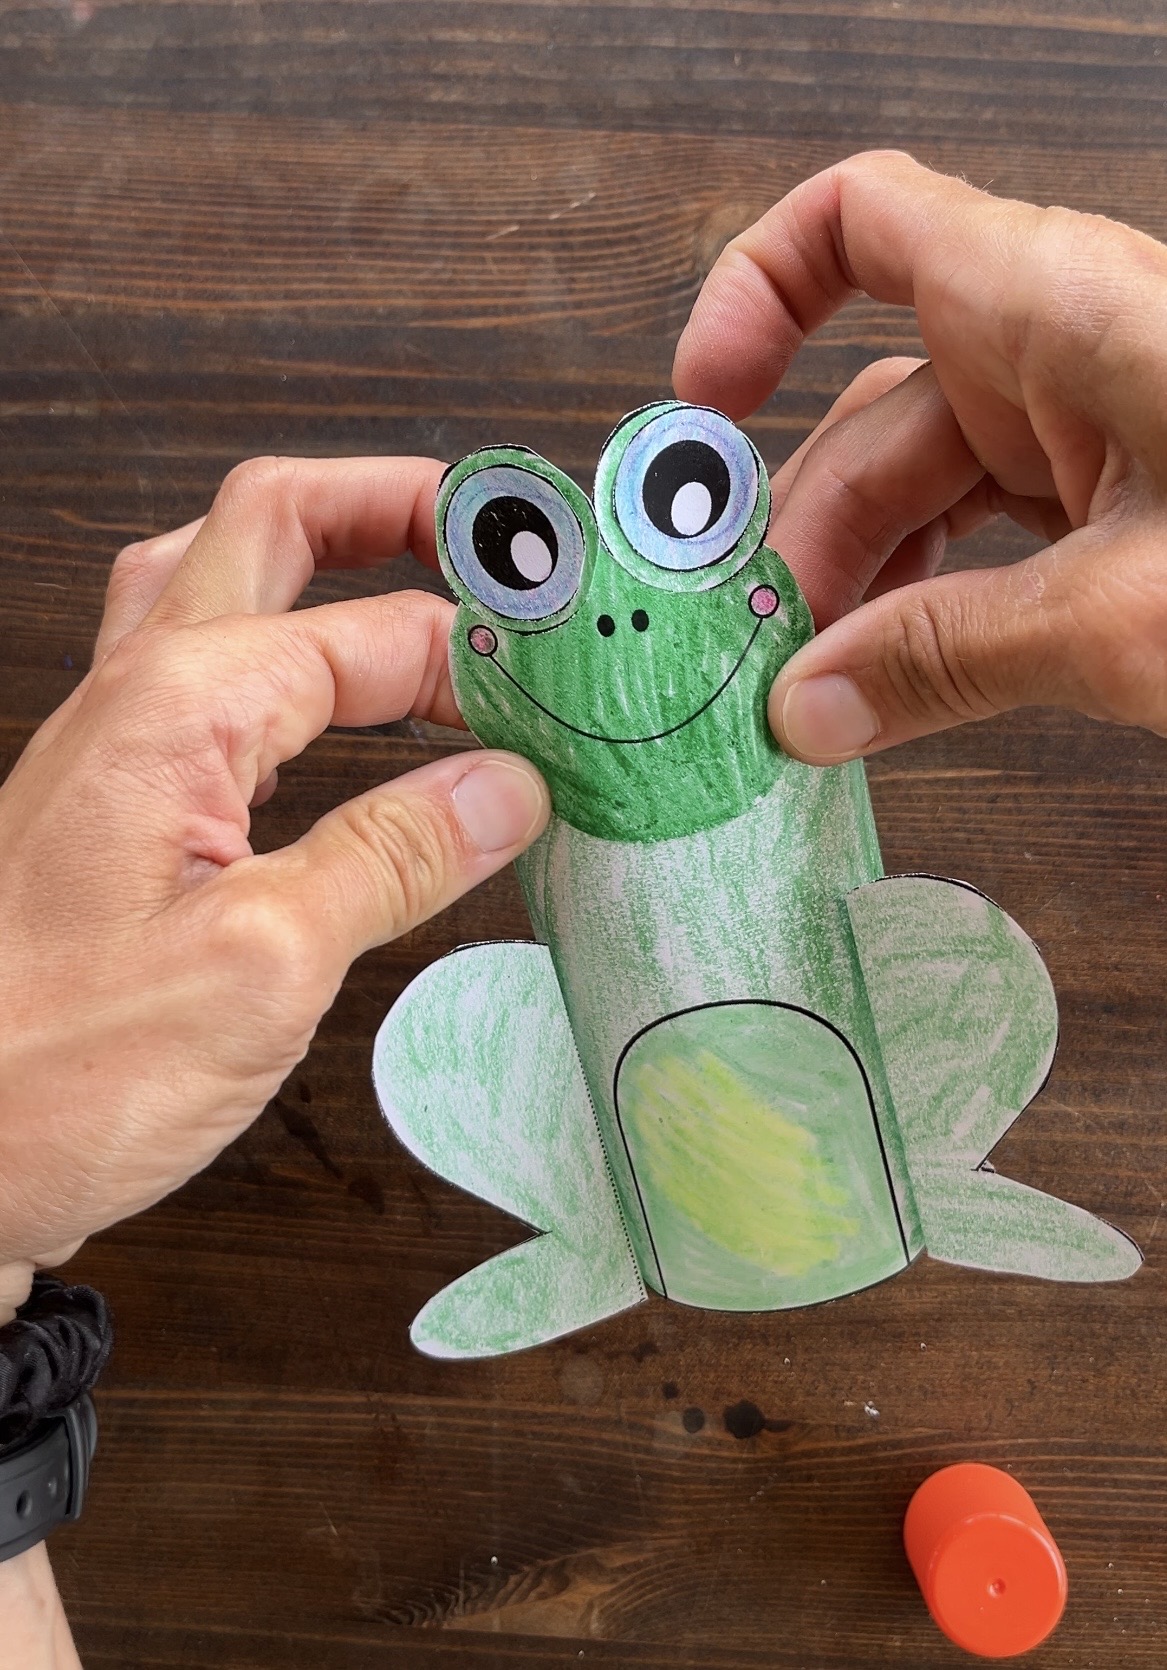
Your frog craft is complete!
Get the Printable!
Ready to get started? You can grab the black-and-white frog template right here. Simply download, print, and let the crafting begin!
This printable is licensed for classroom use, including library use and use with therapy clients.
Redistribution and sale of the templates or print outs is not permitted. Please refer friends and colleagues to this post to download their own copies.
If you agree to these terms of use, you may click below.

I hope you enjoy this 3D frog craft! Check out the posts below for printables and crafts for spring.

Leave a Reply