This post may include affiliate links, which means I may make a commission on purchases made through these links at no additional cost to you.
There are, in fact, two different ways to tie the popular monkey's fist knot. Looking back, I believe the so-called British Admiralty way is actually the first method I learned about 15 years ago. Relearning the knot was somewhat frustrating and none of the excellent visual tutorials online show the British Admiralty pattern variation. The two methods of tying the monkey's fist create, essentially, the same knot. However, the British Admiralty version is slightly more difficult, takes a little more rope, and looks cleaner because it doesn't have visible 'bends' on the corners. It tends to sit flat more easily and is generally a tighter, more attractive knot. This tutorial shows you how to tie the British Admiralty pattern monkey's fist with lots of photos so that, hopefully, more folks can discover this cool knot!
While I hope this tutorial will be useful for a wide variety of people, it is part of my DIY wedding series. Monkey's fist knots are very popular in my Etsy store as decorations, photo props, and nifty, unique place card holders. Learning to tie a new knot and practicing it enough that it actually looks, well, presentable can take a bit of time, but if you're a determined DIYer, this could be a cool wedding project for you! I still haven't decided whether or not I'll tie these knots for our upcoming wedding, but I know lots of other brides have used them.
Monkey's fist knots also make great book ends, doorstops, or even just decorations around the home, and, of course, there are the ever popular paracord keychains! No matter what you use this knot for, I hope you enjoy the tutorial and learn how to create something new.
When you're learning to tie a new knot, it is important to use actual rope (not just a piece of string you found lying around!). The picture knot was tied in ¼" manila, and I high recommend it as a great learning rope. It's stiff enough to hold the knot's form without a solid center, inexpensive, easy to find, and you won't have to use so much rope that everything becomes a tangle. Of course, you can use whatever rope you'd like, but the measurements for this tutorial are based on my favorite manila line. You can also make as many wraps as you'd like, but this tutorial shows how to tie the knot using four wraps.
Materials needed
- About 10 feet of ¼" manila rope (you'll have some extra to trim away)
- Scissors that can cut your rope
- Glue (optional. I prefer to use Gorilla brand wood glue.)
How to tie a British Admiralty pattern monkey's fist knot
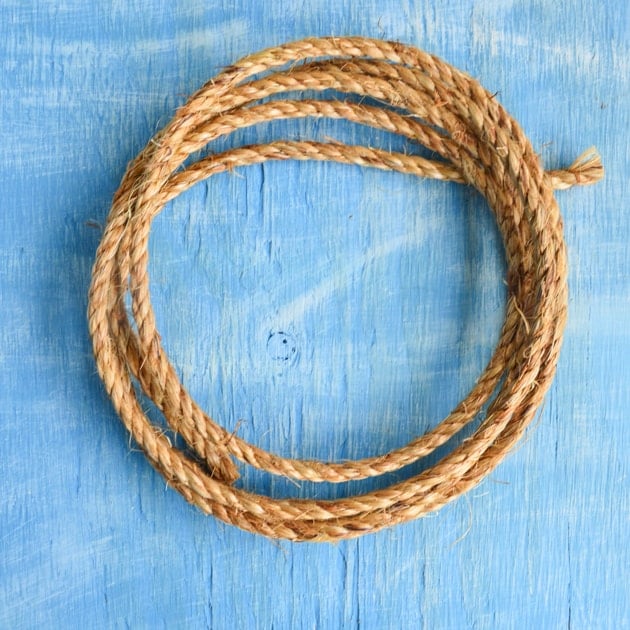
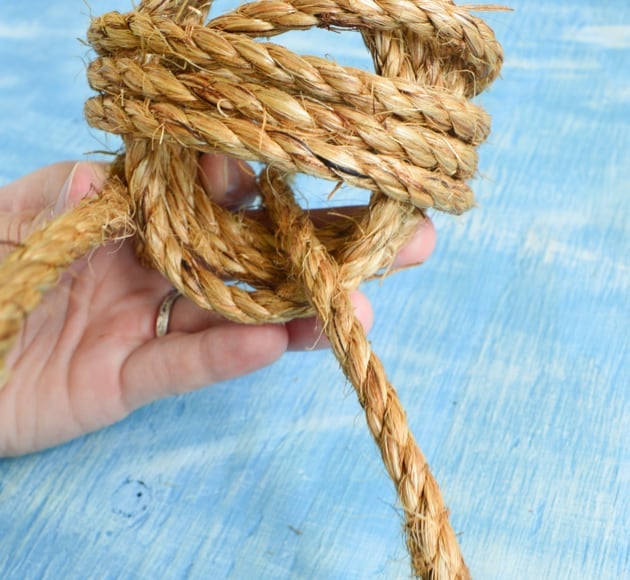
1. Make four loops of rope at one end, as shown. Tie them loosely around your hand and try to keep all four wraps about the same size.
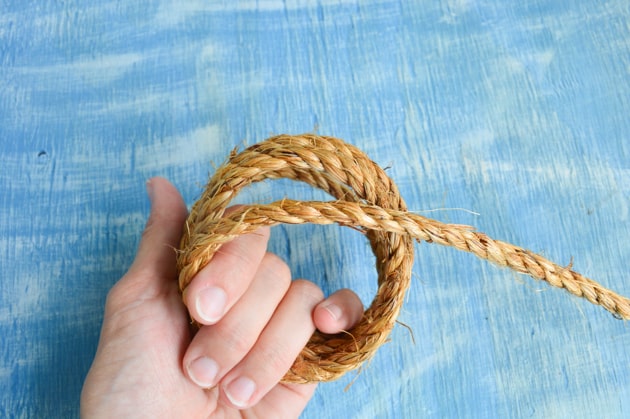
2. Bring the working end across the loops you just made, as shown. Keep it towards the top of these loops because you'll need to make additional passes under it.
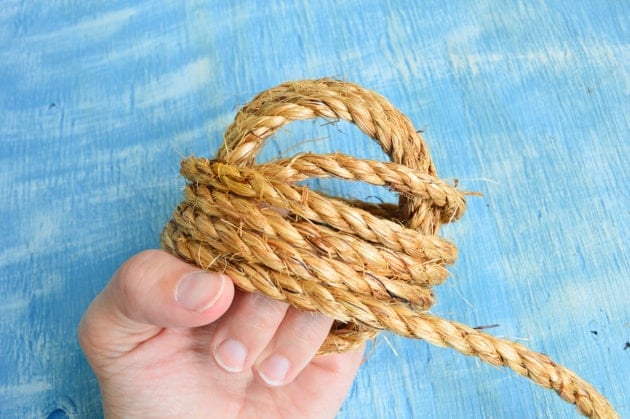
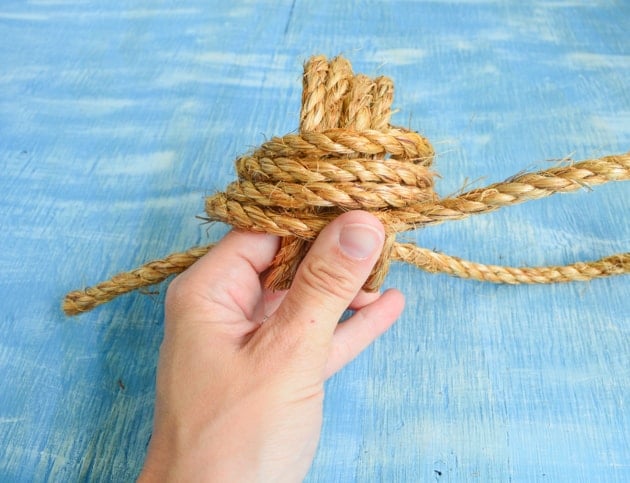
3. Make four passes around your original loops, working your way down as you go.
4. Now it's time to make your final passes. This is the only tricky part! Pass the working end under the "left" side of the passes you just made in step 3...
5. ...Around the outside of the passes opposite your starting point and back in the upper "right" side of the knot...
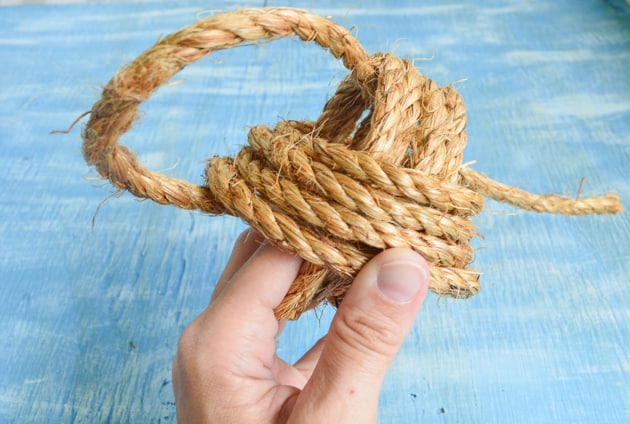
6. ...And finally back out the font so that it exits diagonally up from where you began this pass on the lower left. The rope should cross diagonally from left to right inside the knot.
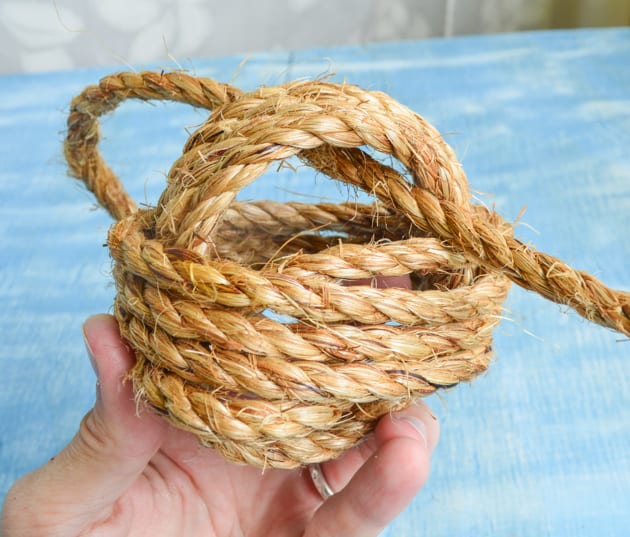
7. Tighten this loop down a little and then make three additional passes, working from right to left. With each pass, make sure you go under the second set of passes on both sides and under the diagonal pass inside the knot.
8. When made correctly, both ends of the rope should come out next to each other.
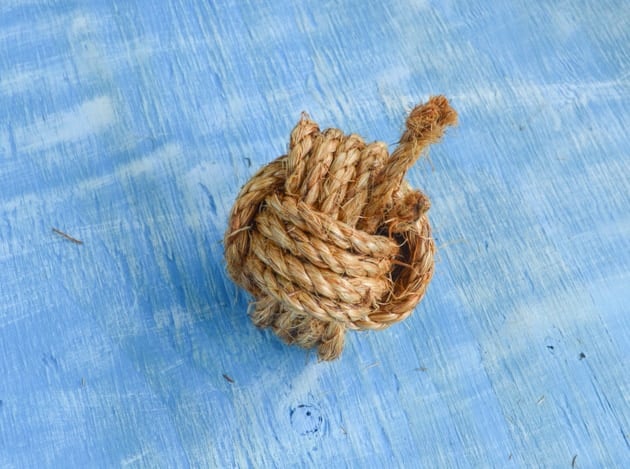
9. Tighten down the knot until you're satisfied.
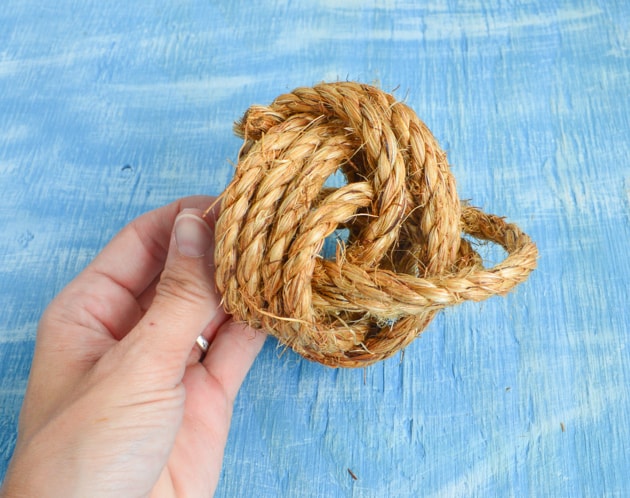
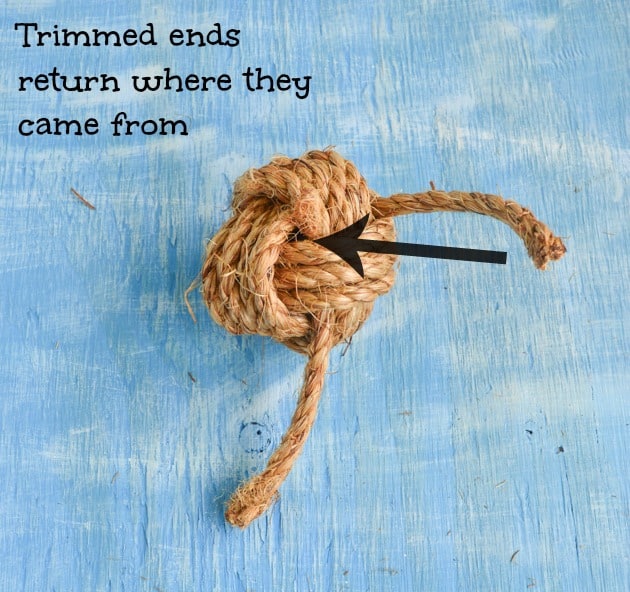
10. At this point, you can either finish the ends outside the knot (by splicing, tying, etc.) or by tucking them into the knot. If you're planning to use the knot as vase filler or a card holder, I recommend hiding the knot ends inside the knot. To do this, untuck both ends from their last wraps, trim the ends so they can just fit back where they came from without sticking out the far side, tighten the knot, as needed, to prevent gaps, and then tuck the ends back in place. If you'd like, you can coat each end with glue before inserting it to ensure it stays well hidden.
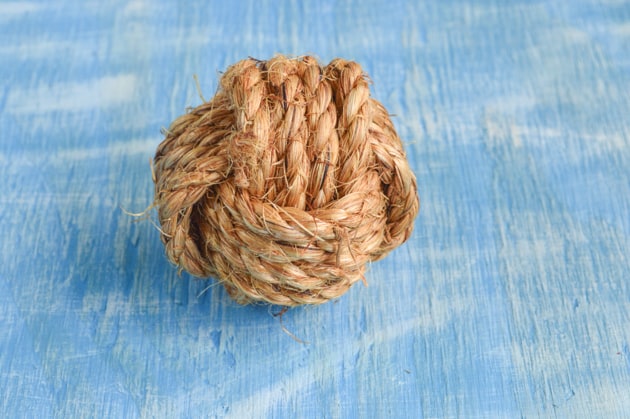
And there you have it! Your very own, beautiful, British Admiralty pattern monkey's fist knot. If you're accustomed to tying monkey's fists the other way, the tightening pattern may seem a little strange at first, but you'll catch on soon.
When using a softer line, whether its paracord or cotton rope, you may need to insert a ball into the knot's center to help it hold its form. These 4" cotton knots have a table tennis ball in the middle to ensure the rope stays in place!
This curtain tie back uses a wooden ball to ensure the knot hangs well.
When gluing manila or sisal rope, I really prefer to use Gorilla wood glue because it dries more clear than other wood glues (and stronger than most "white glues"). As you know if you've ever used wood glue, it has a tendency to be yellow! Gluing your knot isn't always necessary, but now you know what to use if you do!
If you're looking to improve your knot work in general, I highly recommend The Marlinspike Sailor. It's an oldie but a goodie, as it were.
While I've tried hard to make these instructions clear, learning a knot from pictures is difficult! If you have any questions, please let me know and I'll do my best to help.


CJ
Happy New Year Natasha,
I just wanted to let you know I found, and used, your British Admiralty tutorial. My knowledge of knot tying is very limited, but I found your instructions to be very clear and easy to use. It took a couple of patient tries, but the end results are great. Thank you for taking the time to put together and provide these instructions. I will pass it forward!
Namaste,
Catherine
p.s. Love your Etsy store, too!
Natashalh
That is so exciting! I'm really glad you found the tutorial useful. And thank you so much for letting me know - kind comments from people who found my blog online really make blogging worth it! Happy New Year to you, too. =)
james
as useless as all the others , i challenge anybody without a knowledge of knots to do this from these instructions, looked ok at first , fell at 4-5 .
couldn't you have tried this before posting ? you know just check it worked before wasting peoples time .
Natashalh
Wow - Sorry you're having a bad day! Glad you could find my post to comment and vent a little. =) I hope it helped.
This is a difficult way to tie a monkey's fist knot, but it's also better looking. Grog's Animated Knots has easier instructions, if I remember correctly. If you thought my tutorial was hard, then please check out the 18th and 19th century seamanship manuals I struggled with to figure it out. This is much better! I know it's frustrating to figure out the first time, but just look at the pictures with a piece of rope in your hands. I am confident you can figure it out! Clearly I did 'check it worked' because I make knots like this all time time. If I hadn't "tried" it, I couldn't have taken the photos! Anyway, just walk away from it for a minute to chill and come back with some decent-quality rope and an open mind. Once you figure it out the first time you wonder why you thought it was so difficult!
Carl
It's actually a heaving line knot we use at sea to tie mooring lines to be pulled ashore
It's so simple even a child could do it!
Natasha
It certainly is a type of heaving line knot! (And definitely the most attractive one, in my opinion.) Throwing a line without a knot is a great way to get a wet line, but not a good way to get moored up. 😉