I have always associated t-shirt refashioning projects with summer! This easy, no-sew t-shirt refashion tutorial is quick and easy.
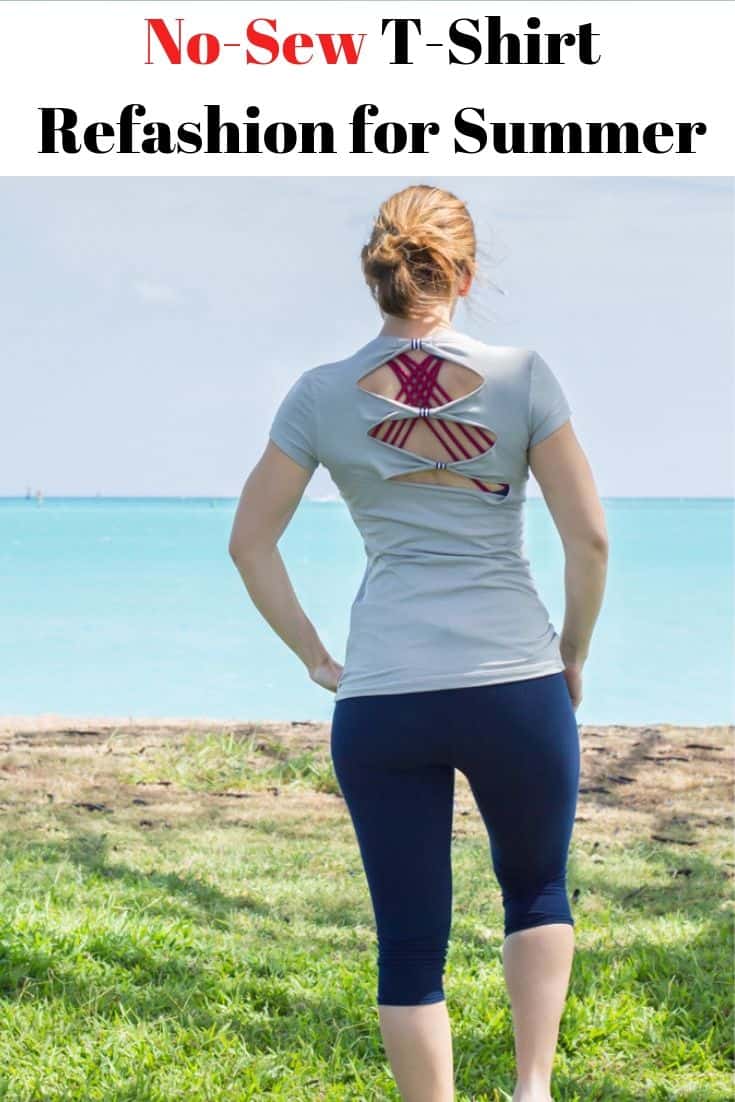
I've shared a few other t-shirt reconstruction ideas in the past, but this one is unique in a couple ways. For starters, it really works best with a shirt that at least mostly fits (the other tutorials show you how to work with a too-big tee). Additionally, this reconstructed shirt is something you could actually wear in public. It looks really cute layered with a solid tee or tank underneath!
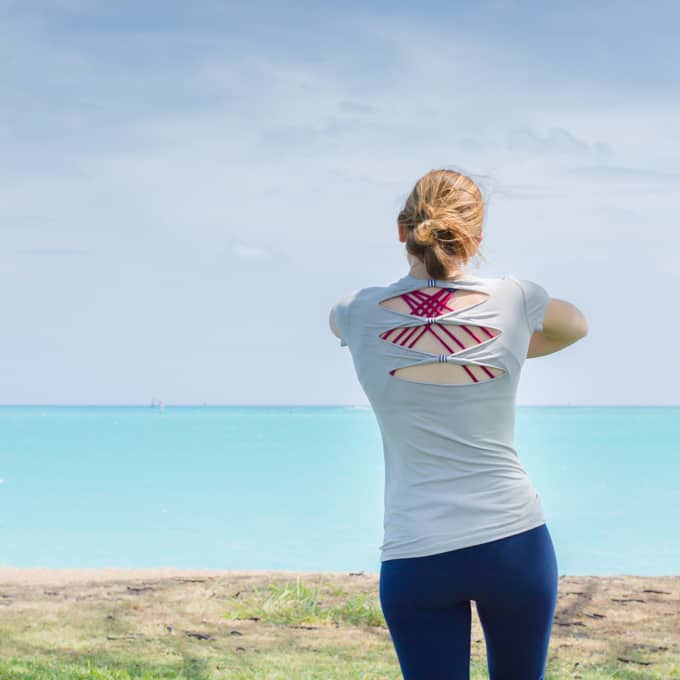
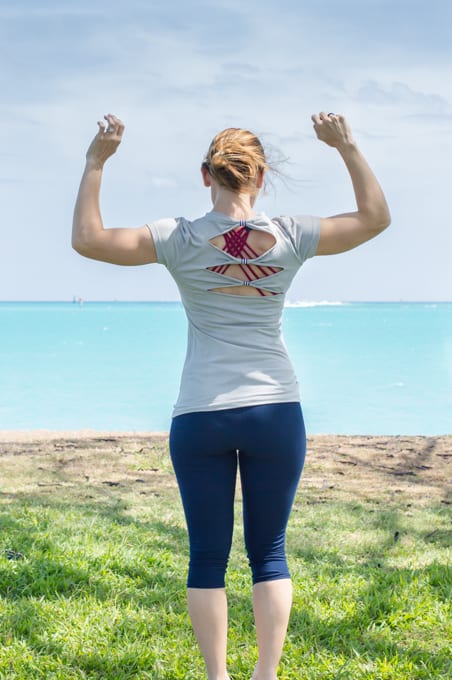
It's still a great choice for things like Zumba or yoga class, though, and was inspired by a new sports bra I picked up during my recent visit back home. It's incredibly comfortable and has this really cool back that seems too neat not to show off! I really hope you enjoy this no-sew bow back t-shirt refashion tutorial!
 This post may include affiliate links, which means I may make a commission on purchases made through these links at no additional cost to you.
Have you ever tried to take nice photos of your own back? It's pretty difficult! Sorry the shirt isn't perfectly smoothed out and totally even in the picture, but I think it's easy to tell how cute it is!
When you undertake this bow back t-shirt project with a shirt that already fits, you won't end up with sagging holes that show off all sorts of things you didn't actually want to show. That's also why this project is a great way to make a nice layering tee!
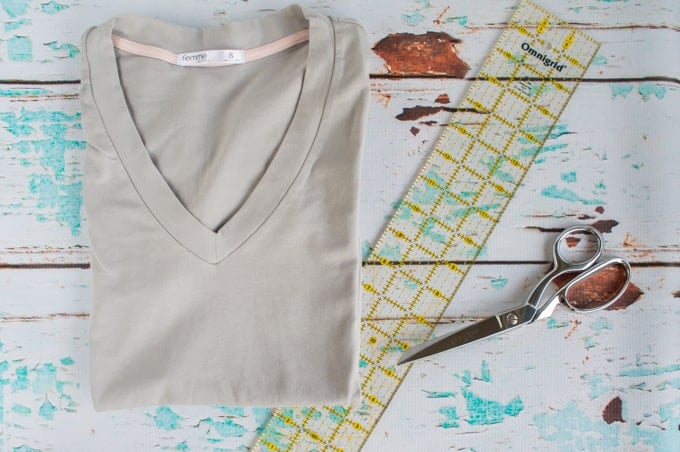
 The shirt is pretty, and so easy to make. This is all you need:
- A t-shirt that fits satisfactorily
- A 3" quilting ruler (a regular ruler will work, a quilting ruler is better!)
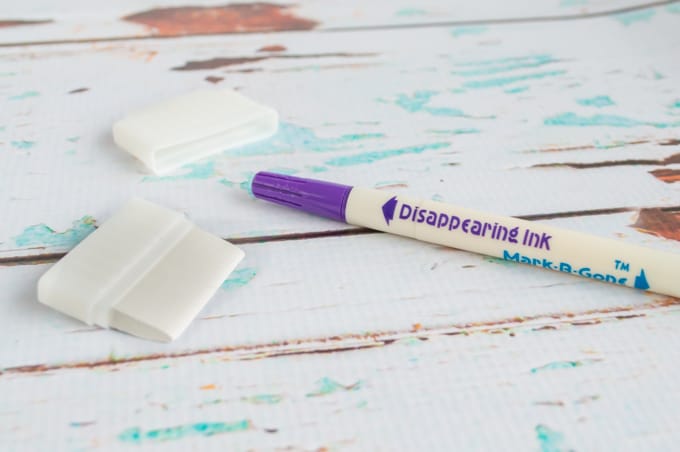
- Tailor's chalk or temporary fabric marker
- Sharp scissors
- Ribbon, lace, or other fabric scraps
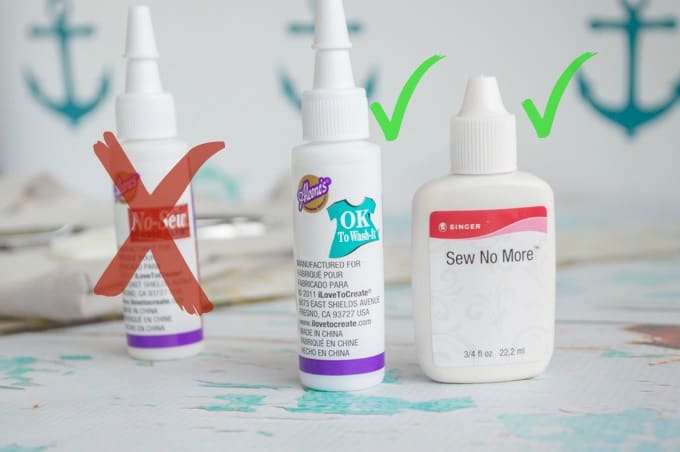
- Fabric glue (make sure it's permanent and washable, not the temporary basting glue)
- Wonder Clips, binder clips, clothespins, etc.
- Lighter (optional)
 That's it! You probably already have most of the supplies on hand already. If you want, you can sew the ribbon loops in place. If sewing and glue both give you hives, just tie the ribbons in place for a more casual look. If you're using glue, make sure it is a washable one. Some fabric glues are permanent, but others are designed to wash out.
 I've learned that temporary fabric markers don't always behave quite the way you'd like, so tailor's chalk is a safer choice for this project. It's only happened a couple of times, but I have had a temporary marker actually permanently change the color of my fabric. I did use a 'vanishing' marker for this project because it's far easier to see in photos than chalk, but chalk has pretty much no risk of damaging your shirt. Honestly, if you don't have either option on hand, you can even use a pencil to draw your lines. It will be a little more difficult, but it will save you a trip to the craft store. (Hmm...that might not be such a good thing. Who wants to miss out on an excuse to visit the craft store?)
 No-Sew Bow Back T-Shirt Refashion Tutorial
1. Turn your shirt inside out. You don't have to do this, but it really helps! You can see the seams more easily and it makes attaching the bow portions easier.
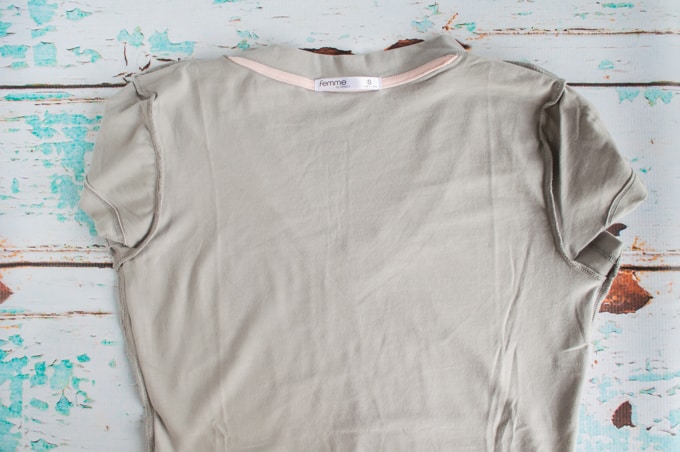
2. Lay the shirt as flat as possible, lining up side seams.
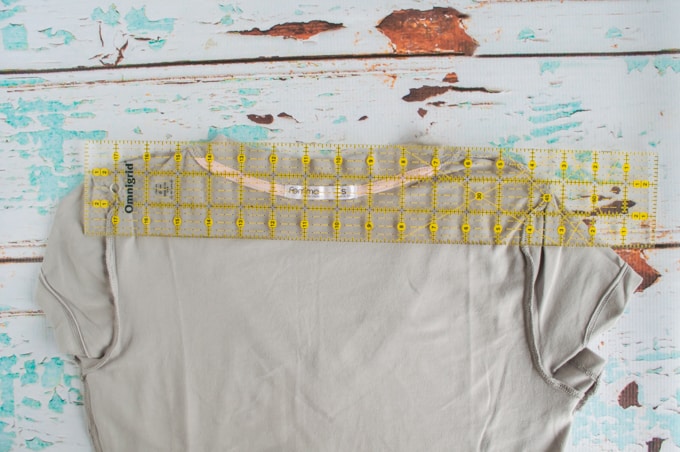
3. Place your ruler flat across the upper area of the t-shirt's back and line it up with the top of the shoulder seams. I positioned my ruler so that the 1" mark was on the seams and 2" of ruler were below the seams, as shown. Many regular rulers are 1" wide - that works fine, too. Feel free to adjust this positioning based on your shirt and what you like.
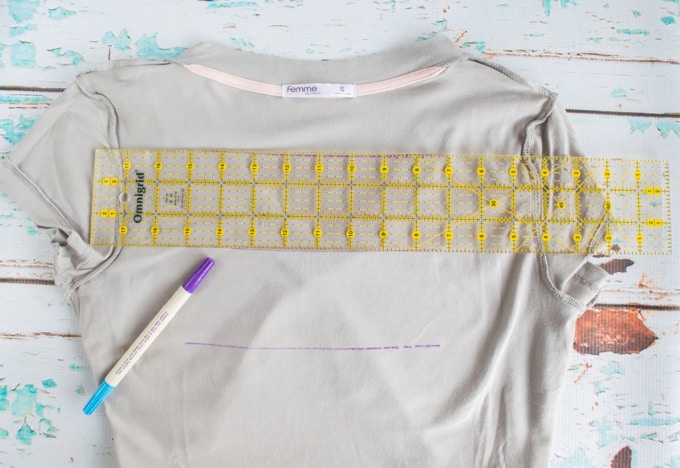
4. Hold the ruler securely in place and mark your line with tailor's chalk or vanishing marker. I made my line about 8" long, but the exact length of your line will depend on how large your shirt is and what you want it to look like! Just remember that it's very easy to make the cut longer if you want, but you can't magic the shirt back together if you think the cut is too long.
5. If you're using a 3" quilting ruler - don't move it! Draw your second line along the bottom edge of the ruler, making sure it is the same length as the first line.
- If your quilting ruler is a different width, adjust it so that you can draw a second line three inches lower than the first.
- If you're using a 'regular' ruler, make a small mark 3" down from the left end of your top line, a mark 3' down from roughly the midpoint of your line, and a mark 3" down from the right end. Use these three points as a guide to position your ruler and then mark your second line.
6. To make the third and final line, reposition your 3" quilting ruler so that its top rests along the second line and then draw third line along its bottom edge. Repeat the processes outlined in step 5 for other ruler types.
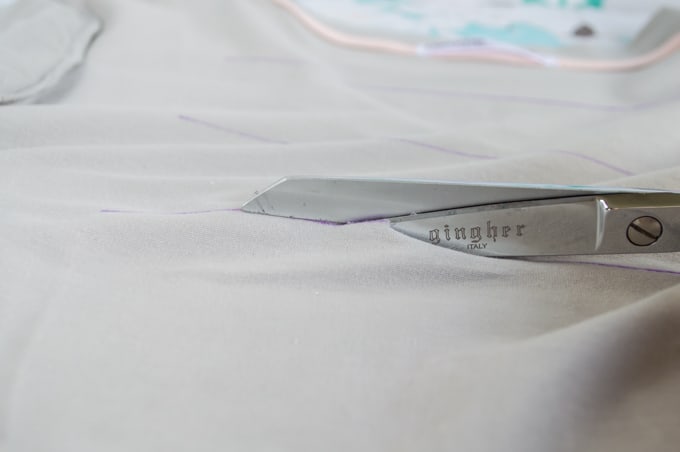
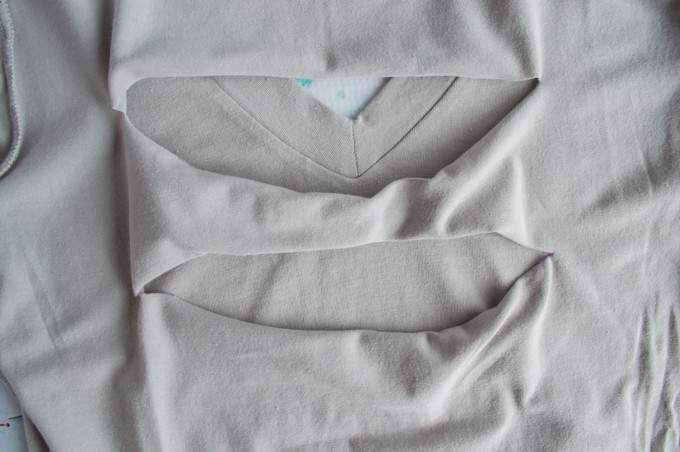
7. Now it's time to cut! Make sure you only cut through the back of your shirt, not through both layers.
Carefully cut along the length of all three marked lines. I find it easiest to start the cut by folding the fabric in the middle and making a little snip to start the cutting off, then I carefully cut along the line in both directions. When you start in the middle, any unevenness caused by that initial cut will be concealed under the ribbon tie. =)
8. Now you're ready to cut your ties!
You will need three of them.
I used a nautical woven edge ribbon and cut three pieces about 1.5" long, but if your shirt is really thick, you may need a little more.
The ribbon used on top will need to be a little longer because it has to go around the collar, which is bulkier than the plain fabric. If you have ribbon that's prone to fraying, quickly heat seal the ends by passing them through a lighter's flame until they just begin to melt. Please be careful and don't burn yourself!

9. You'll probably notice the t-shirt material has curled along the cut lines - this is totally normal!
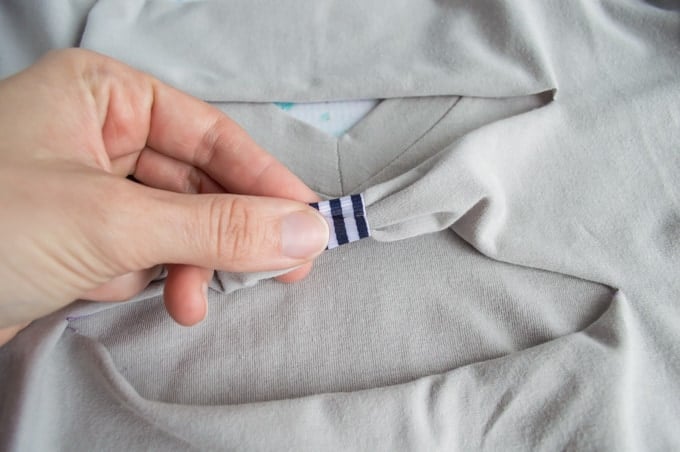
It will probably curl "out," if the shirt were right side out (so "in" on your inside out shirt). I like to encourage this and basically fold the fabric into thirds before placing the tie around the middle of each section. You can also pleat it a little - that's cute, too.
10. Test fit a tie around the folded over the bottom section of fabric and trim the ribbon, as needed.
I like to overlap the ribbon ends by at least half an inch to ensure there's plenty of smooth surface for gluing. Make sure the visible edge of the ribbon on top is on the inside of the shirt (facing you). Make sure the ribbon tie is centered! If your shirt has a tag on the collar, it can be a great guide for centering the ribbon ties.
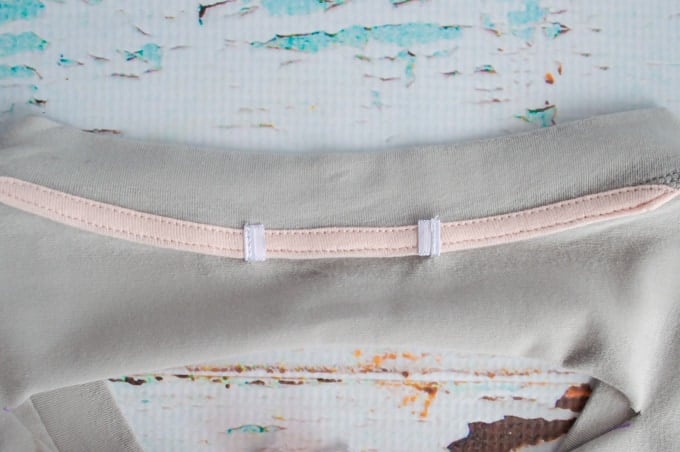
11. Glue the ribbon in place, following the instructions provided with your fabric glue.
Some glues direct you to simply slather it on and hold the pieces together, but others want a thin layer on both sides that you allow to dry for a few minutes before sticking the two pieces together.
Do whatever your glue says! To help hold the ribbon in place while the glue dries, use a couple Wonder Clips, binder clips, or clothespins.

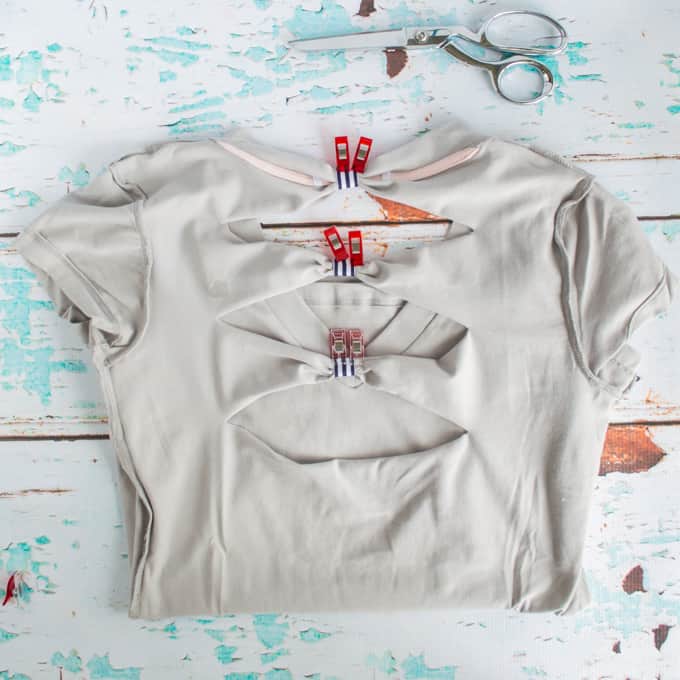
12. Repeat steps 9-11 with the middle strip of fabric.
13. To remove extra bulk, carefully cut the collar tag off your shirt then repeat steps 9-12 to create the top bow.
14. Allow the glue to dry before removing the clips and trying it on. I wait at least 2 hours, or as directed on the bottle. Many glues are not not fully cured and waterproof for 24 hours or more, so make sure to check the glue packaging for this information, too!
15. Wear and enjoy your awesome new altered t-shirt.
Don't lose tack of the t-shirt refashion tutorial! Make sure to Pin it now!
Looking for altered t-shirt project to do with your too big shirts? Check out my other tutorials! You can discover how to make a t-shirt tank top, a herringbone side laced tank, and t-shirt yarn statement scarf. I must really like cutting up t-shirts!
 What's your favorite way to refashion t-shirts?
Duni
That looks great, Natasha! I love T-shirt re-fashions and that knit fabrics don't fray! The layer underneath is very cool 🙂
Your post is a timely reminder, as I still need to publish mine, the only thing holding me back is that it's not warm enough to wear!
Natashalh
Eek for not warm enough to wear! I hope spring weather arrives for you soon. Or summer weather, if your spring is usually chilly.
Recognize the leggings in the photo? =)
marieken
I love it when a simple shirt has something special in the back!
Natashalh
Your comment actually alerted me to the fact that this post was accidentally published two days early and before it was finished! It must have looked kind of silly stopping in the middle. Anyway, I can reply now that the post is actually published for real. If you hadn't commented, who knows how long it would have taken me to realize the post was published!