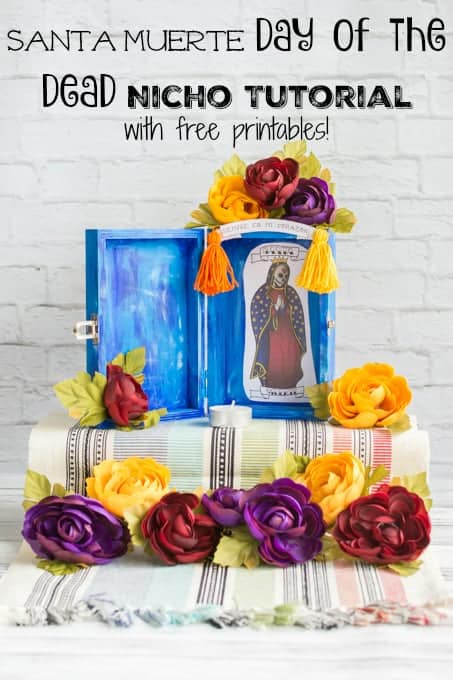
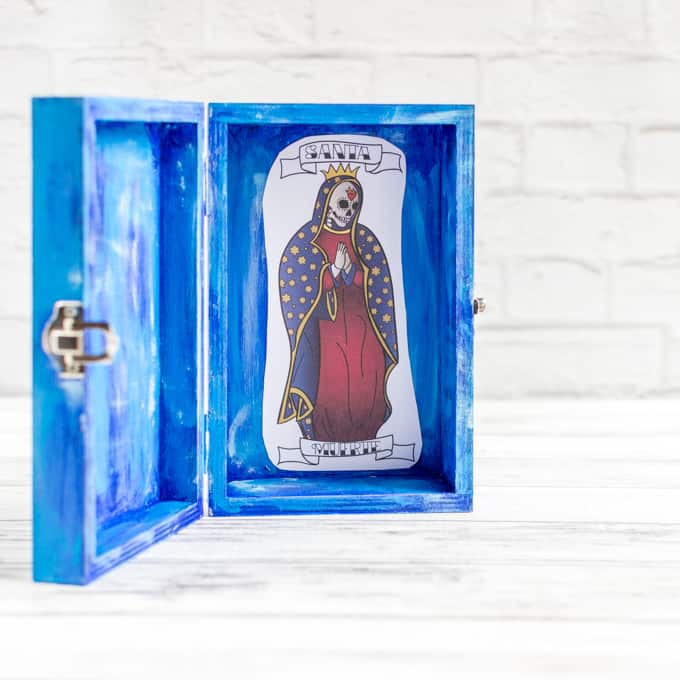
Dia de los Muertos celebrations vary regionally, but objects called "nichos" are frequently part of the altars constructed by a family to honor its ancestors.
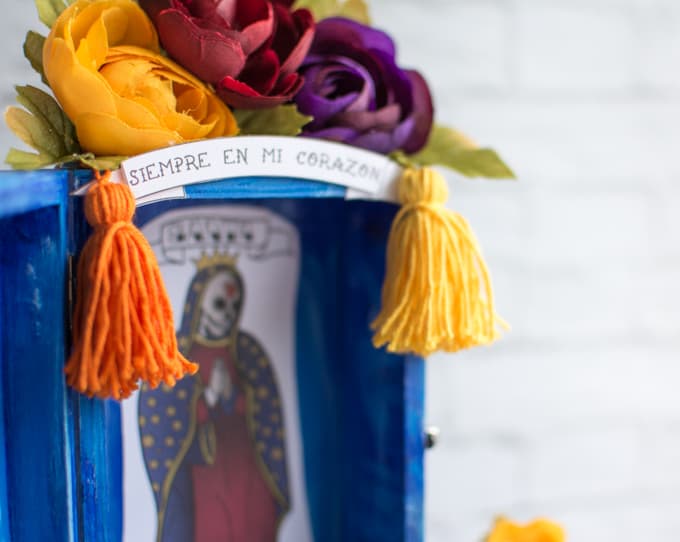
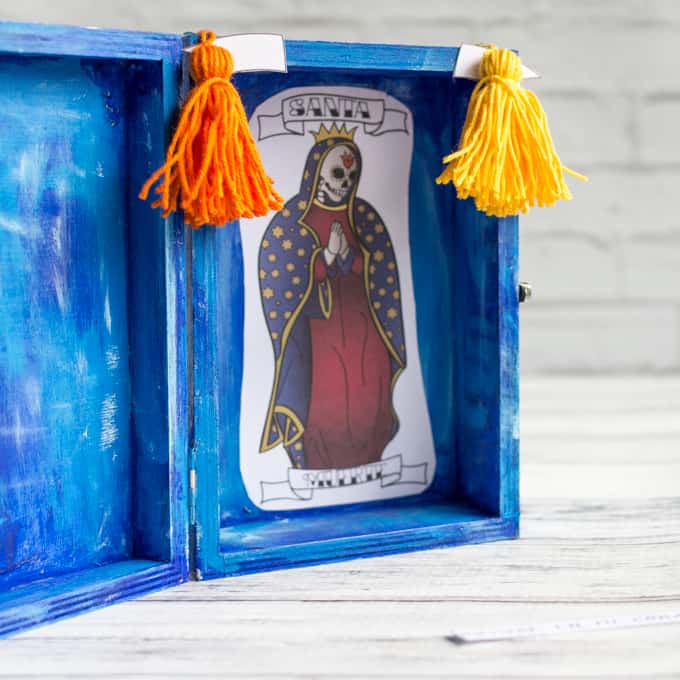
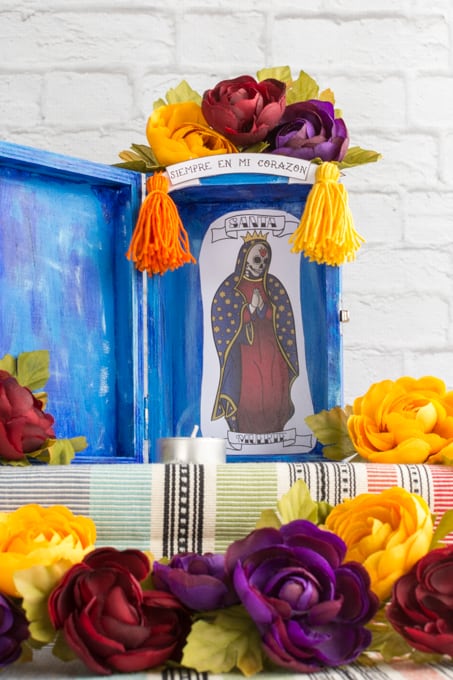
Nichos typically have a key object or person honored in a shadow box style creation. Today's tutorial shows you how to make a nicho featuring a printable of Santa Muerte and a banner reading "siempre en mi corazon" (always in my heart).
I also show you how to antique your painted box using a Vaseline resist technique and give ideas for decorating with tassels and flowers.
This post may include affiliate links, which means I may make a commission on purchases made through these links at no additional cost to you.
At first glance, Day of the Dead celebrations seem highly macabre. Maybe it's the holiday's proximity to Halloween that gets some Americans I know pretty creeped out by Dia de los Muertos traditions such as sugar skulls and dressing up like a skeleton!
While the two holidays do have some superficial similarities, the spirit of the Day of the Dead is totally different from that of Halloween. In fact, I think they're kind of opposites.
People posit that modern Halloween customs come from activities done to ward off wandering ghosts, but Day of the Dead activities are about celebrating the deceased and connecting with the spirits of one's ancestors.
You may, of course, add more or different decorations if you'd like. This tutorial is just a jumping off point. You may also choose to add a photo or photos of your departed loved ones. You can use the provide printable as shown and add your photos on the left, or you can move/omit the printable. It's a personal choice - this is your nicho!
Supplies for Santa Muerte Nicho
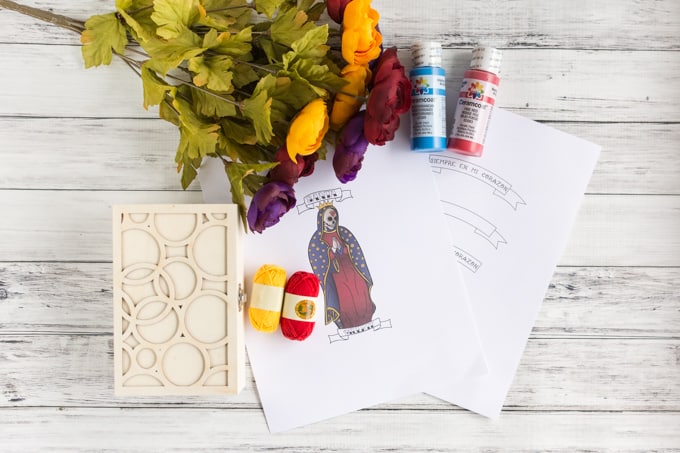
These are the supplies I used to make the tutorial's nicho. You may need less or more, depending on how you decide to decorate.
- An unpainted wooden box - mine is about 6.25"x4"x2" and is basically the same size as this unfinished box. Unfinished boxes are readily available at pretty much any craft store.
- Acrylic craft paint - I used two shades of blue and white
- Craft paint brushes - I used a .5" flat brush and a foam brush
- Vaseline
- Paper towels
- Hot glue gun/glue sticks (Not sure what to use? Stop by top hot glue tips & tricks!)
- Artificial flowers
- Embroidery floss or thin yarn - I used Lion Bonbons
- Scissors
- Matte Mod Podge
- Santa Muerte printable
- Banner printable
- Clear coat spray (optional, but helps ensure the printable's colors don't run when Mod Podged)
- Double sided foam tape (optional - gives the banner a dimensional appearance)
- A gift card or something similar to press down the Mod Podged printable and for making tassles
Using cardstock for your printables creates the best results, but you can use plain printer paper if that's all you have.
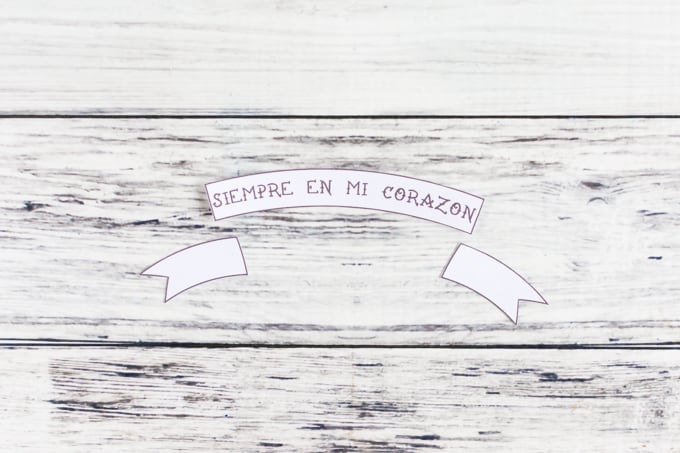
The banner file has several different options. There is a flat banner with "siempre en mi corazon," a blank flat banner for you to write on, and then both options with separate tail ends to cut out individually. Use a single piece banner if you're not giving it a dimensional appearance with foam tape but choose the multiple part option if you want to create a dimensional banner.

Here are your printables! Santa Muerte is about 6" tall when printed at 100% size and the banners are about 4" long. Just scale when you print, as needed, to suit your box. =)
Day of the Dead Nicho Tutorial
Congratulations! You've made it through the supply list and are ready to start constructing your nicho. 😉
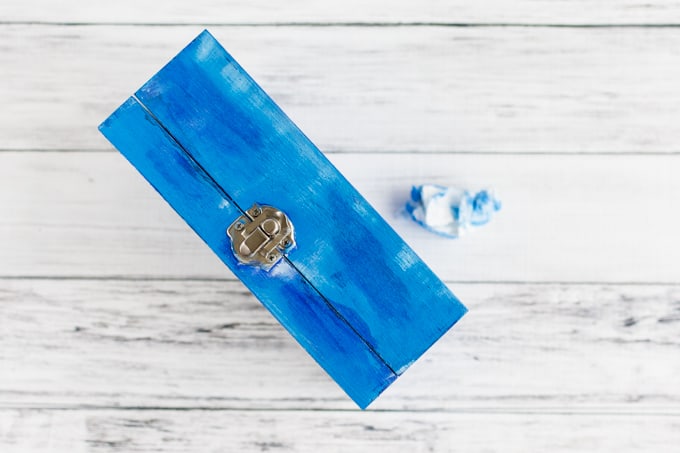
1. Give your box a first coat of paint! If you're only going with one coat and not choosing to give it an antiqued appearance, make sure this coat is thorough. If you are doing a second coat, still try for full coverage but don't stress any spots that end up light on the paint.
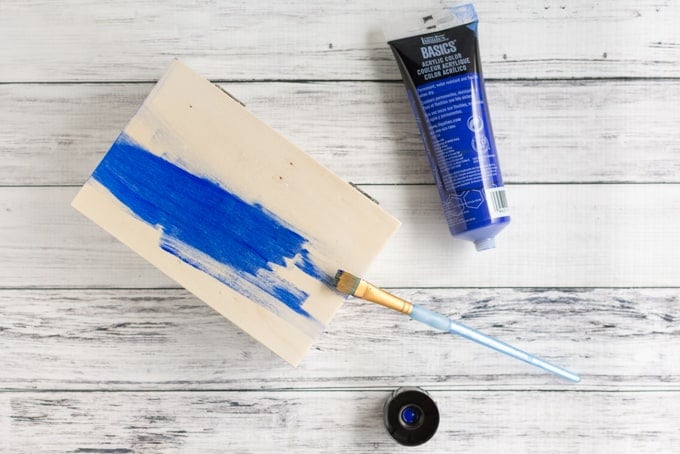
The main exception are the crevices of any details, if your box has them. Even if you're doing multiple coats of paint, make sure to get as much down in those corners as you can without gunking everything up.
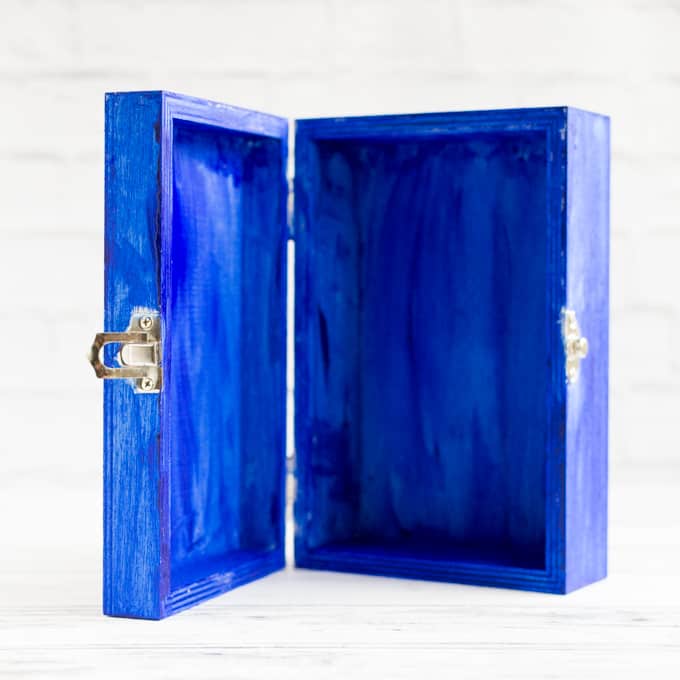
Don't forget to paint the bottom and inside, too!

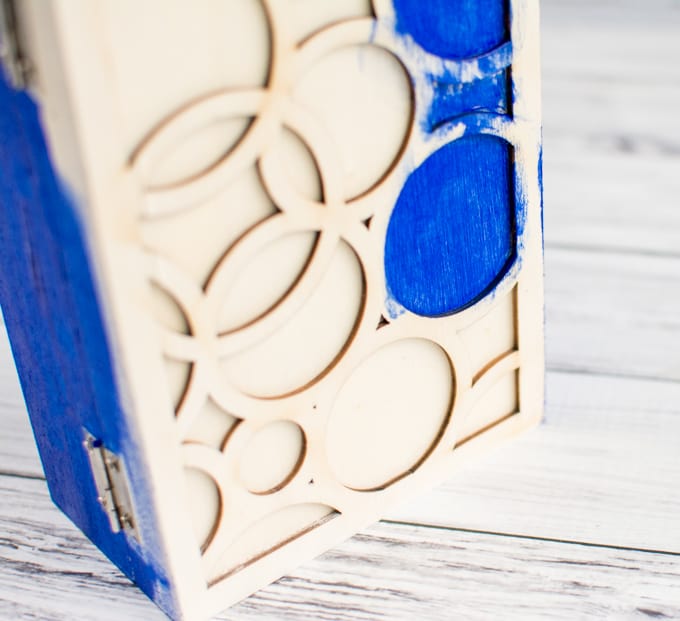
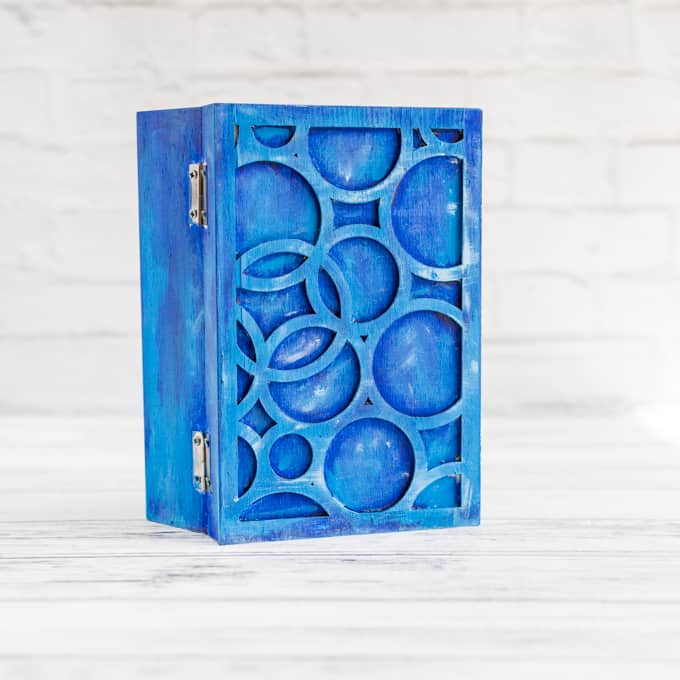
2. Once this first coat is dry, use your fingers to apply Vaseline along the edges and corners. Add a few patches along the box's flat surfaces, too. These areas are where the bottom paint color will show through, so keep that in mind when applying the Vaseline! See the shiny spots in the photo? That's where the Vaseline is.
3. Give the Vaseline a few minutes to set a little then paint a second color of paint. Again, don't forget to paint the bottom and inside!
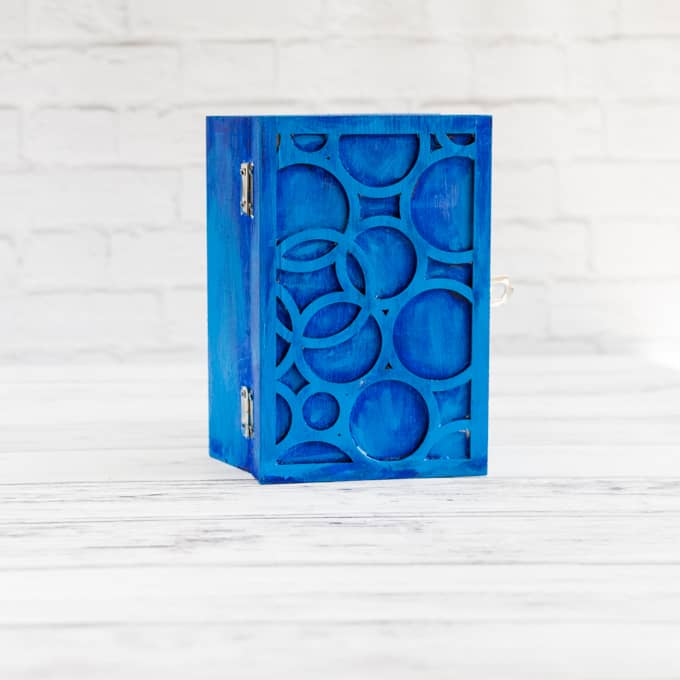
4. Now it's time to dry brush the highlight areas. Whatever your base coat colors, white paint should work well for bringing out the highlights. This step is totally optional, so skip it if you'd like. If you want to bring out the highlights, get some paint on a foam brush and then wipe the paint off on a paper towel until there's only the smallest amount left on the brush. Use this very dry brush to lightly add highlights. This works great on areas with raised decoration, like the front of my box, or on flat areas when you brush across the grain. Reload the brush as needed.
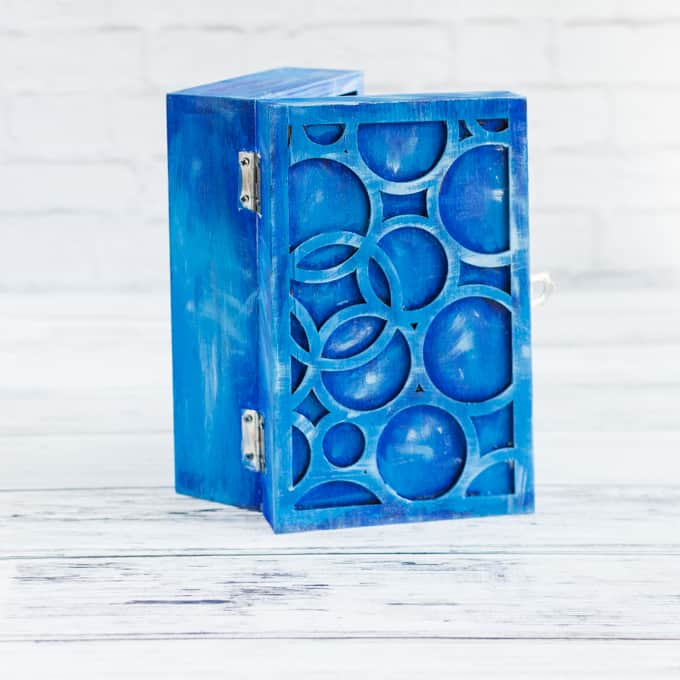
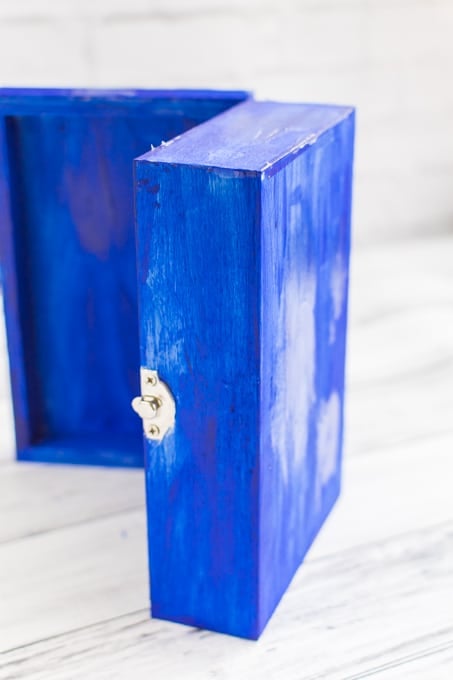
5. Once final coat of paint is fully dry, use paper towels to wipe away the Vaseline and reveal the paint color underneath. In several days, residual Vaseline will actually dry, causing any remaining paint on its surface to crack and peel away. If you see this happening, just help the paint along and don't panic - this is just how the antiquing process works. Your project isn't totally falling apart! You can also use some fine grit sand paper to pull off extra paint if you decide you want an even more antiqued appearance.
6. Cut out Santa Muerte and grab your Mod Podge. If you're using a clear coat to seal the ink jet printing in place, quickly coat Santa Muerte front and back and wait for the sealer to dry. This only takes a minute or two. Use your .5" brush to give a fairly generous coat of Mod Podge to wherever you want Santa Muerte to be. I went with the inside right of my nicho. Make sure to brush on enough Mod Podge to adhere the card stock, but not so much that things turn into a soupy mess. Place the printable on the prepared area then carefully use the gift card to press out any bubbles (don't scrape too hard or you may damage the print out, especially if you used plain printer paper!).
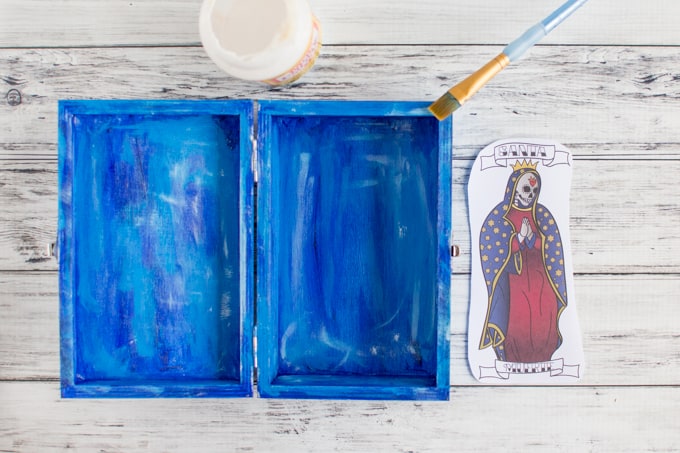
7. Allow the Mod Podge to dry fully, about 10-15 minutes, then apply a second, thinner coat to the entire surface.
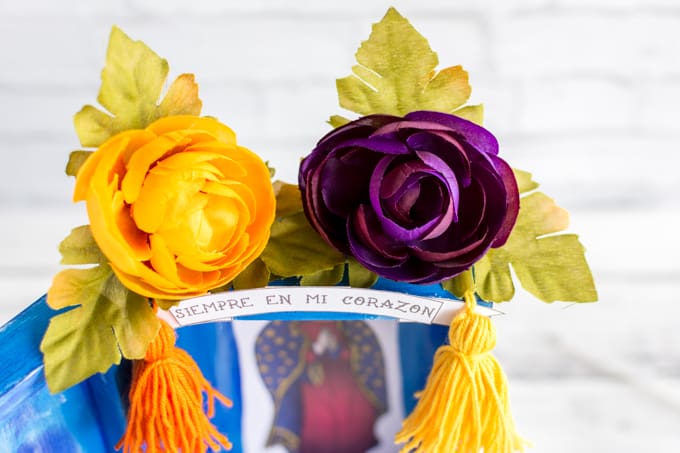
8. Now comes the really fun part - decorating! I made tassels and attached flowers. I highly recommend playing around with the various decorative elements and deciding pretty much where you want everything to be before you start gluing anything in place.

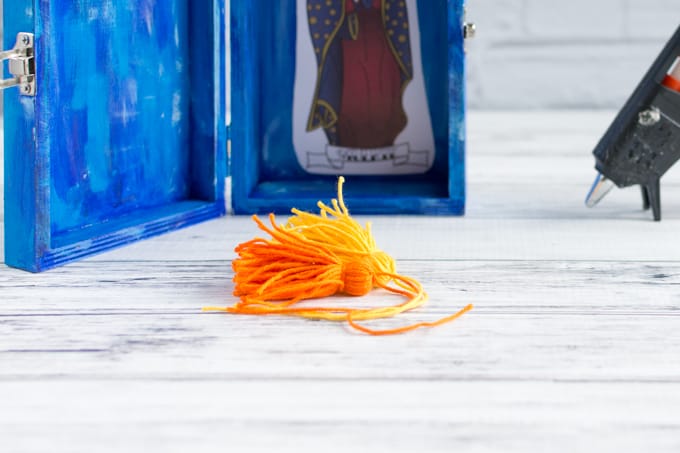
9. To make tassels, wind your floss or yarn around the gift card until you like how full it looks.

Cut the yarn free from the ball then cut a piece 6"-8" long. Thread this under the yarn on the card.

Slide the yarn off the card then tie the loose yarn tightly to hold everything together.

Cut a second, shorter, piece of yarn and tie it around the wound yarn, as shown.

Cut through the yarn loops opposite the tied up end to create your tassel. Trim any long/short pieces to even things up, as necessary. Repeat to create as many tassels as you'd like!
To attach my tassels, I positioned the tail ends over the box's top and temporarily held them in place with painter's tape. Then I used hot glue to stick them in place more permanently.
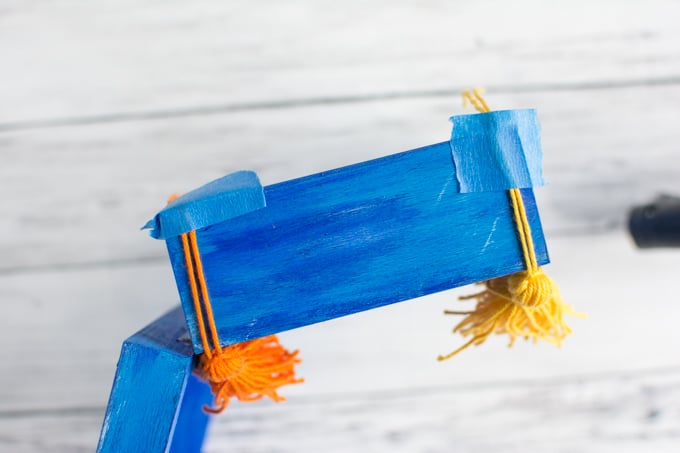
If you want to attach a banner, as shown, do not glue the ball of the tassel directly to the box as this will interfere with adding the banner.
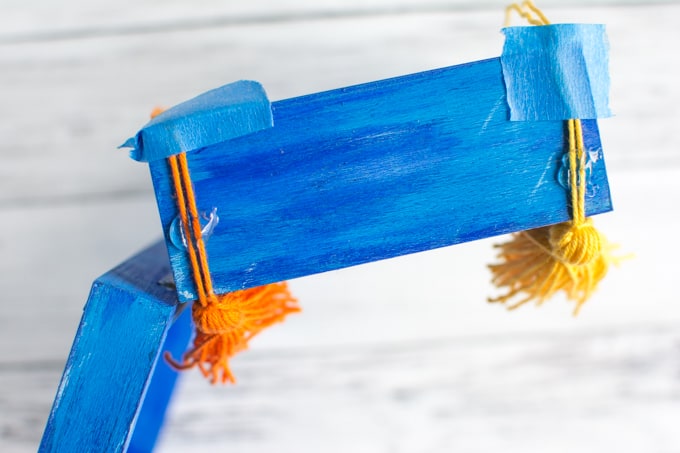
Remove and discard the tape once the glue has hardened.
10. Now it's time to add the banner. It may seem silly to place the banner behind the tassels instead of attaching it first, but I found that the tassel's weight helps hold the banner in place while you're playing with positioning, which is pretty helpful! To get started, cut out your banner pieces.
Play around with the positioning to see where you want everything to be, then hot glue the two tail ends in place (if your nicho is like mine, they should be partially behind the tassels).
Place foam sticky tape on the back side of the central banner piece.
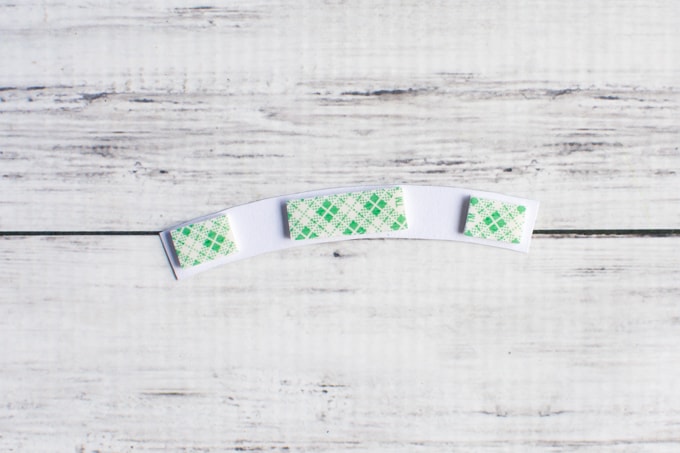
Take the backing off the foam tape and stick the banner in place. Add a bead of hot glue along the back if your banner sticks up in order to make it more secure.
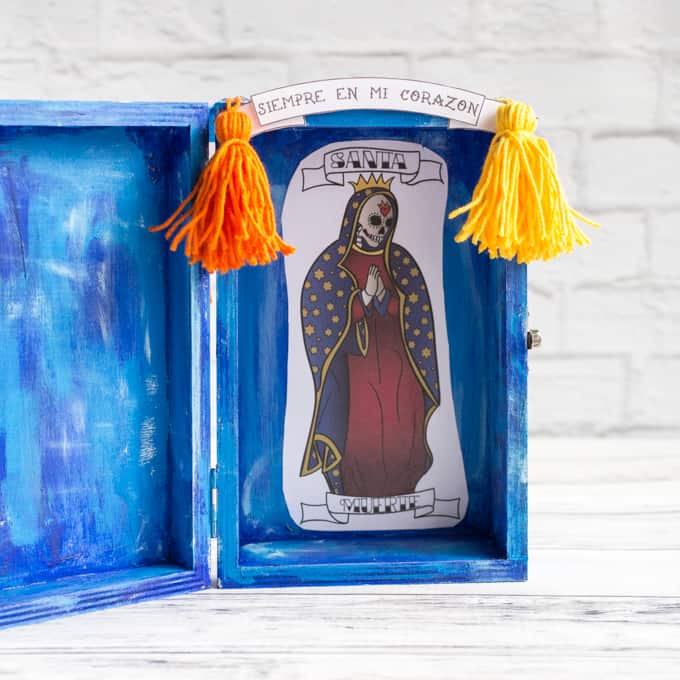
11. Now it's time to add flowers and other decorations! I used flowers to cover the hot glue holding the tassels in place, and I also added some in the box's corners. In addition to flowers, you might want to paint designs on the nicho or add pictures to the side opposite Santa Muerte.
Once you're happy with your nicho, you can set it up for display on its own or as part of a Day of the Dead altar.
Whether you're creating your nicho just because you like the Day of the Dead or have someone siempre en tu corazon to commemorate, I hope you enjoy this Dia de los Muertos tutorial and printables.

Duni
What a beautiful post to honour your Dad. I have always been intrigued by cultural festivals that pay respect to the deceased. Your box turned out wonderful, and although I rarely get out my paint I must remember the Vaseline technique! Does this work on other materials, besides wood?
Natashalh
The Japanese have a very interesting holiday honoring the dead, too. They make vegetable animals! But since you've lived in Asia you probably already know that. =)
I'm not sure how the Vaseline trick works on materials other than wood, but I've used it with different types of paint. I imagine it would work just as well on other things, I just haven't personally tried it!
Paige
This was so educational! There's a fairly large Mexican population here, so I knew the part about Dia de los Muertos honoring family members who have passed, but I've never seen a nicho! How awesome. I love the 3D banner.
Natashalh
Thank you! The banner was actually my husband's idea, then I turned it 3D.