Smokeless fire pits make family evenings around the fire so much more fun!
You don't have to worry about your kids breathing in lots of smoke or getting stinky after bath time.
Unfortunately, buying a smokeless fire pit can be pretty expensive. In this post, we're showing you how a smokeless fire pit works and how to make your own smokeless fire pit.
If you're wondering how long this fire pit lasts, the photo above shows the same fire pit I made in the video after three hard years of use! It's starting to show its age, but it's worked well for us for a long time.
This post may include affiliate links which means I may earn a commission on qualifying purchases at no additional cost to you.
How a Smokeless Fire Pit Works
So-called smokeless fire pits reduce the amount of smoke generated by making use of a secondary combustion of most of the smoke that goes unburned in traditional fire pits.
Most of the DIY smokeless fire pits are based on commercially available products such as the Solo Stove and Breeo. These brands charge top dollar for their sleek stainless steel designs so it is worth it to find ways to make it yourself.
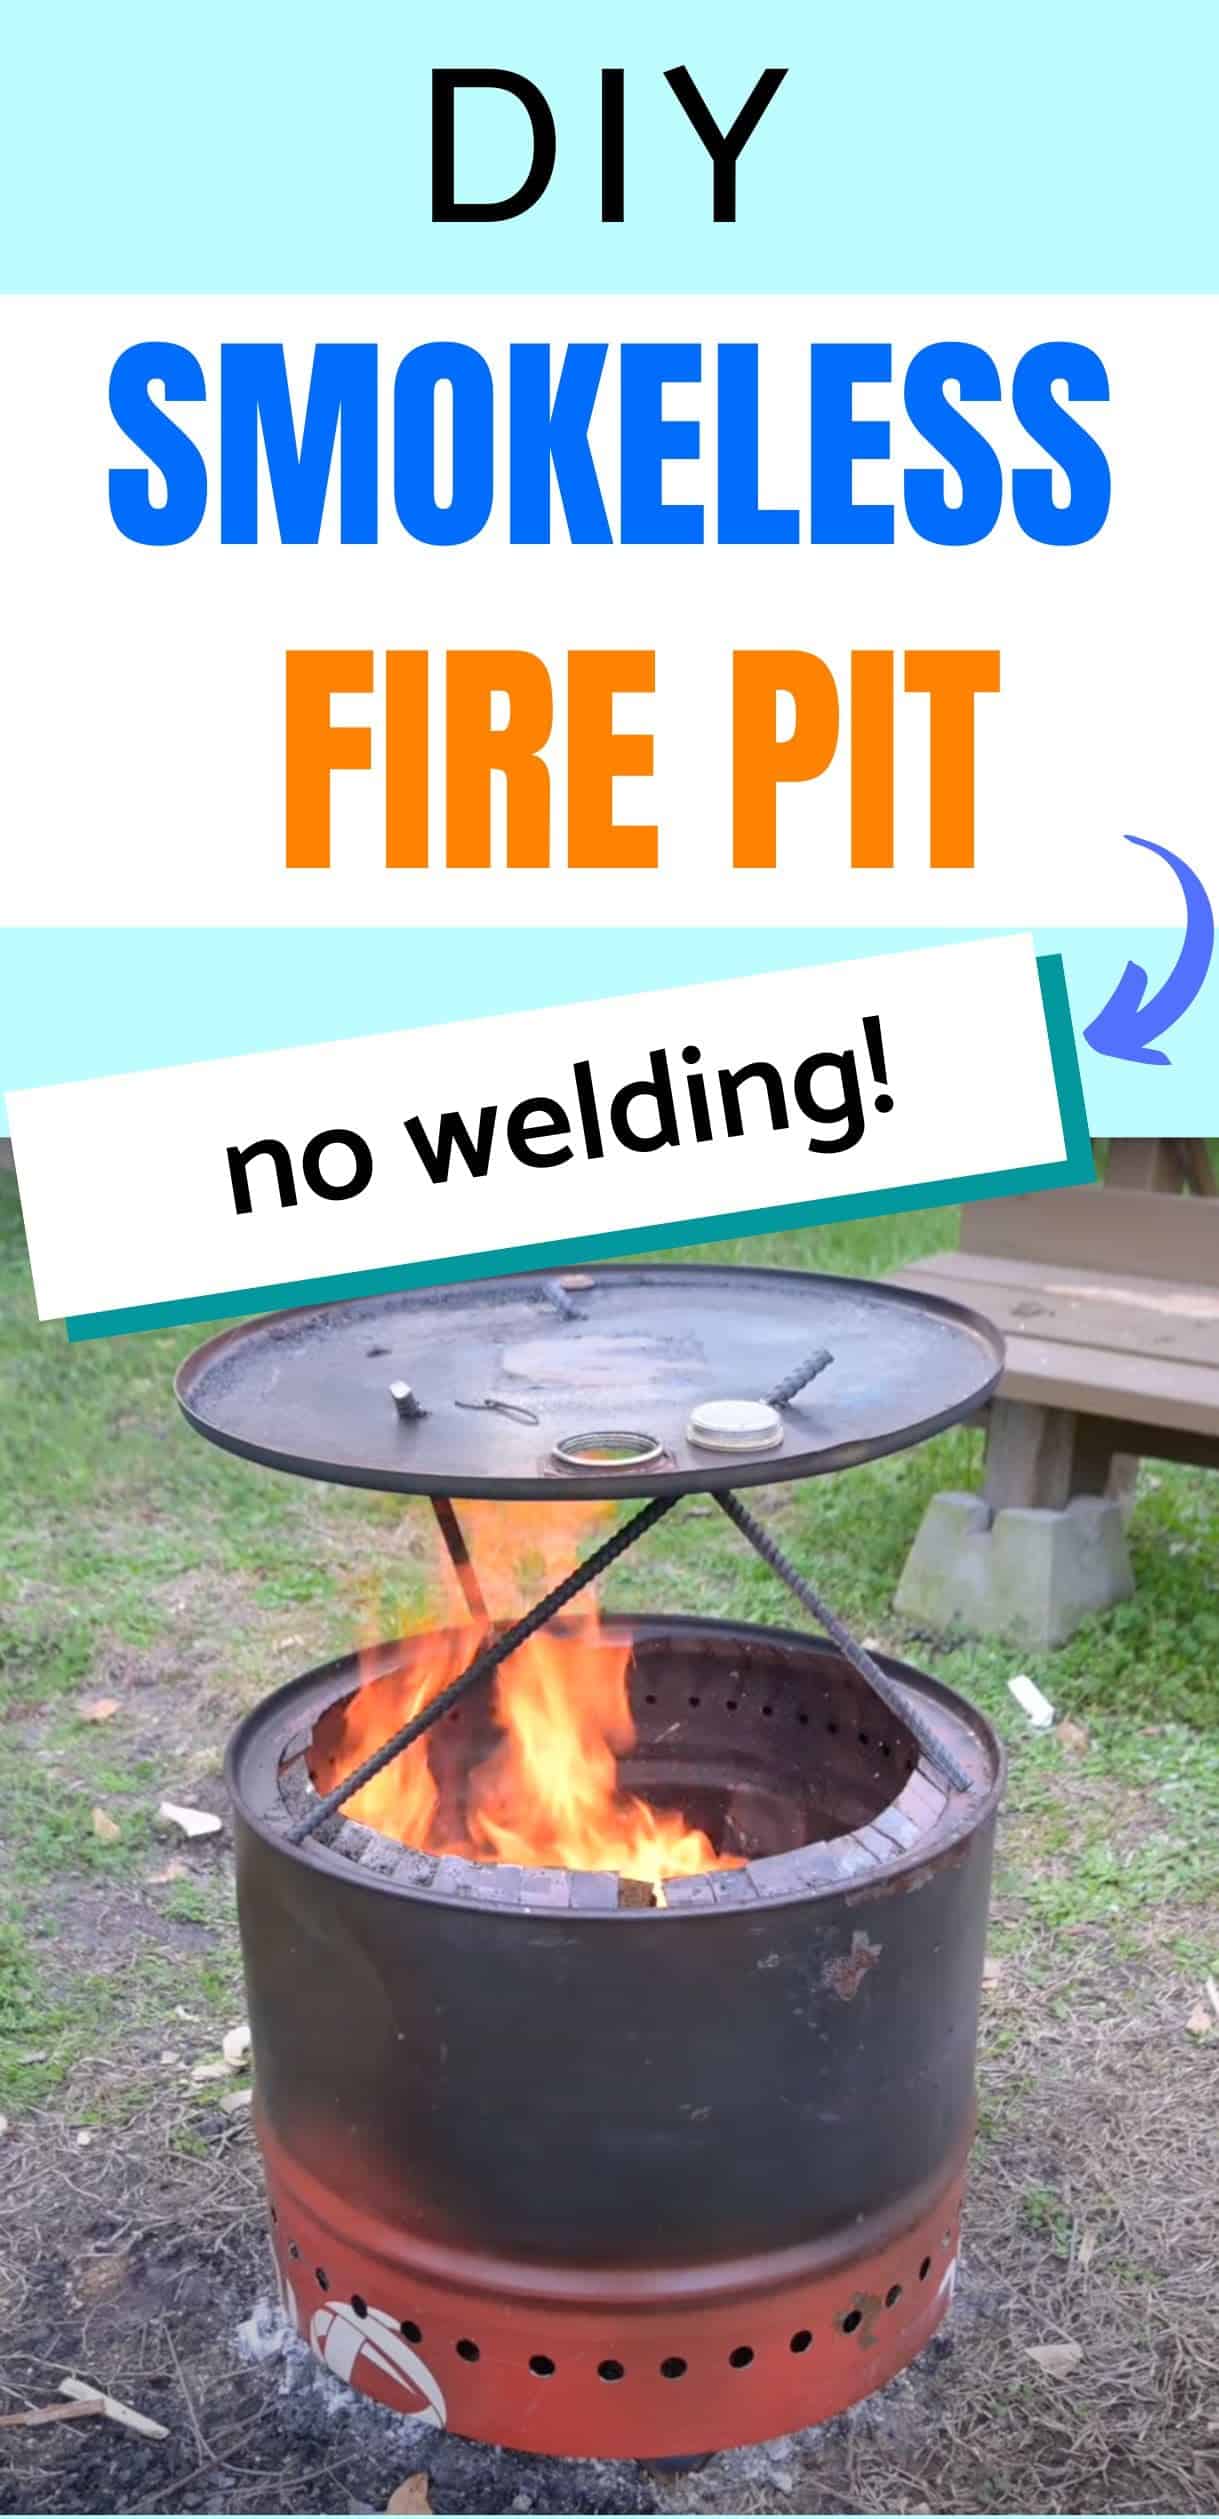
In this step-by-step guide we'll be using a 55 gallon drum for a simple design that mimics those of a popular commercial smokeless fire pit. This is an easy, no weld design that uses a single barrel.
To go along with this guide we have an accompanying video which shows the same steps lined out here. It can help clear up any confusion you may have before you get to building your own smokeless fire pit.
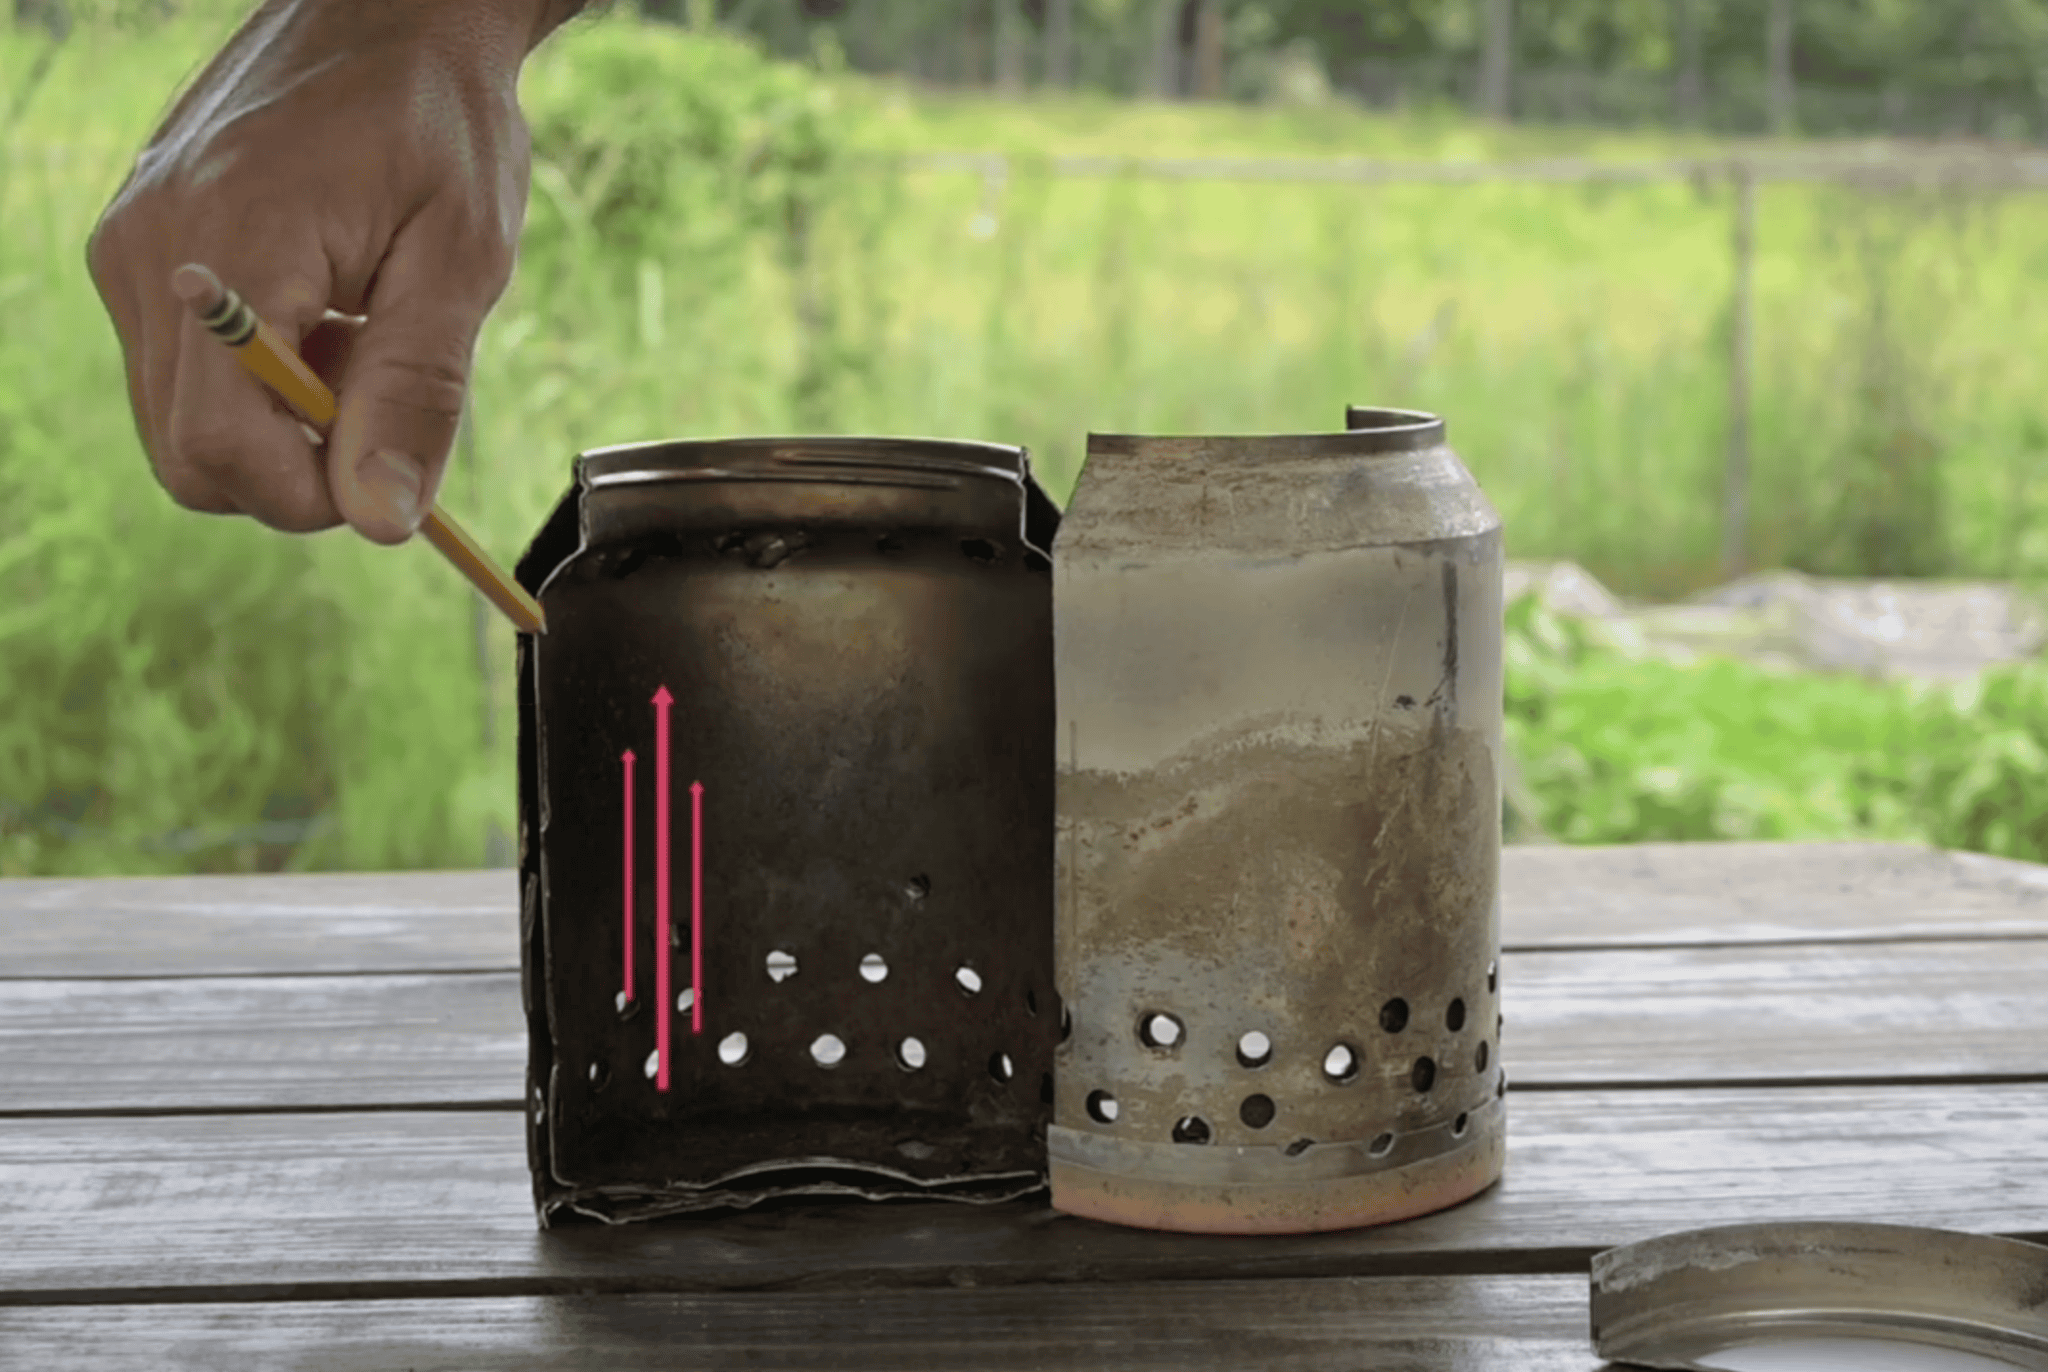
A smokeless fire pit consists of a double-wall structure, i.e. an inner and an outer shell.
The fuel (firewood or pellets) is placed inside the inner shell and lit on fire just like a regular fire pit. Then the magic happens as the whole fire grows in size and starts to heat the inner shell.
The inner wall has two sets of holes, one at the bottom and another set towards the top. This is to allow two different temperatures of air to enter the combustion chamber.
Cold air enters the fire burn area and supplies the fire with enough oxygen to cause a first burn.
As the walls heat up, the second set of holes supply heated oxygen to the burn chamber causing a secondary combustion. This results in virtually no smoke, certainly way less smoke than traditional fire pits which are usually just giant smoke bombs.
How to Make Your Own Smokeless Firepit from a 55 Gallon Drum
To make this smokeless fire pit I used a single 55 gallon drum.
These can usually be found at mom and pop hardware stores or by searching the local classifieds/Facebook marketplace.
I used a variety of power tools but the main ones were:
- a drill
- angle grinder
- A pop rivet gun
- ratchet straps
- step drill bit and some other miscellaneous tools are good to have on hand but not critical.

- 4 Interchangeable Rivet Heads: Arrow rivet gun kit, comes with 4 size manual interchangeable rivet heads- 3/32"(2.4mm), ⅛" (3.2mm), 5/32"(4mm), and...
- Easy Identification & Install Heads: All of the 4 nose pieces have color coded and stamped size marking that will help you identify them easily. Thumb...
- 100 Pieces Rivets Included: Riveter gun kit is equipped with 100 pieces 4 different sizes rivets-3/32", ⅛", 5/32", 3/16 ", each 25 pieces, which...
You can watch the step by step tutorial video below, or scroll for the written summary of the steps. I highly recommend watching the video because it's difficult to accurately express the steps in words.
The first step is to clean out your 55 gallon drum.
Most of the time they'll have residual oil left inside the barrel, this isn't really dangerous but it can get very messy if you don't fully empty it out. I usually pour the rest of the oil into a 5 gallon bucket and seal it with a lid for later use.
To see the process in action, make sure to watch the video tutorial above.
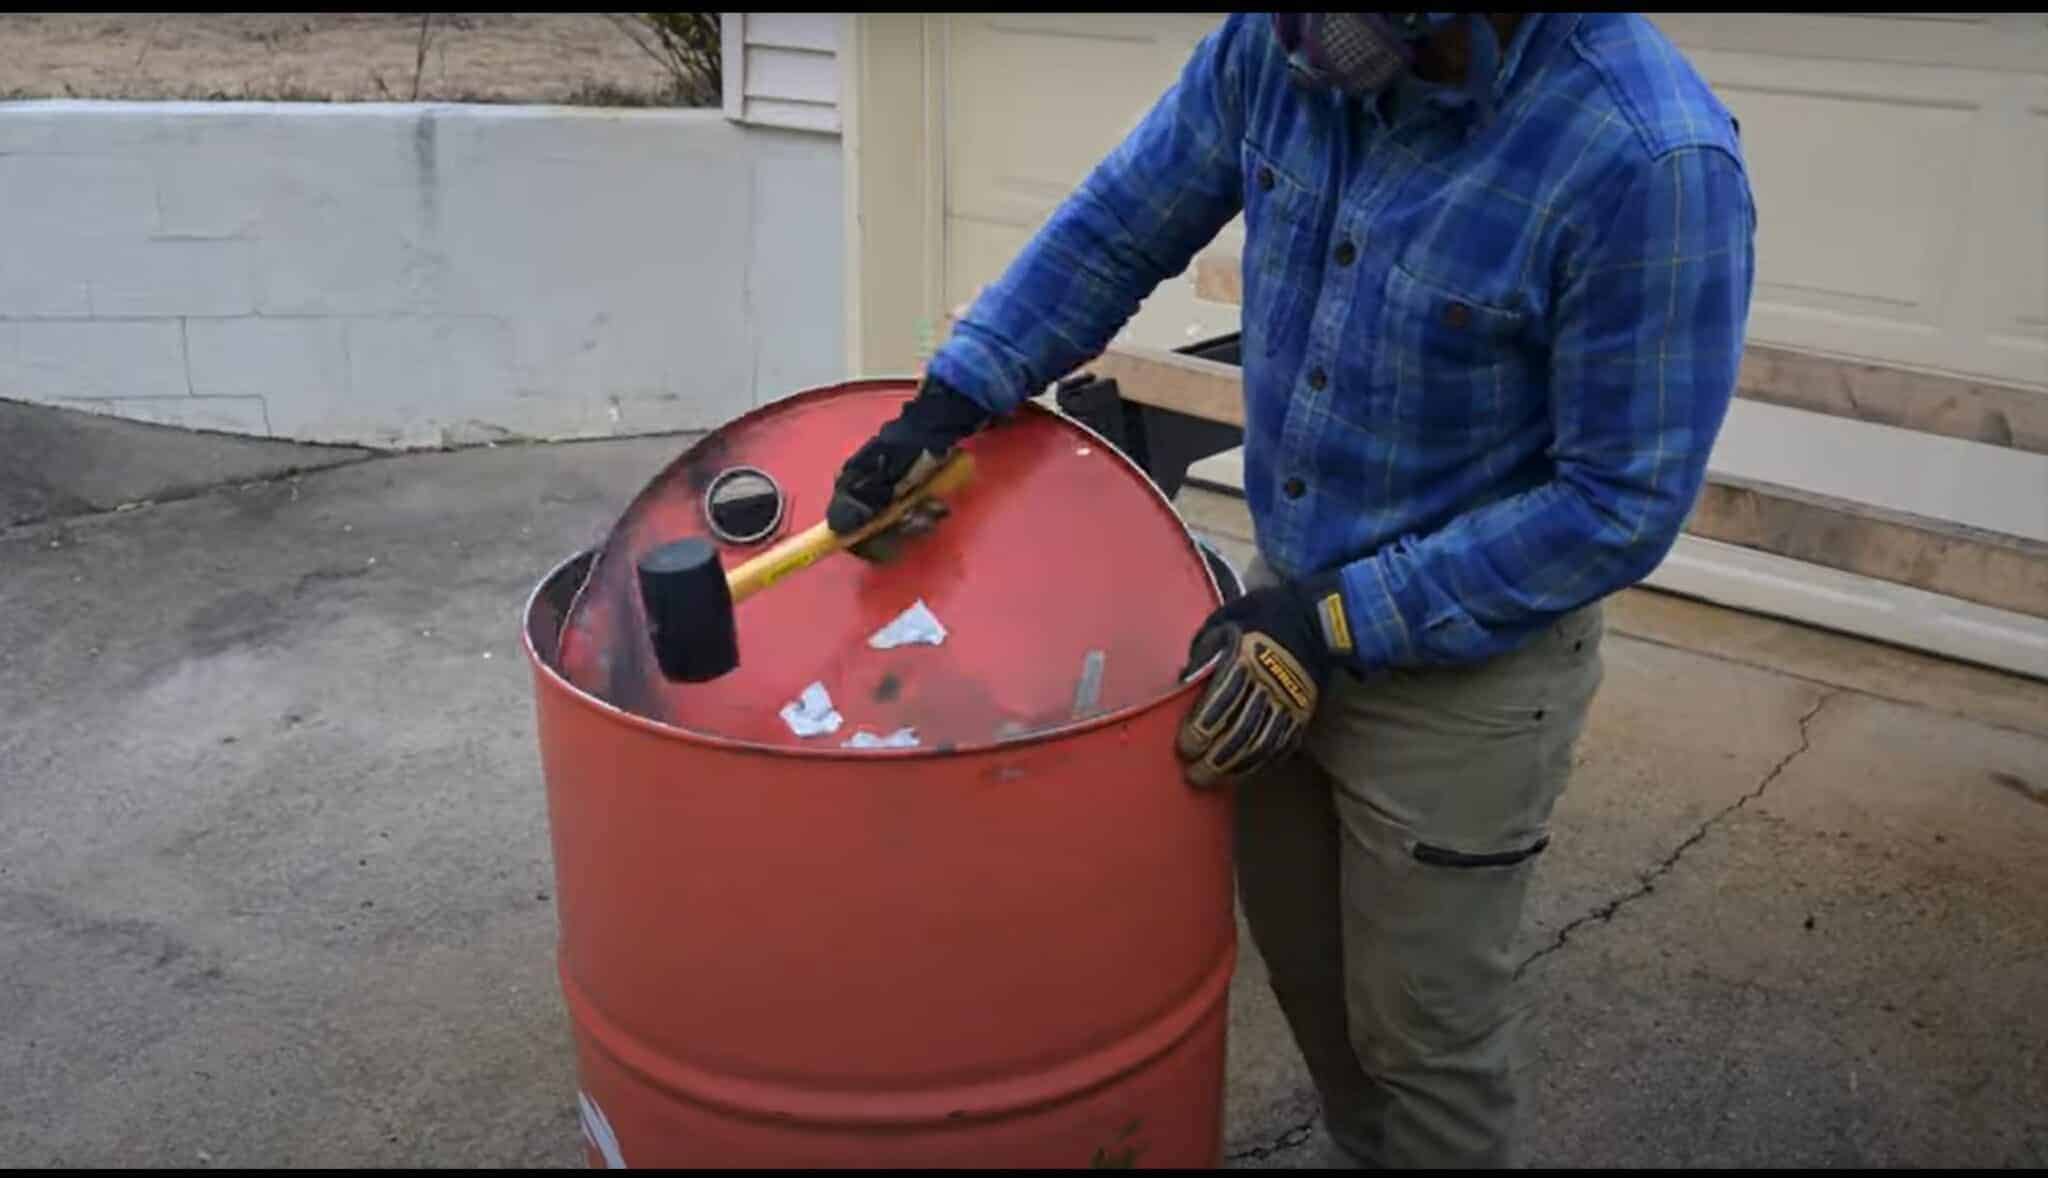
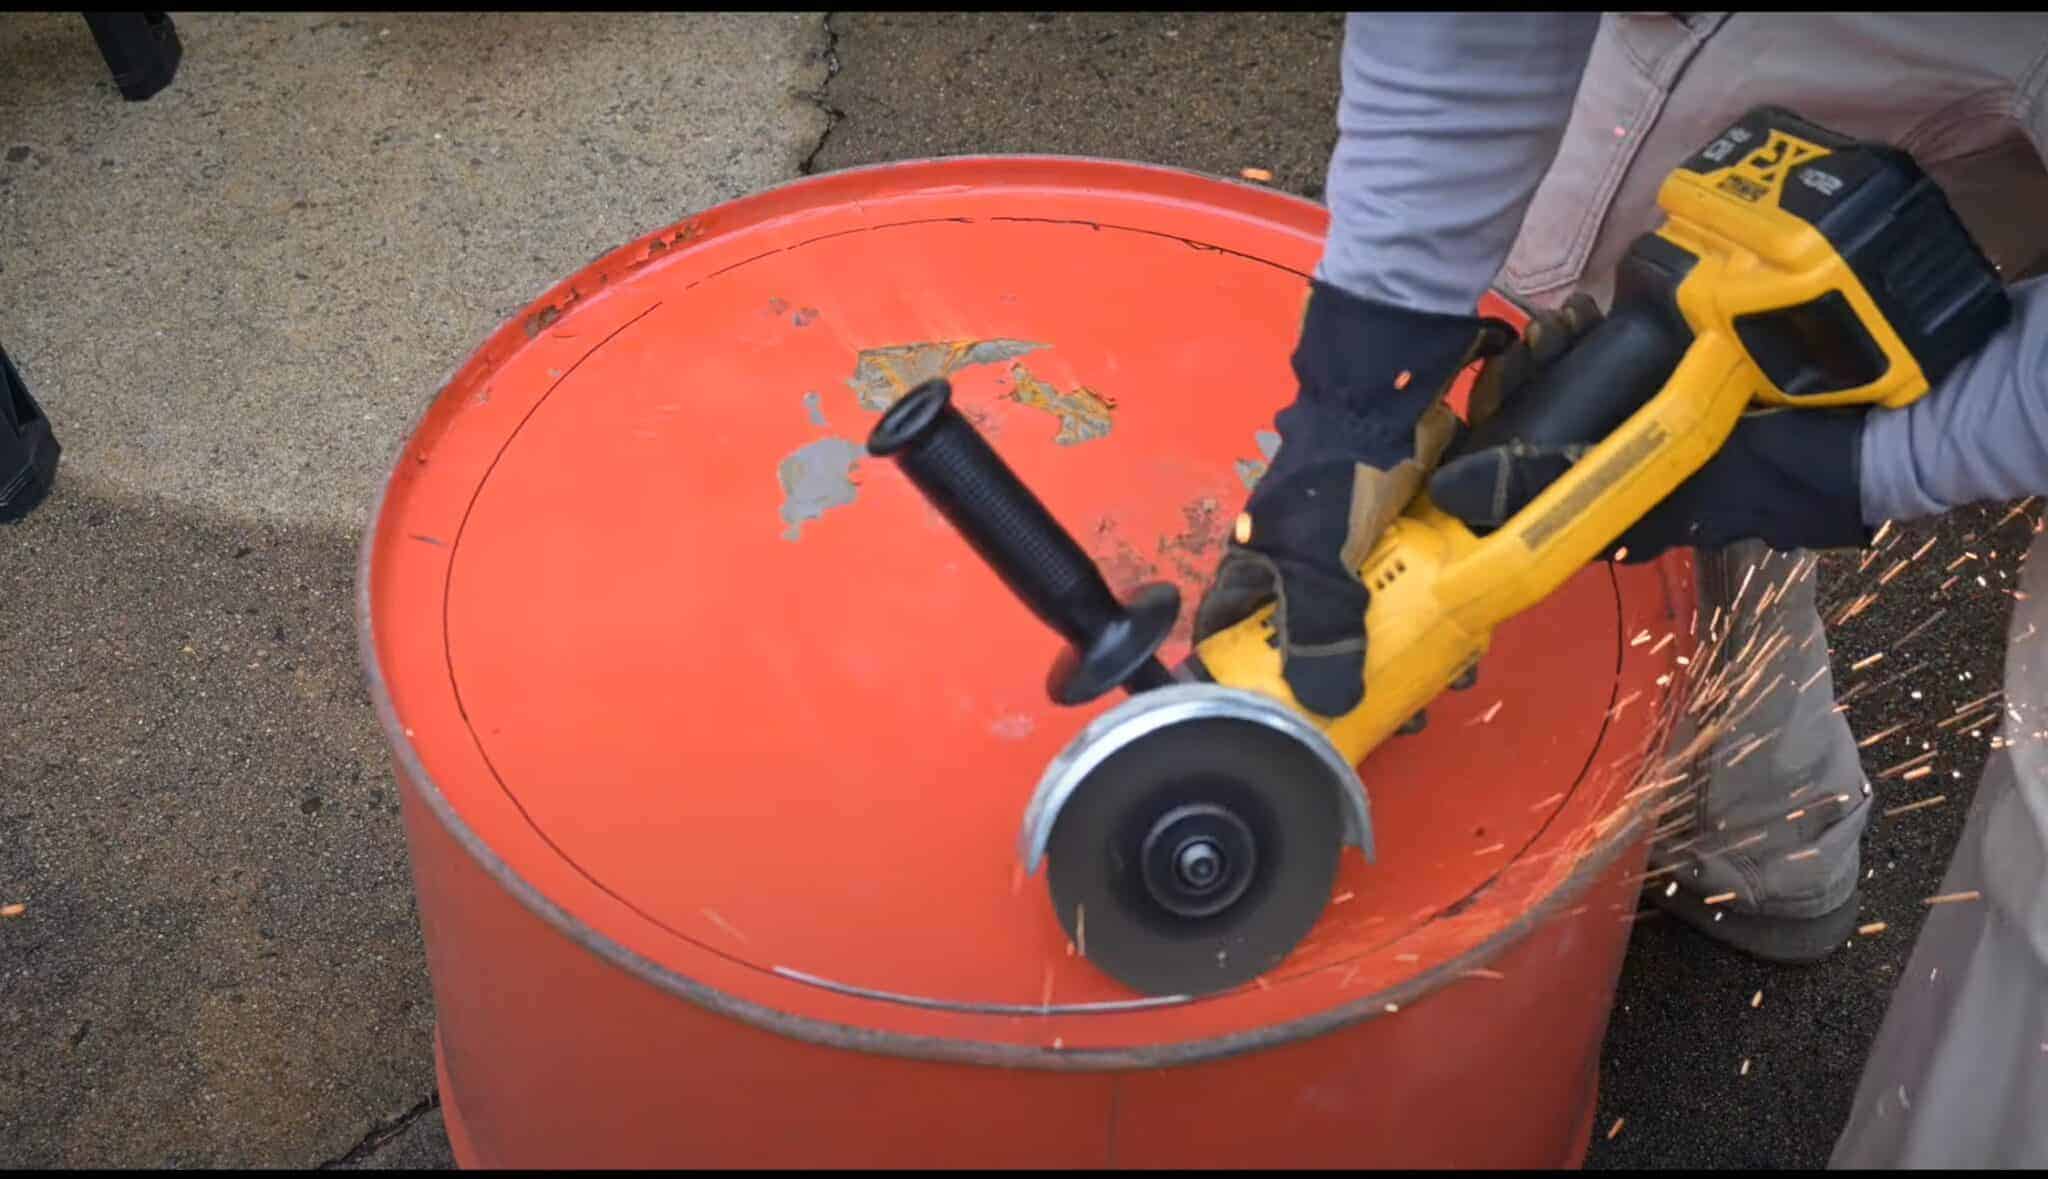
Remove the large bung on the barrel. This prevents any pressure build up inside the barrel while grinding. The next step is to remove the top lid.
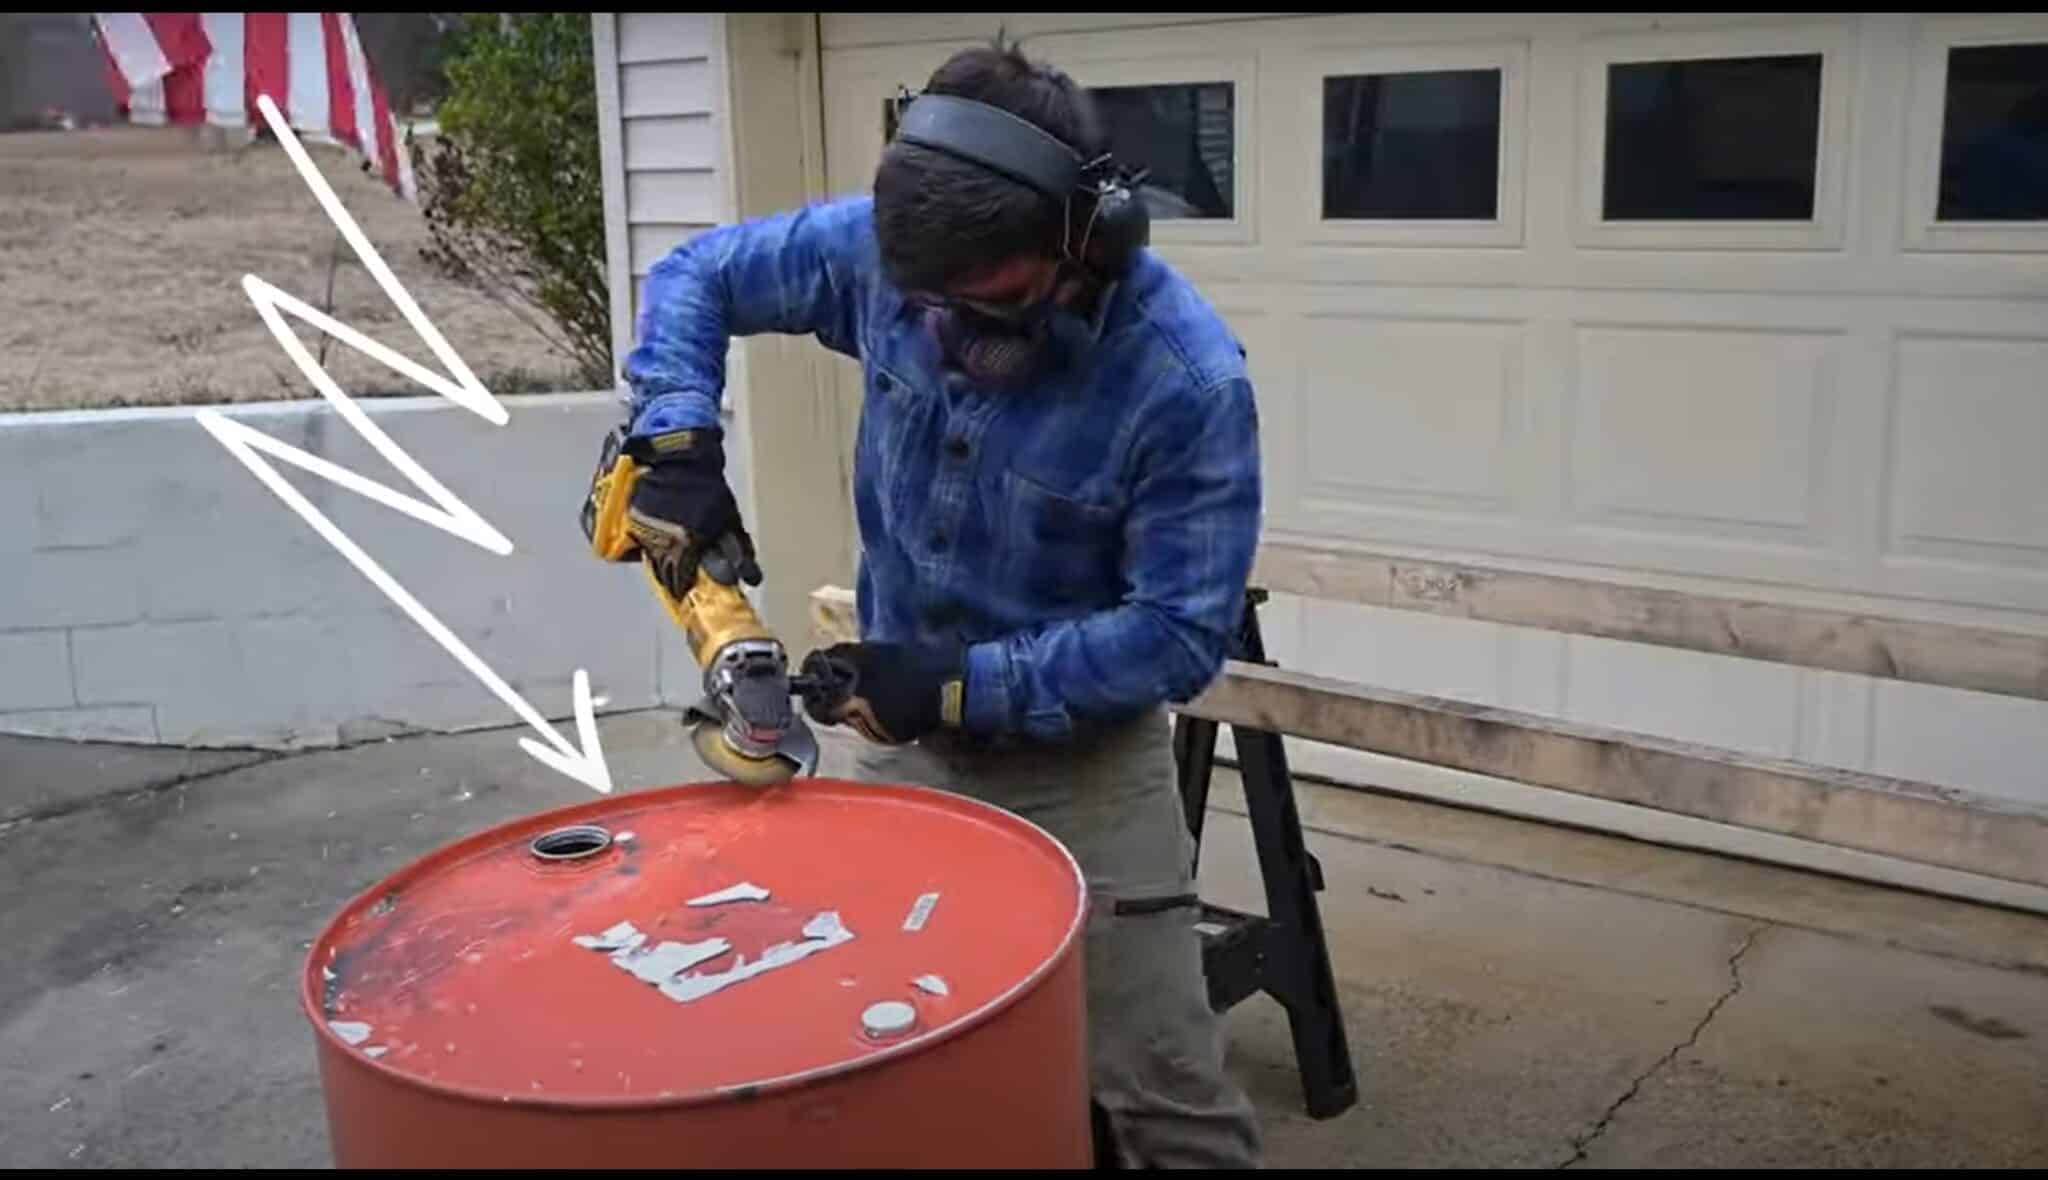
To remove the top lid, I used an angle grinder with a metal grinding disc and ran it all along the top edge of the barrel.
You'll do this until you see a little bit of oil seep out from the seam, this means you've gotten past the top layer and the lid is ready to be removed.
Use a rubber mallet to bang it out without destroying the lid. This design makes use of every part of the barrel so make sure to keep this lid for later.
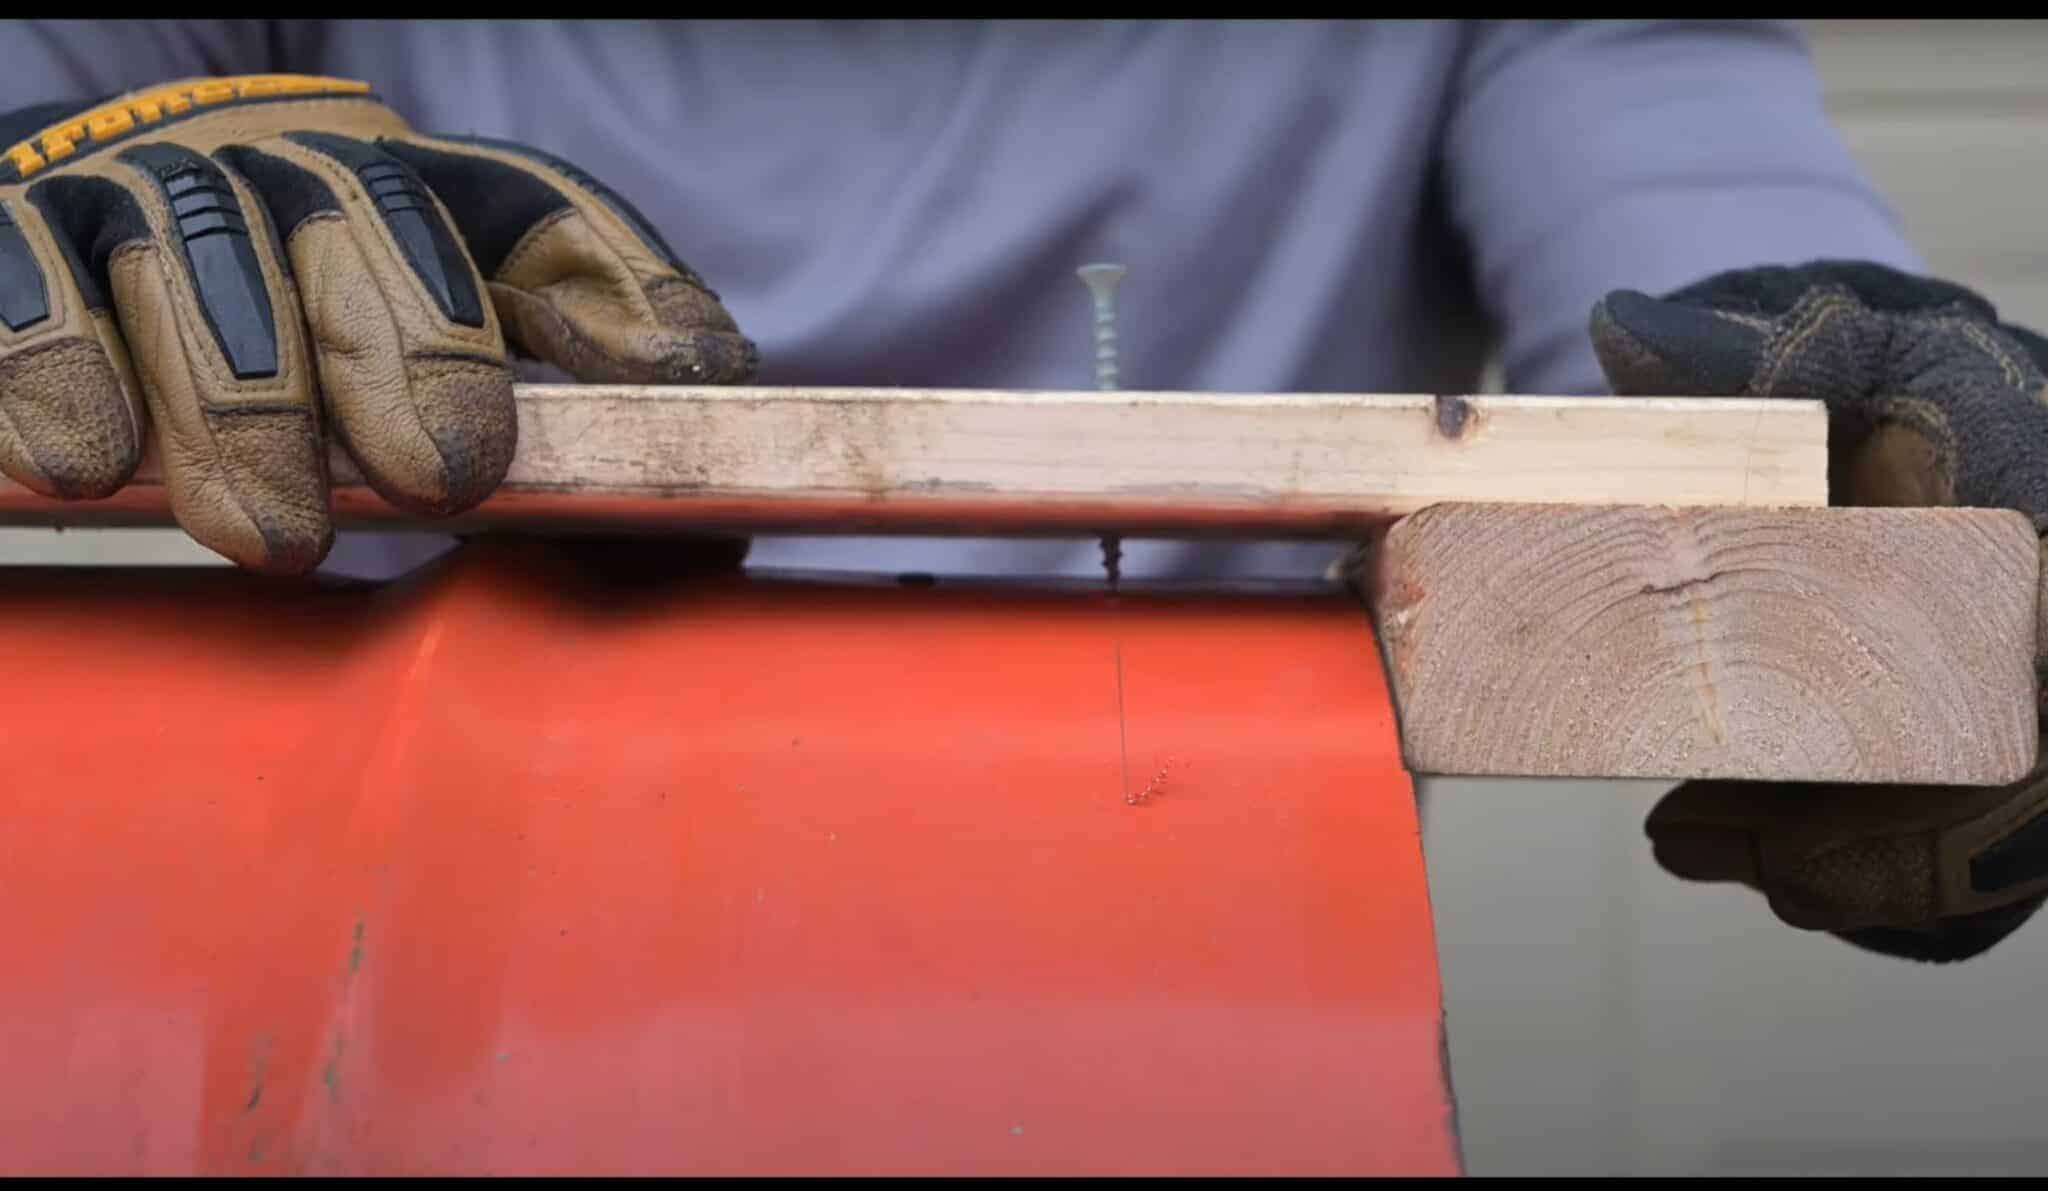
Now you can set the barrel up on 2x4s between two saw horses, this keeps the barrel stable while cutting and drilling.
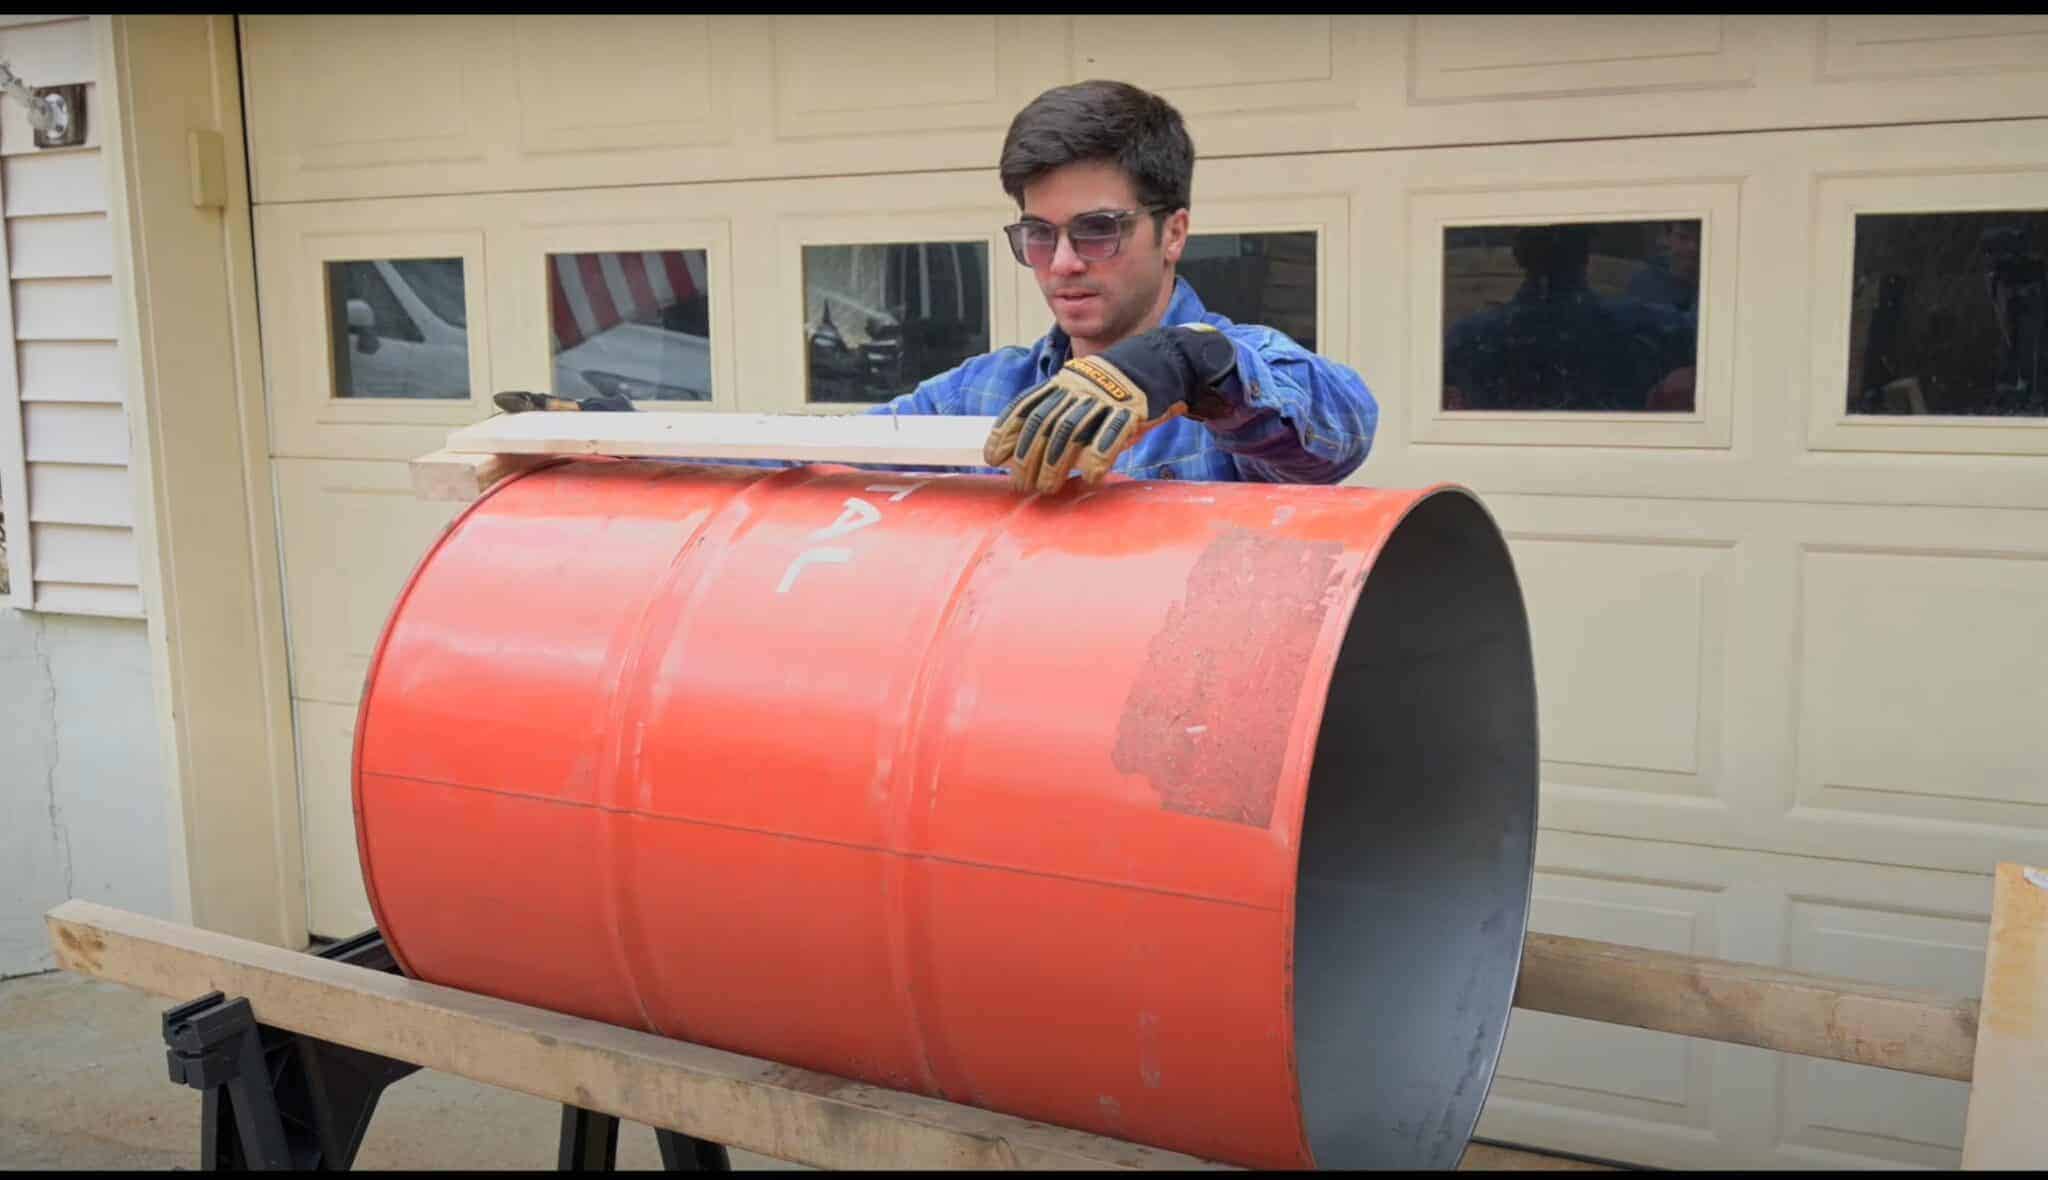
The next step is to cut the barrel in half.
To mark it I used some scraps of wood and a screw. The screw scratches the surface paint and the 2x4 keeps the whole contraption at 90 degrees to the barrel.
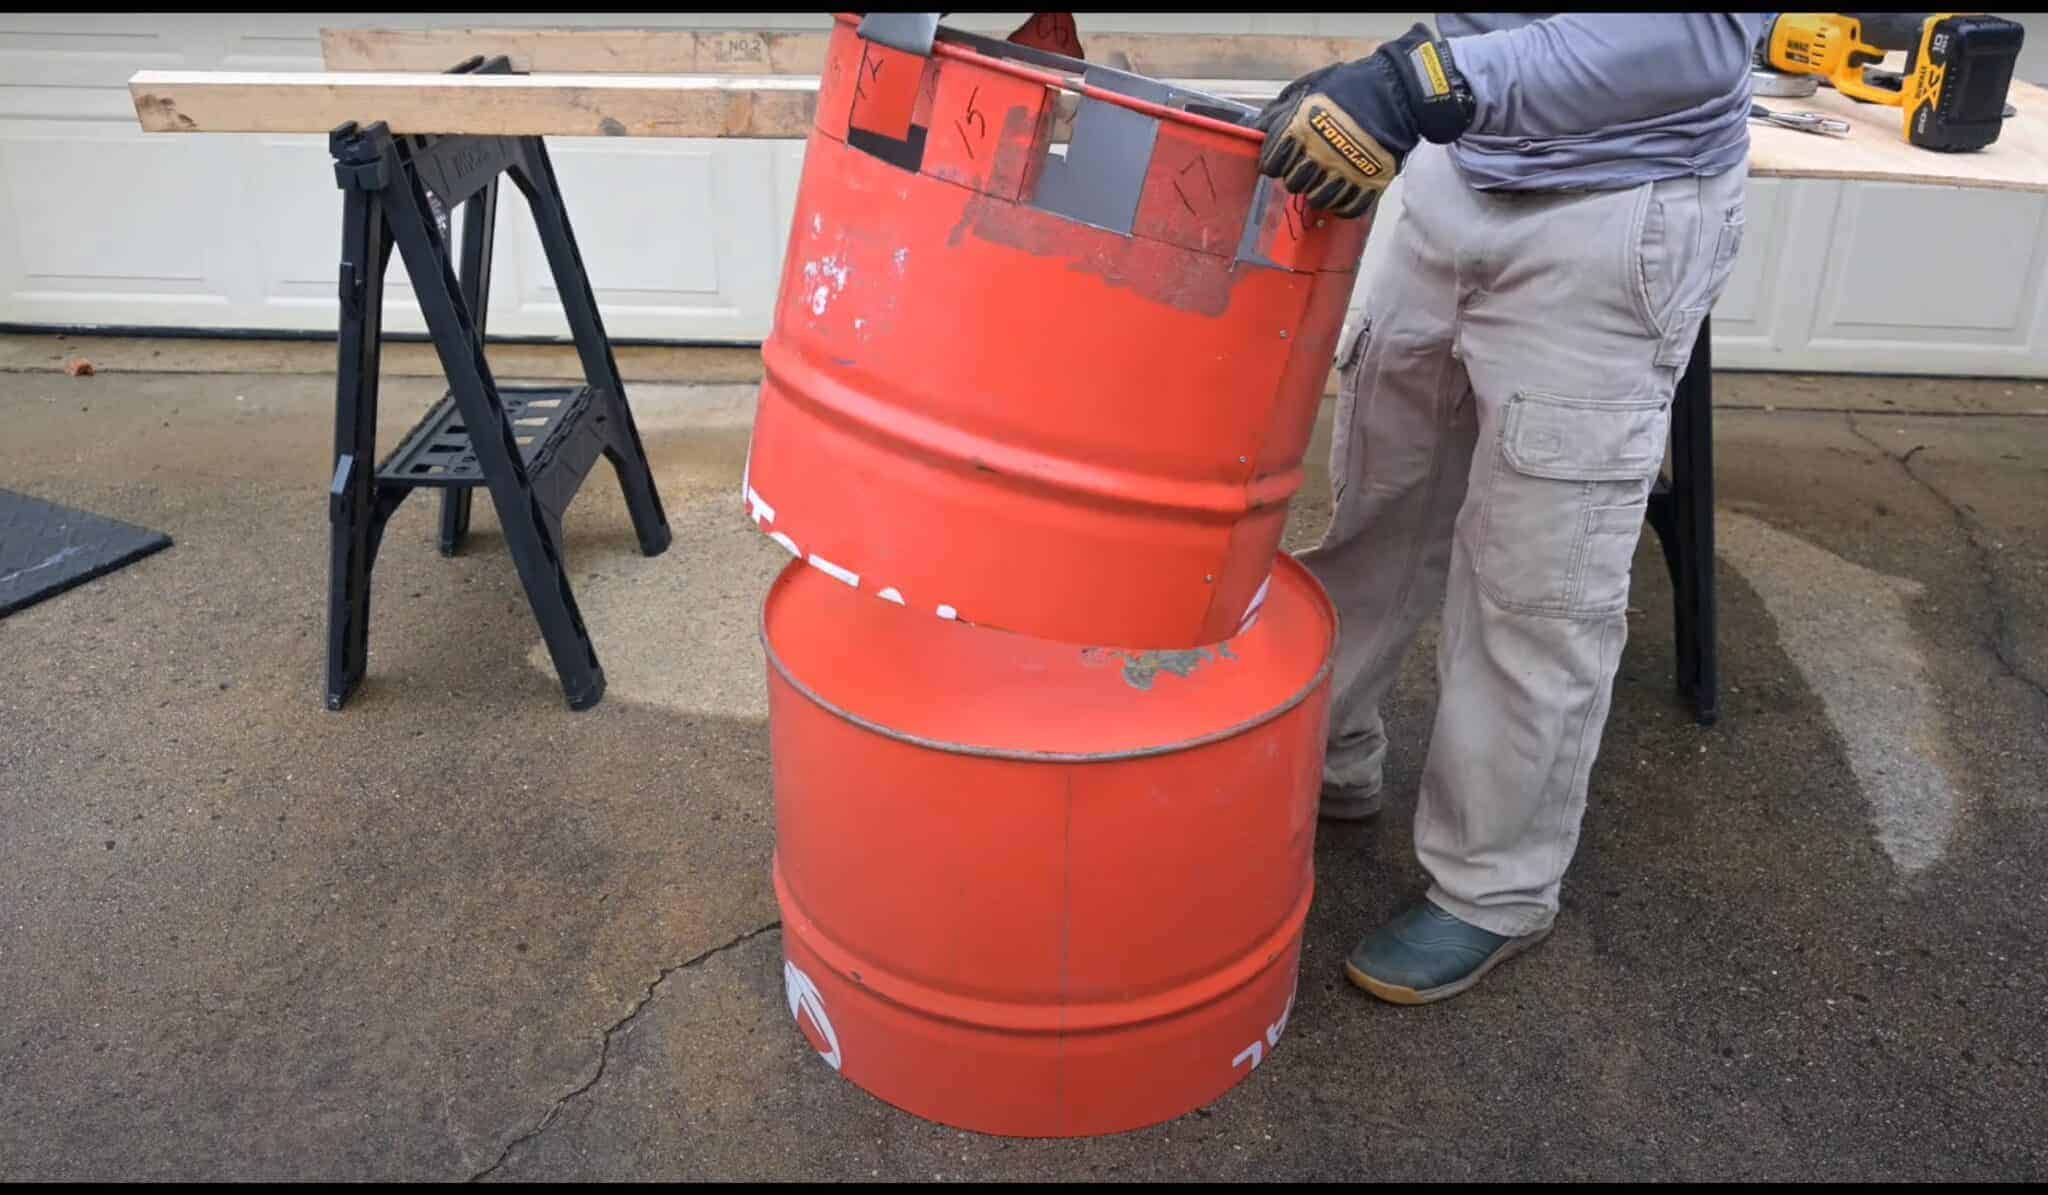
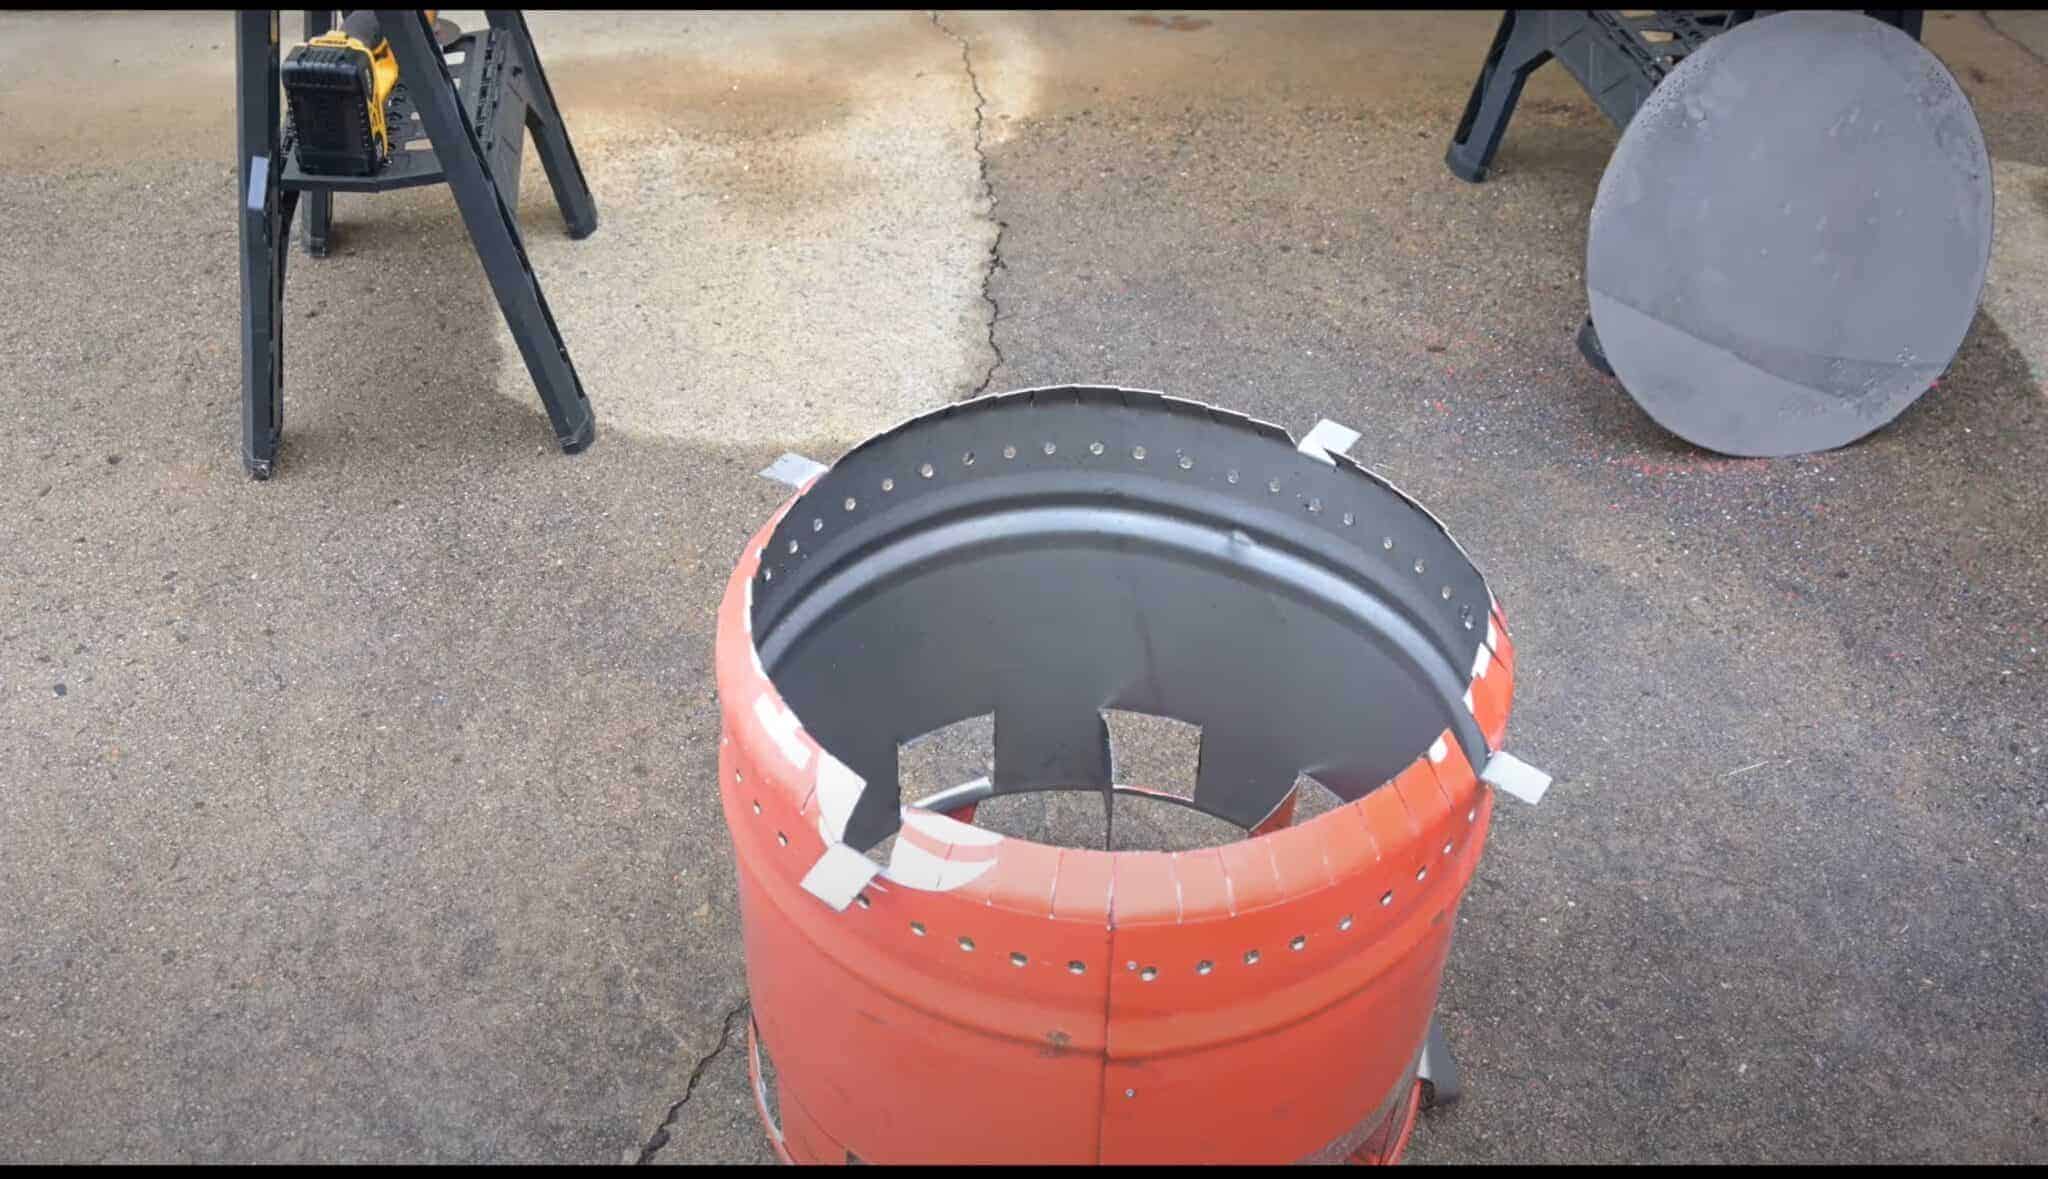
Now you can use the angle grinder with a cutting wheel to cut the barrel in half. Now it is important to keep track of which half is which. The half with the lid cut out is the inner barrel, that is what we'll work on next.
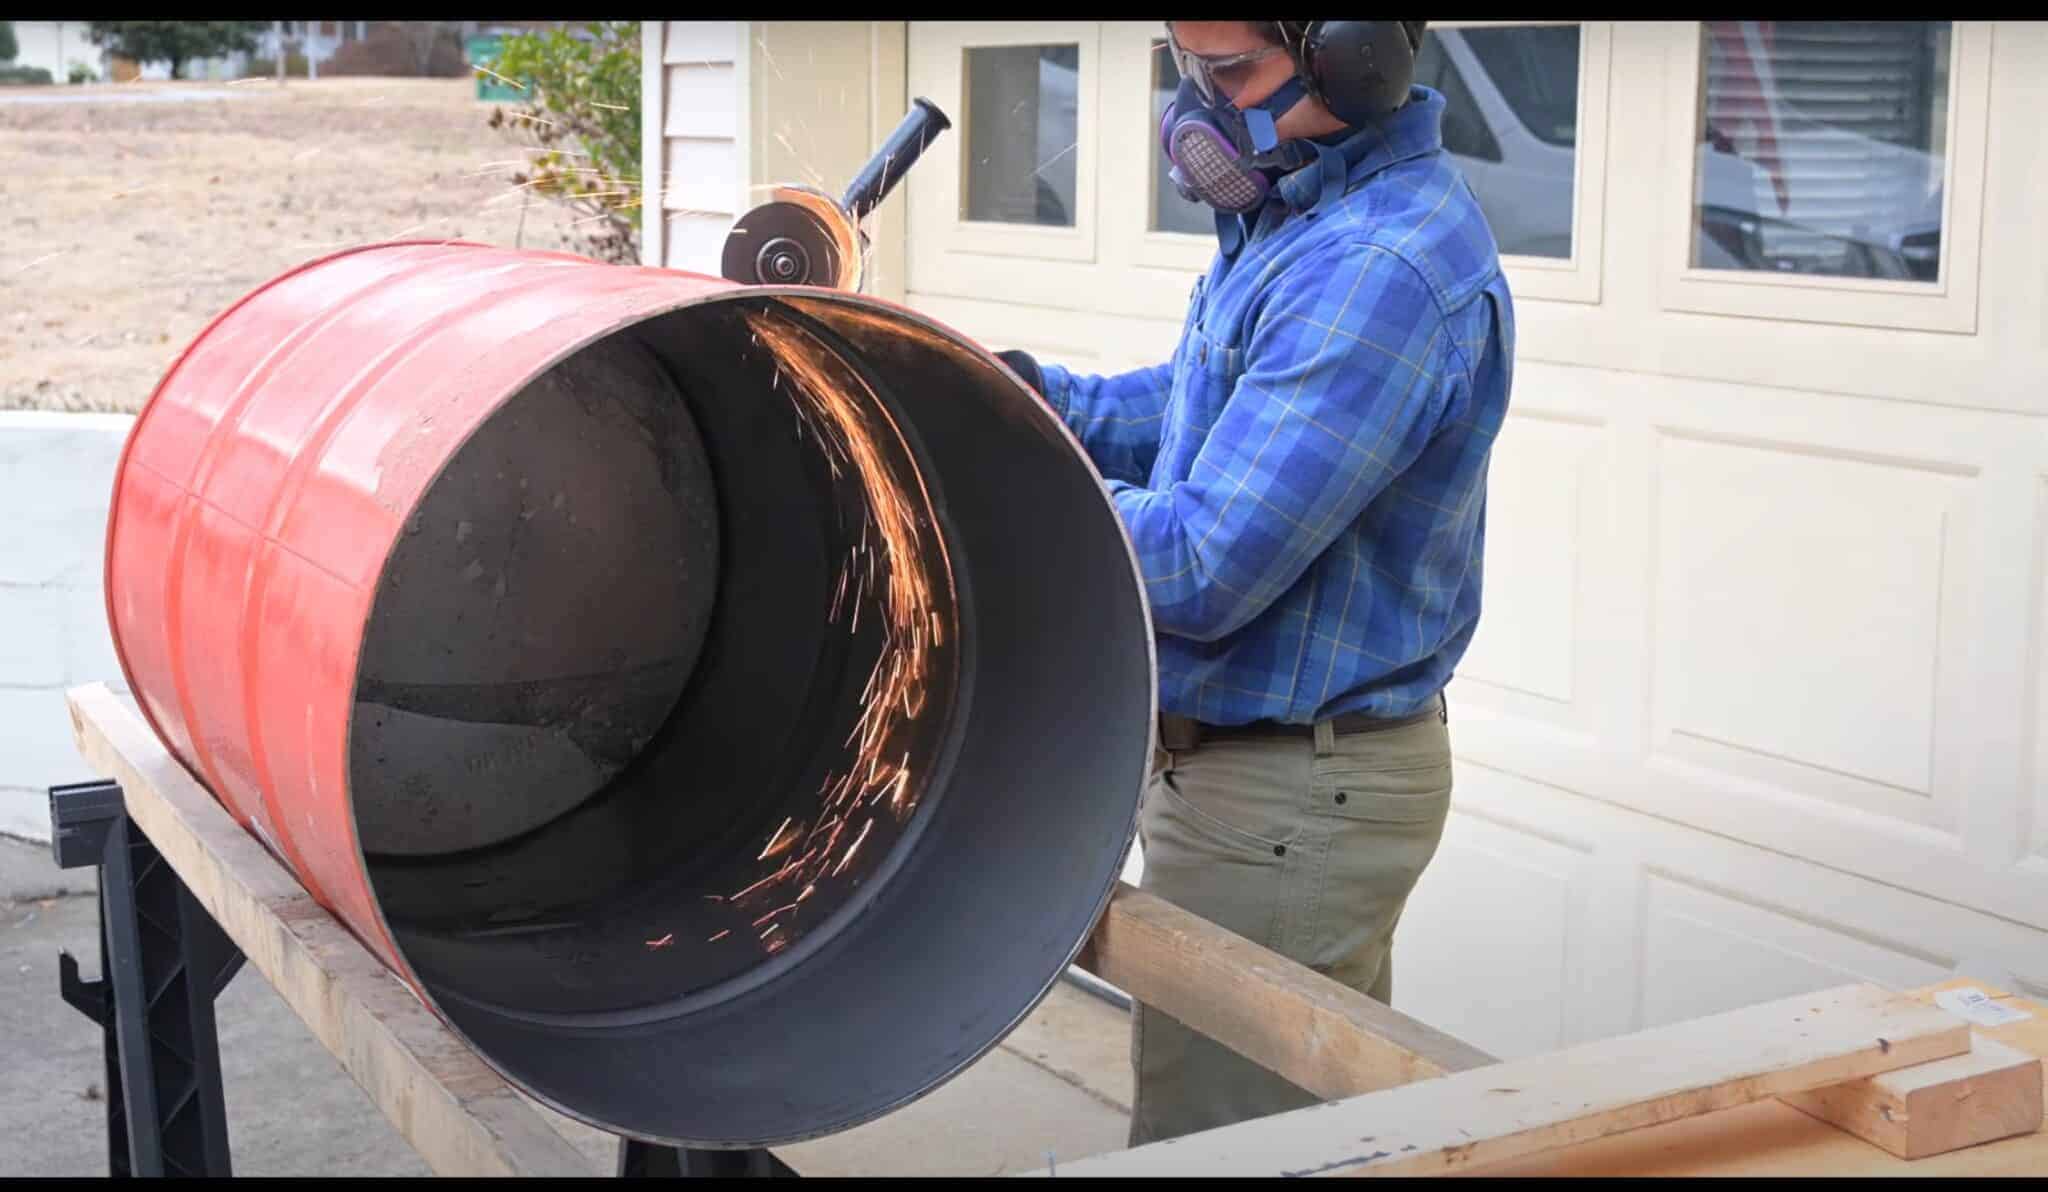
To use this piece as the inner barrel, we need to reduce the diameter of the barrel by about 2 inches so we'll cut out a 6 inch section. Using the center seam as a guide, mark a line at 6 inches and 7 inches.
Then cut out the 6 inch section by cutting along the seam and the 6 inch line. You'll also need to remove a bit of the edge of the barrel so it folds over nicely.
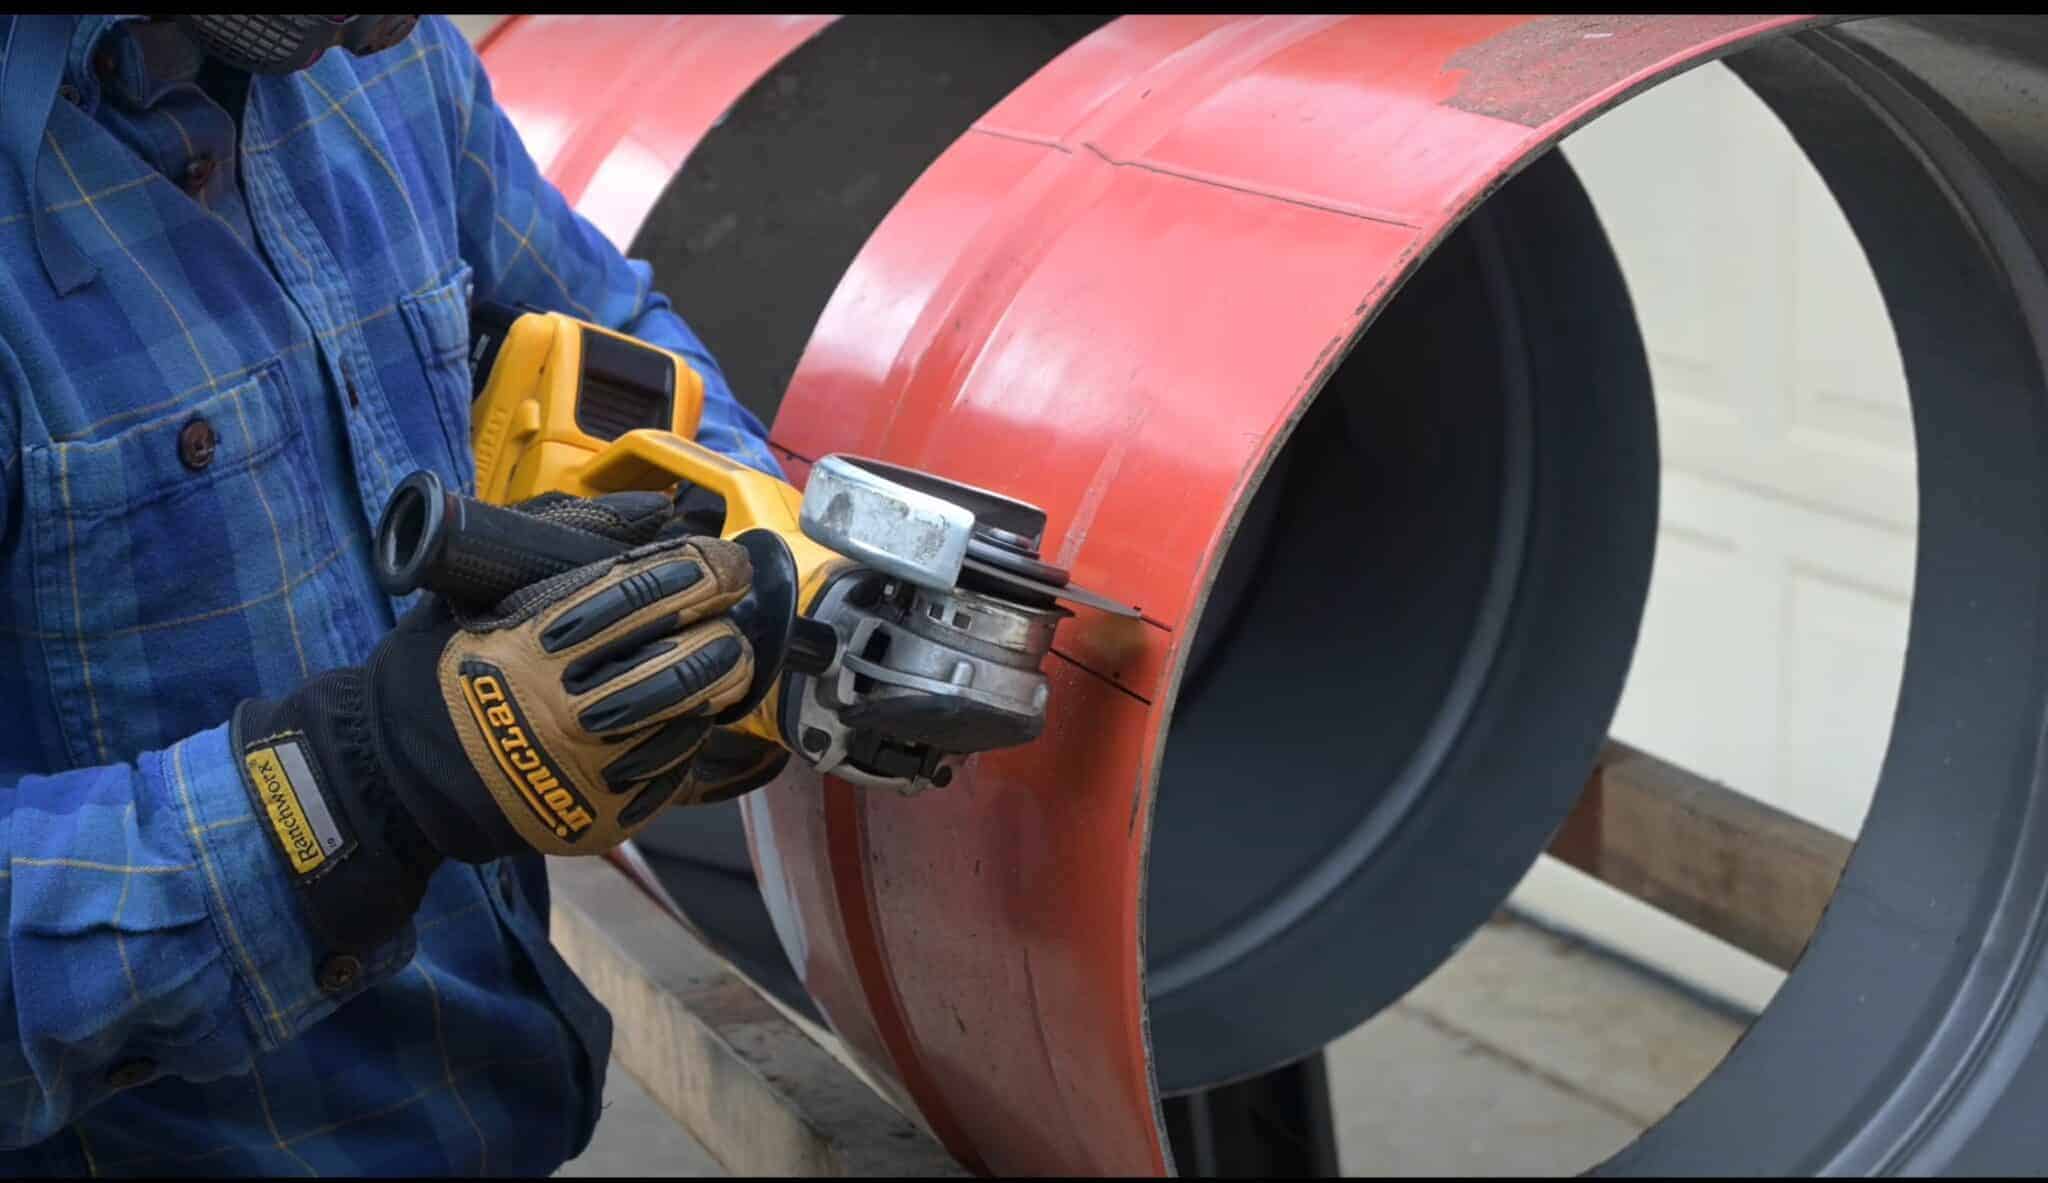
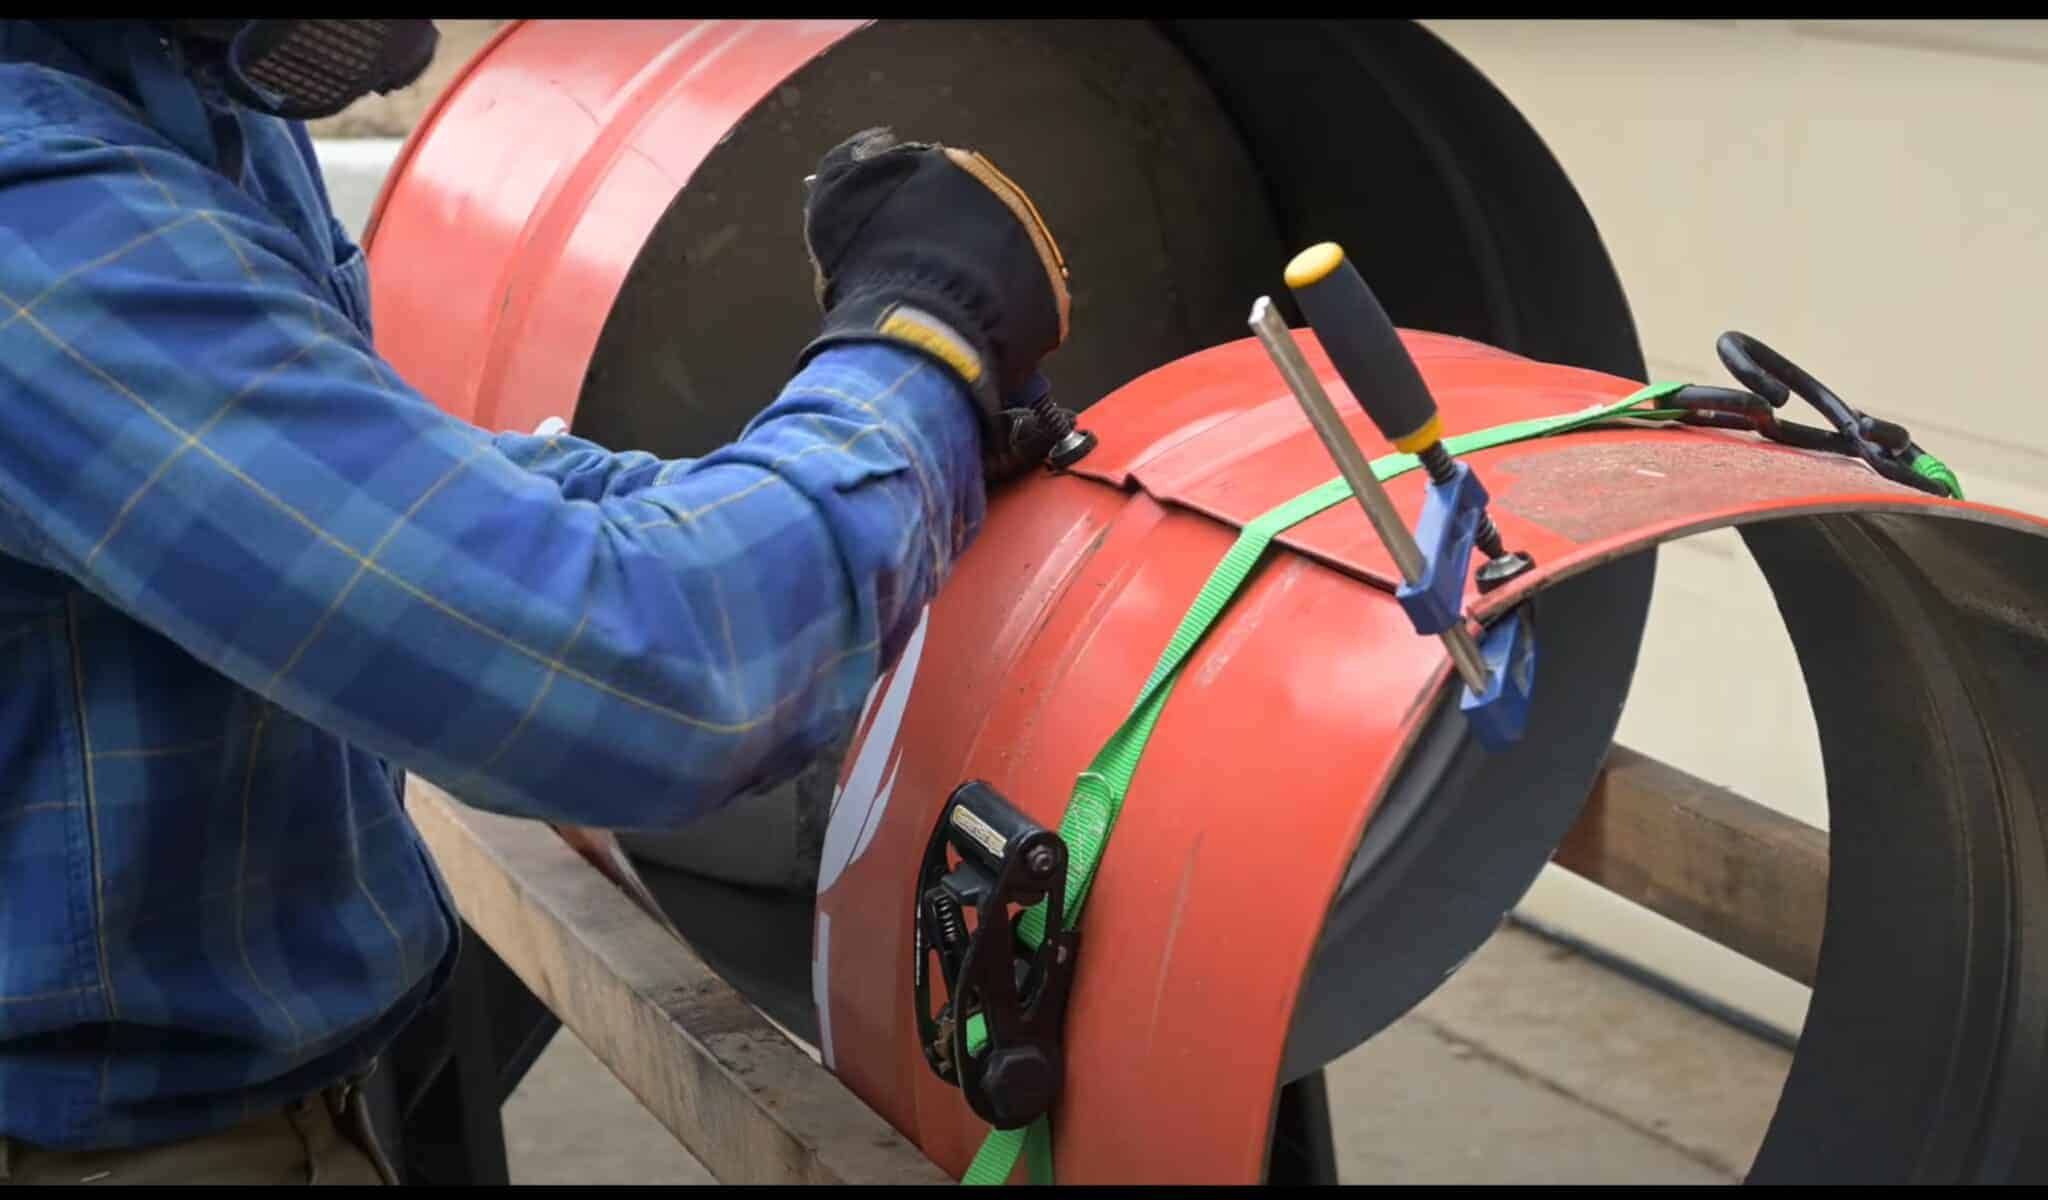
Join the two newly cut edges by overlapping them to the one inch line you marked before (previously at 7 inches).
A ratchet strap is helpful holding the barrel while you work. Then you can pop-rivet the barrel together.
I used 4 steel pop-rivets and it's held up quite well for multiple years.
Remember to use steel pop rivets and not aluminum since the open fire can get to over 1000 degrees. I'm not joking, it produces that much heat! That temperature can make aluminum pop rivets very soft and even melt.
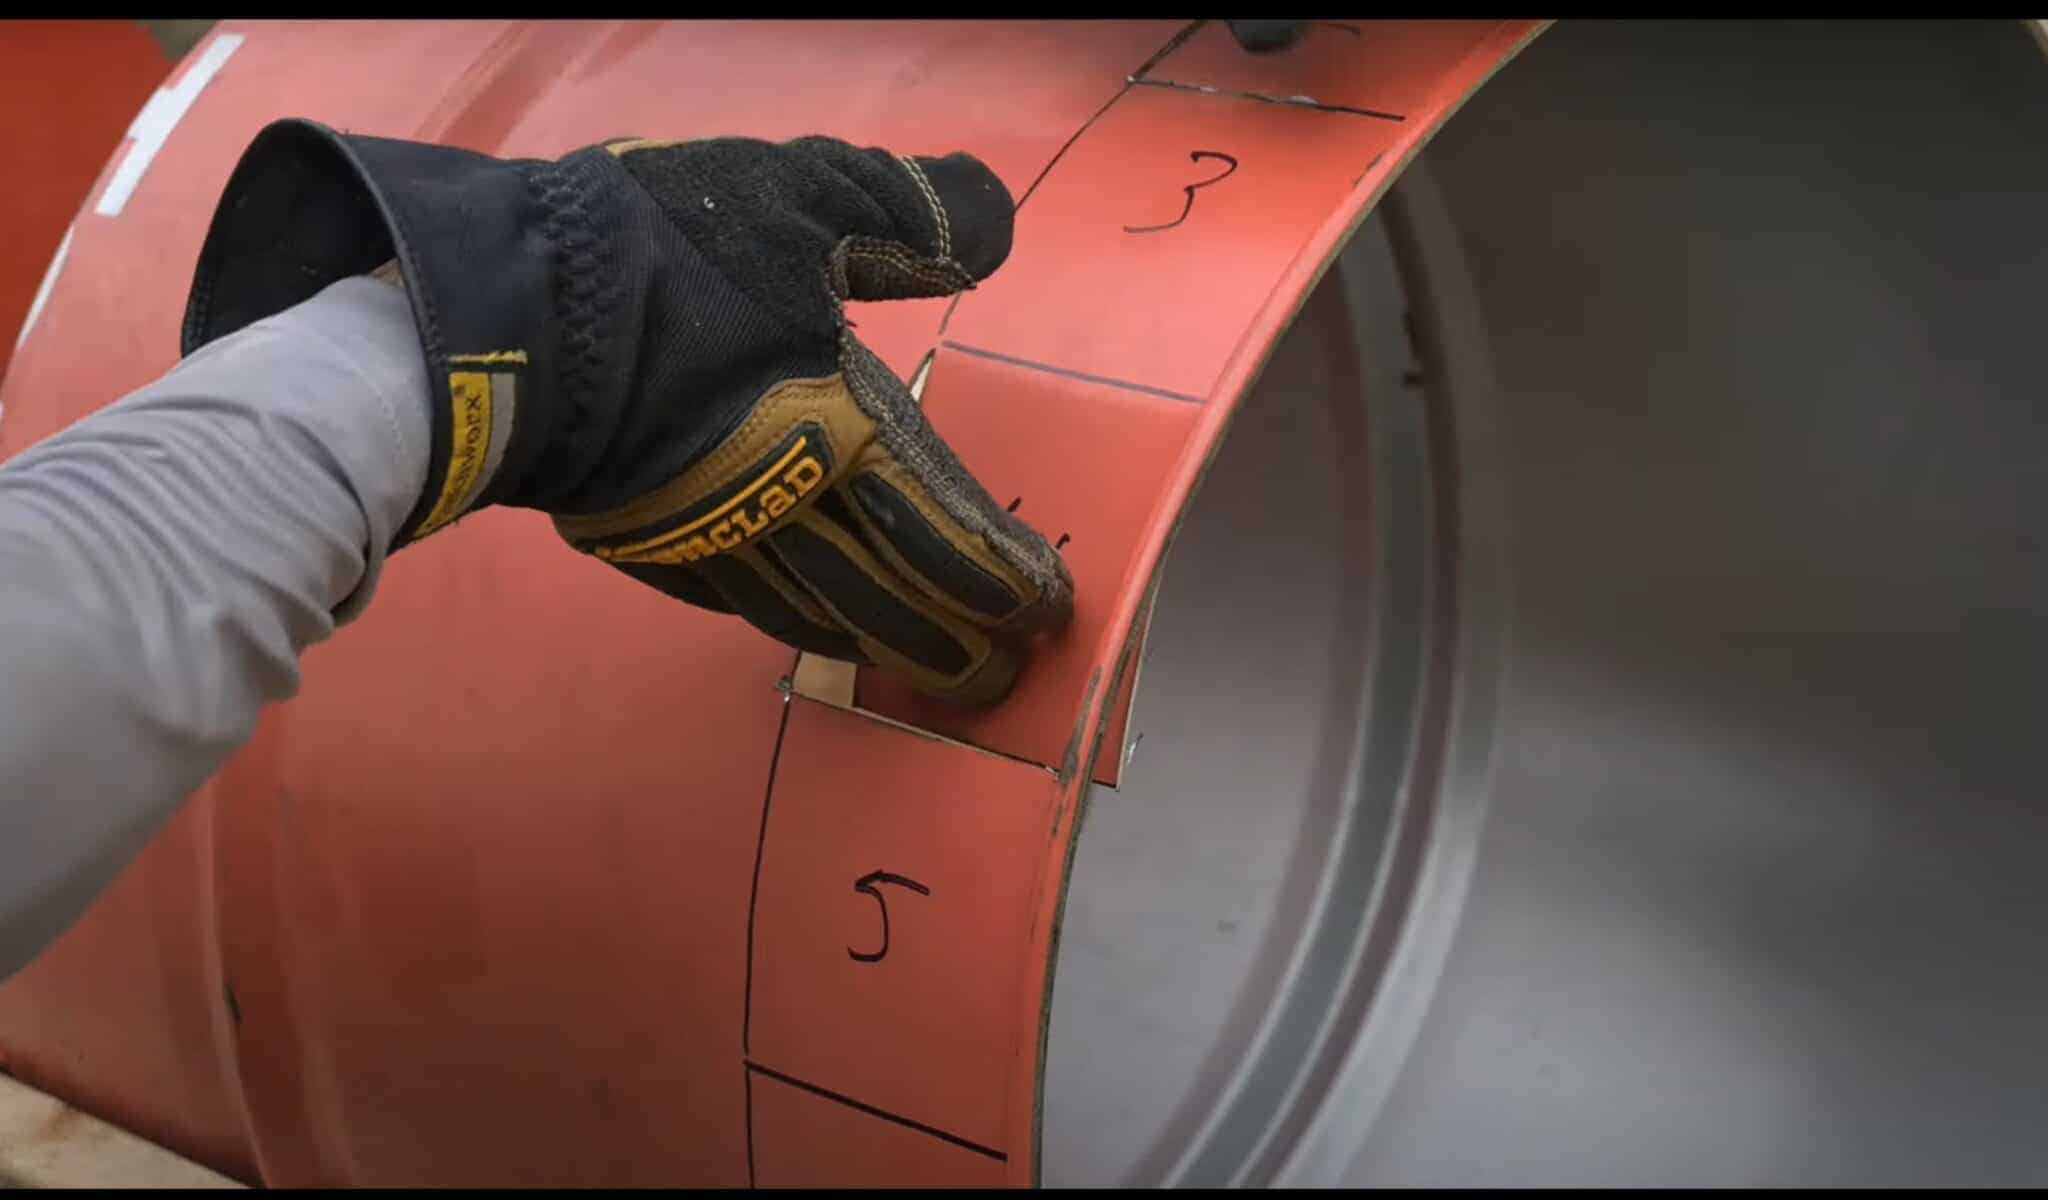
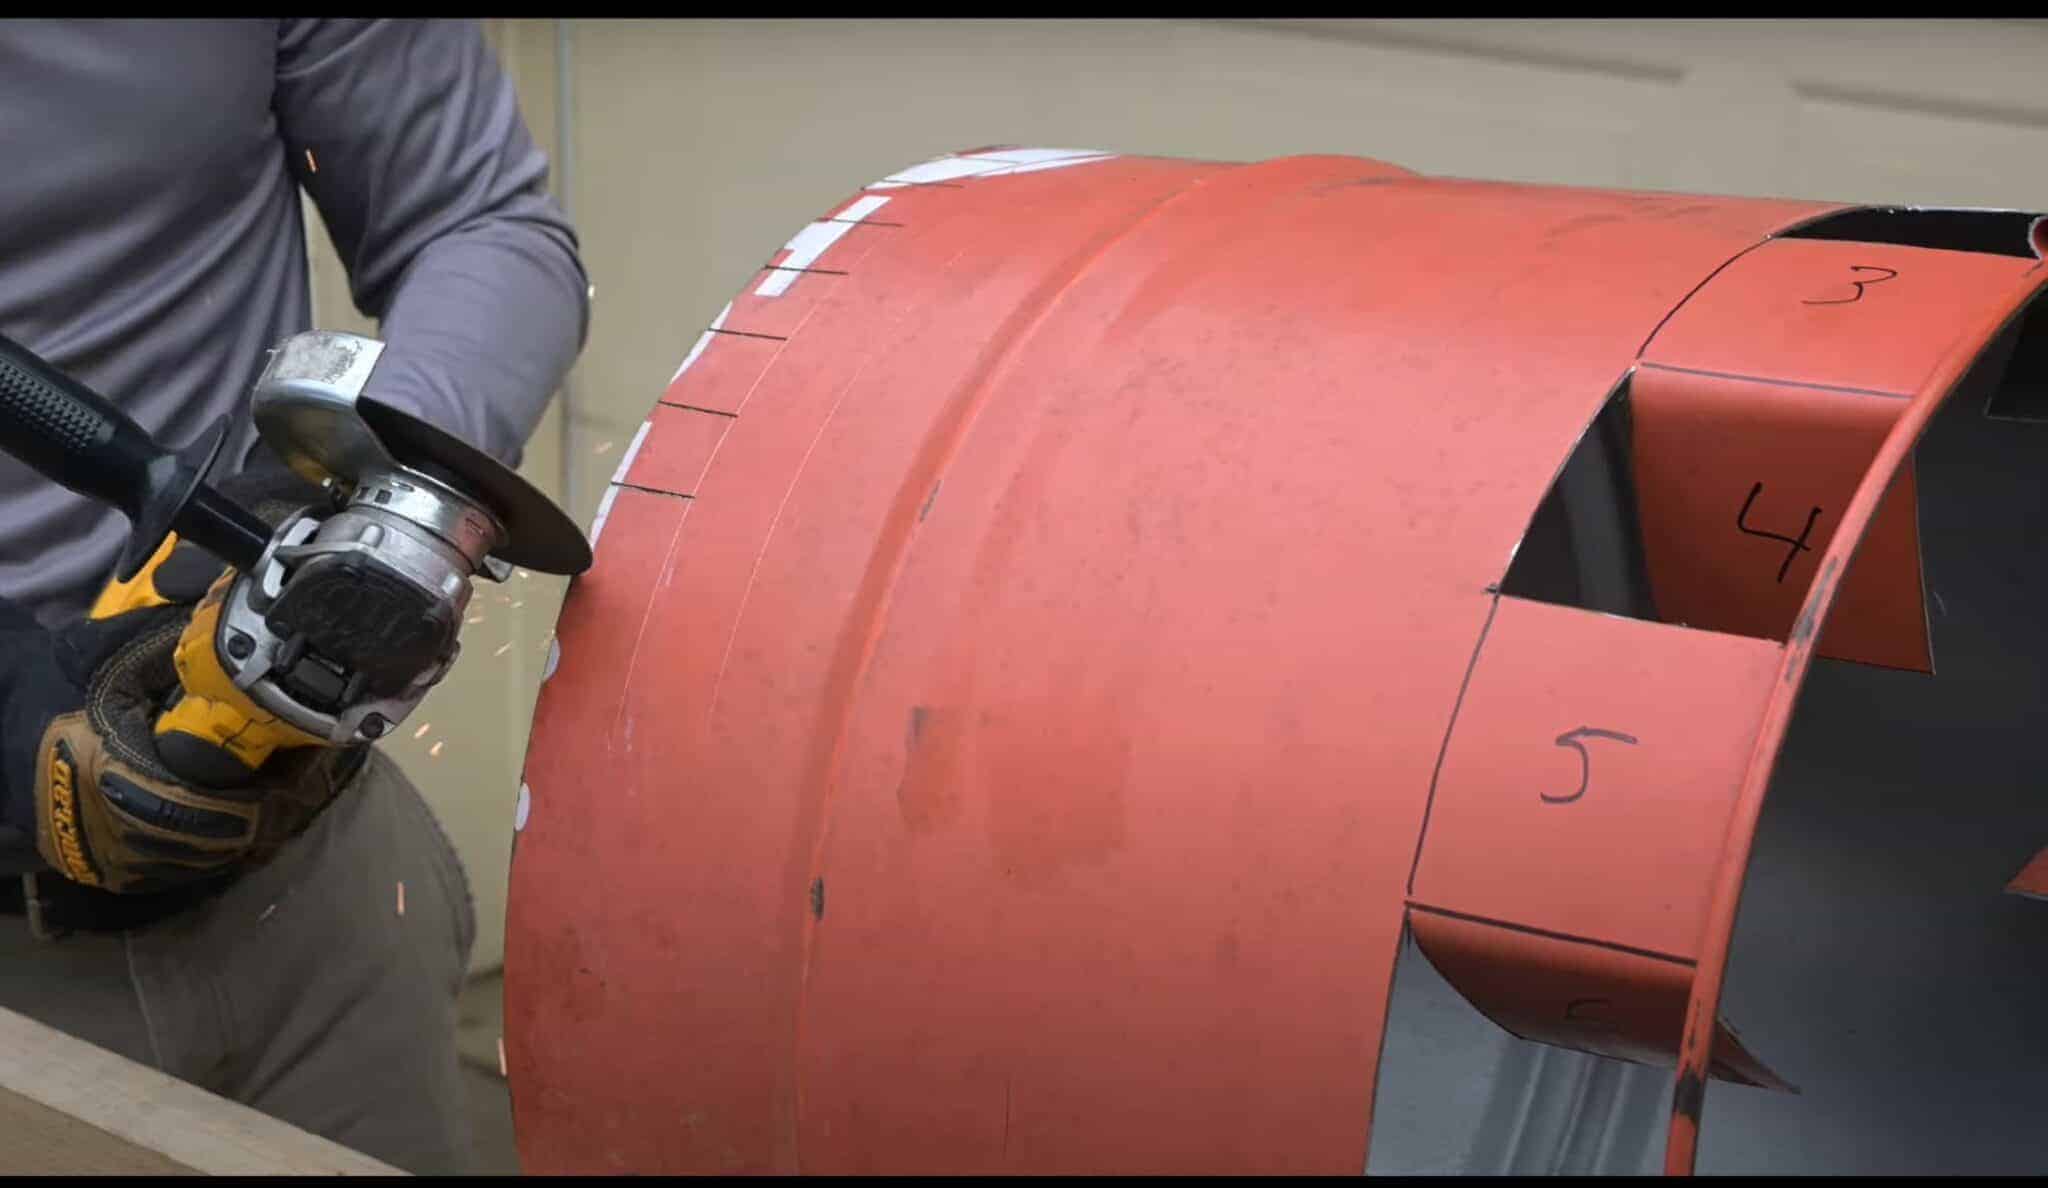
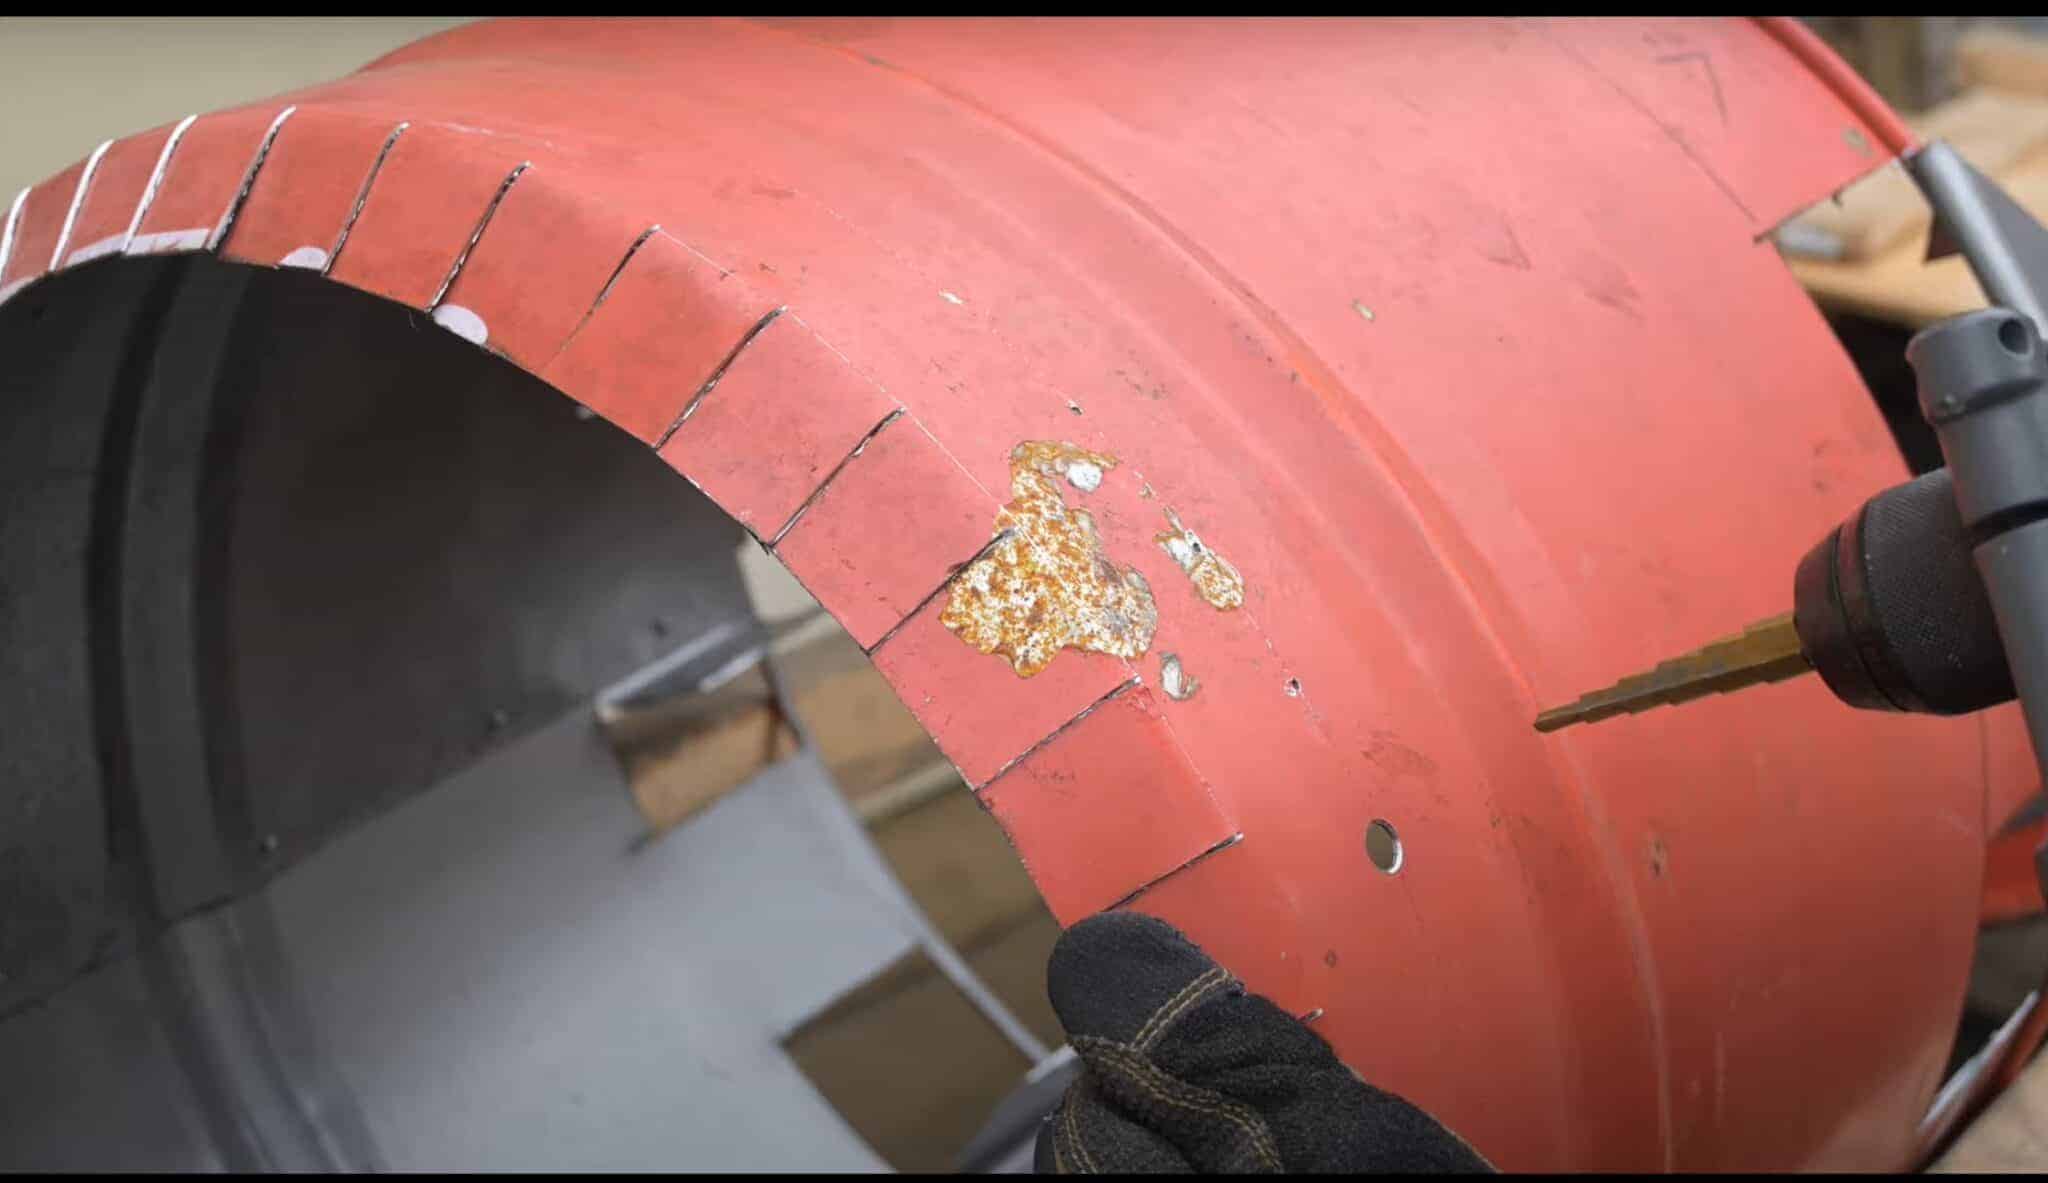
The lower air vents are next. You'll need a 3.5" square piece of cardboard to mark the holes.
Mark the squares all around the edge with the rim and number the squares consecutively 1-18.
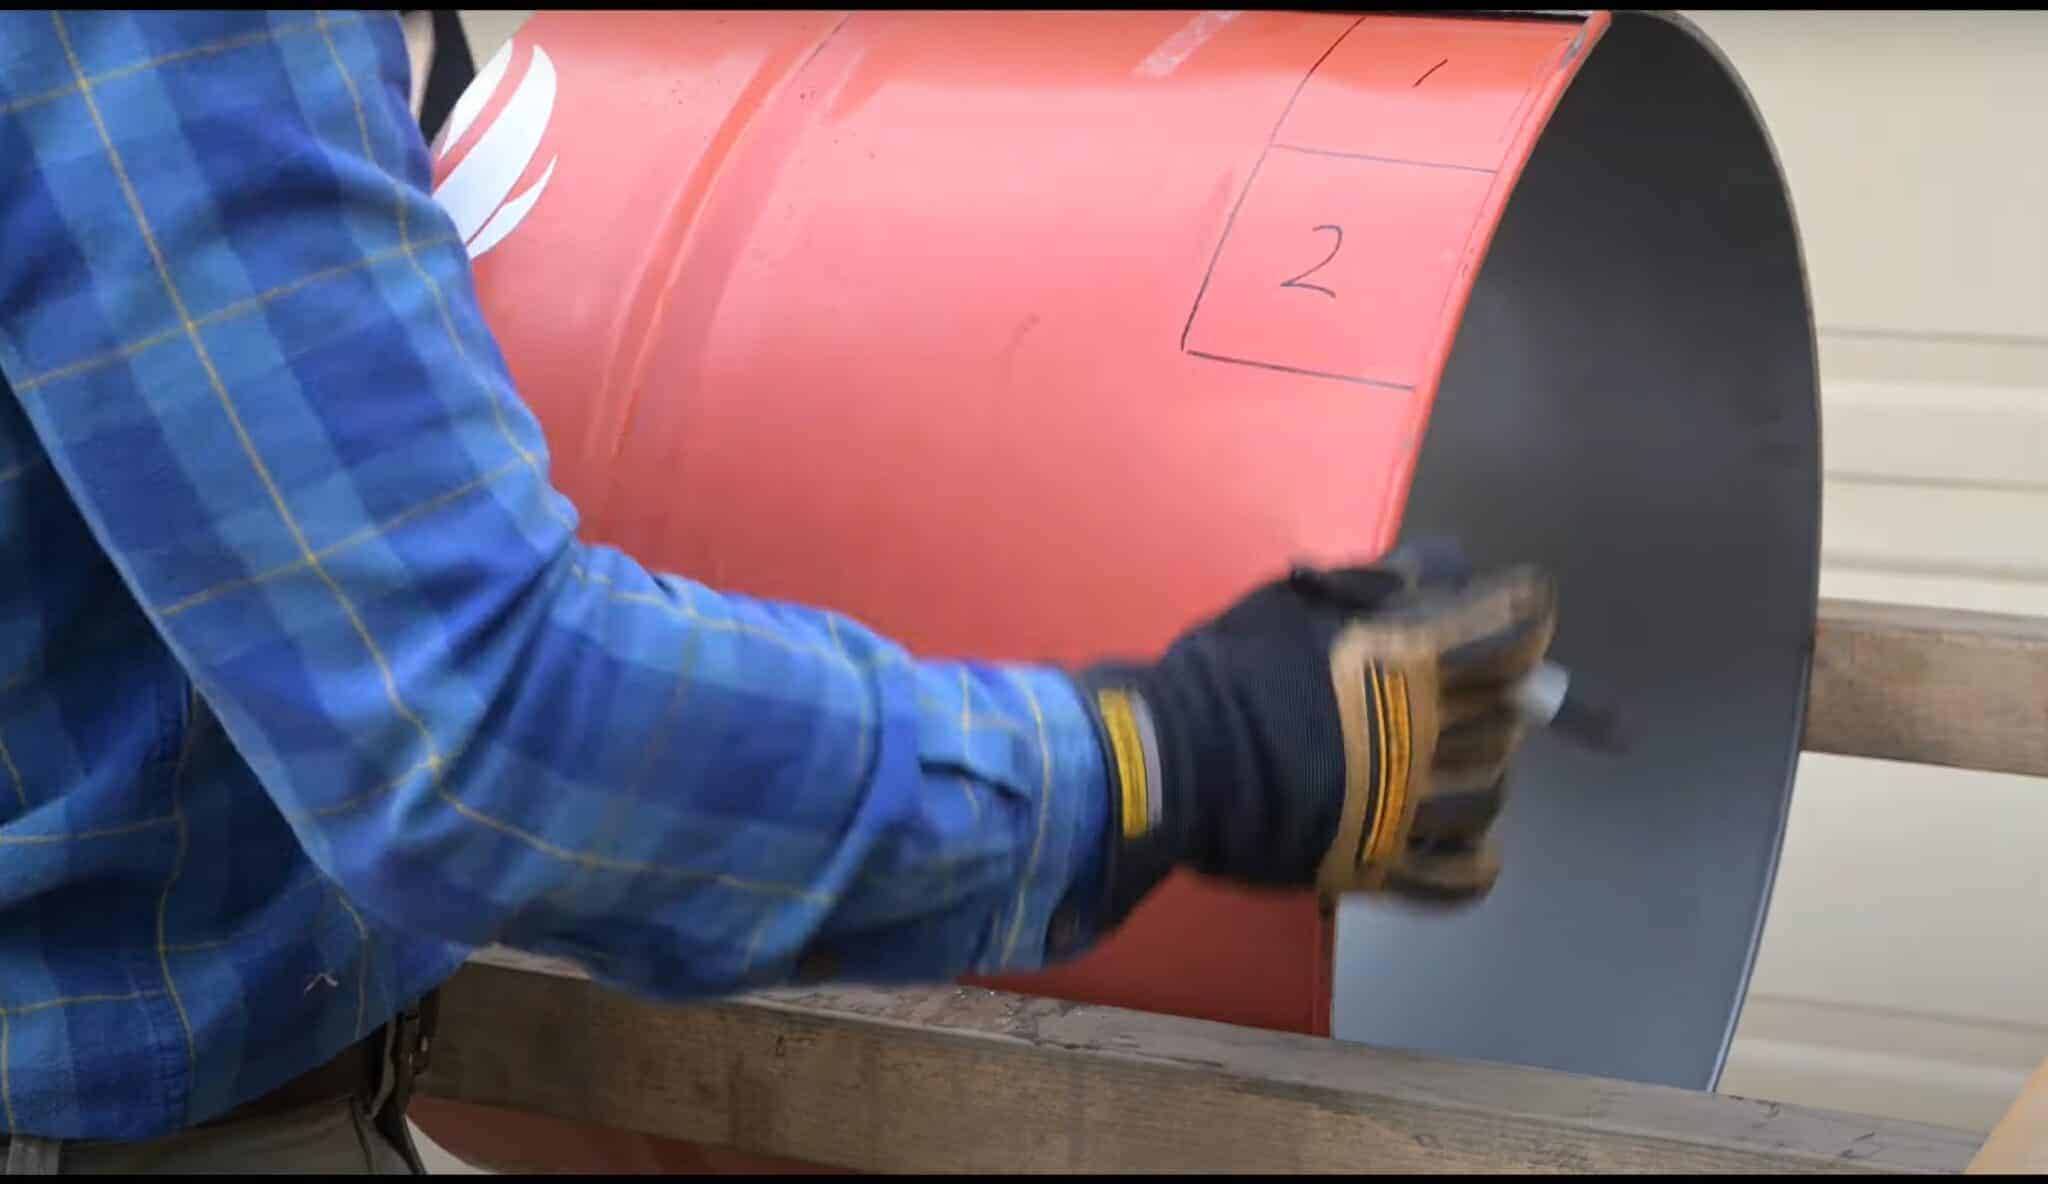

Squares 2, 8, and 14 are legs so they'll be cut to keep them attached to the rim. Looking at the photos may help clear up what I mean.

All the other even squares are the air vents and they are cut to bend them inwards.
Be careful with number 18 and the overlap is directly below the square. These air vents are very big and they let in a lot of air into the fire which is important for a smokeless firepit.
After you've cut the vents as shown in the photos, go ahead and bend them inward.
Now, set the inner barrel on top of the outer barrel and mark the outline of the barrel onto the lid.
Use an angle grinder to cut the circular shape. You can also use a jig saw with a metal cutting blade by drilling holes to get the jig saw started.

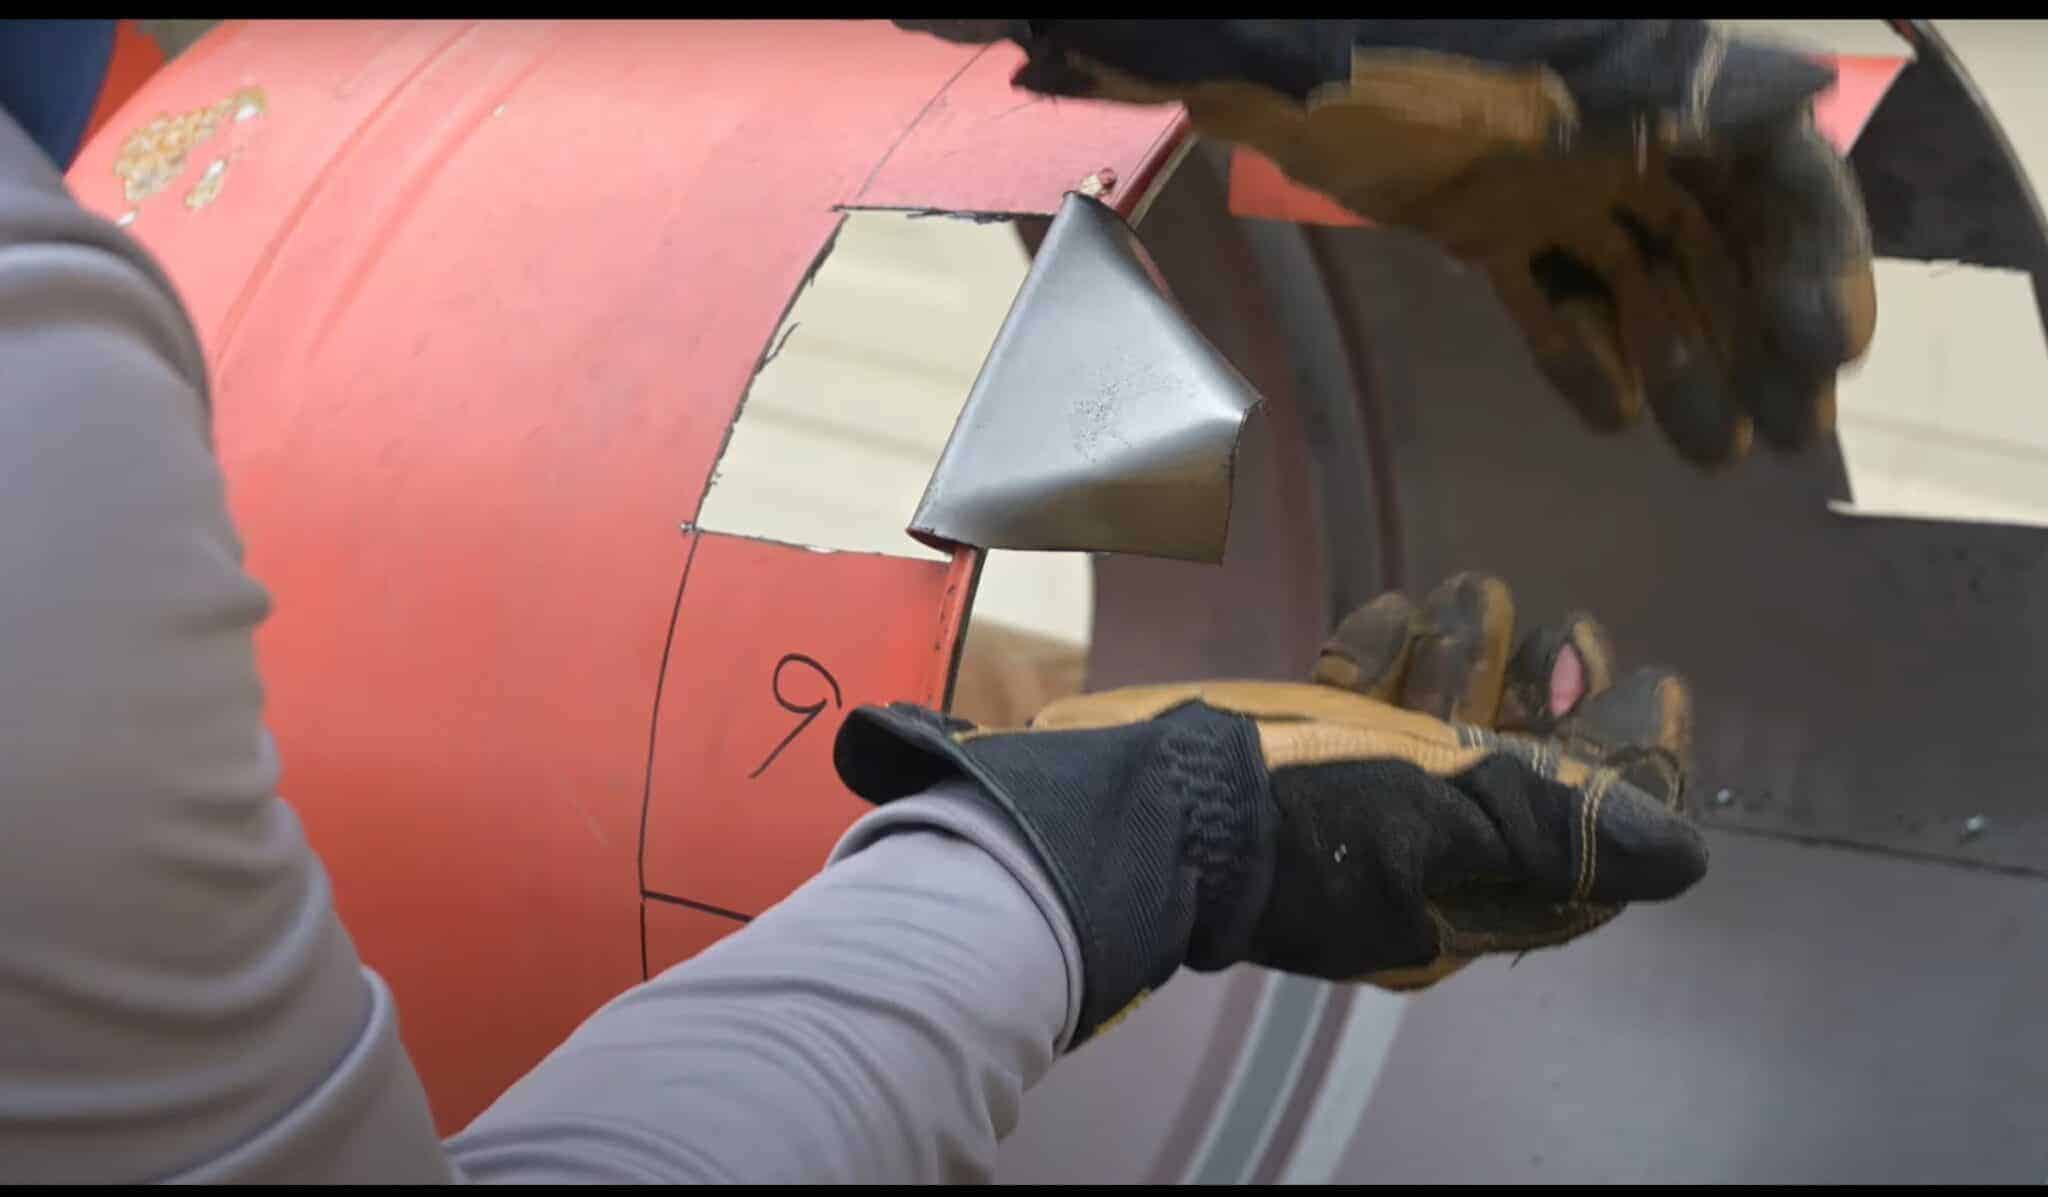
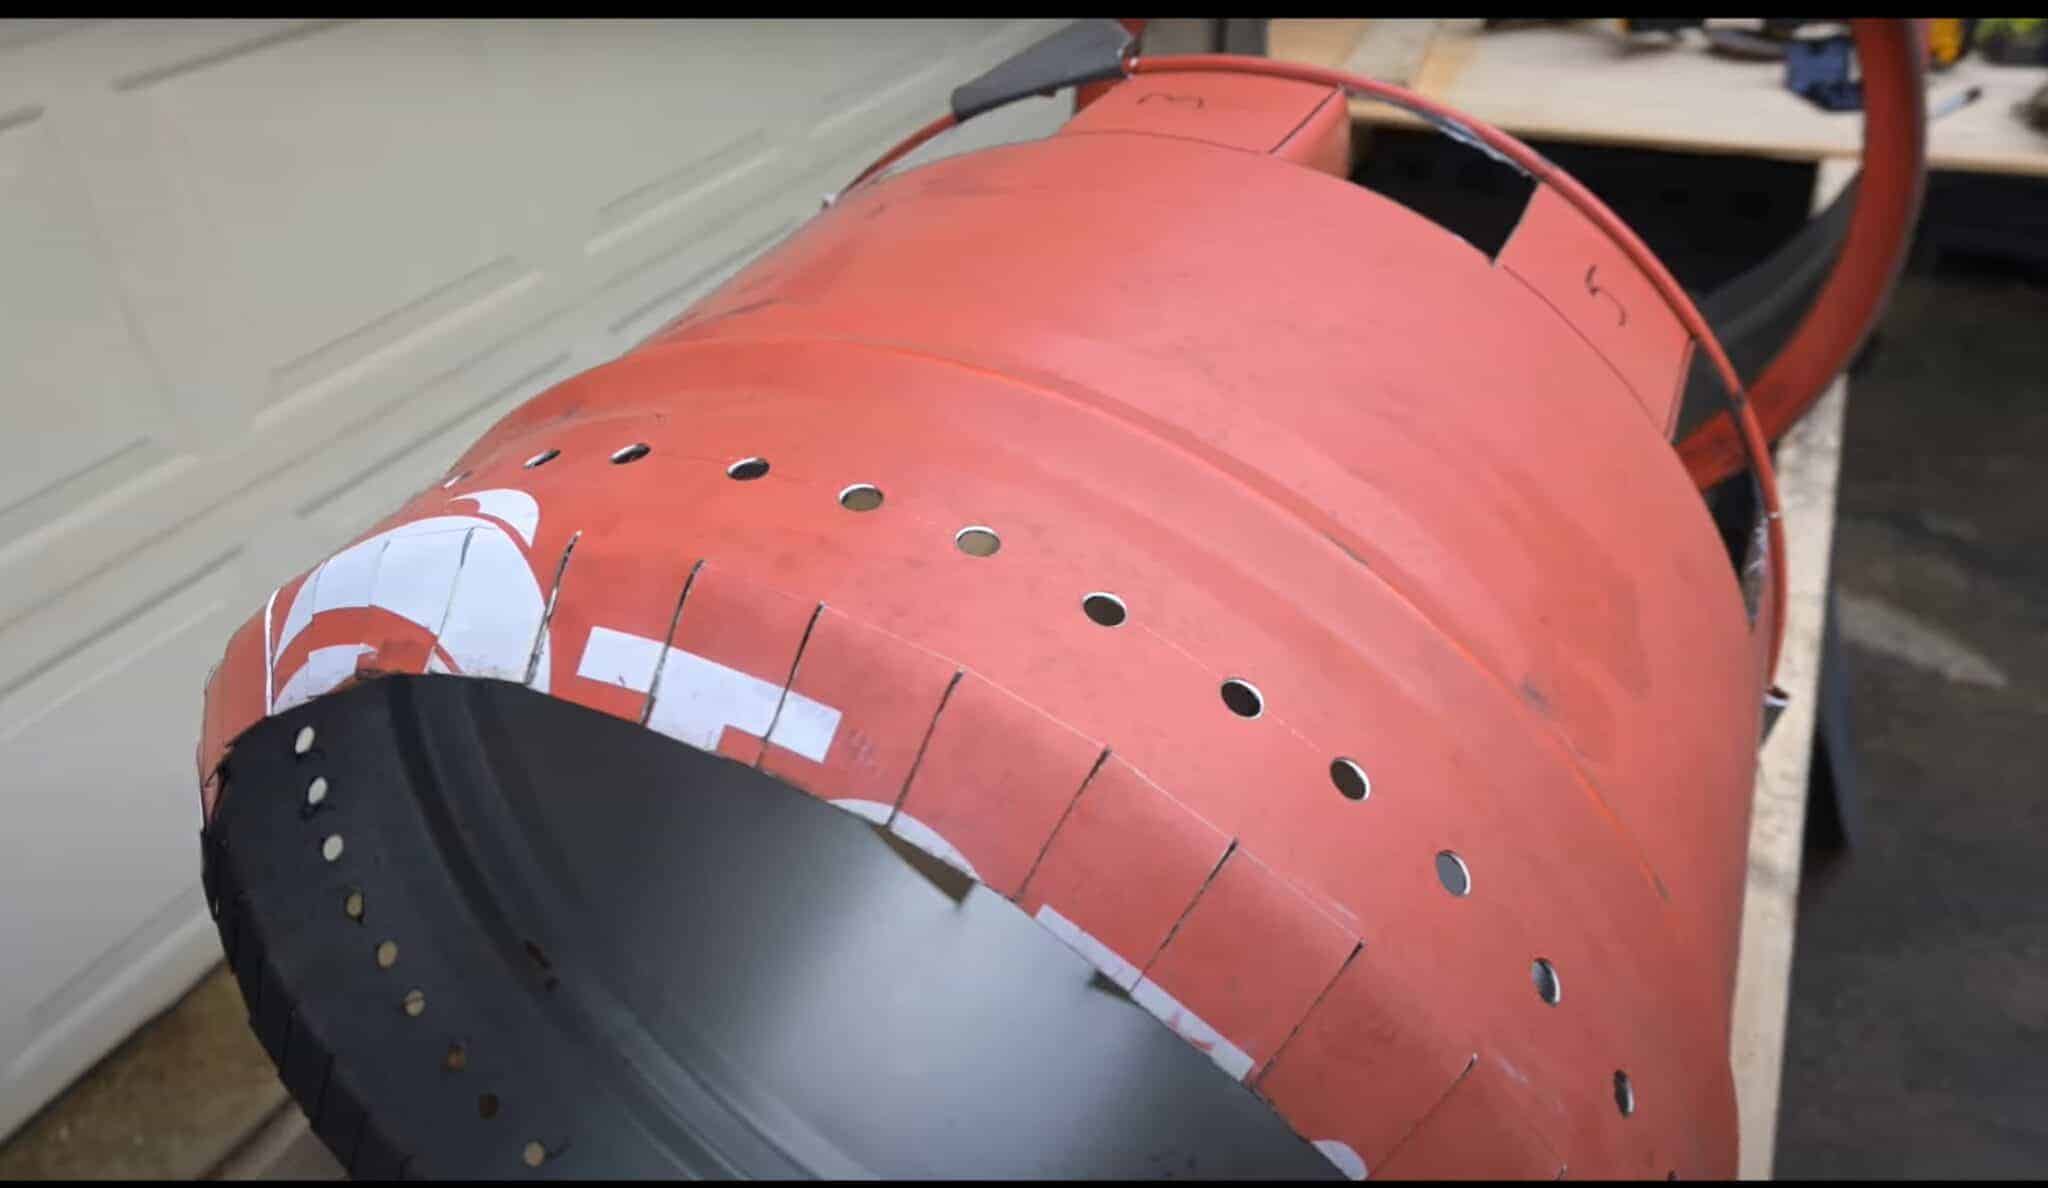
Go back to the inner barrel and use the marking jig to scribe 1.5 and 3 inches from the cut end. This is to cut out a series of tabs and the upper vent holes.
Now cut one inch wide tabs down to the 1.5" mark all around the edge. You should be able to bend them slightly inward.
To drill holes at the 3 inch line you'll need a step drill bit. These are the upper vent holes where the open flame gets it's second dose of oxygen.
Drill the holes along the 3 inch line and beneath every tab. These are small holes, just ½".
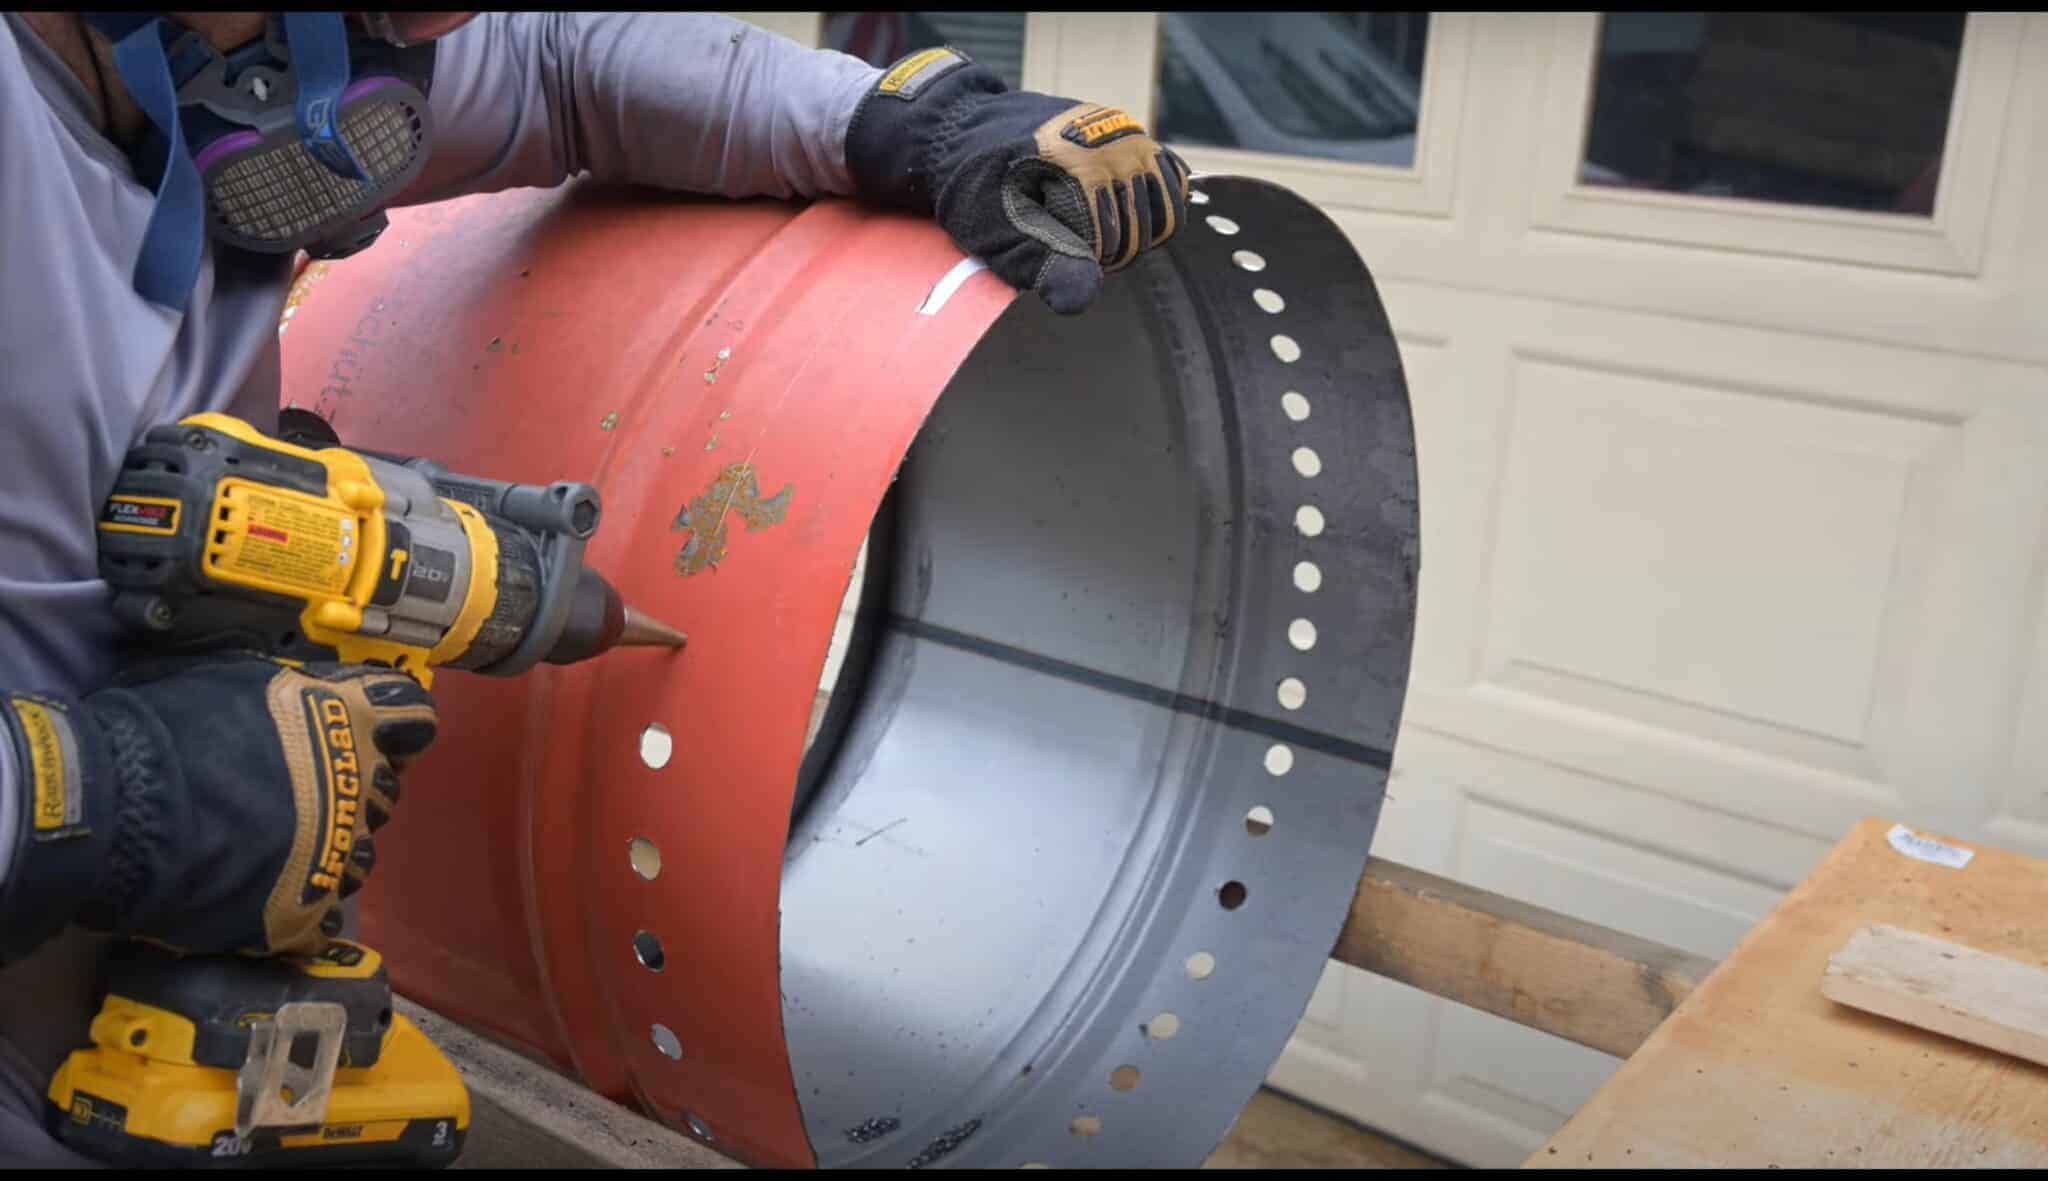
It's almost done! Now we need the intake holes at the bottom of the outer barrel.
Using the marking jig, scribe a line 3 inches up from the cut edge and drill vent holes using a step drill bit about every 1.5 inches. These need to be slightly larger so ¾" inch holes work great.
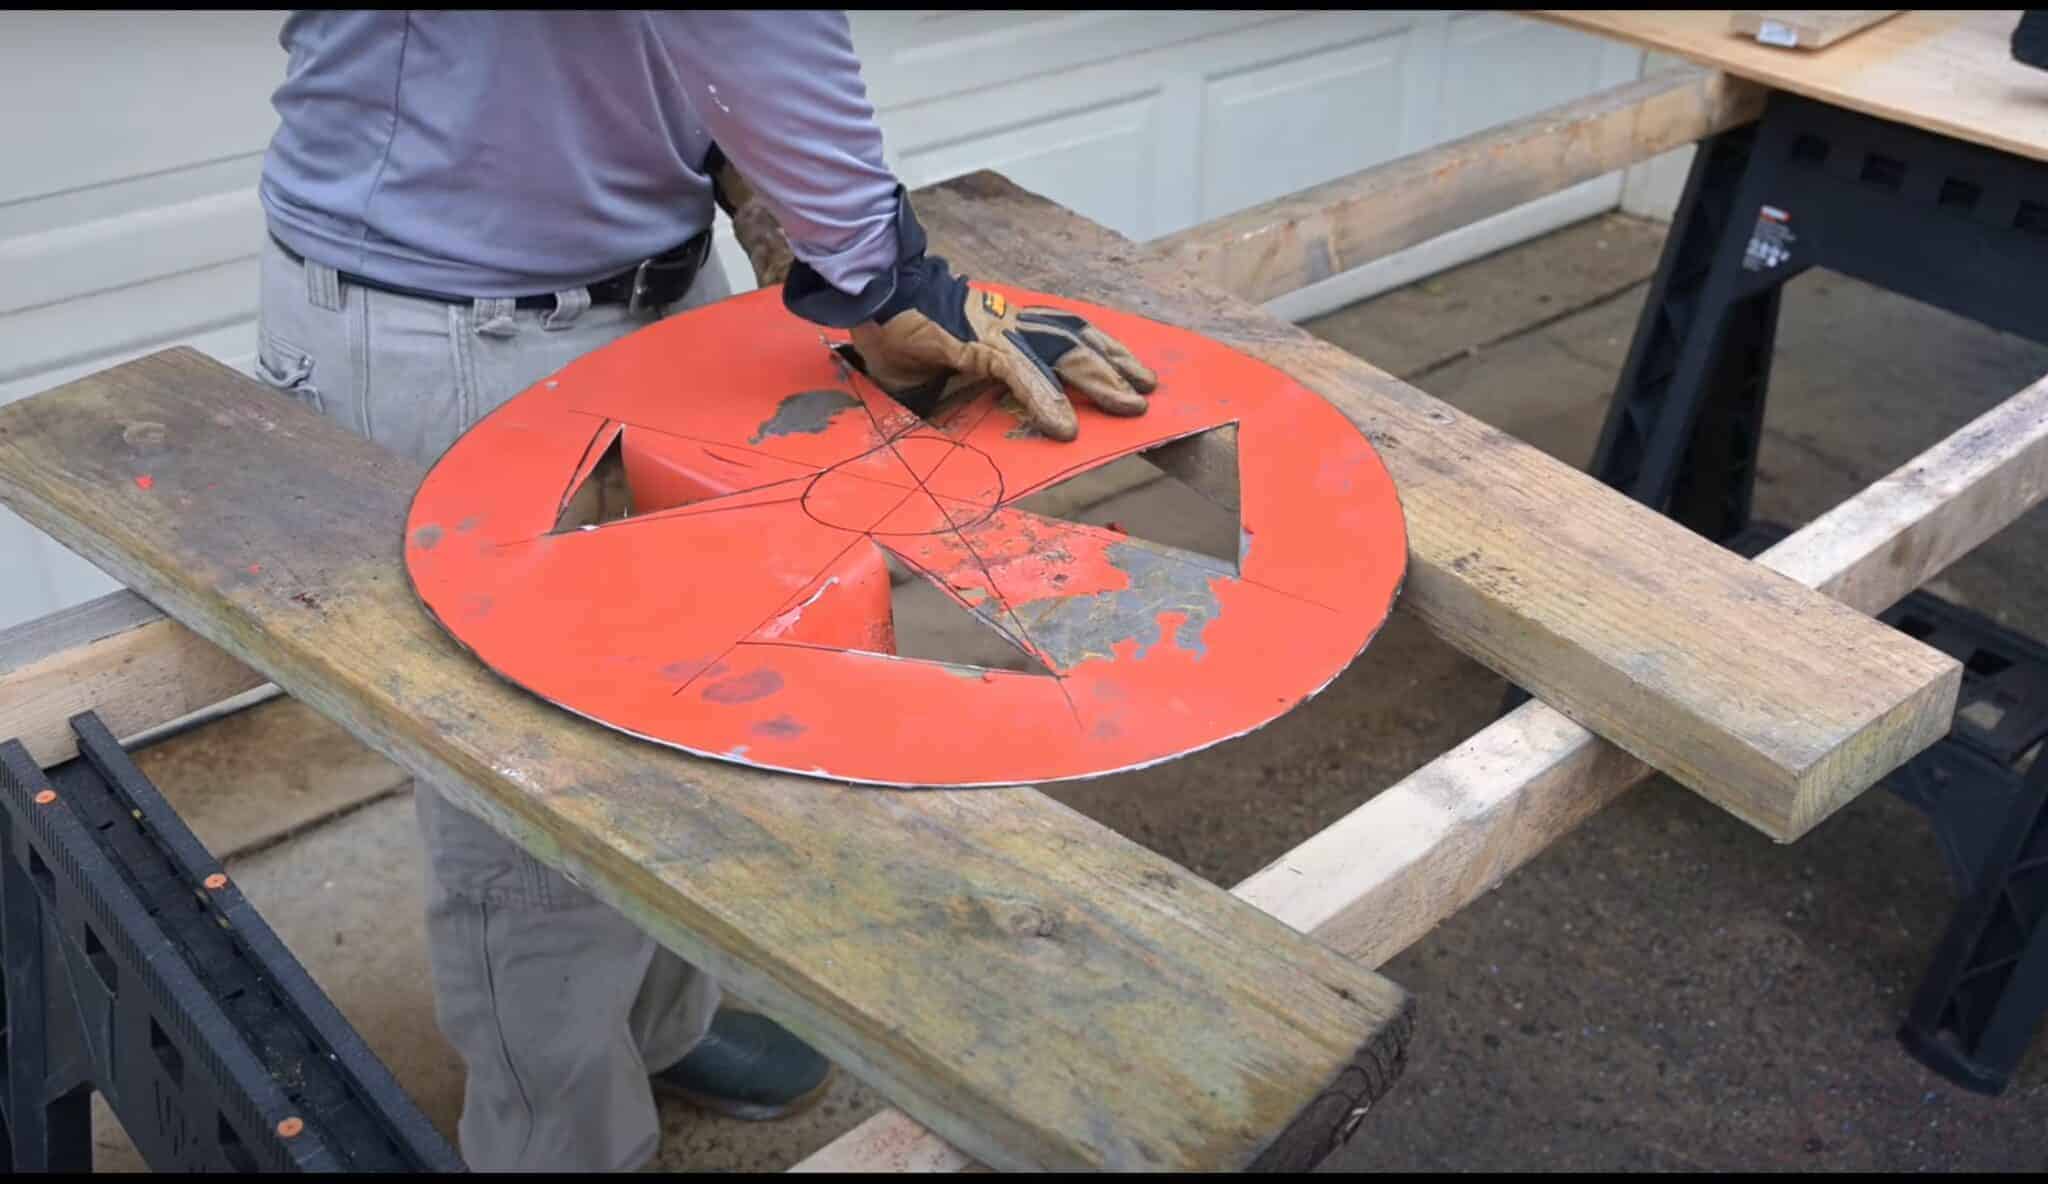
The last cutting that needs to happen is to make the lower grill where the wood will sit and burn.
To do this, use the flat circular shaped lid that came out of the outer barrel and cut vent holes into it like in the photo.
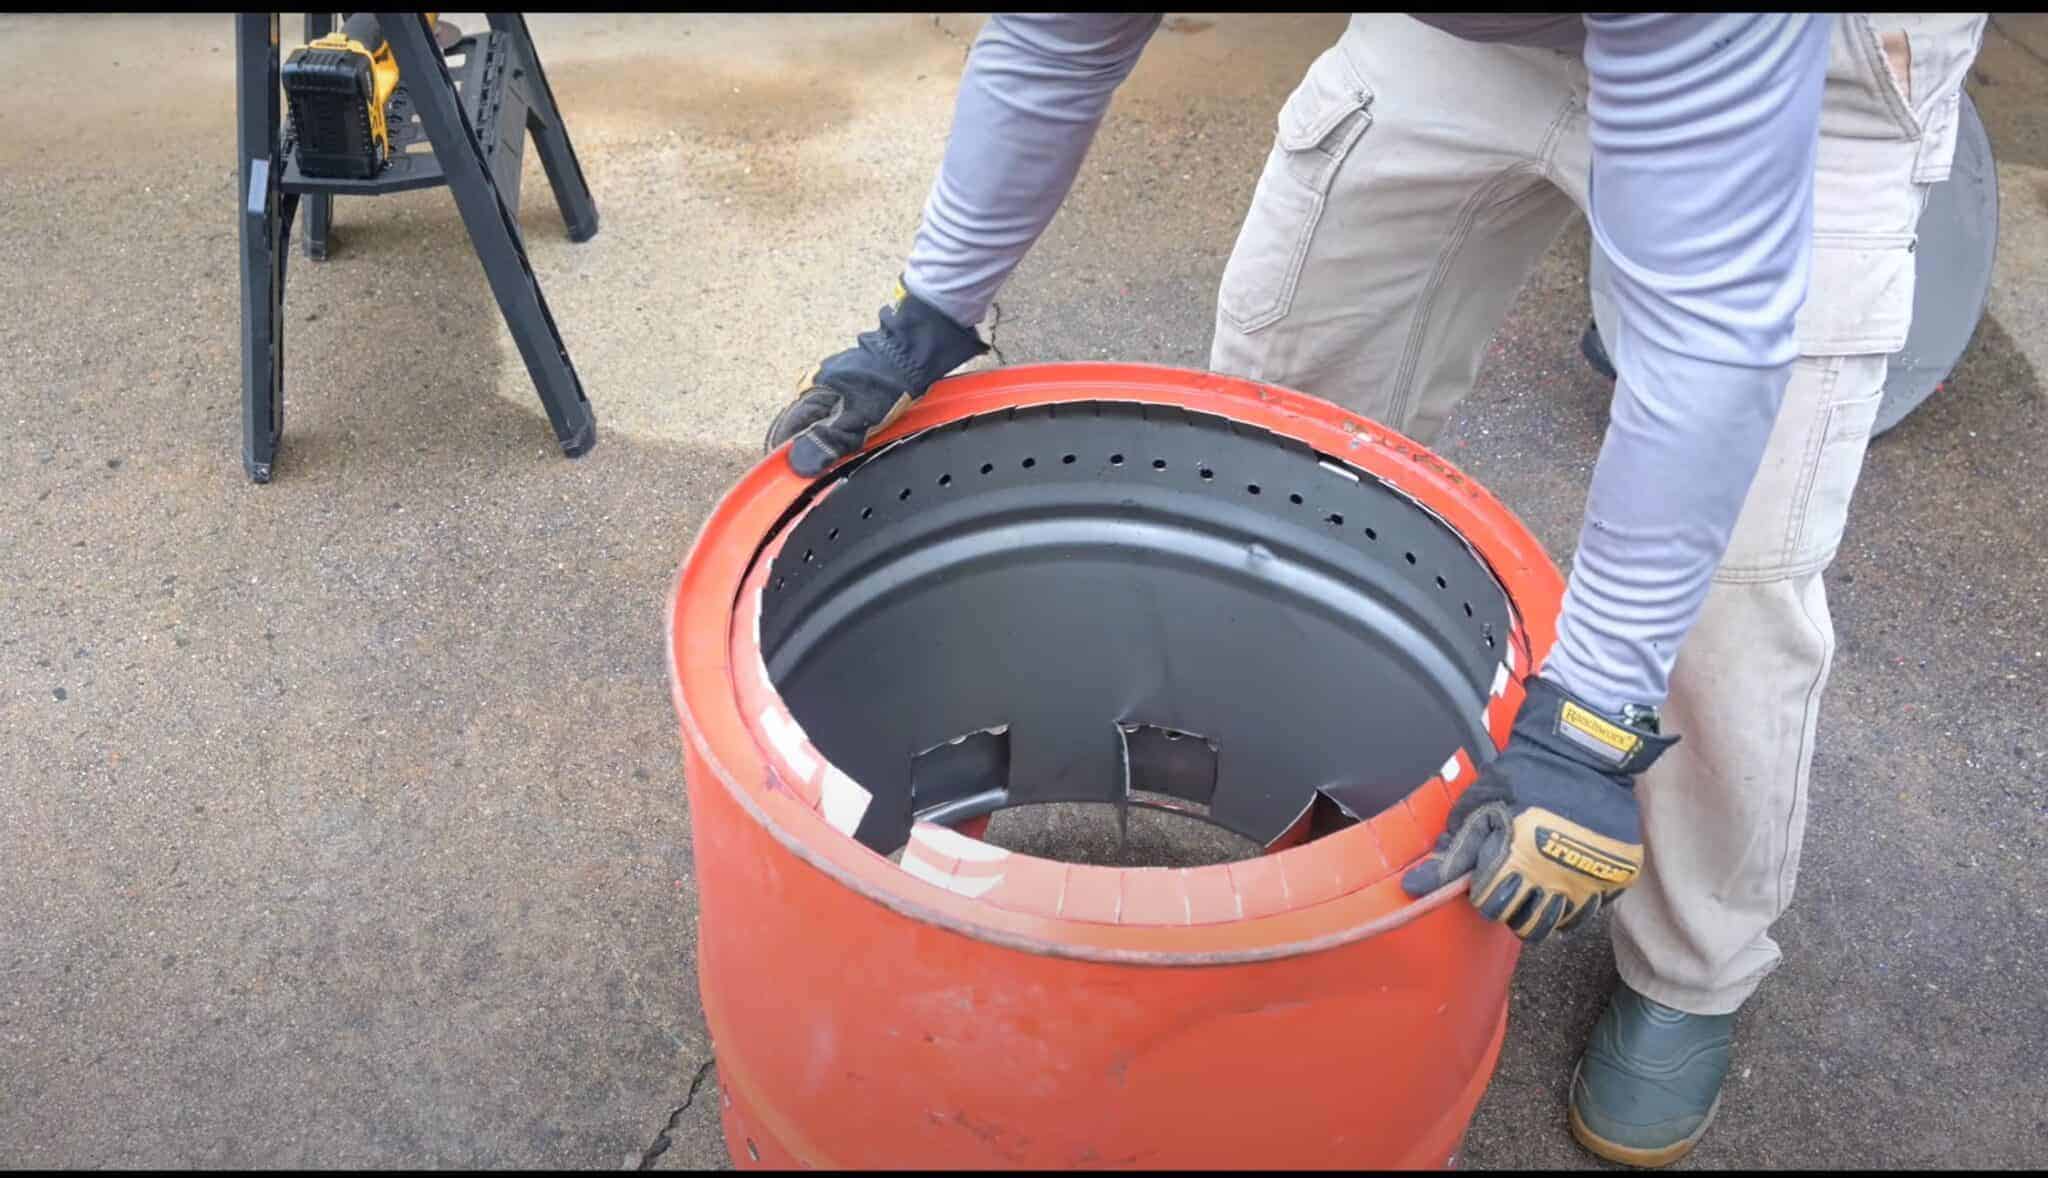
Now you are ready to assemble everything.
First, bend out 4 of the tabs from the inner barrel so the outer shell can sit on. The tabs should be about 90 degree from each other.
Now slide the outer shell over the inner shell. It should slightly float above the ground suspended by the four tabs you just bent outward. Now place the flat grill into the bottom of the inner barrel.
You are now ready for your first test fire. Be aware that there will always been some residual oil left from the barrel so there will be an acrid smell when you first light it.
Before you light your smokeless fire pit, you should place it in a well ventilated location.
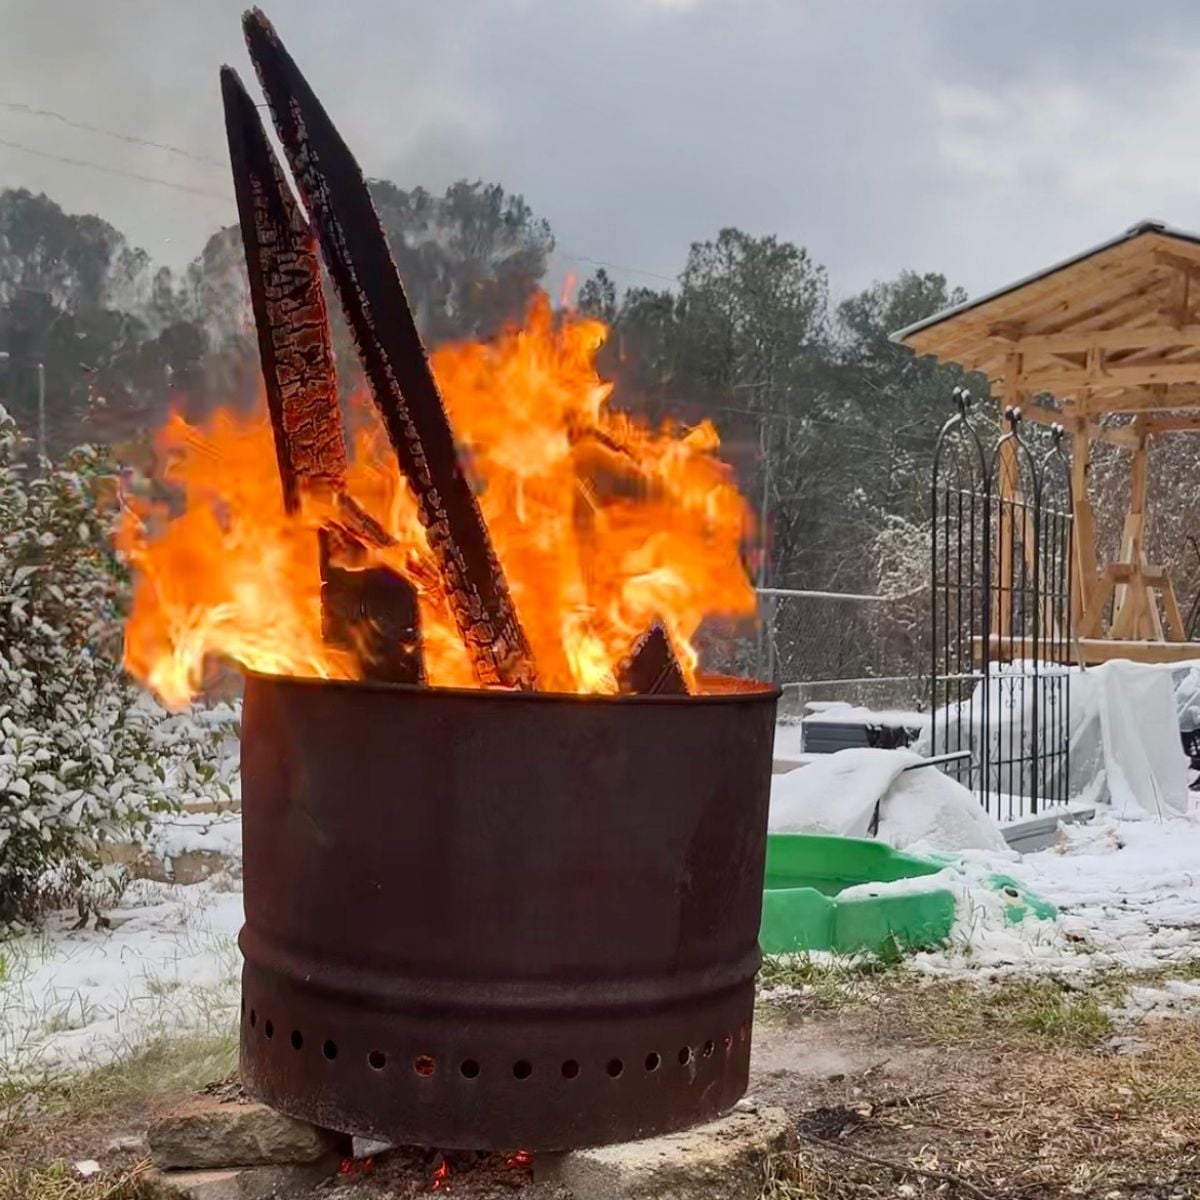
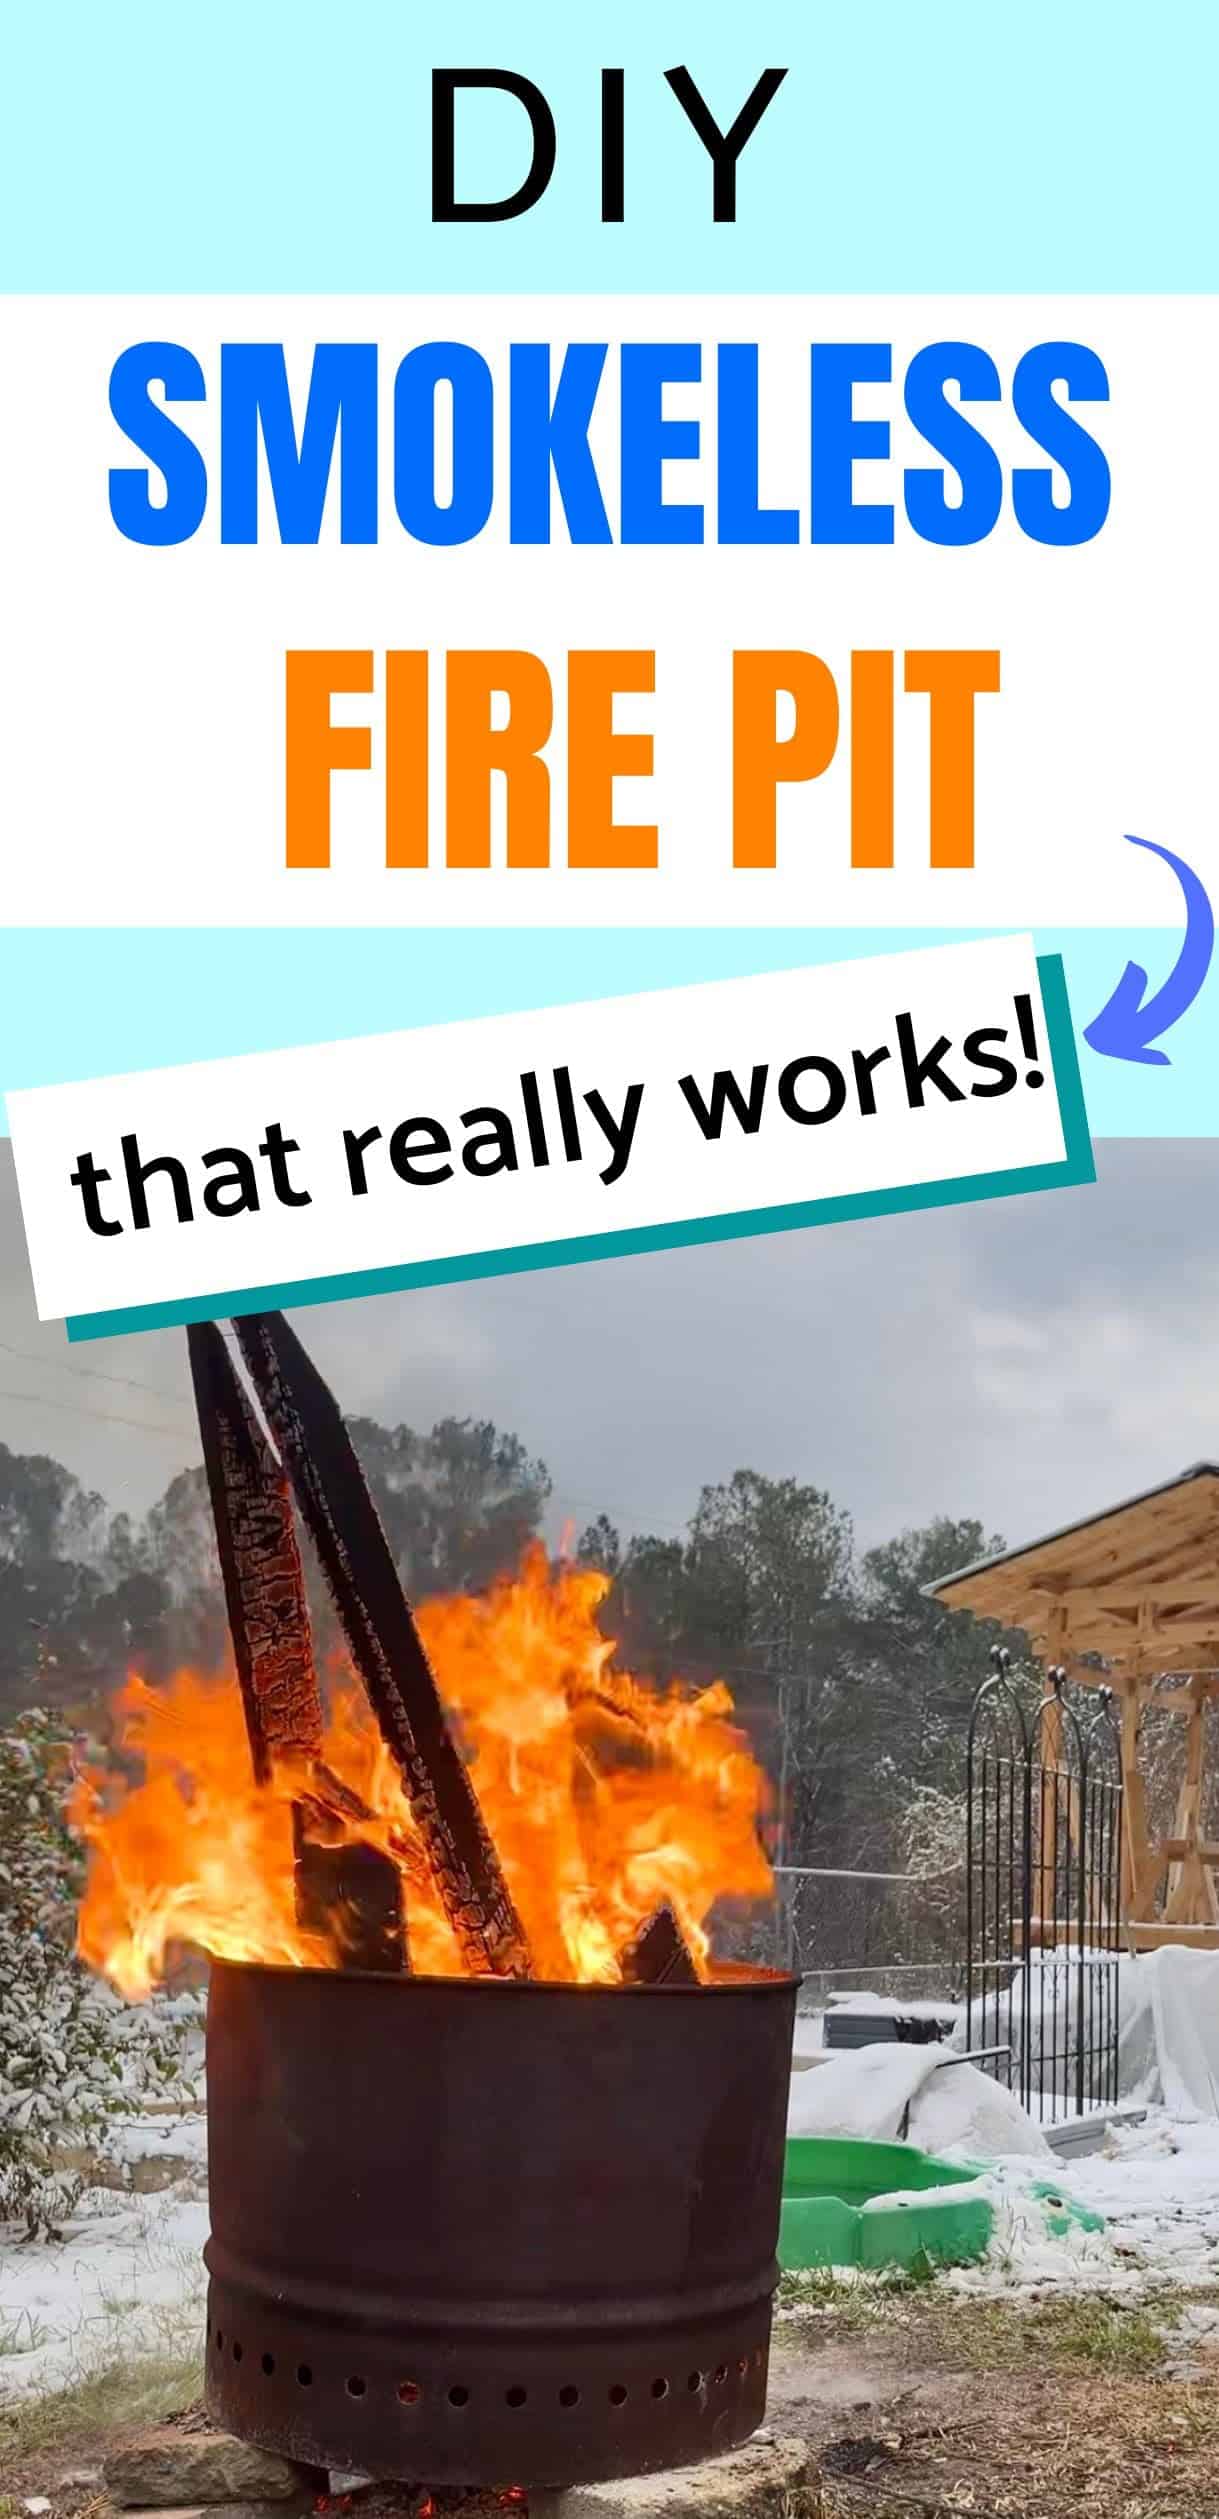
These firepits move a lot of air and the flames can get to over 5 feet tall, so make sure there are no low hanging trees or any combustibles nearby.
Another word of caution, the outer wall gets very hot and it can easily ignite any dry grass or loose leaves that are on the ground.
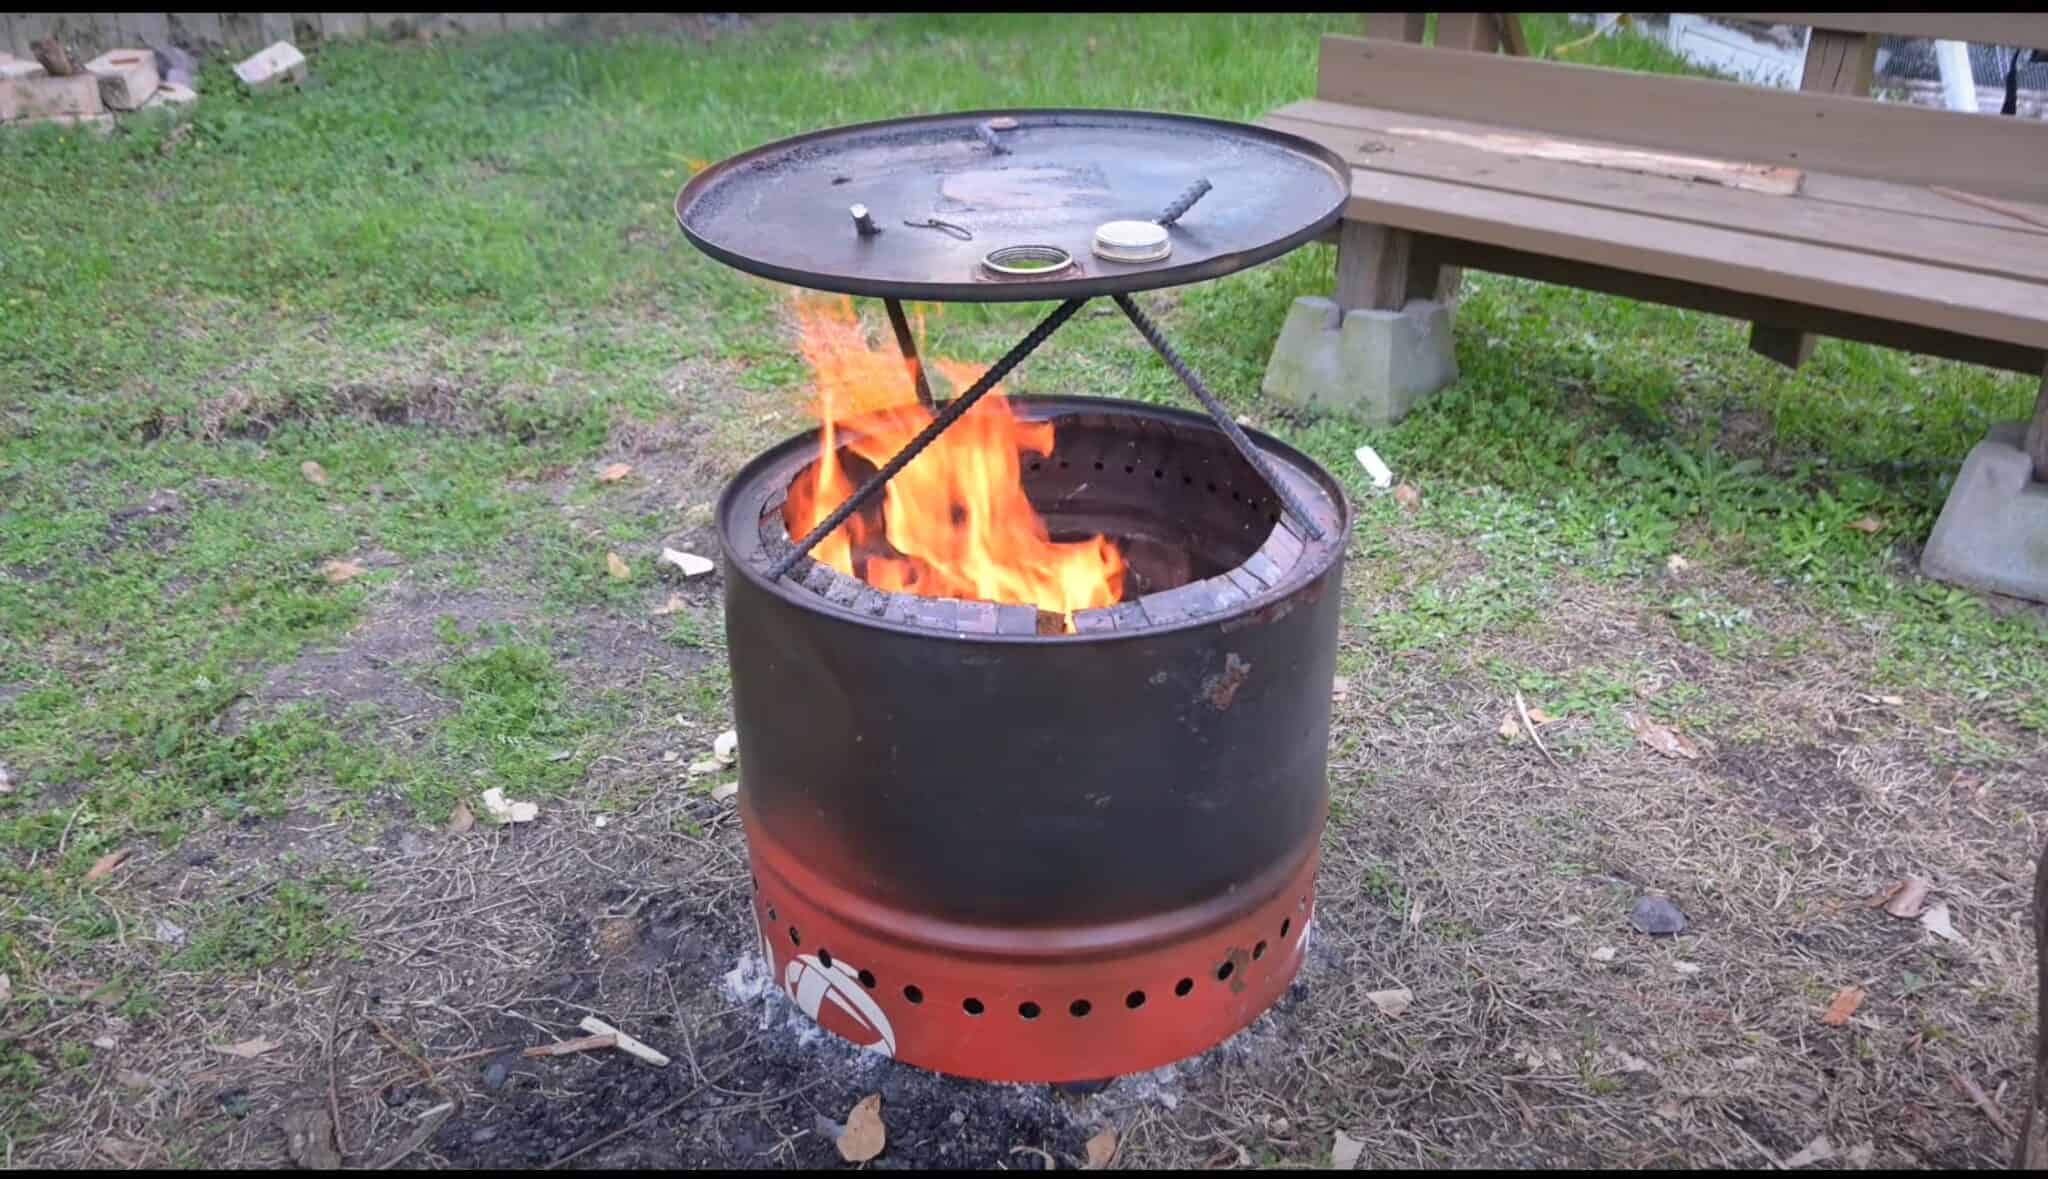
Now for the fun part - starting your fire inside the fire pit.
The best way to get a fire started in a smokeless fire pit is to stack the firewood in a log cabin pattern using dry wood.
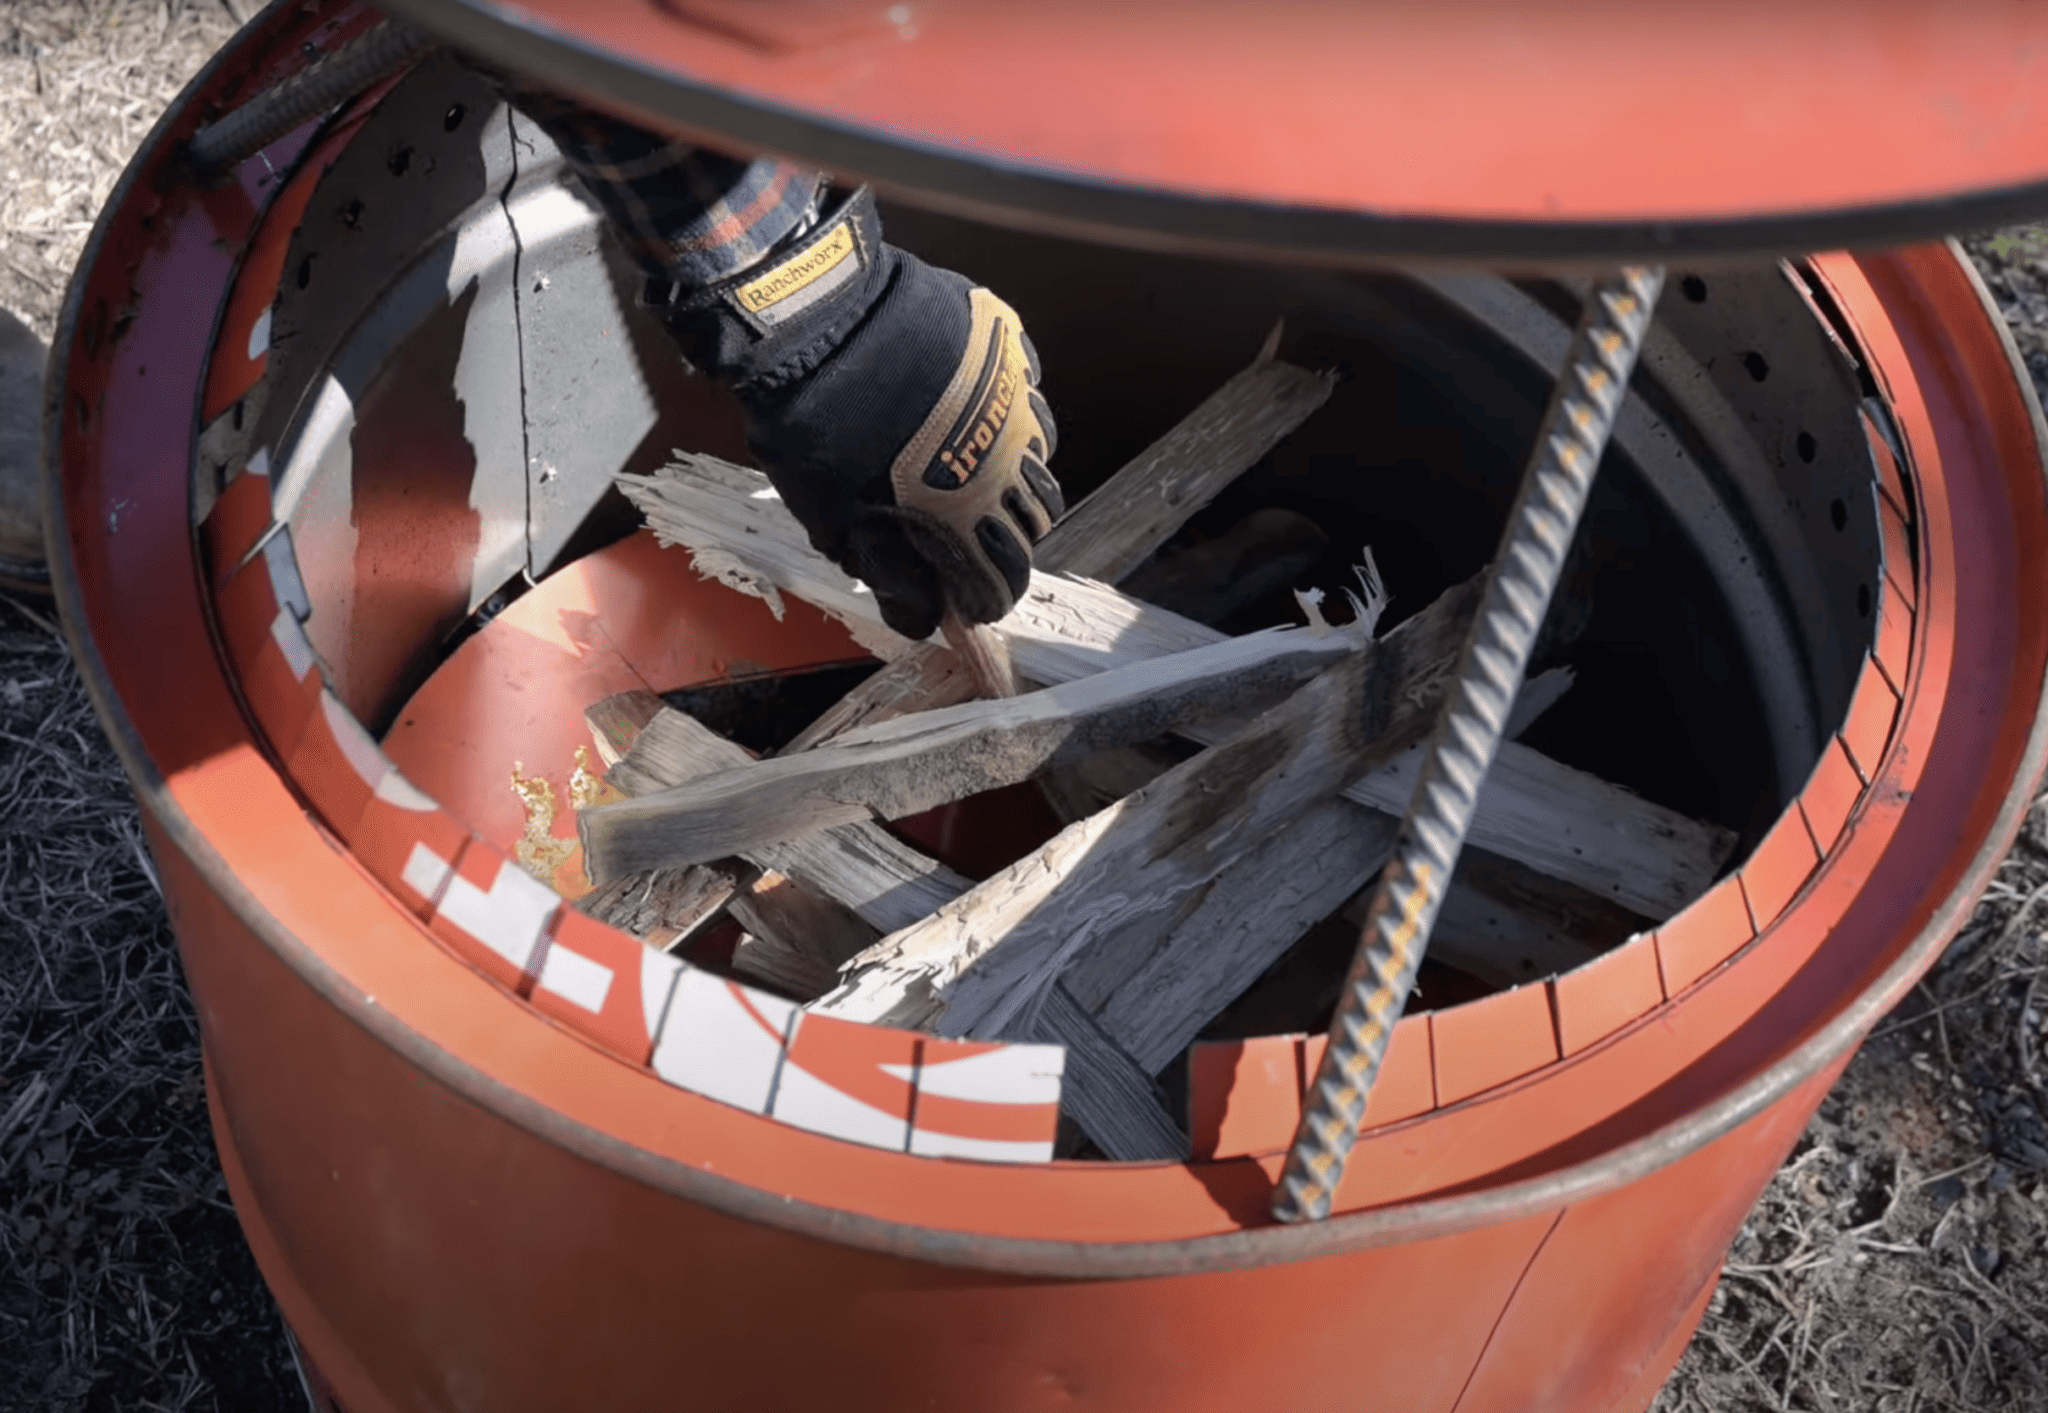
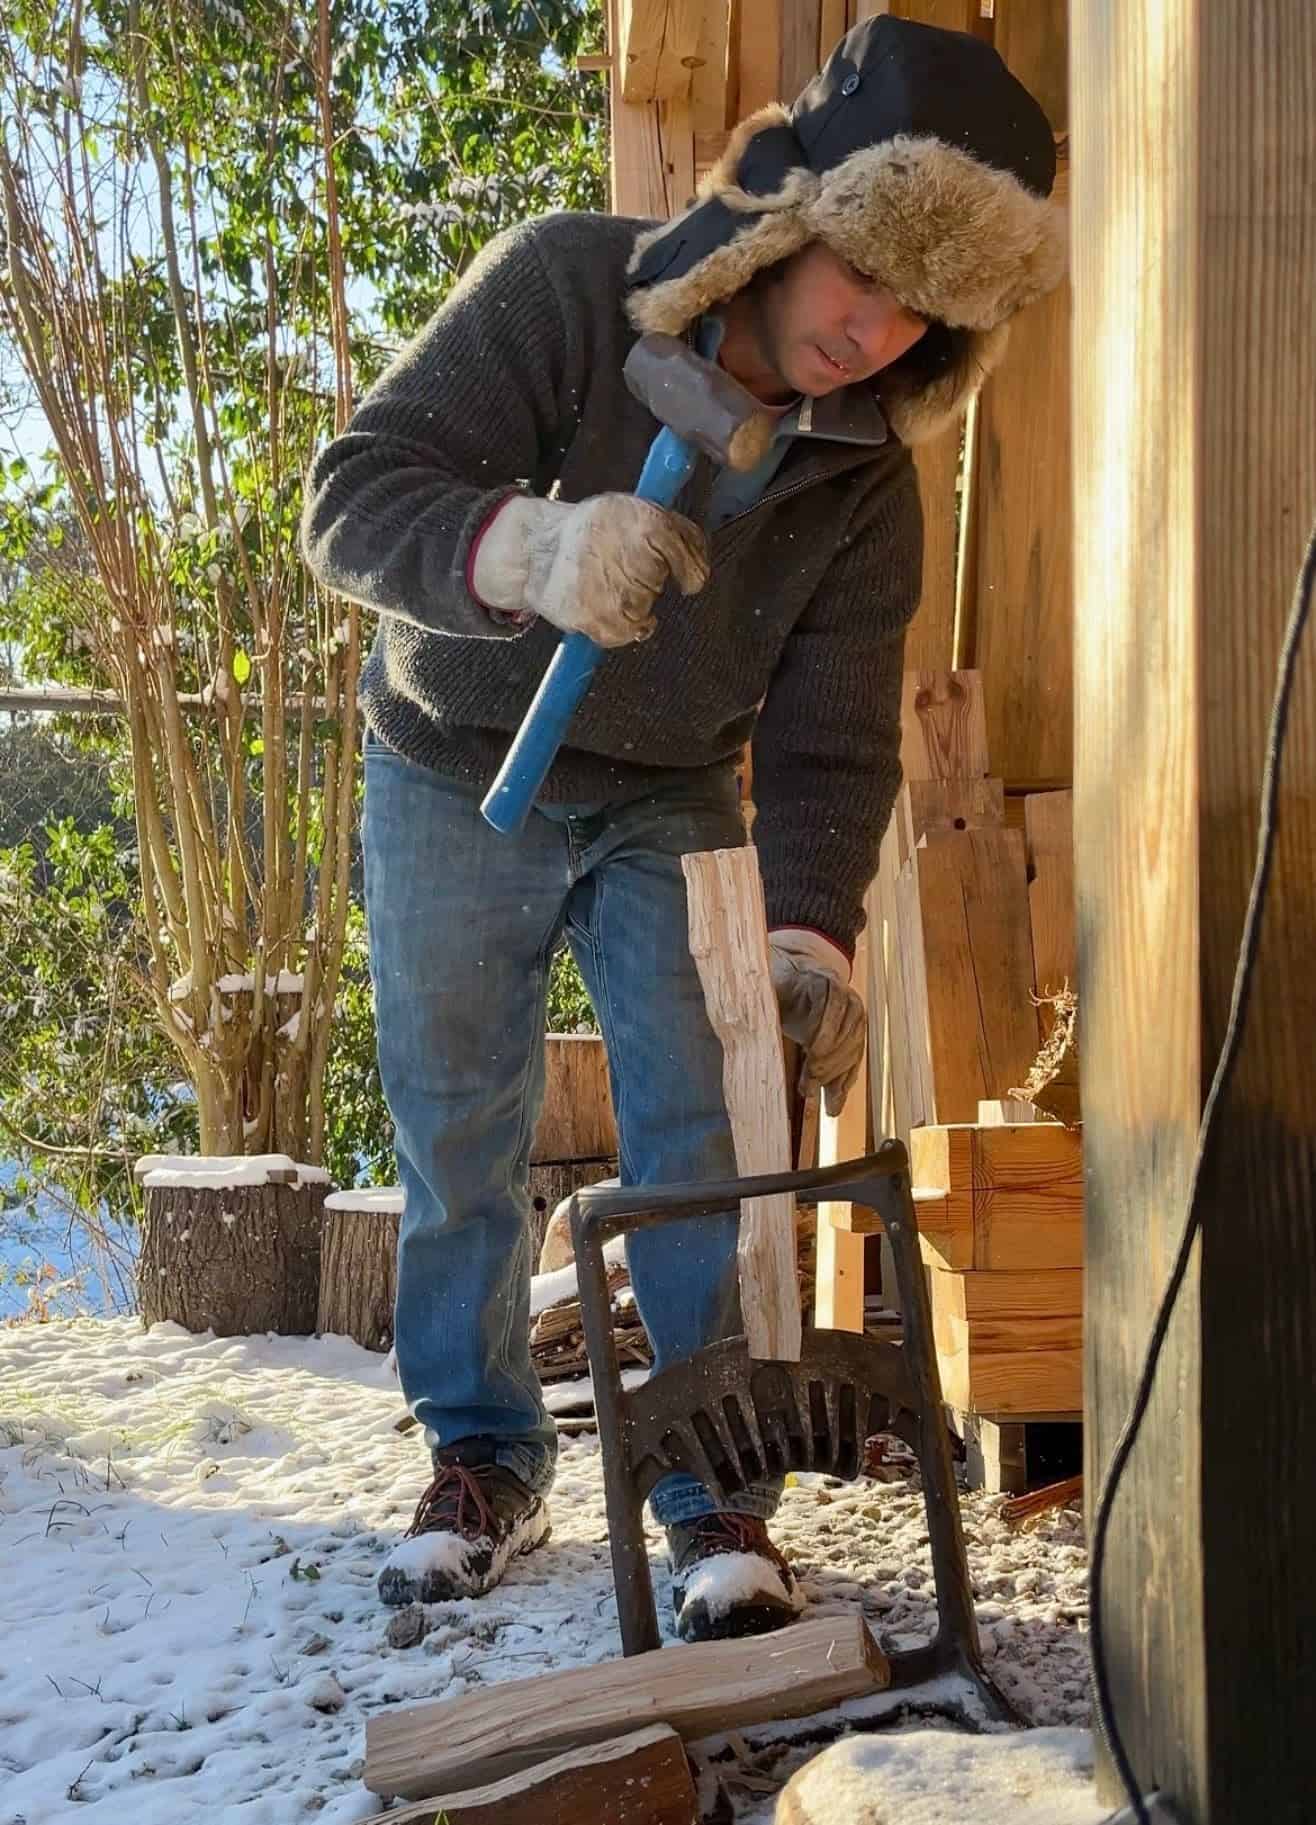
If you have the ability to break down the wood into kindling, this will greatly speed up the smoke free function of the fire pit. I use my XL kindling cracker to make this task quick and easy.

- THE WORLD'S SAFEST WAY TO SPLIT KINDLING - INVENTED BY A TEENAGER: The Kindling Cracker was designed by 13-year-old Ayla Hutchinson of New Zealand...
- EFFORTLESS TO USE - ANYONE CAN DO IT: Place a log inside the 9-inch cast iron safety ring, strike the top with a mallet, hammer, or even another piece...
- ONE SOLID PIECE OF AUSTRALIAN CAST IRON - BUILT FOR GENERATIONS: Forged as a single, seamless piece of premium cast iron at an Australian foundry, the...
As with any fire pit, the initial lighting of the fire pit will have some amount of smoke. As the hot fire builds in size it will heat up the walls and commence the secondary combustion resulting in little smoke.
The first time you light this type of fire pit there may be a foul smell. This is all the residual oil burning off from the barrel. Keep it going long enough to burn off all the oil. Keep in mind that the fire pit will change in color because of the high heat.
I hope you enjoy this DIY smokeless fire pit tutorial! Make sure to visit us on YouTube for more fun DIY projects.


Leave a Reply