Flowers are nice on Mother's Day, but they usually start looking sad by Tuesday
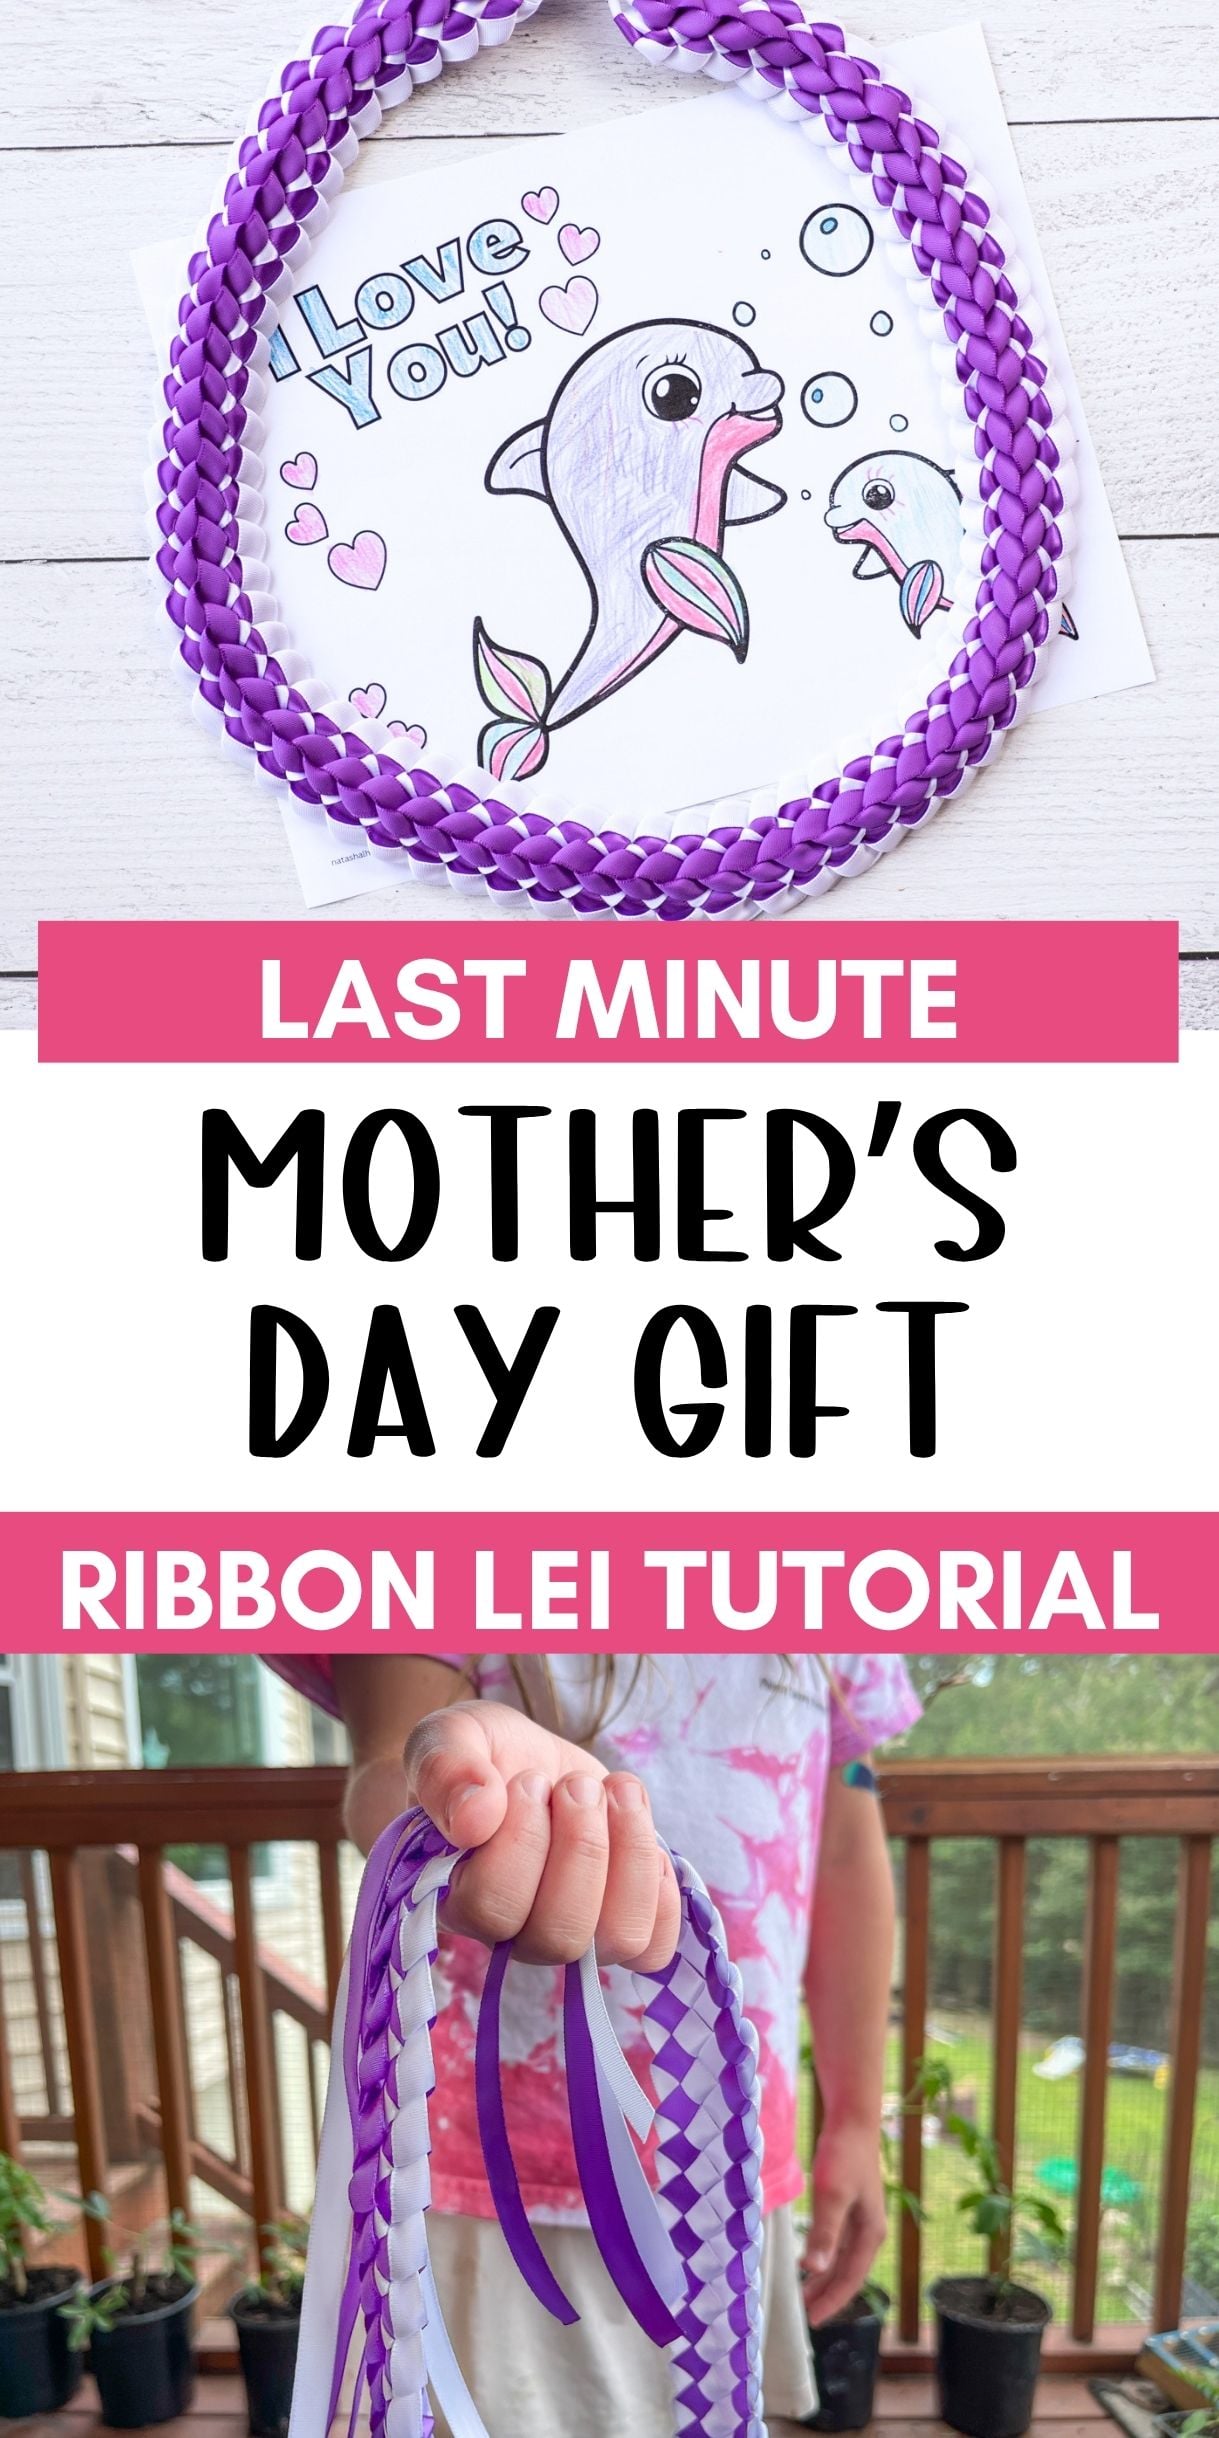
This year, why not make her something that actually lasts? These double braided Hawaiian ribbon lei are a fabulous gift anyone can make.
They look super intricate and high-end, but once you get the rhythm down, they’re actually really relaxing to make. Plus, they won’t wilt!
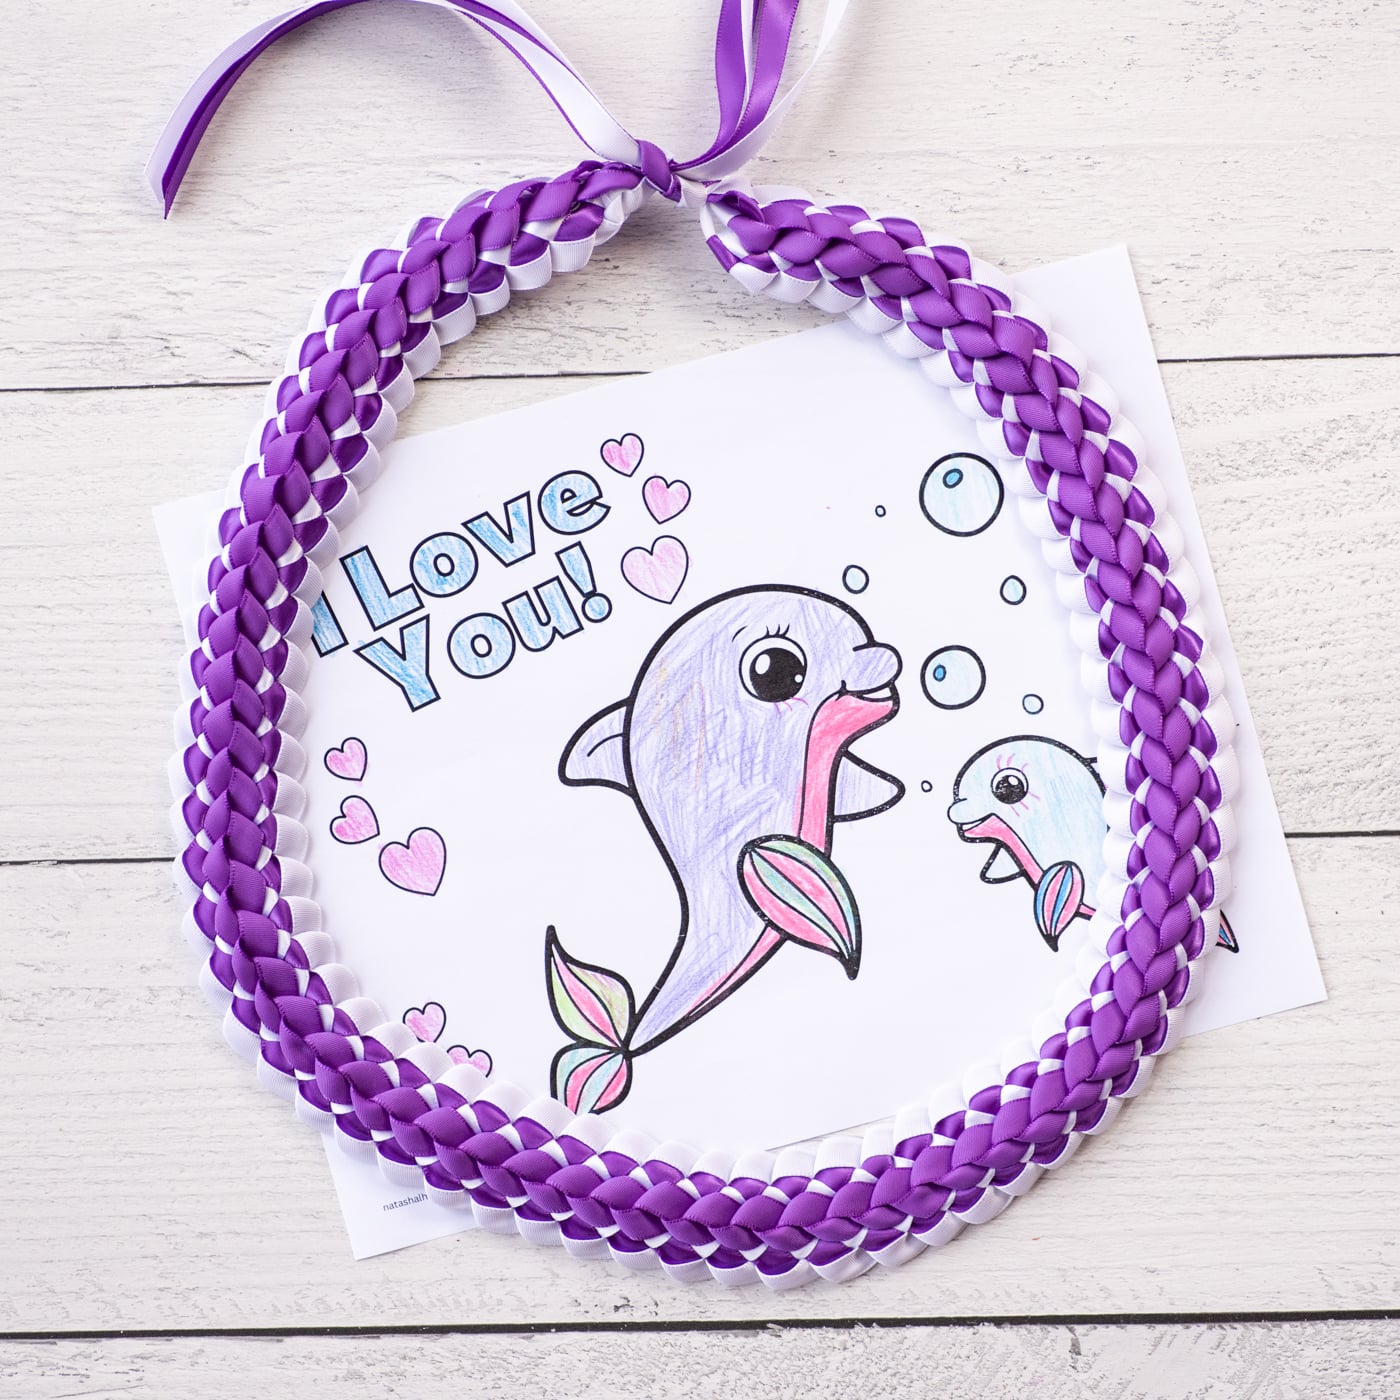
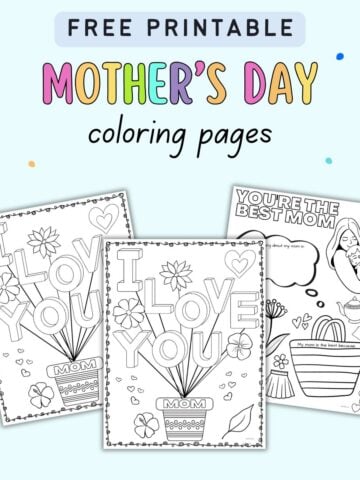
The lei above is shown with a sheet from this set of free printable Mother's Day coloring pages. Make sure to grab some while you're here!
If you really want to treat Mom, whip up this delicious strawberry Dutch baby pancake for breakfast!
Why Make a Ribbon Lei for Mother’s Day?
In Hawaii, leis are all about love, honor, and celebration. Giving one to your mom is such a sweet way to show her she’s the MVP of the family.
Since this version uses four strands, it’s nice and thick, making it a real statement piece for Mother’s Day brunch or a family dinner.
This post may include affiliate links which means I may earn a commission on qualifying purchases at no additional cost to you.
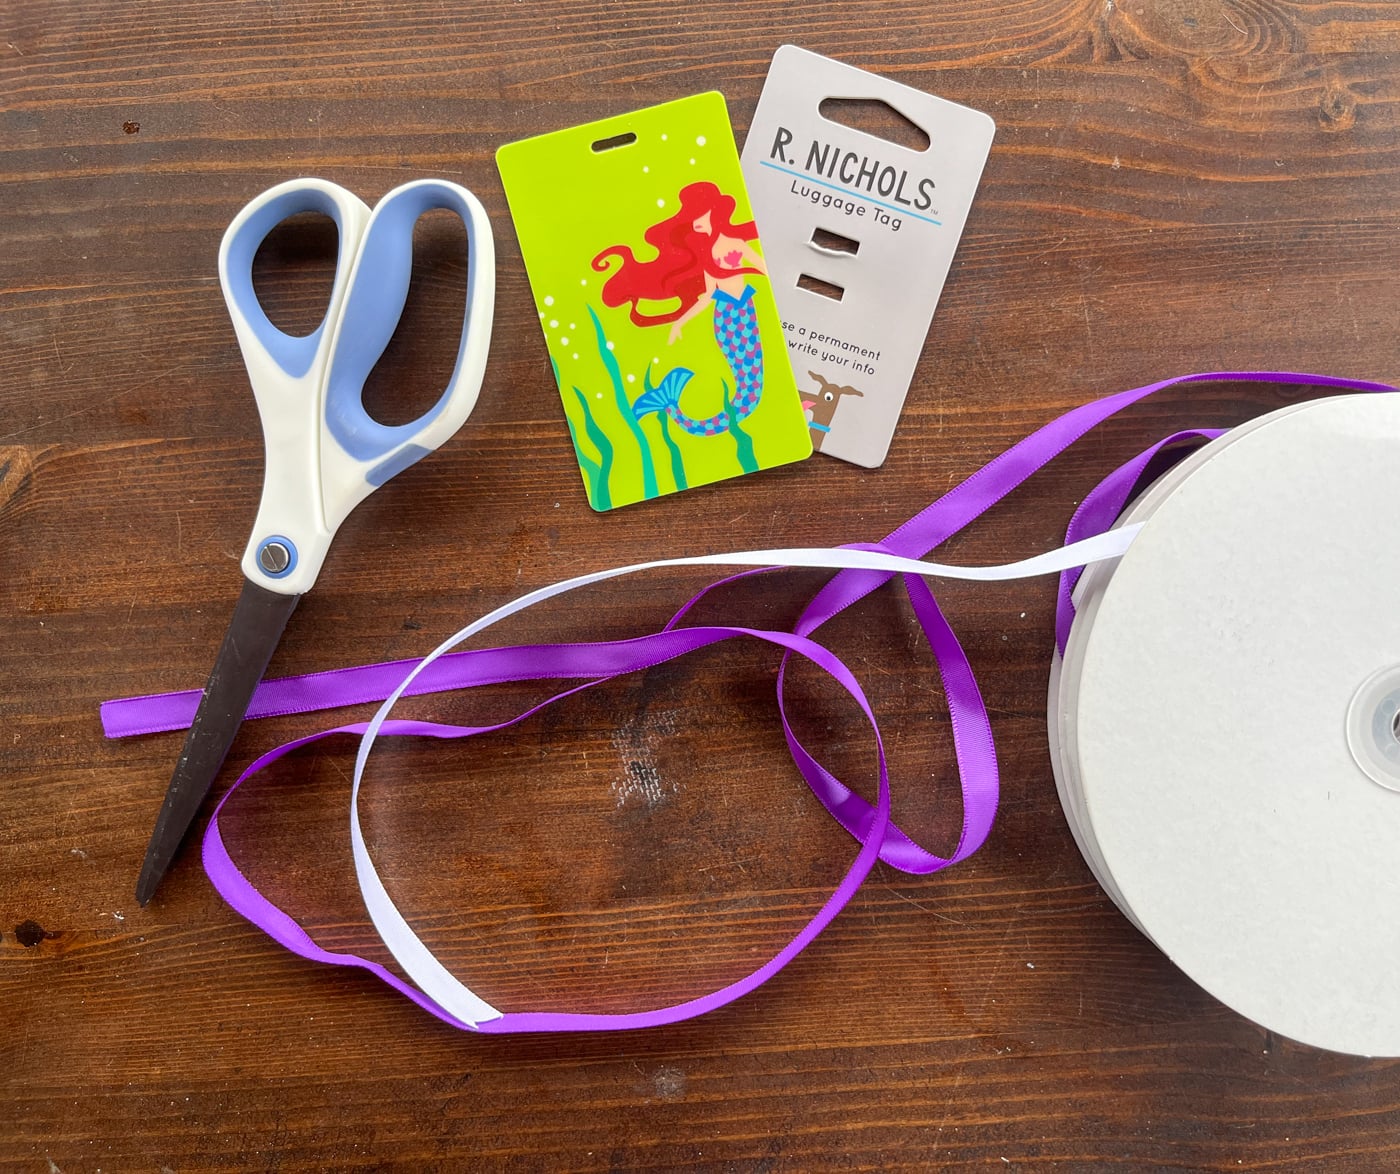
What You’ll Need:
- Ribbon. You’ll need 4 strands of ⅜" satin ribbon. For a standard lei, I recommend at least 6 to 7 yards per strand. This means you'll need a total of 12-14 yards of each color.
- Bobbins. Use old gift cards or scraps of cardboard to wind your ribbon. It keeps things from becoming a tangled mess.
- Clips. Binder clips or quilting clips are your best friends here to keep your ribbon organized
- Scissors
- A lighter to singe the ends so they don’t fray.

- Sewing Clips Opening : 0.9cm,it is easy to hold several thin fabics in place. without putting pins or holes in the fabric,It helps stitching your many...
- Precision Guide for Perfect Seams: Features practical seam allowance markings on the clip itself, allowing you to quickly and accurately align your...
- Premium Plastic Clips-The variety of bright transparent and vibrant colors allows you to choose the clip that fit your materials best make the...
Most small spools of ribbon are 5 yards each, which isn't enough for this lei. I recommend grabbing larger ribbon spools.

- Dimensions- High grade single face solid satin ribbons ⅜ inch(1cm)wide/spool, these ribbon come in a convenient 100 yards packages so that you...
- Bright Color- There are four colors: gold, white, black, red. All ribbons’colors look fashionable and bright as the pictures shown.The beautiful...
- High Quality- With the Toniful Ribbons consists of 100% polyester ribbon.High temperature dyeing, machine washable and colorfast, bright colors.Double...
Color Ideas for Mom:
- The Classic: Soft pink and cream.
- The Garden: Lavender and sage green.
- The Bold: Her favorite "power" colors or the colors of her alma mater!
how to Make a Hawaiian Ribbon Lei
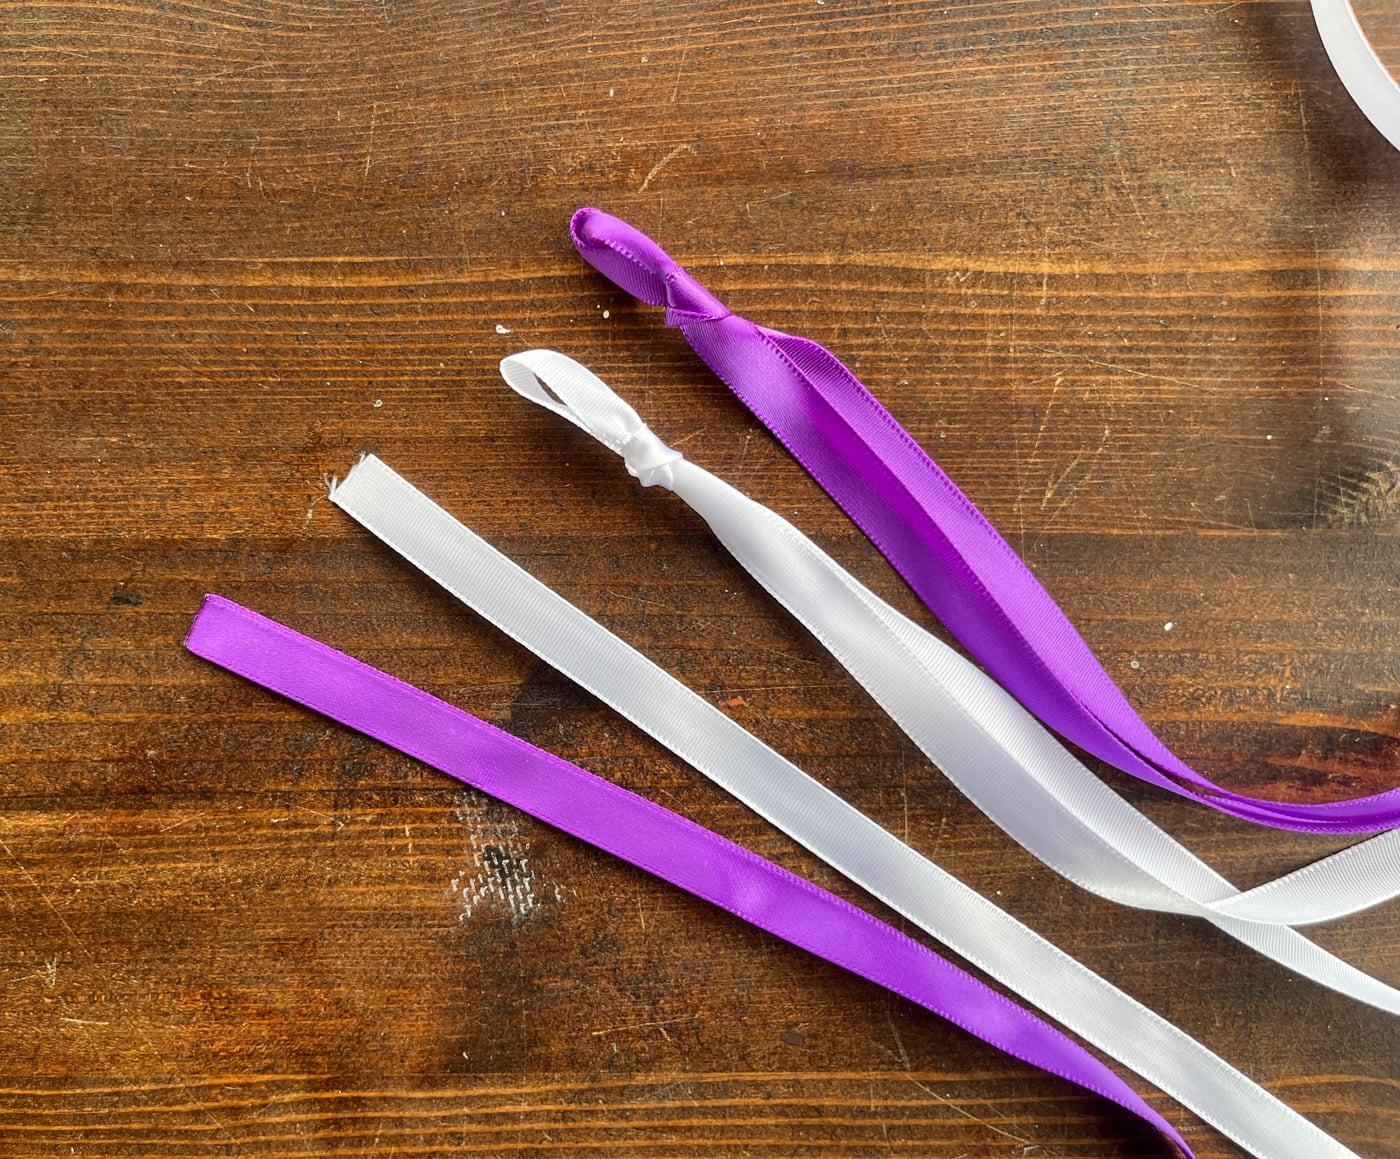
Prepare the ribbons
First, cut two of your ribbons to length. Cut at least 6 yards of both colors of ribbon. I did 7 yards for the lei in this post and had some left over, but I'd rather have a bit of wasted ribbon than run out before it's finished!
I used to cut both strands of both colors, but then I realized that was unnecessary! You can work straight off the spool for two of the strands.
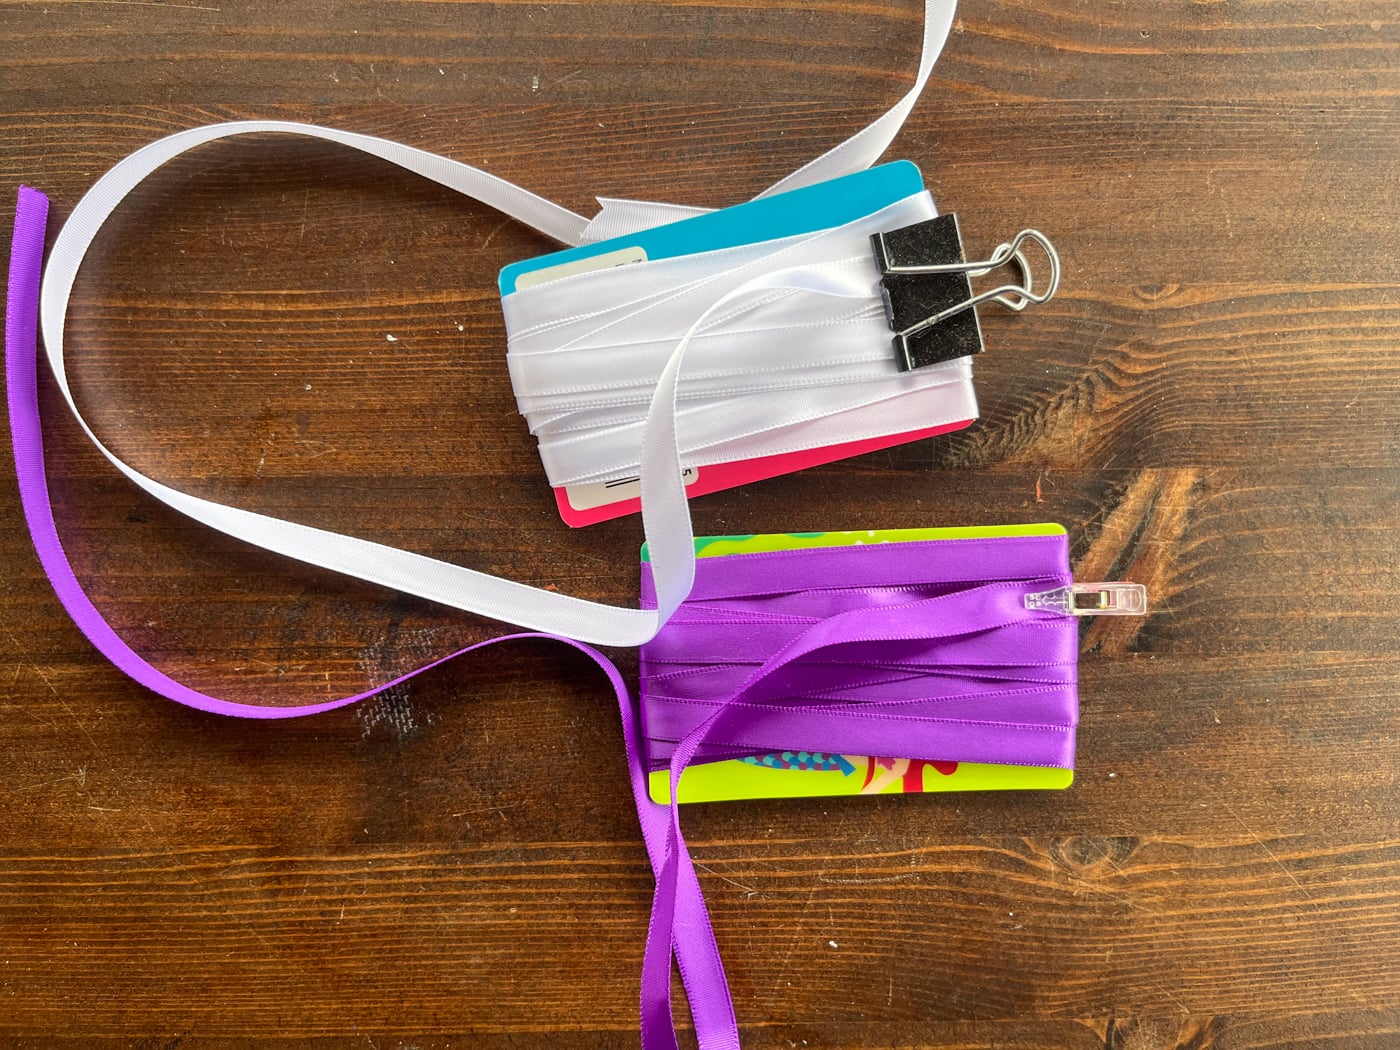
Wind each cut ribbon strand onto "bobbin." leaving about a foot of "working room" at the end. Gift cards work great. In this example, I used a luggage tag and the cardboard it came on.
Use your clips to keep the ribbon from unspooling while you work.
Starting your double ribbon lei
I have a video for you, but it isn't stand alone tutorial. You'll want to read the instructions, look at the photos, and use the video as a supplement to see the movements in action.
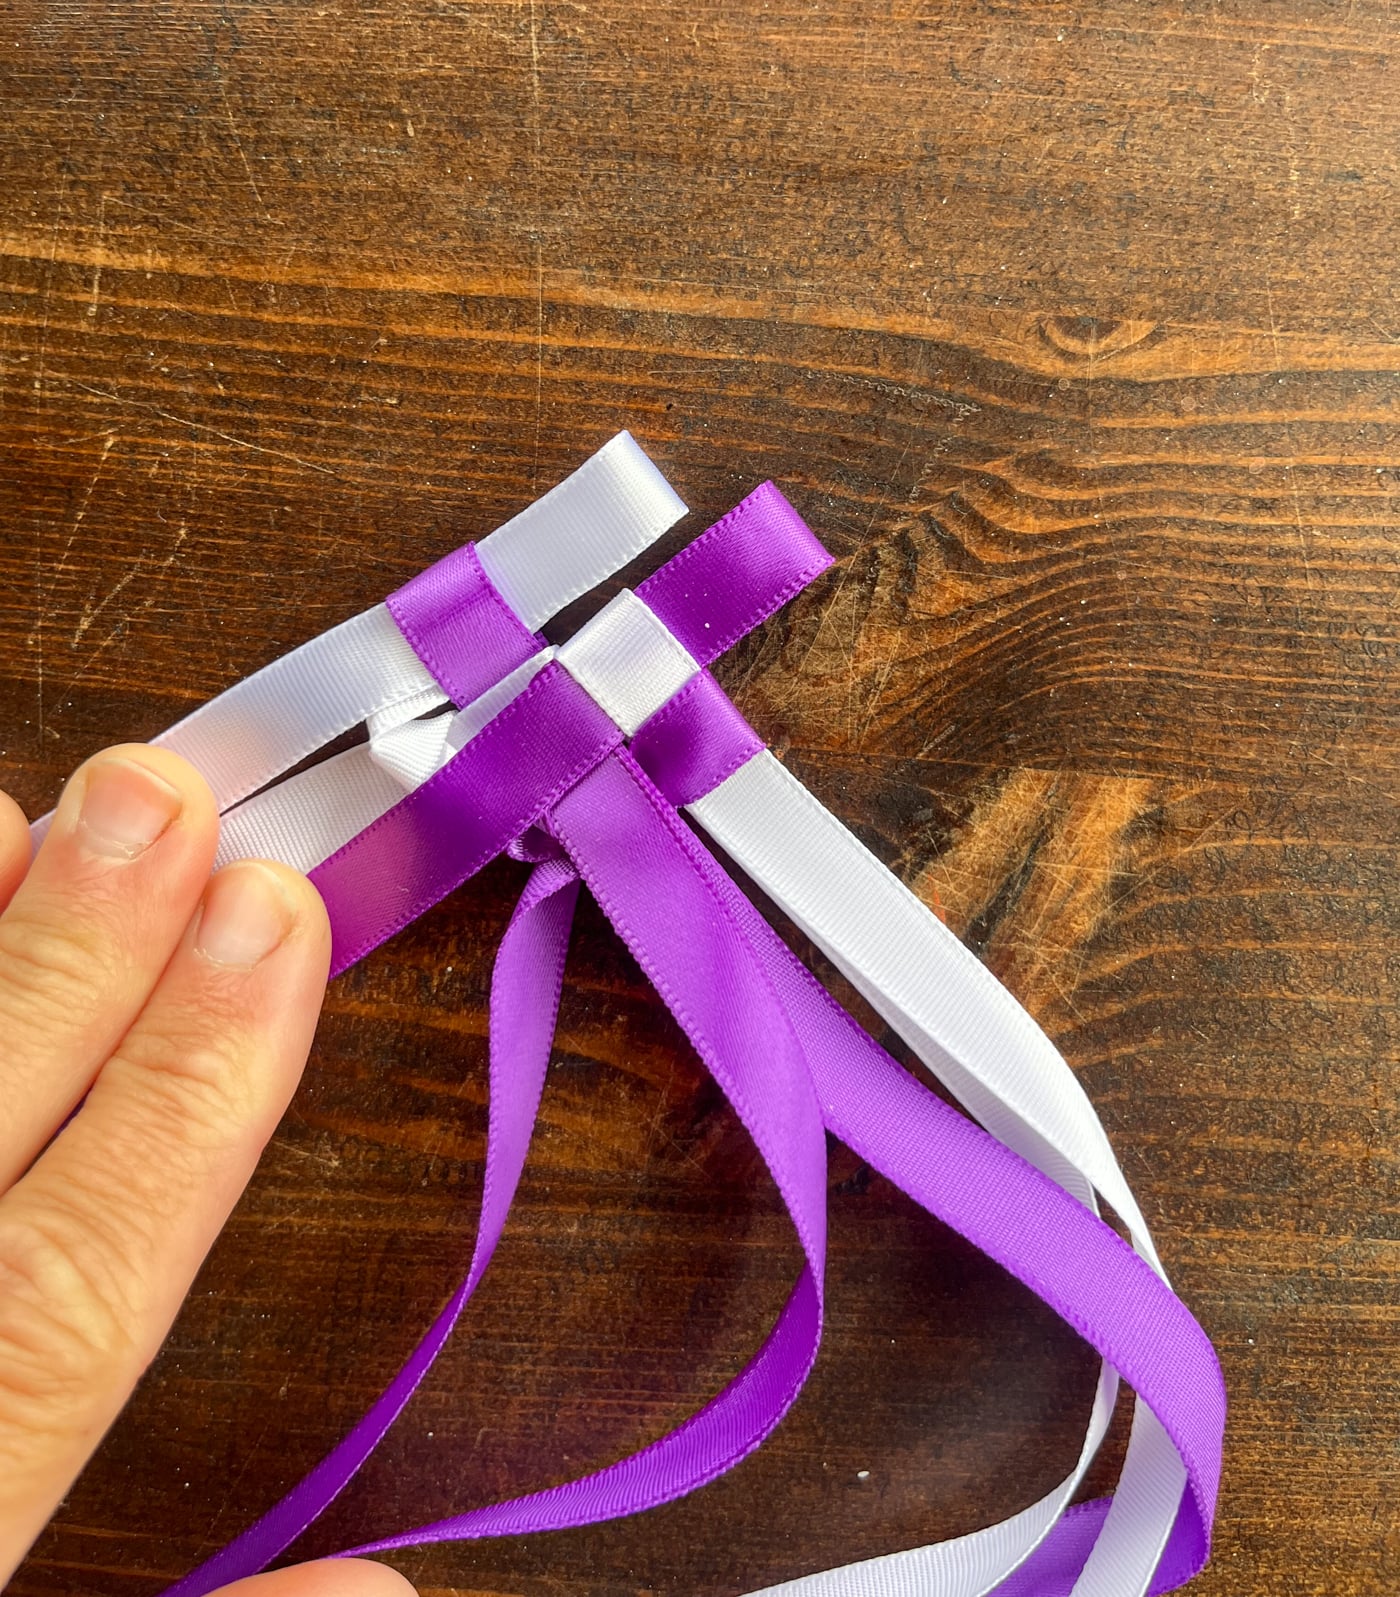
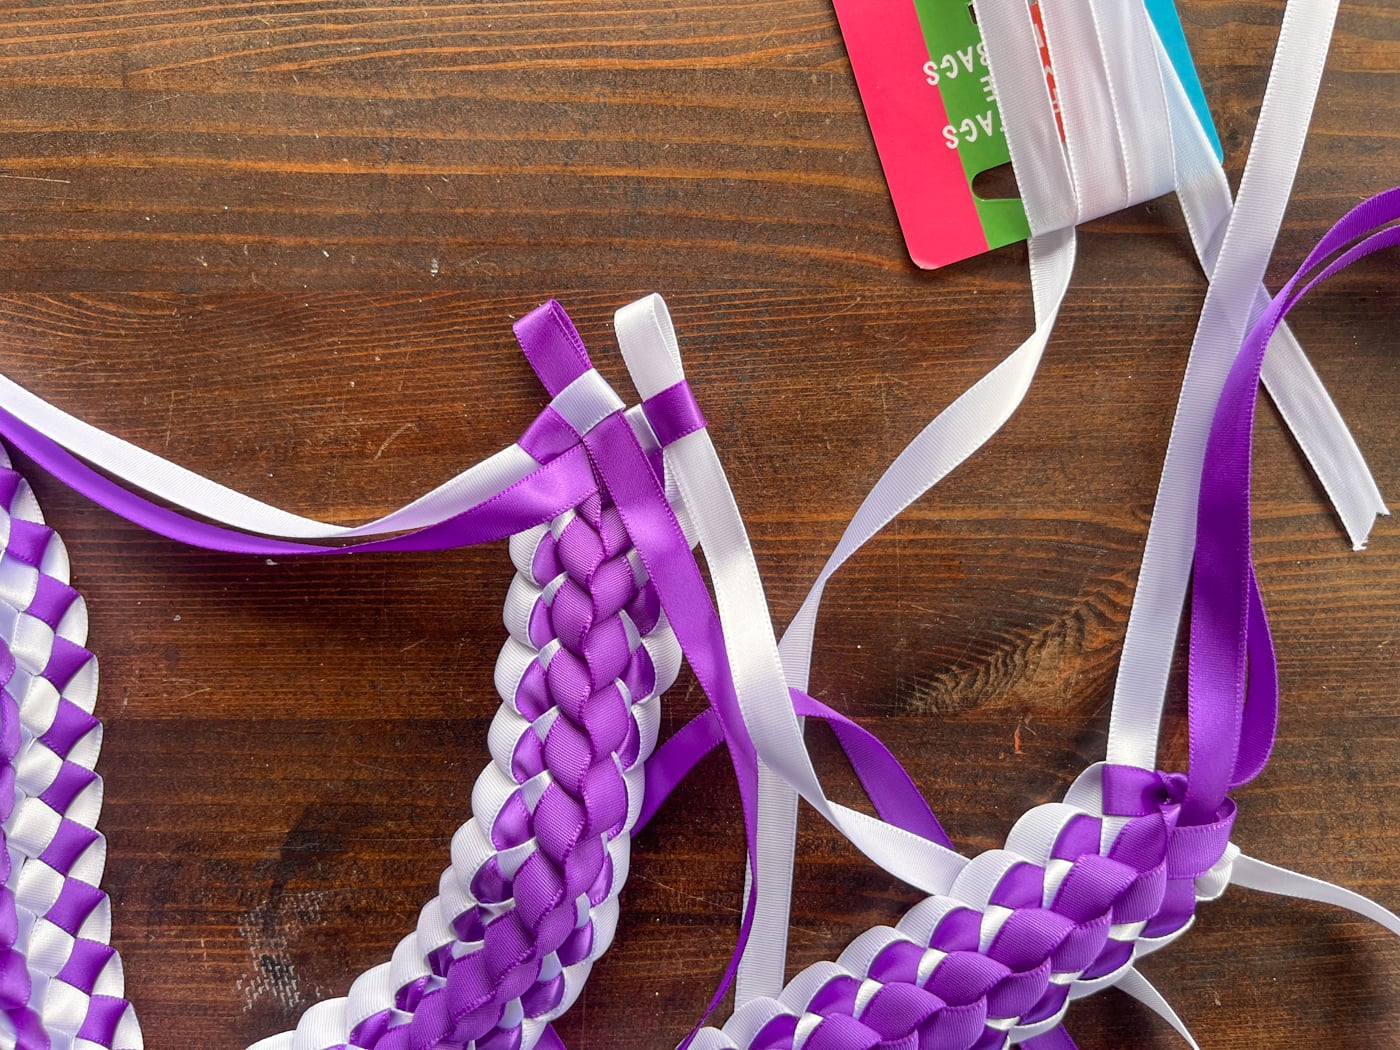
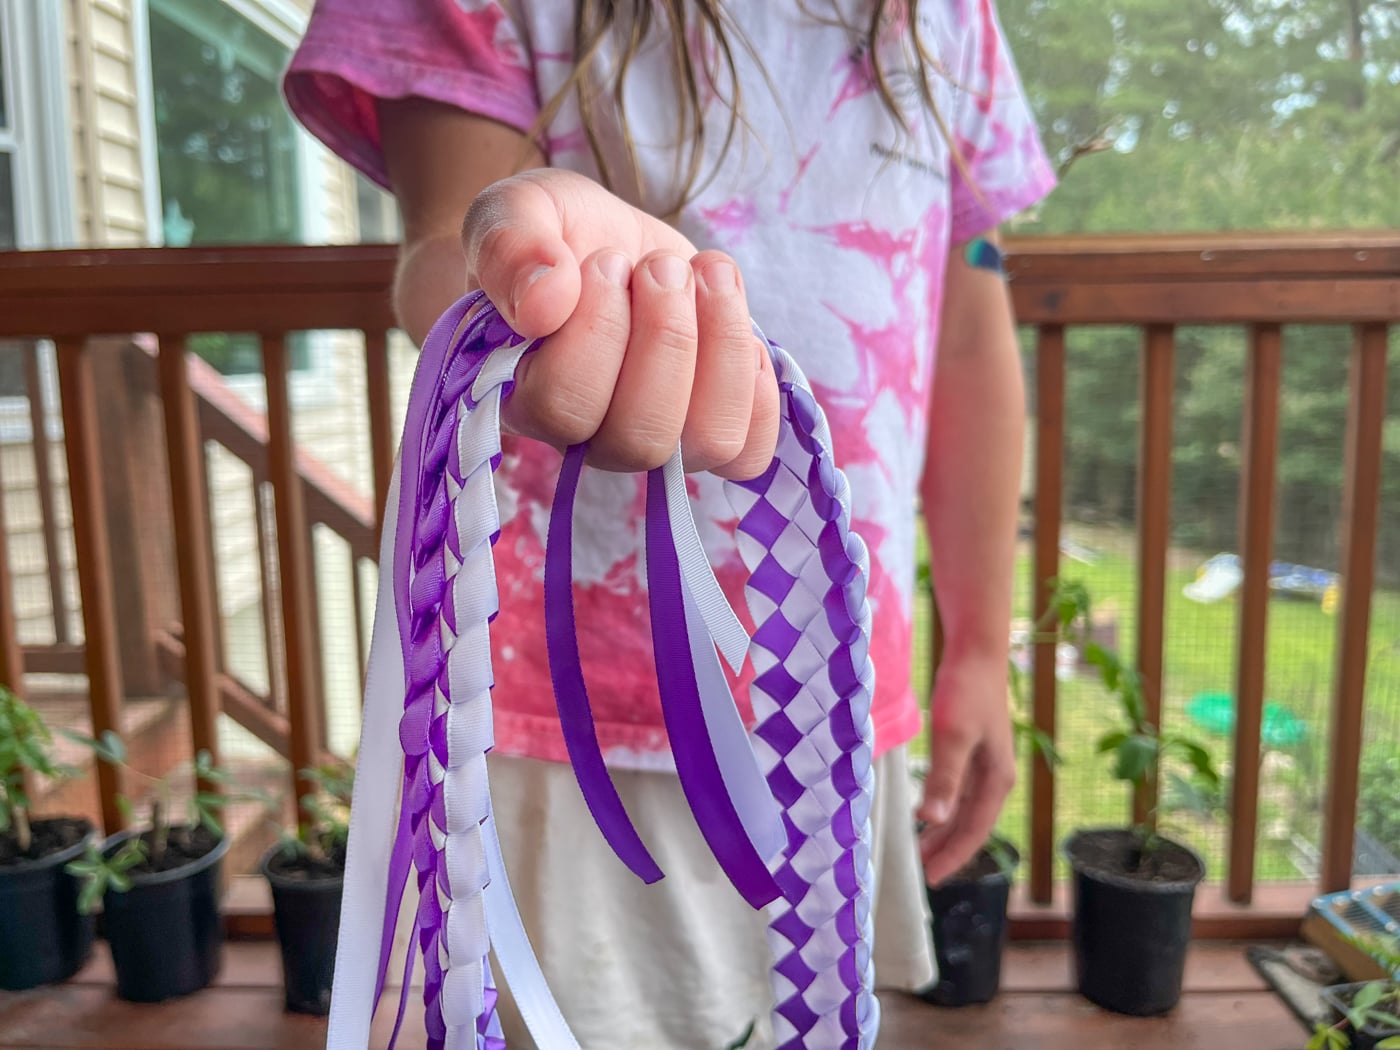
Pair your ribbons off so that each ribbon in the pair has a different color (for example, purple and white).
- In each pair, tie a slip knot in one of the ribbons, leaving about 6-8 inches of tail to tie the ends of the lei together.
- Important: Make sure you tie the knot on different colors for each pair (e.g., tie a slip knot on one purple strand and one white strand).
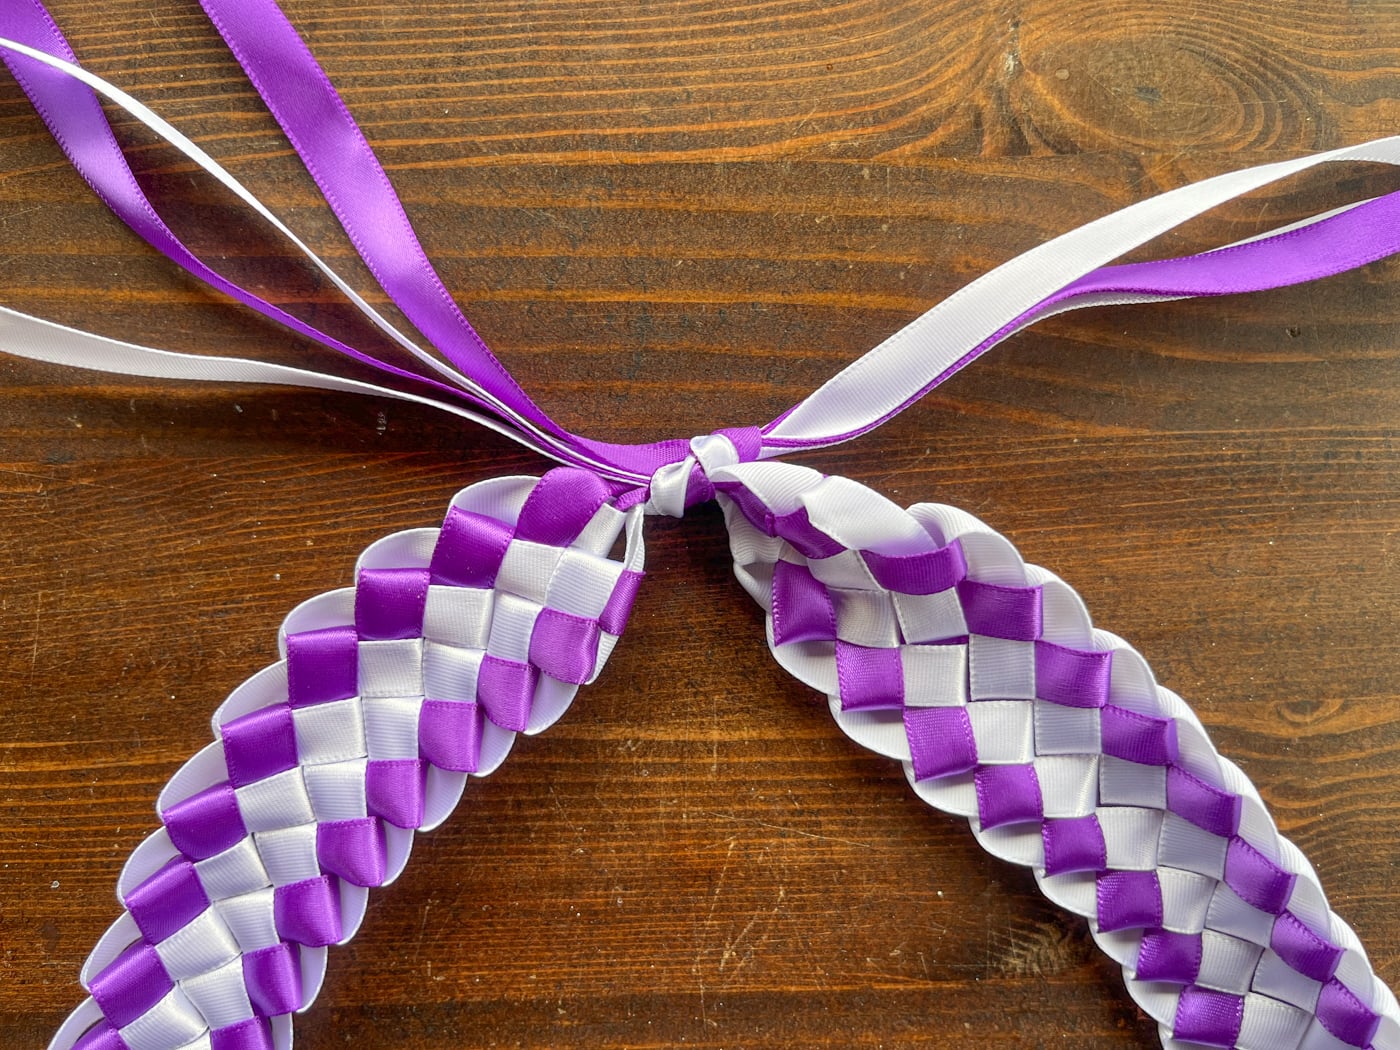
Starting the "Braid"
Take your first pair. Fold a little "bunny ear" loop in the ribbon that doesn't have the slip knot, and slide it through the slip knot of its partner.
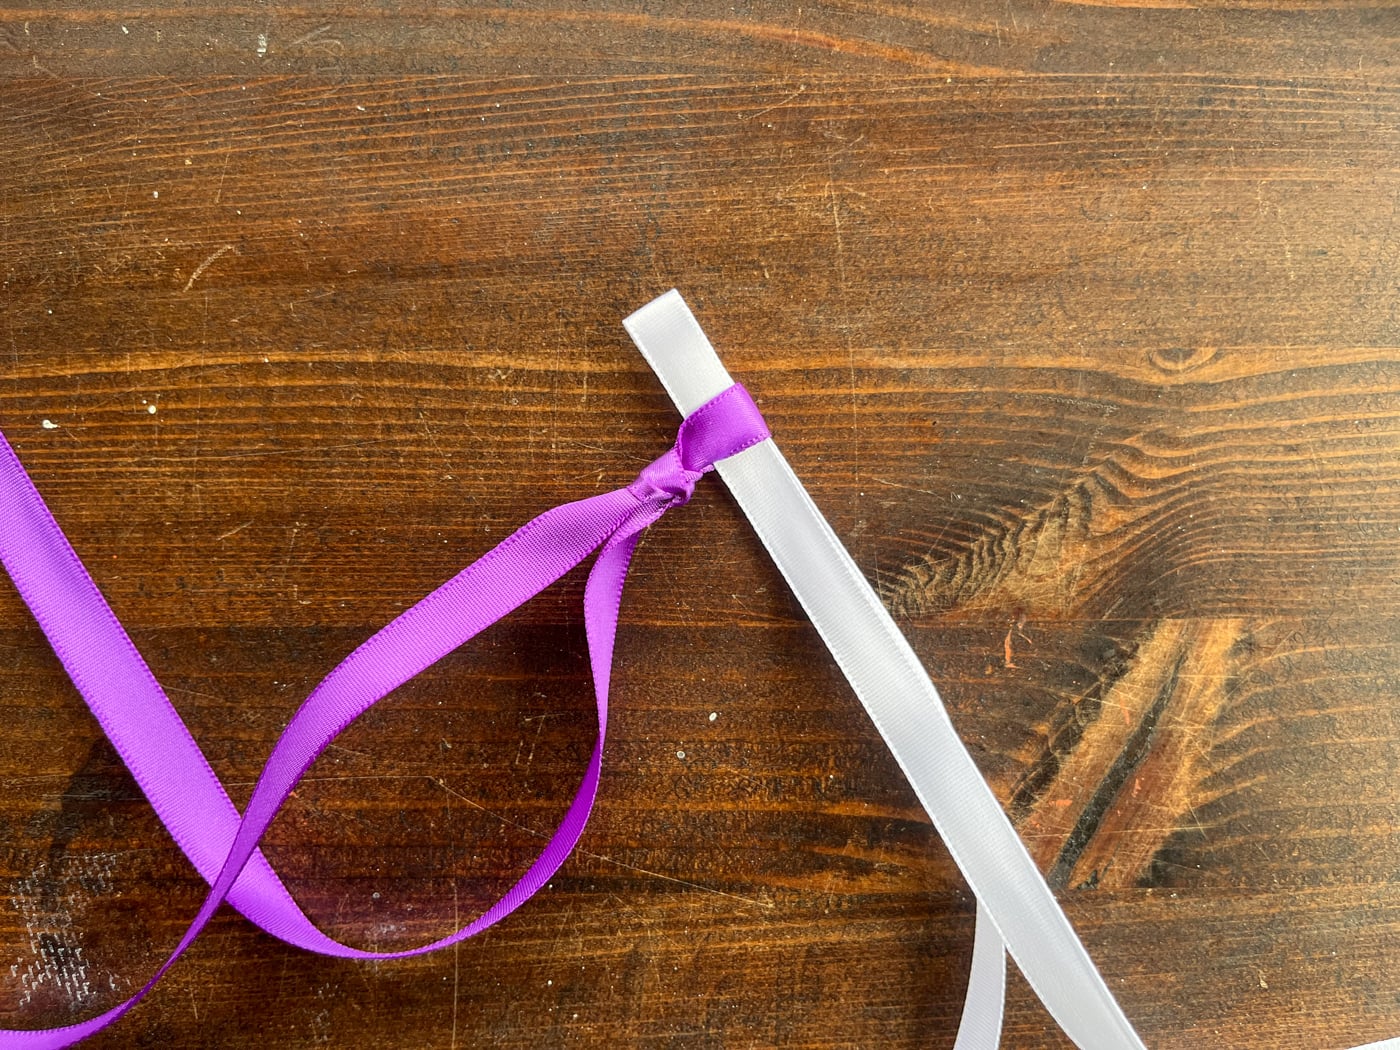
Pull the slip knot snug. Repeat this with the second pair. Now you have two sets of loops ready to go!

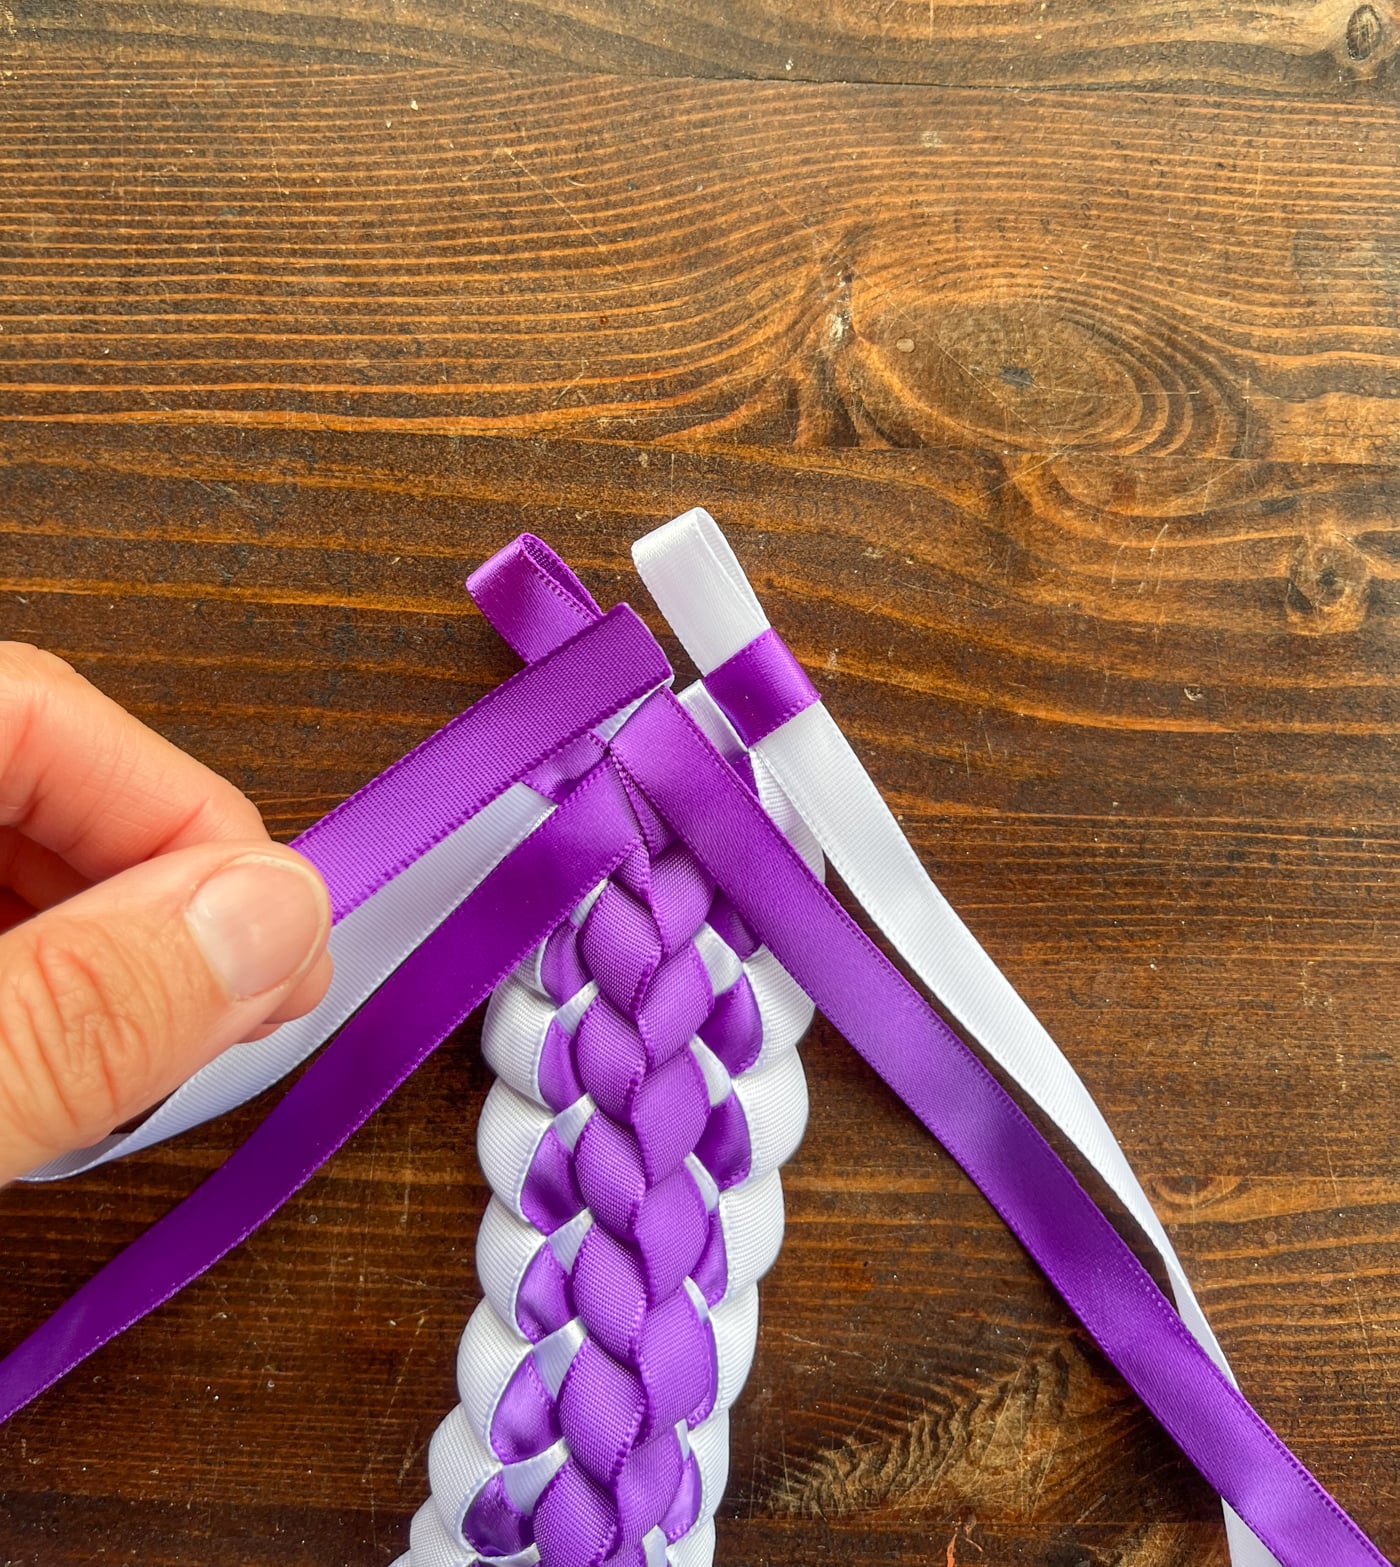
Set up your ribbons exactly as shown below. It's hard to put into words so please look at the photo! The set of ribbons that's up and to the right will lie underneath the set of ribbons that's down and to the left.
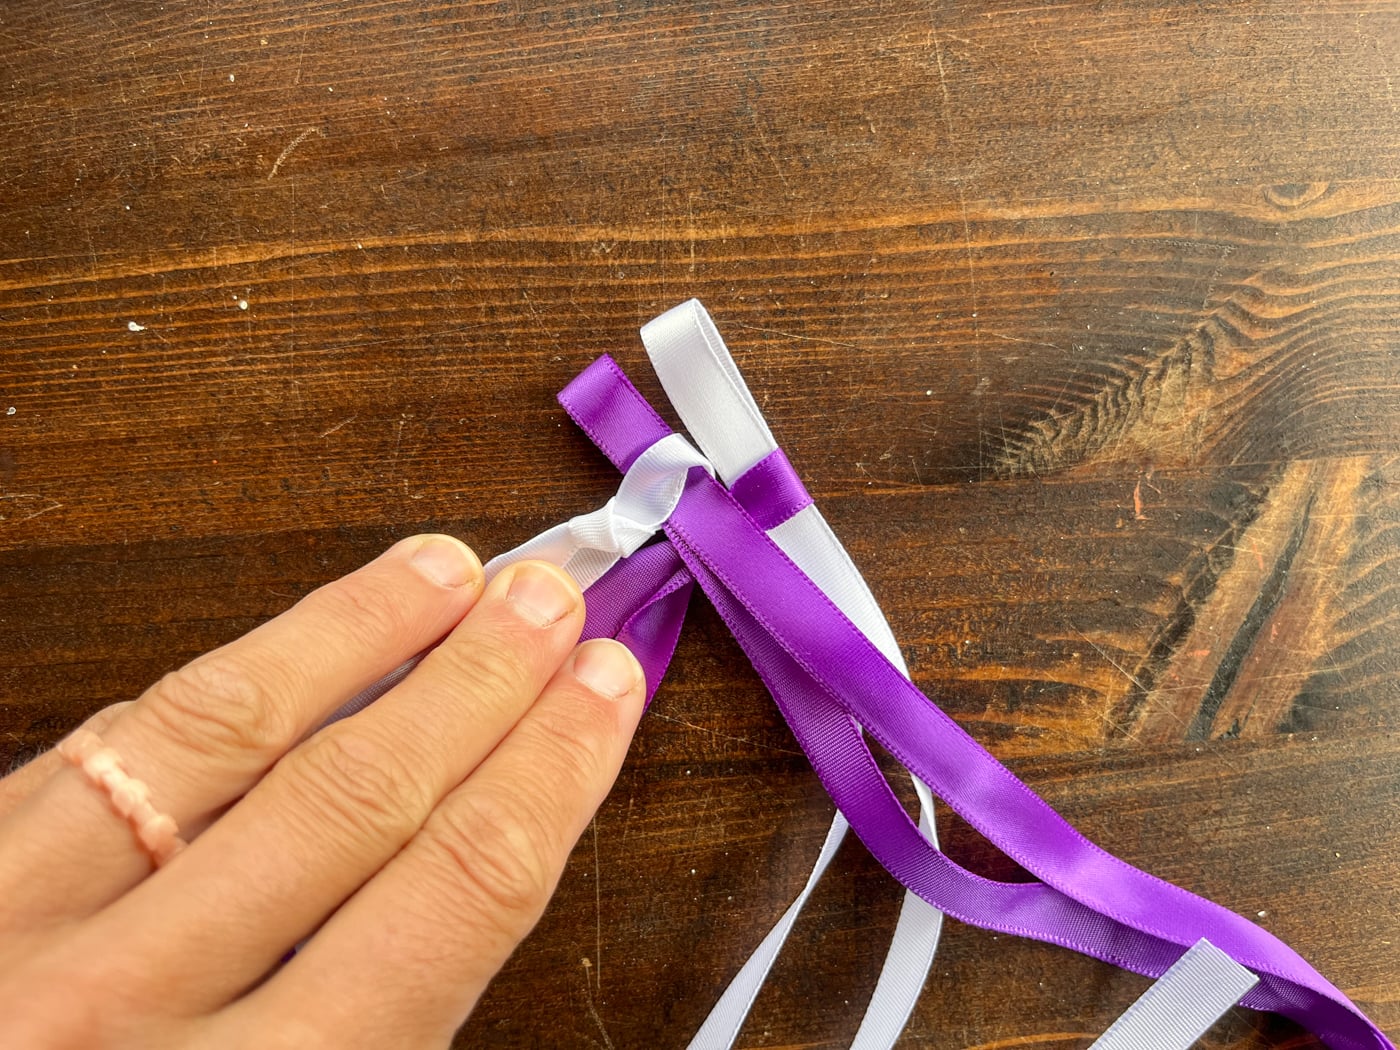
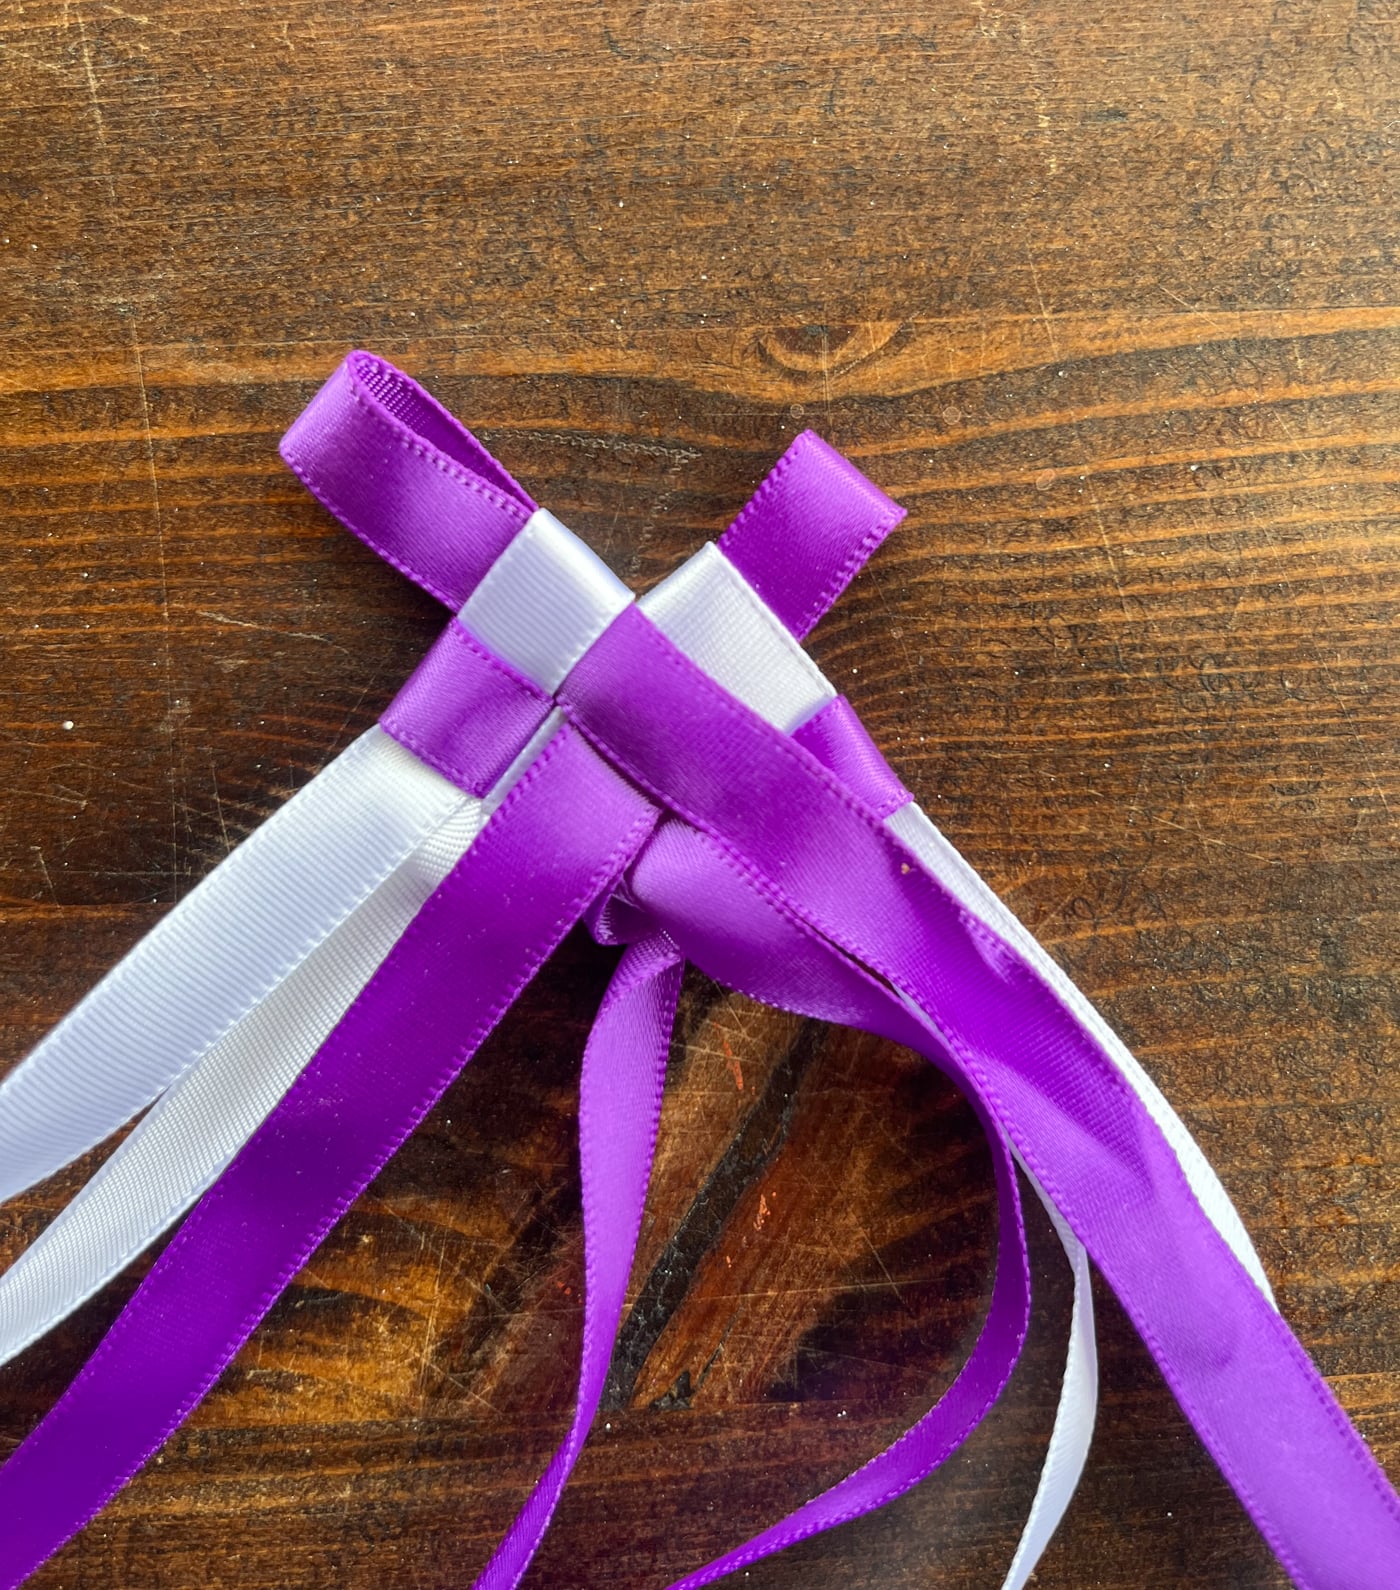
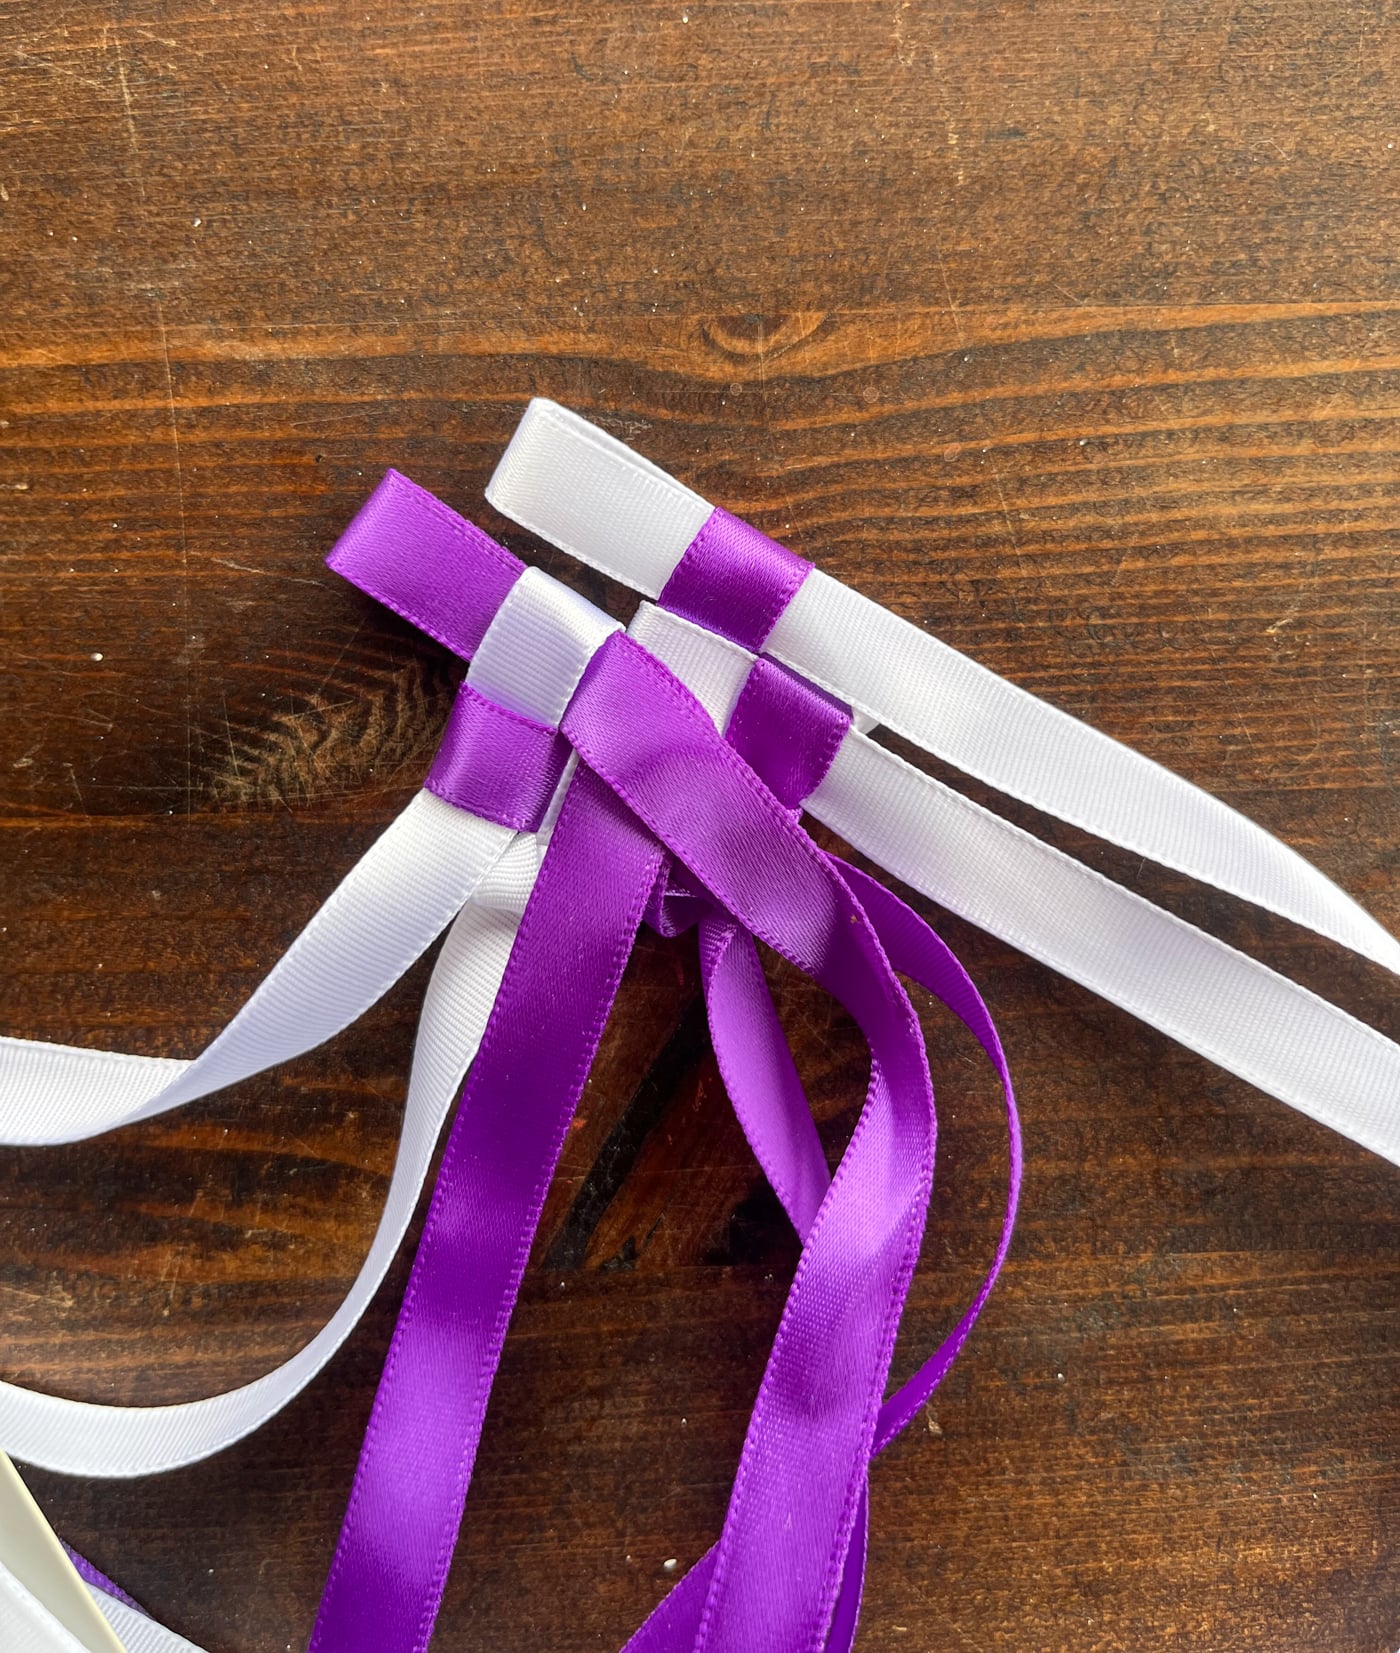
The Double Braid Rhythm
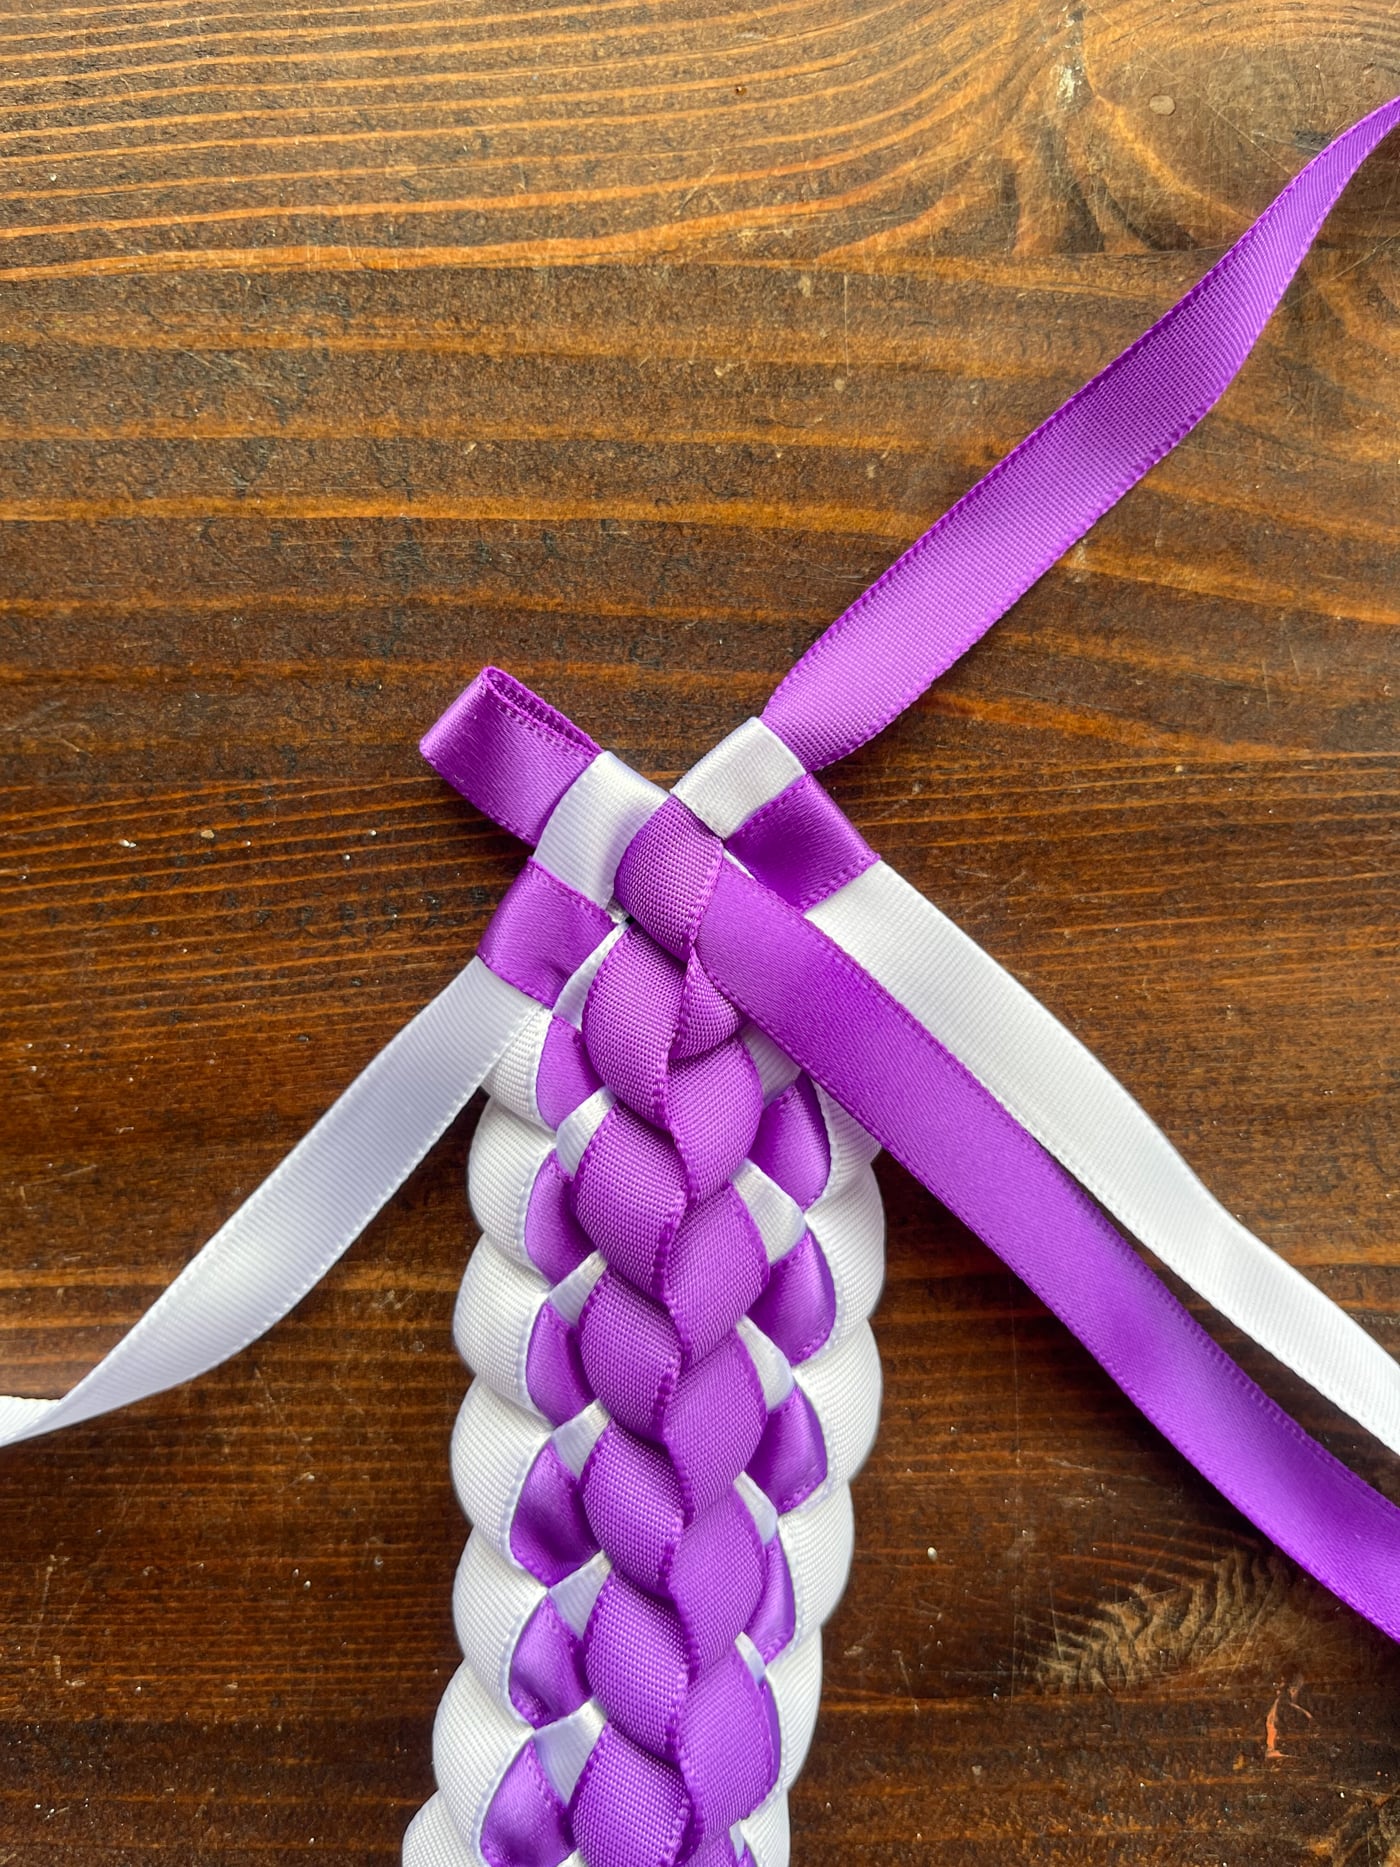
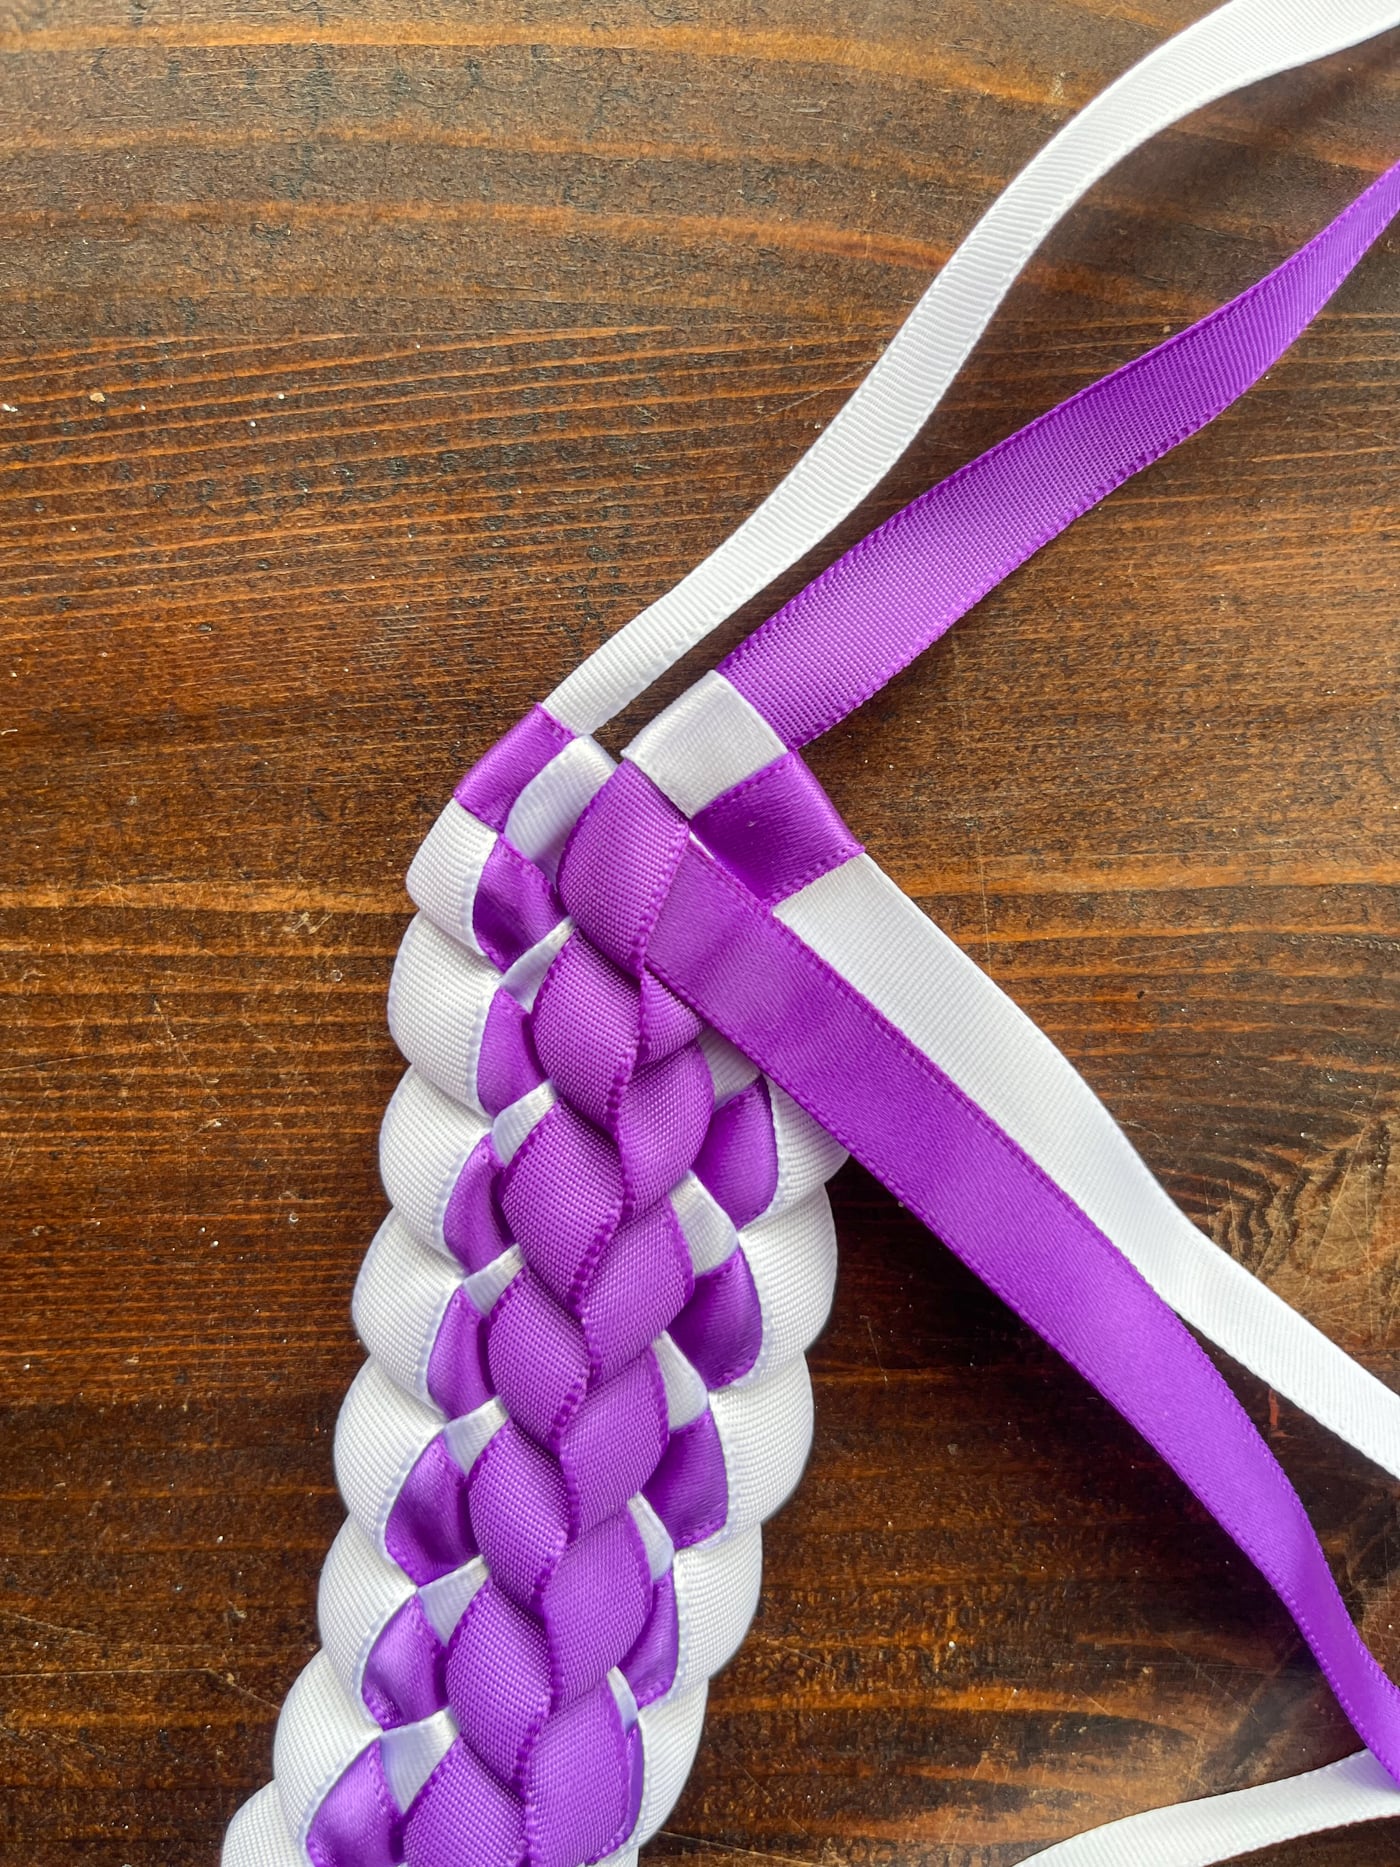
Now you'll repeat this sequence of steps over and over. Always start with the set of ribbons that is "on top."
Make a new bunny ear loop with the partner ribbon of that top loop.
Slide that new loop through the existing one.
Pull the old loop tight to secure it.
Now move to the other side and do the same thing.
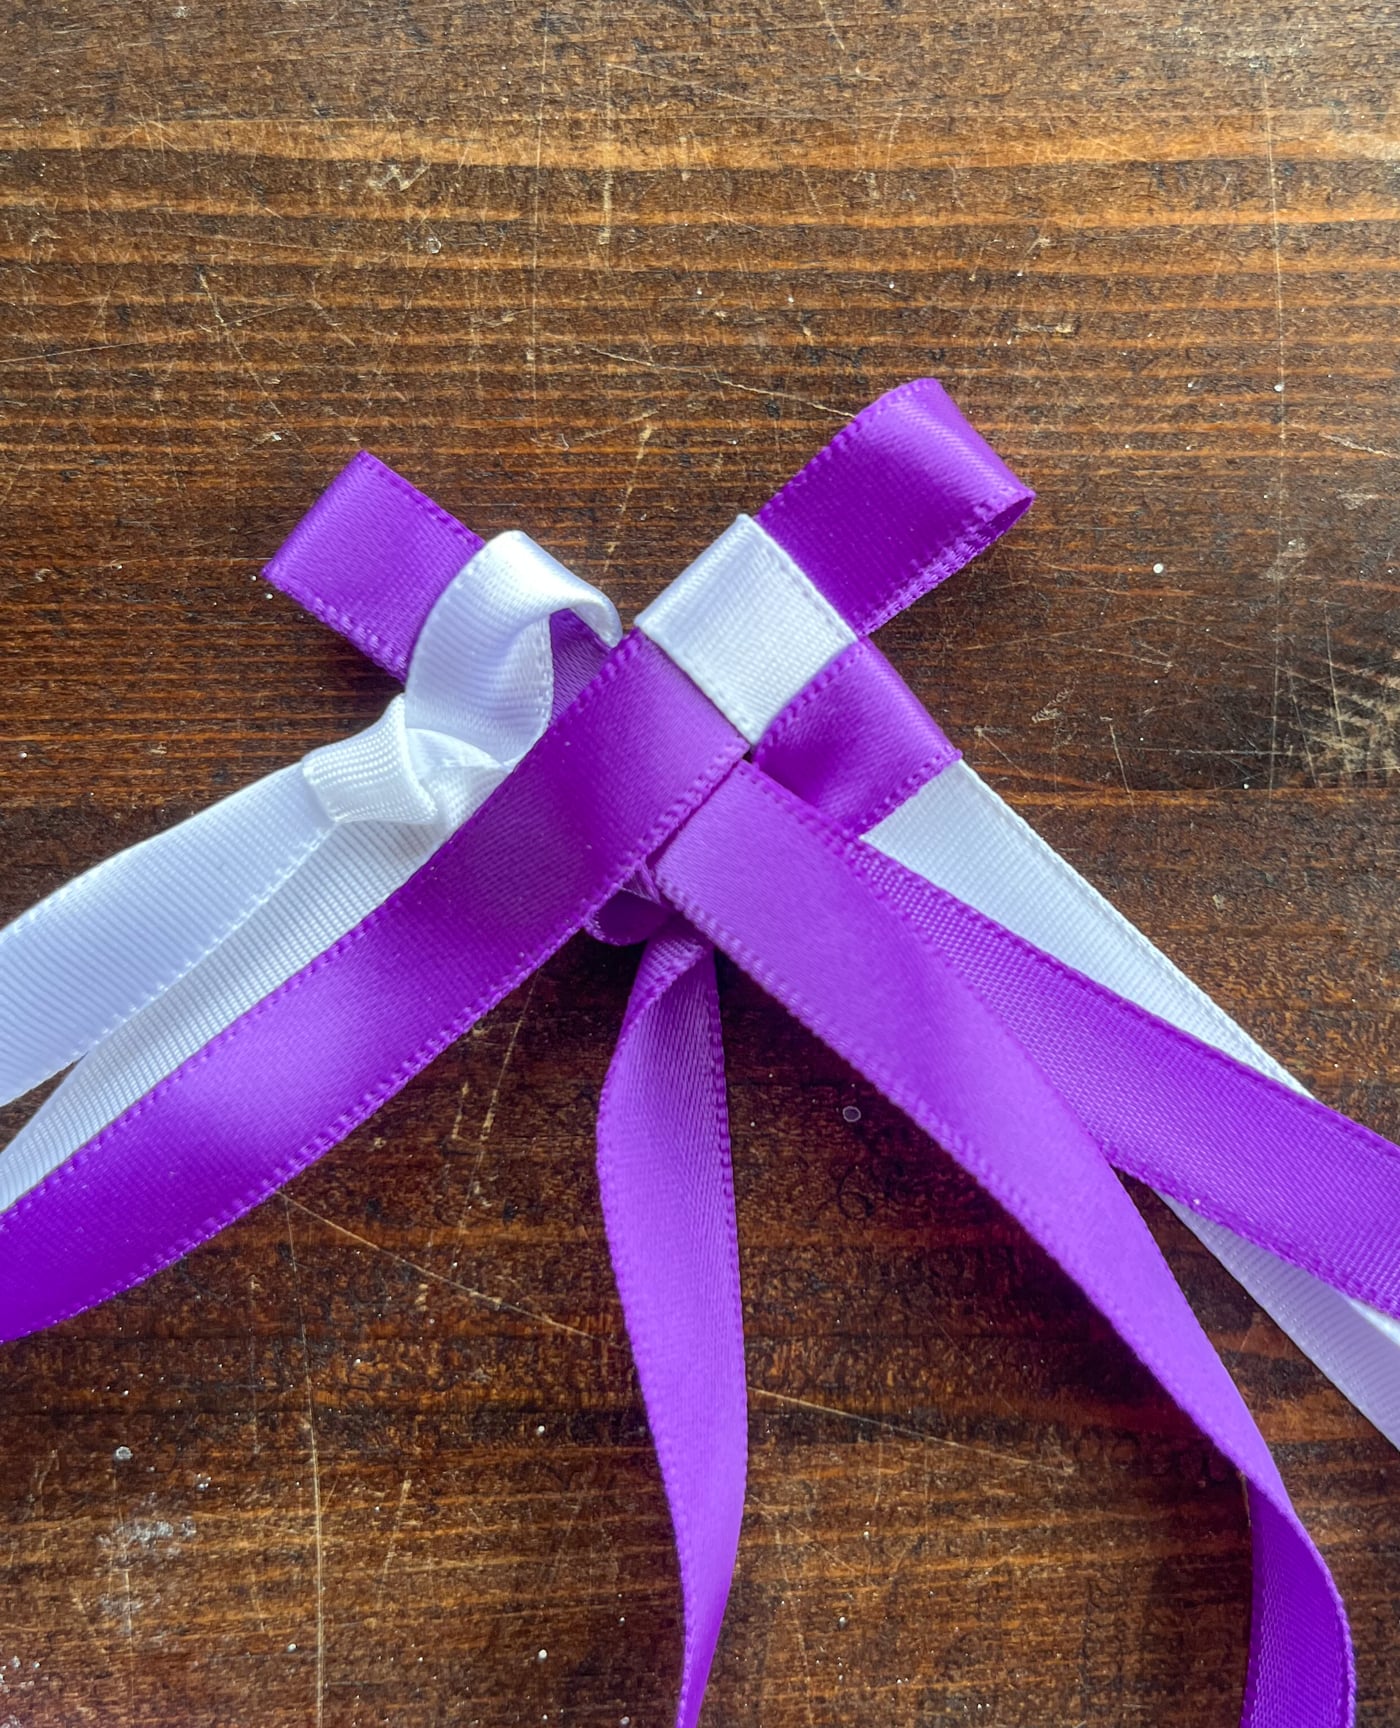
It’s just a cycle of: Loop, Insert, Pull. Once you do it a few times, you’ll start to see that gorgeous checkerboard pattern emerge.
Always start with the pair of ribbons that's on top. This means you'll do the second loop with a ribbon, then immediately work that same ribbon pair again. Please watch the video towards the top of the tutorial if you're confused!
Letting your ribbons stay loose will keep the braid more flat. Pulling them a bit more snugly will give the lei a more 3D appearance. My yardage estimates are based on pull the lei tight enough to have it pop up a bit.
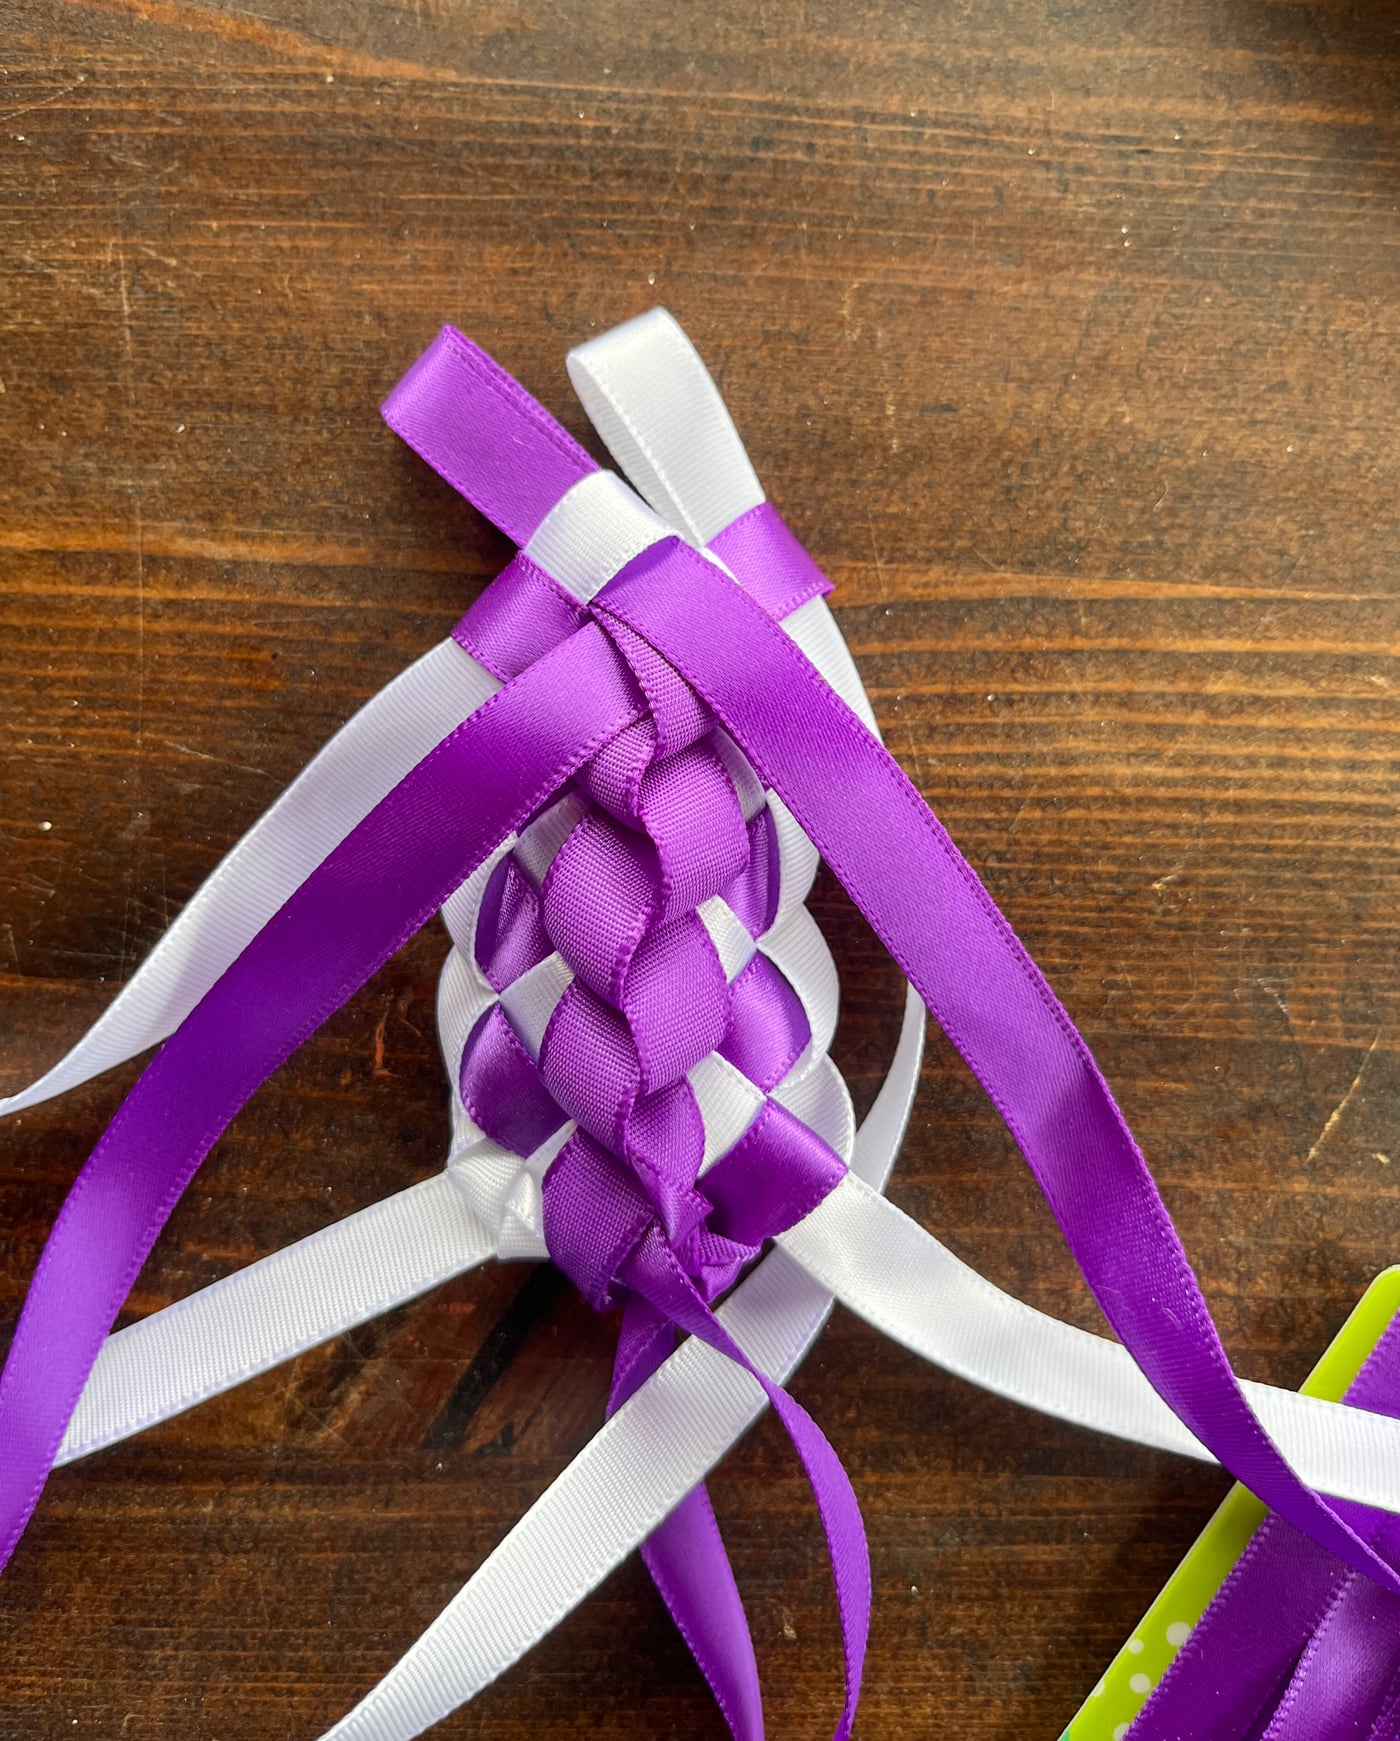
Keep Going!
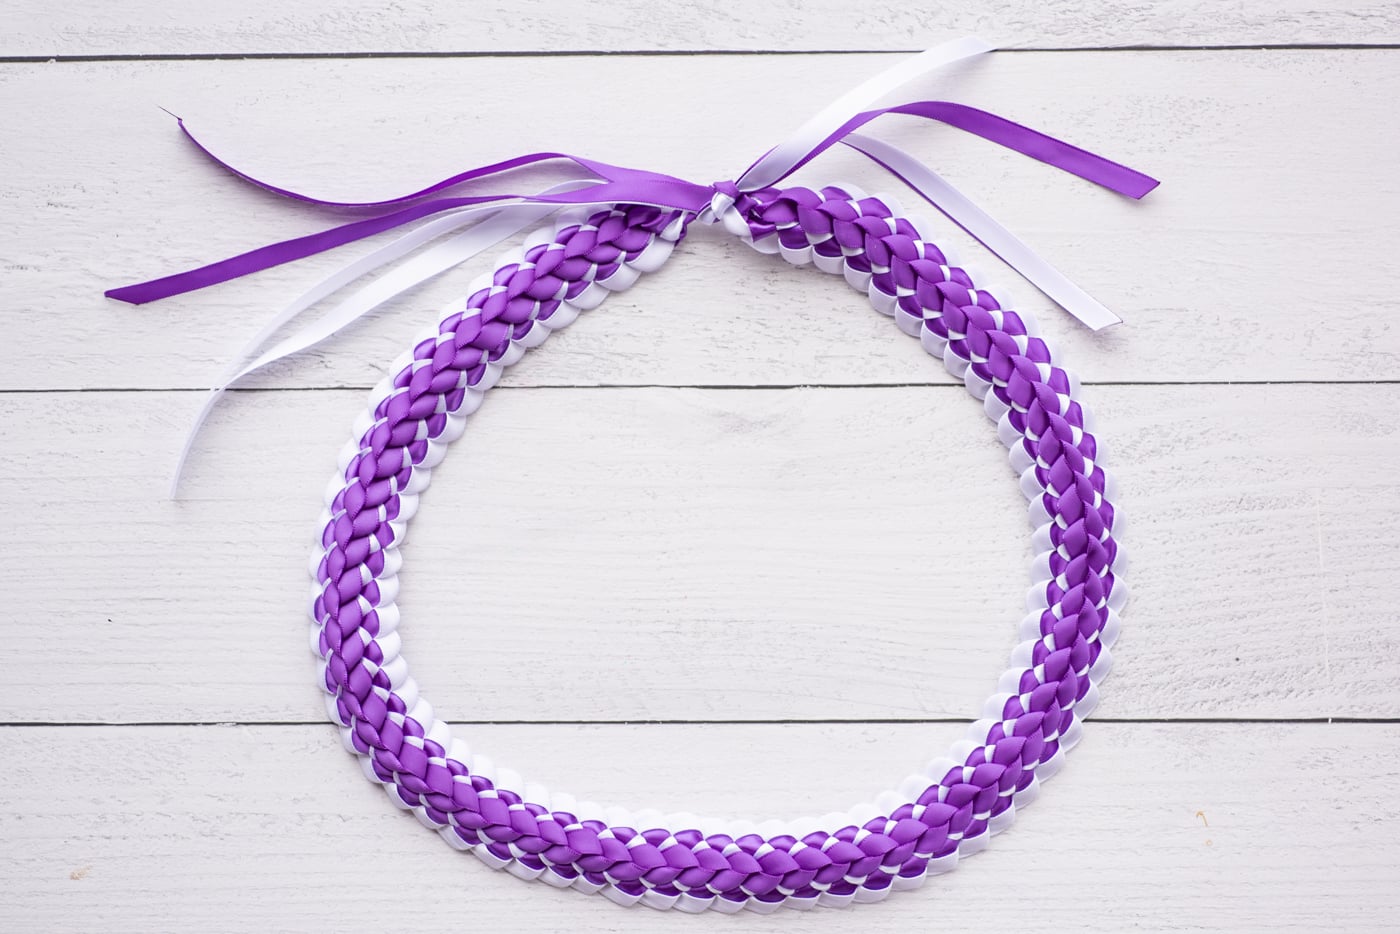
Keep at it until the lei is about 36 inches long (or however long you want it to be).
Finishing your lei
When you reach the end, instead of leaving a loop, just pull the tail of the ribbon all the way through the last loop and tug it tight. Tie the two ends of the lei together in a sturdy knot.
You can tie a bow or attach a larger, fluffy bow.
Trim up the ribbon ends to make them even then give them a quick zap with your lighter to seal them, and you’re done!

Here's what your completed lei will look like!
Gift it Like a Pro
When you give it to Mom, remember to place it over her shoulders and give her a hug. It’s a handmade gift that she can keep in her keepsake box forever.


Leave a Reply