This post may include affiliate links, which means I may make a commission on purchases made through these links at no additional cost to you.
Discover how to make an easy water beads essential oil diffuser!
Although spring may not be as different from the other seasons here in Hawaii as spring in other places, there are some seasonal variations. For one, there are several lovely-smelling plants that bloom most abundantly this time of year. I also can't help associating spring with spring cleaning, opening windows, and letting fresh air in (even though we have our windows open year-round here!). To celebrate spring this year, I decided to make a bright-smelling water beads essential oil diffuser!
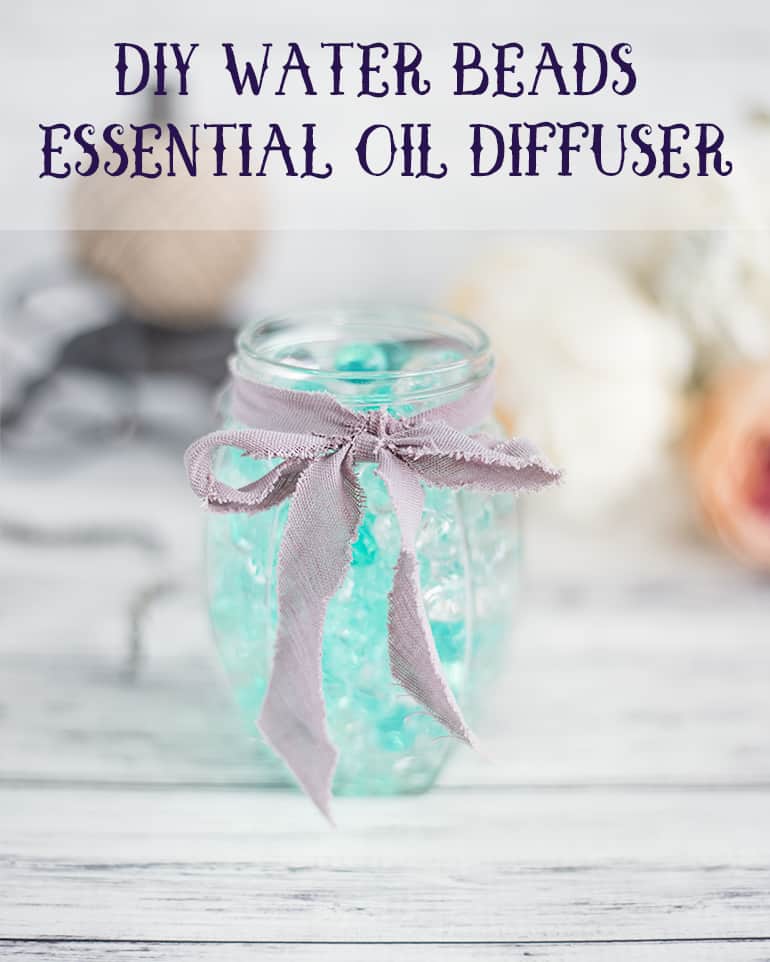
An essential oil diffuser is a simple way to add non-chemical scents to your home any time of year, but since this month's challenge is about celebrating spring I decided to use a bright and cheerful scent - wild orange. Lemon or lime could also work well, as would something more floral like lavender. As a note - many citrus oils dissolve petroleum products. You shouldn't have a problem with the beads, but please do make sure you're using a glass jar and not a plastic container. Making a water beads essential oil diffuser is super simple, and a great opportunity to upcycle a glass jar!
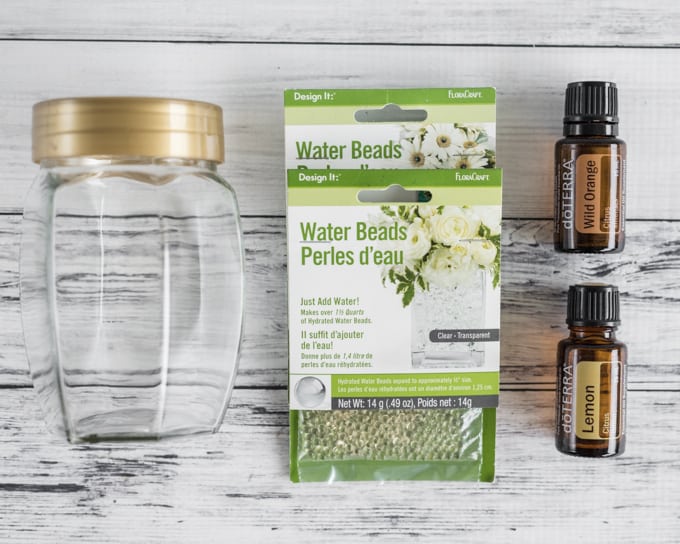
Materials needed to make a water bead essential oil diffuser
- Water beads! I happened to have both clear and turquoise, but you won't even need one full package for a single diffuser
- A jar - I used an upcycled honey jar
- Water
- A large bowl
- Essential oils. I used to only use DoTerra, but there are so many pure essential oils available today that are fine for diffusing. The Now Foods single oils, for example, are a great affordable option.
- Ribbon, twine, lace, etc. to decorate your jar - optional but fun!
How to make a Water Bead Essential Oil Diffuser
Get a large bowl and consult the packaging your water beads came in. Different beads expand differently, so see if your brand has particular advice on how much water to use! I used a heaping teaspoon full of beads for my jar. Don't be afraid to add more water than you think you'll need - it's easy to drain the beads when you're ready to use them and they need to be fully submerged in order to expand properly.
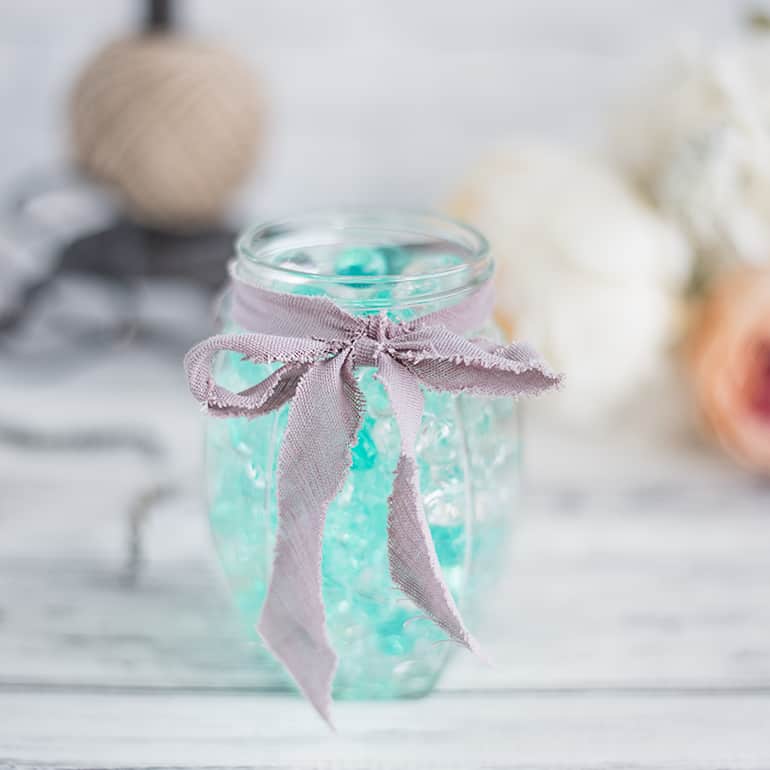
While you're waiting for your beads to expand, you can decorate your jar! I added a simple bow made from linen scraps, but twine, lace, ribbon, and flowers would all look nice.

Most beads take 4-6 hours to expand, but some take longer. You can use them whenever you like the way they look, though! Mine claim to have a full size of about ½", but I wanted them slightly smaller. You can also add more beads part way through the soaking process to have varying sizes of beads in your jar. When you're ready, drain off excess water and transfer the water beads to your prepared jar.
![]()
Add a few drops of your favorite essential oil and stir/shake gently to combine. The exact amount you'll need depends on your jar and oils, but I used about 20 drops.
Reapply a little oil every 2-3 days, or as needed, to keep the scent strong, and add a little water periodically to keep the beads hydrated. The exact amount of water you'll need to add depends on your weather - humid conditions help keep the beads hydrated, but dry weather will dehydrate them more quickly.
How are you celebrating spring?
![]()
More Related Posts
[pt_view id=“15d429e15n"]
[catlist search="tutorial" numberposts=4 orderby=rand excludeposts=this]
Julie
I love this idea! Now I'll be on a hunt to find water beads here in Singers...!
Natashalh
Good luck! They're quite popular for weddings, so maybe somewhere will have them.