Discover how to make your own rustic taper candles with this easy tutorial!
In middle and high school, I'd have an argument each year with my dad about the Christmas candles in my bedroom window. All those little light bulbs in my window annoyed me and kept me awake, so I'd unplug them when I went to bed.
If the modern, LED, battery operated Christmas candles were around then, I might have left them turned on because they glow more faintly - almost like a real candle instead of that annoyingly bright bulb from the old plug in candles!
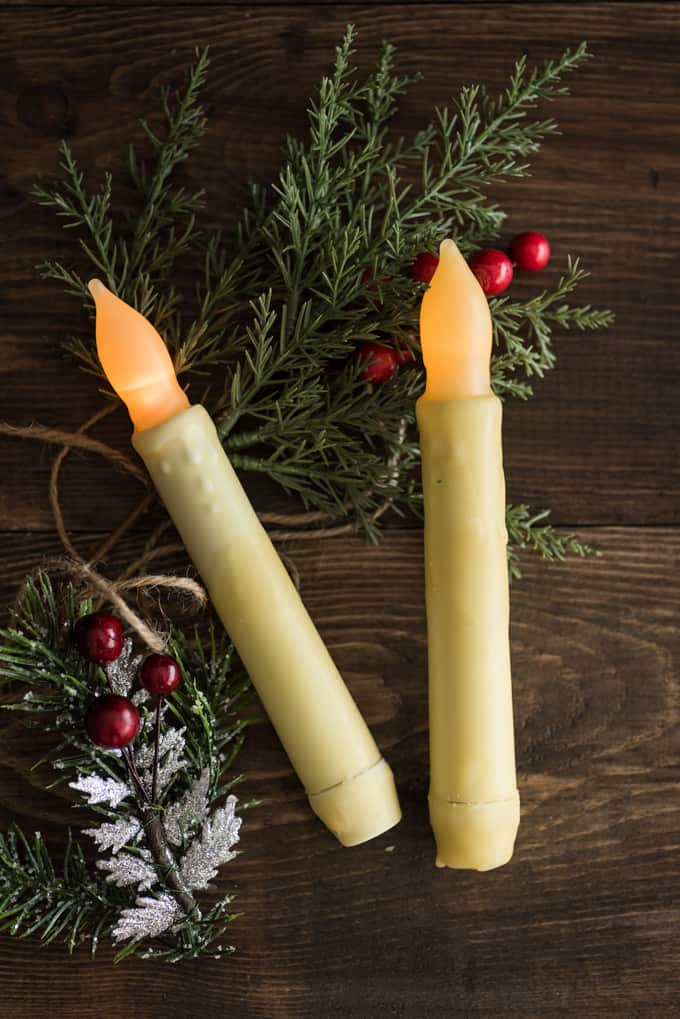
In today's tutorial, I'm sharing how to how to make DIY rustic wax covered LED taper candles you can decorate with all year long!

This post may include affiliate links, which means I may make a commission on purchases made through these links at no additional cost to you.
Like many of the tutorials I share, this project is very customizable. You can choose to use beeswax, as I did, soy wax for a whiter look, or even colored or scented wax. You can decorate the tapers for Christmas, tie lace on them for spring, or make them spooky for Halloween.
Materials needed to make wax covered LED taper candles
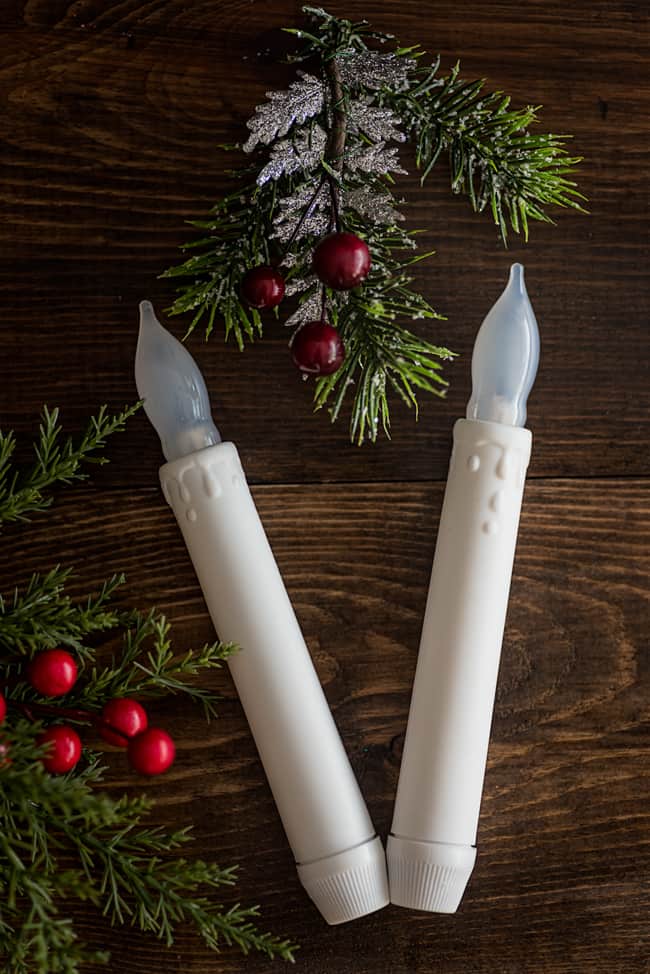
- LED taper candles!
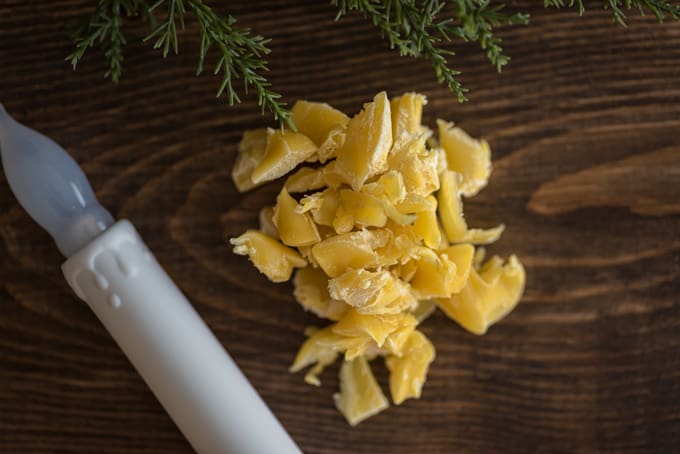
- Wax. I used beeswax, but you can use pretty much any kind of candle wax
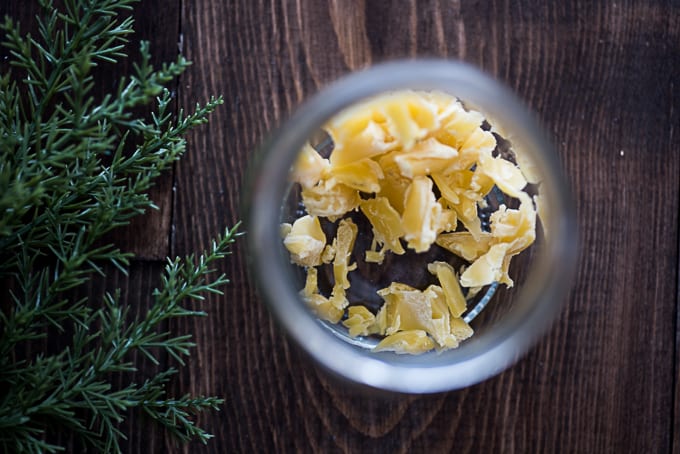
- A glass jar, I used a pint Ball canning jar, and a pan to make a double boiler with using said glass jar, or a tempered glass cup/glass you don't mind using with wax.
- A hobby knife or box cutter
- Decorative items, optional. I used a bit of lace and burlap
- Oven mits, a towel, or something else to hold the container of melted wax
- Parchment paper or a nonstick crafting mat


How to make wax covered LED candles
The basic process is very simple - melt some wax then dip the taper in! Unless you have a whole lot of wax and a deep container, you'll probably need to carefully tilt the container, preferably a high-sided glass or jar, and dip half a candle at a time.
You can melt your wax wither in the microwave or in a double boiler on the stove. For two candles, I melted about 2 oz of wax. Melting more wax takes more time, but also makes it easier to dip the candle.
If you're using the microwave, keep a very close eye on it. It can melt in as little as 2 minutes or take closer to 4-5, so watch the wax carefully and make sure to use a microwave safe container.
To set up a double boiler, place your wax in a jar or other high-sided, heatable container. Canning jars work well! Put several inches of water in a pan and carefully place the wax filled jar in the water. Try to avoid having the jar sit directly on the bottom. You can carefully set the jar's lip on the edge of the pan, hold it in place with tongs, or even fit the pan with a steamer basked and let the jar sit on the basket. Place your double boiler on a medium-low heat burner and watch it carefully. Some waxes melt very quickly!
While the wax is melting, set out a square of parchment paper.
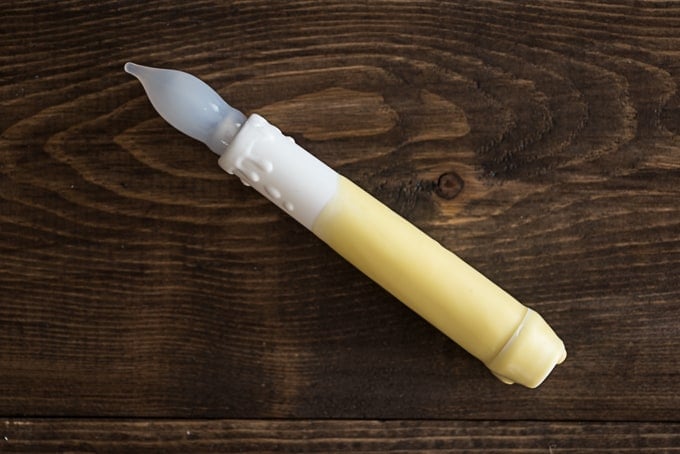
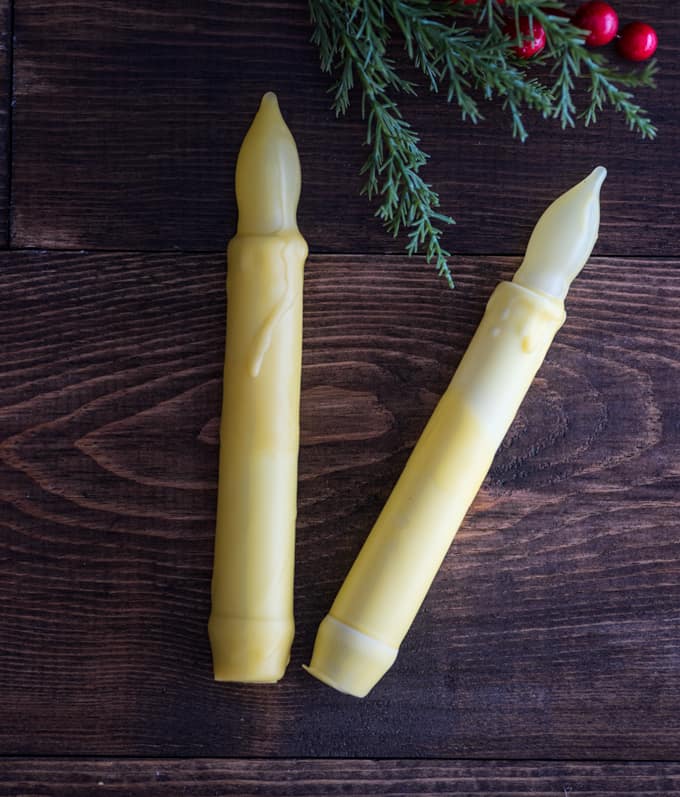
Once your wax has melted, carefully use your oven mitts, towel, or something similar to hold your container of melted wax in one hand and carefully dip the bottom end of a taper into the wax. Holding the wax container on its side is helpful - you need to get wax at least half way up the taper. Remove the candle from the wax and allow any excess to drip off. Hold it in the air for a few seconds before setting it on the wax paper - you want the wax to be mostly cool so it doesn't flatten out against the paper and look funny.
Update - Wearing silicone finger protectors is a really good idea in case your fingers accidentally get too close to the wax! They're also great for any time you work with hot glue.
No products found.
Repeat this process with the bottom end of your remaining tapers.
If you need to, reheat the wax a little.
Repeat the dipping process for the 'top' end of your tapers, quickly rotating each taper as you pull it from the wax so any drips will naturally fall down, adding to the realistic 'burning candle' appearance.
After the candles are fully cooled and the wax is no longer tacky, use a hobby knife or box cutter (or even a regular, non serrated kitchen knife) to carefully cut the wax around the base where it unscrews to add batteries.
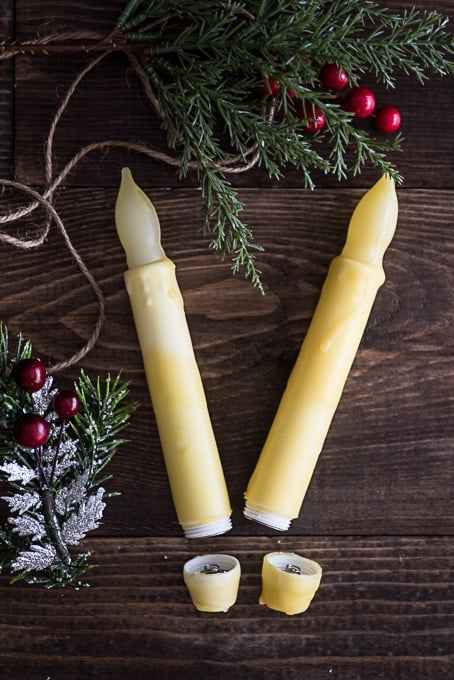
Add batteries, screw the end caps back on, and you're basically ready to rock!
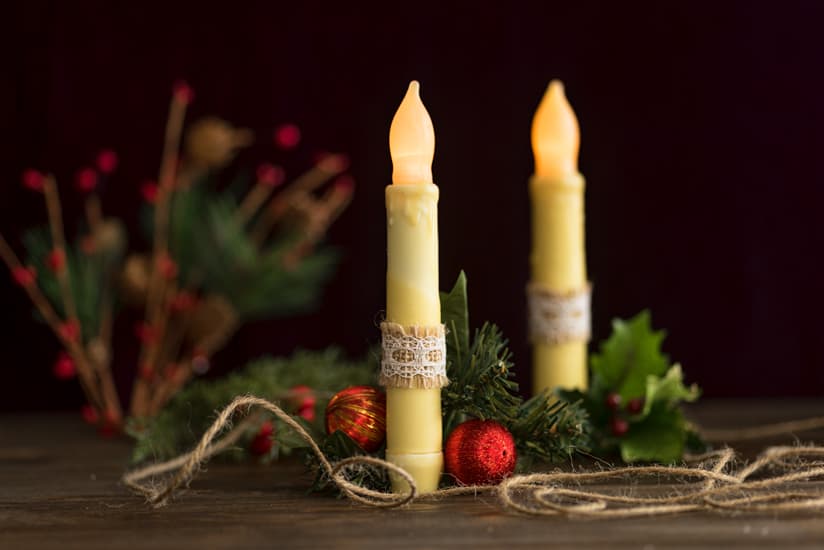
If you'd like, you can decorate your wax covered tapers. I wrapped a simple band of lace and burlap around each candle and held it in place with a dab of hot glue. As mentioned above, you could add just about anything to personalize the candles to your decor or the time of year!
This same technique can be used for pillar candles, too, which would be great for tablescapes and displays around the house. I enjoy candles, but I'm paranoid about leaving them unattended or having them in places where they might pose a fire hazard, so using wax dipped LED candles is a fantastic solution for me.
How about you? Are you one of those people who can leave candles burning and not panic? Or do you insist on keeping an eagle eye on them, like me?


Jilleah
Thank you. I was wondering if I could dip plastic candles. We are getting married after a 19 year engagement and a 17 year old daughter together. We are doing the wedding we’ve had to postpone for nearly two decades. Between an unexpected pregnancy at 40, a heart attack, open heart surgery, melanoma, several other surgeries, and just being broke, we are tying the knot May 29,2021. It the gothic wedding we originally planned for 2003. Most of the decorations in the chapel will be elaborate candelabras. I need nearly 100 tapers in black and red. We are not made of money. We even started a GoFund me account. So this will save us big bucks. So, thanks again.
Duni
Another great idea, Natasha! I associate the smell of beeswax with Christmas - perfect 🙂
I do have real candles at Christmas, but they are never unattended, not with kitties in the house!
Happy Christmas!
Natashalh
Thank you. =) I absolutely love beeswax candles! They smell so wonderful. Kitties + burning candles is certainly a combination to keep an eye on! My mom seems surprised that her bouncy boys (brothers just about a year old) haven't knocked her tree over yet.