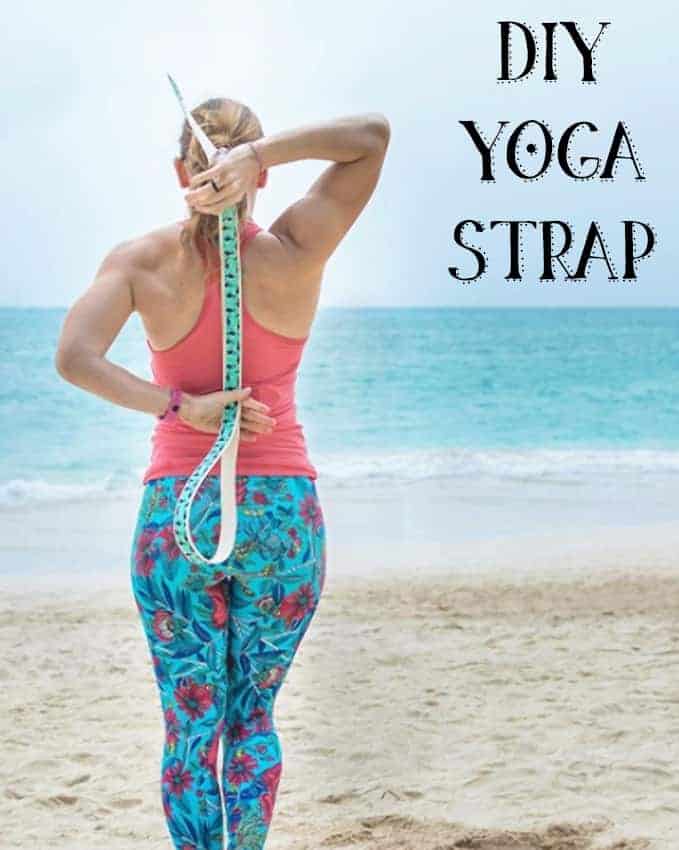
Learn how to make your own yoga strap with this easy tutorial!
Last spring I decided to start making yoga straps for sale. I got all the materials, made some prototypes and...got busy, went away for a month, and never listed then on Etsy. Eek!
For various reasons, I've decided to put selling yoga straps on indefinite hold. Because I get requests from people wanting to know if I make yoga straps (I do make yoga mat straps, so it's a fair question!), I decided to share this DIY yoga strap tutorial today.
It's fairly easy to make your own cute yoga strap decorated wth a fabric you like, plus you can make your yoga strap a custom length instead of relying on what you can find at the store.
This post may include affiliate links, which means I may make a commission on purchases made through these links at no additional cost to you.
The measurements I give are based on a 'standard' 6 foot yoga strap. However, as we all know, every person is different! If you need a longer strap, please just modify the lengths as needed to make your own custom yoga strap.
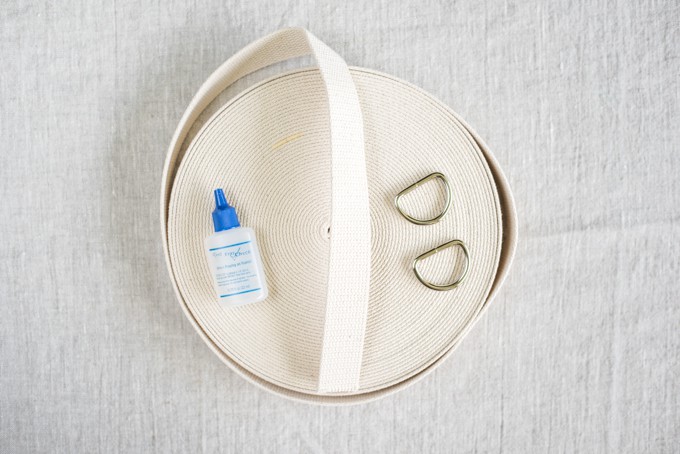
Materials for a DIY yoga strap
- 6'2" of 1.25" heavyweight cotton webbing, or more, if needed. A webbing length of 6'2" will give you a finished yoga strap that's 6' long. A lot of fabric stores have cotton webbing, but mine doesn't. 🙁 I ordered my webbing and hardware from All Island Webbing.
- 2 heavy duty 1.25" D rings
- FrayCheck or your favorite similar product (optional, but very helpful)
- Decorative cotton fabric. You'll need a piece just over 6' long and 2" wide, but it doesn't have to be in a continuous piece.
- Scissors and a cardboard cutting mat or a rotary cutter set
- Wonder Clips, or other quilting clips
- An iron/ironing board
- Sewing machine with needle and thread to match your webbing or fabric
How to make your own yoga strap
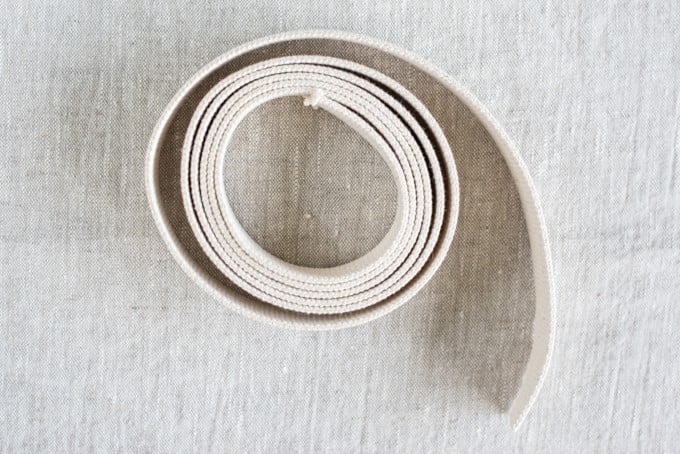
Measure and cut 6'2" feet of webbing, or more if you need greater length. Treat the ends with FrayCheck to prevent unraveling.
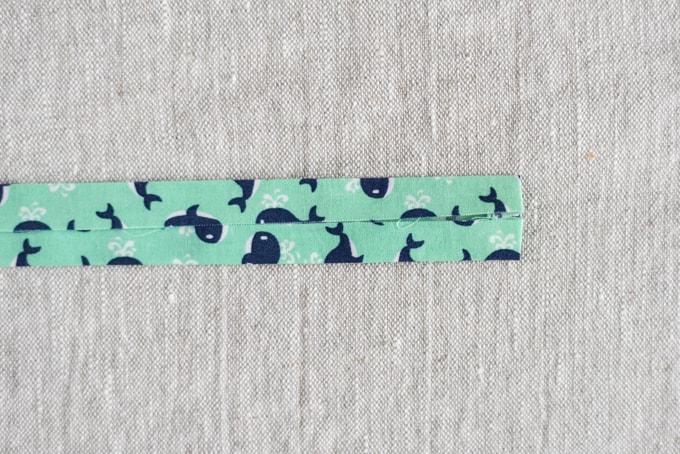
Iron your fabric then cut a strip that is 6'2" long and 2", or just slightly less, wide.
If you can't make a continuous strip of 6'2", don't worry! Cut mulptile 2" wide strips, but make sure to add .25" of length to each piece to account for stitching the fabric together.
If needed, clip or pin strips right sides together and stitch with a .25" seam allowance to piece together a continuous longer piece.
Turn both short ends under about .25" and iron, then fold the long edges so they meet in the center, right sides out, and iron. Your fabric strip should look like this:
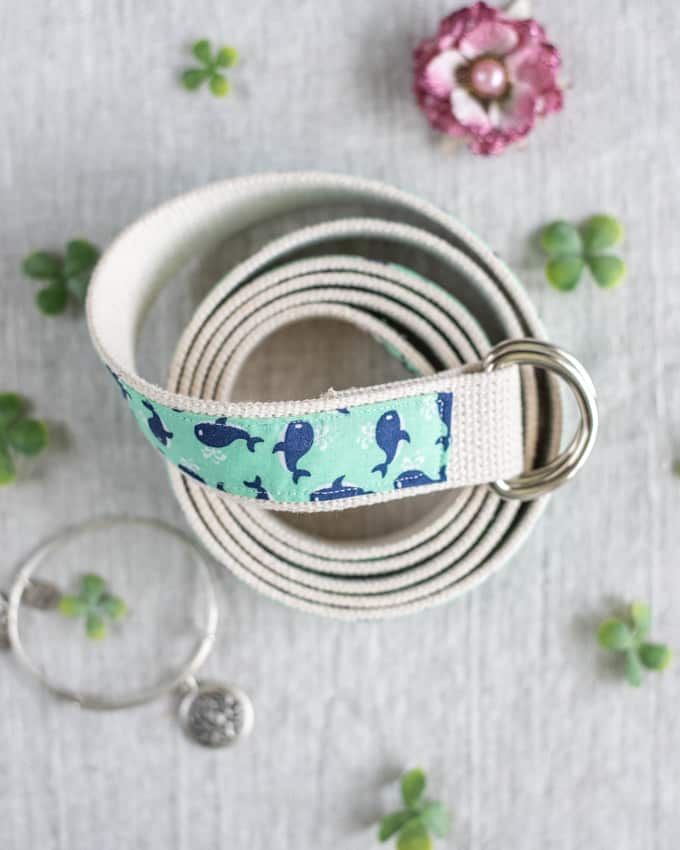
Insert the webbing through your pair of D-rings and fold over about 2" of webbing. Hold in place with clips, then sew a box stitch.
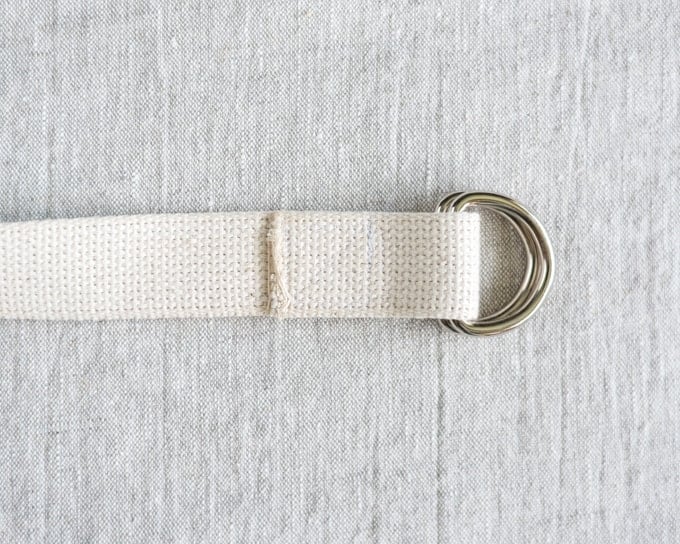
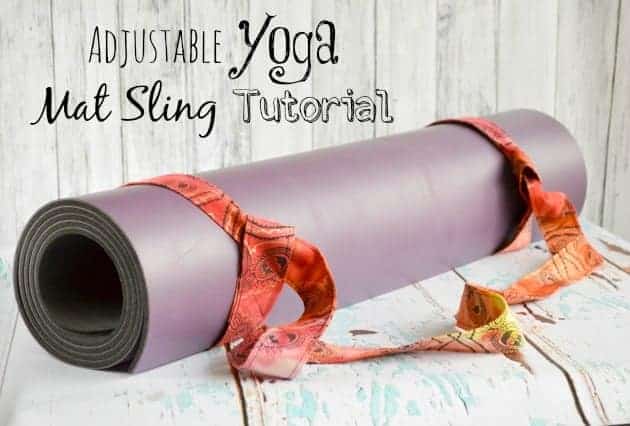
I apologize that the white on white stitching is difficult to see. You can see the box stitch a bit better in this image from my adjustable yoga mat strap tutorial:
All you need to do is sew all four corners of a box and stitch an X inside it. It's pretty simple!
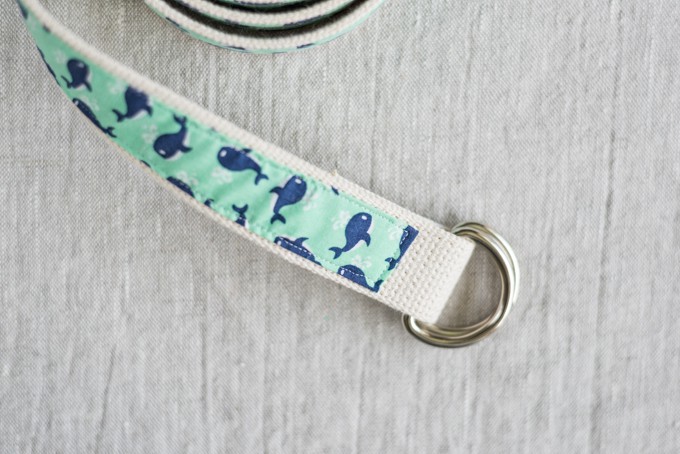
Once your D rings are in place, it's time to clip your fabric on! I like to position the strip so one end is essentially aligned with the top of the box stitch, but on the opposite side of the webbing. Here's a shot from after the stitching to show the positioning:
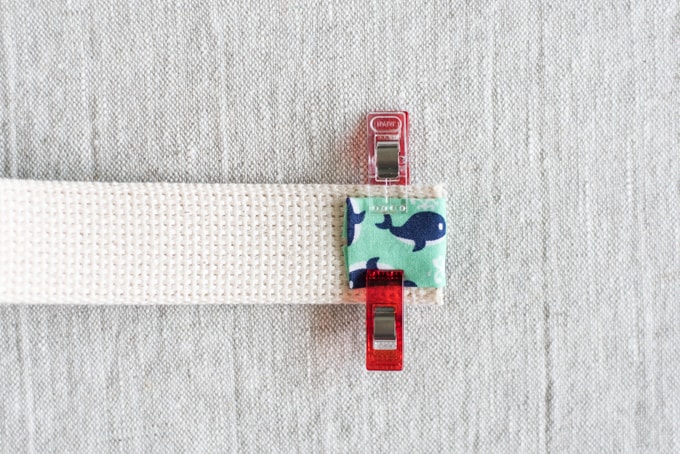
Clip the fabric in place down the length of the webbing. On the end opposite the D rings, fold the fabric to the under side to enclose the webbing's end:
Stitch the fabric in place using a medium-length straight stitch. Keep fairly close to the fabric's edge and make sure to stitch all the way around! I do recommend flipping the yoga strap over to stitch down the short end on the "back" side, as well.
Now go yoga!

I hope you enjoy this DIY yoga strap tutorial! If you have any questions, please don't hesitate to ask and I'll do my best to help or clarify. 🙂
While you have your sewing machine out, you may also enjoy checking out my adjustable yoga mat strap tutorial!
What have you made lately?

More Related Posts
[pt_view id=“15d429e15n"]
[catlist search="tutorial" numberposts=4 orderby=rand excludeposts=this]
Wanda
Thank you for this tutorial. Tomorrow I’ll go and get so material and make it.