Is it just my daughter, or is everyone totally obsessed with axolotls lately? Between Minecraft and every cute stationery shop on the planet, these little "Mexican walking fish" are everywhere.
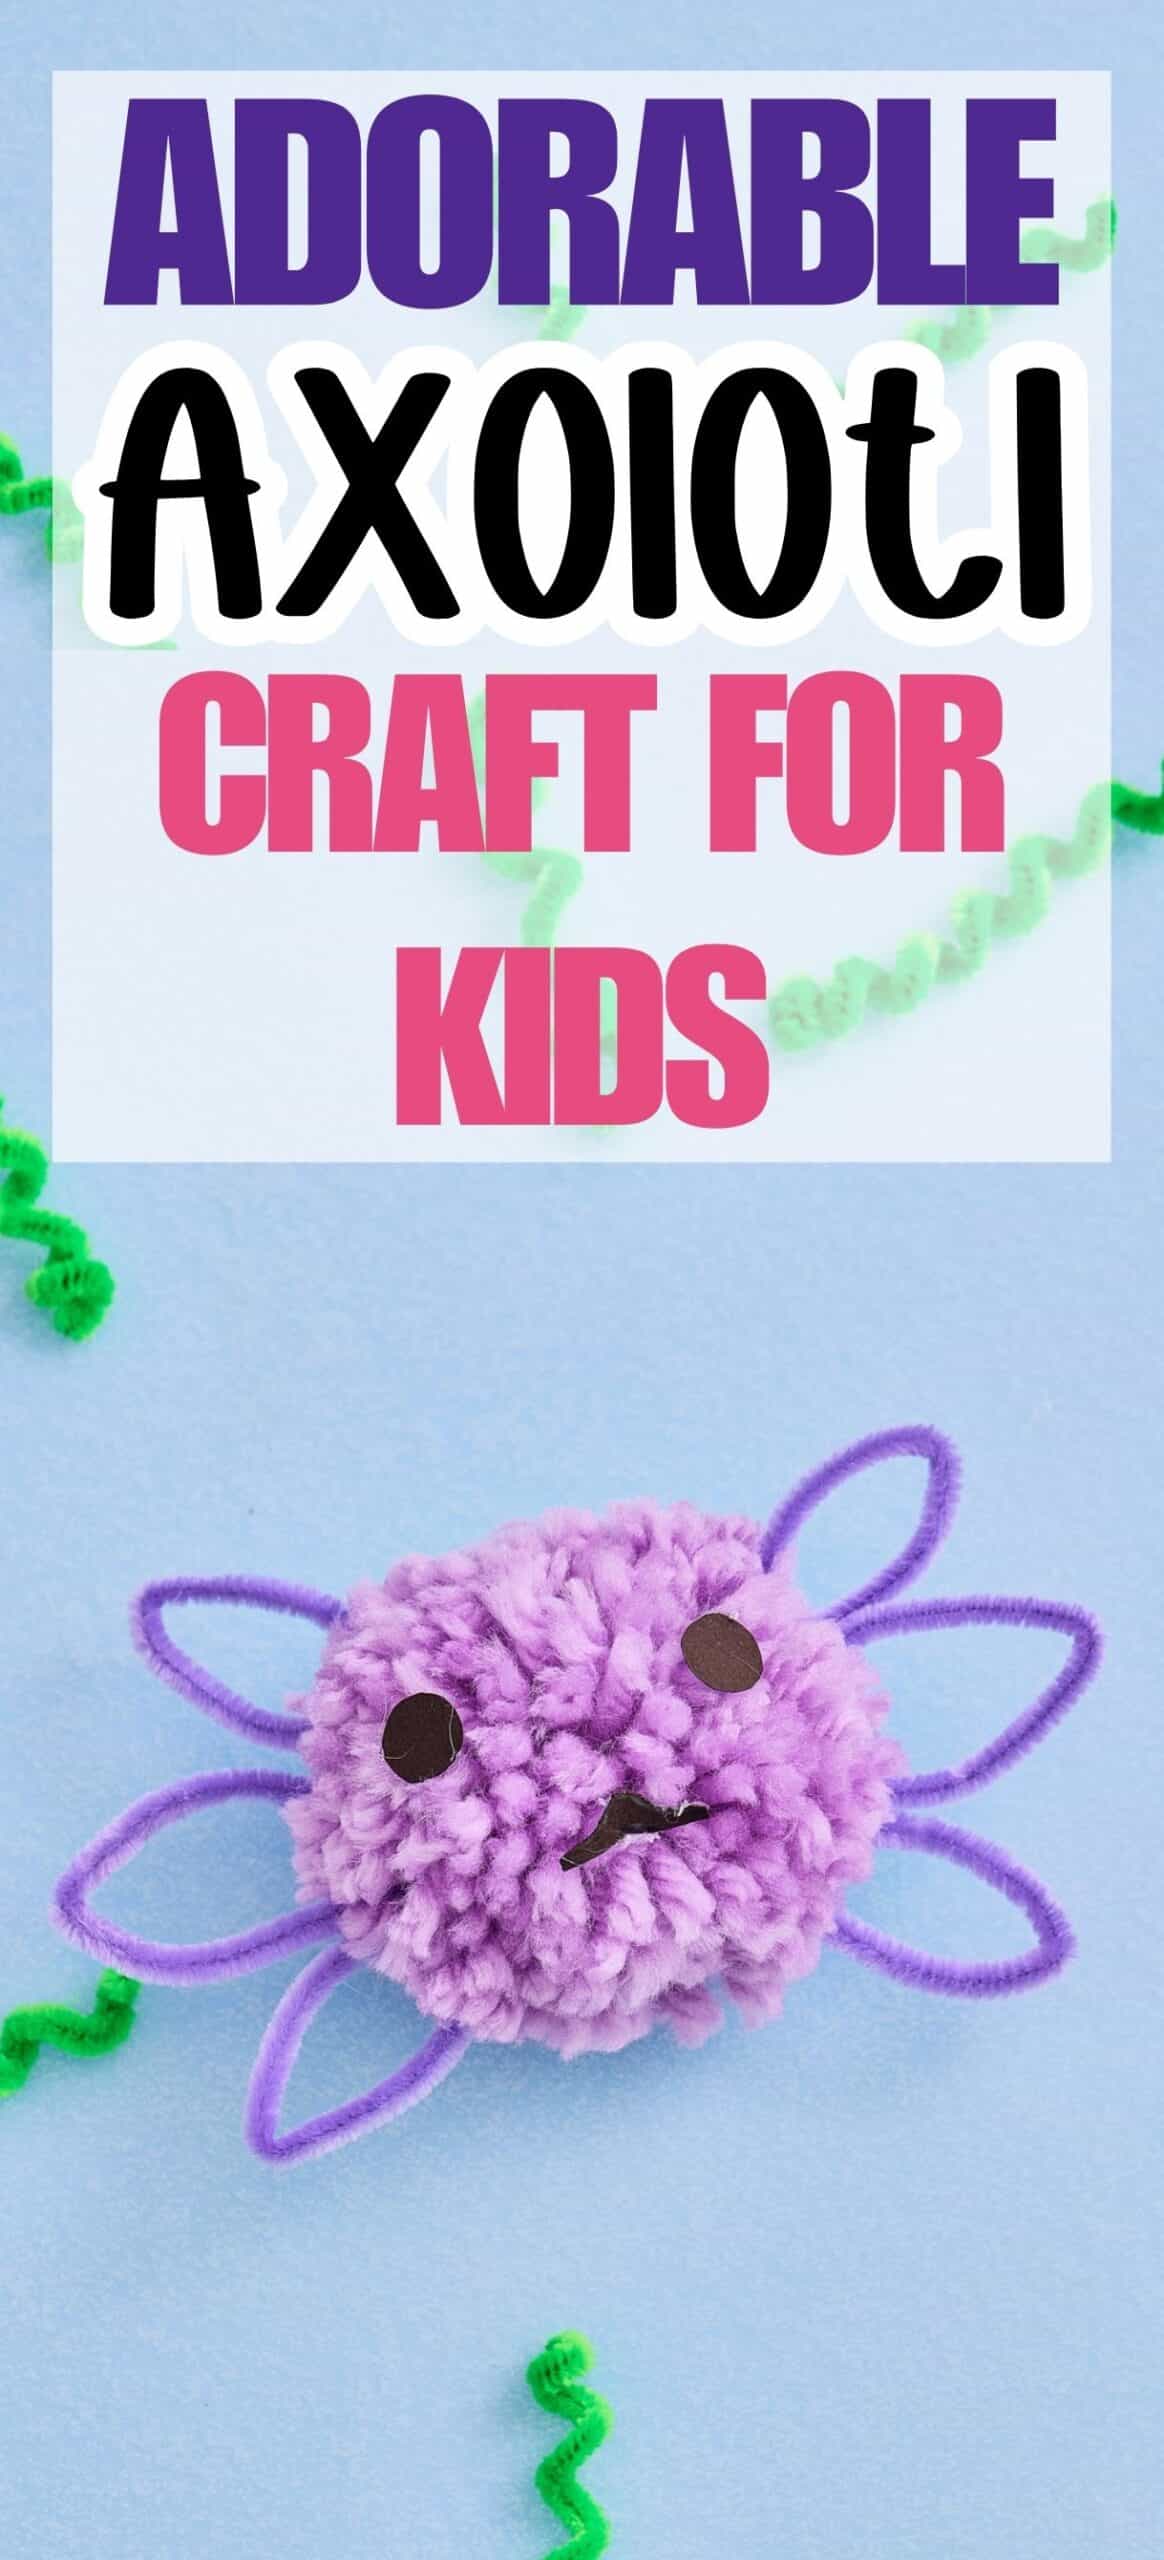
If you’re looking for a quick, budget-friendly craft to do with the kids (or just a little shot of dopamine for your own desk), you are going to love these DIY Axolotl Pom-Poms.
They take about 10 minutes to make, use supplies you probably already have in your craft bin, and they're way easier to take care of than a real aquarium!
Ready to make a tiny cute friend? Let’s get started!
This post may include affiliate links which means I may earn a commission on qualifying purchases at no additional cost to you.
My daughter is always bummed when the axolotl isn't out at the zoo. She loves these wacky looking creatures!
This activity is a great way to reinforce or extend a science lesson about axolotls. We like this Nature Kids' Guide to Axolotls with tons of real photos.

- Anderson, David (Author)
- English (Publication Language)
- 40 Pages - 01/16/2026 (Publication Date) - LP Media Inc (Publisher)
What You’ll Need for an Axolotl Pompom craft
One of the best things about this project is that it’s a great "scrap buster." You don’t need much!
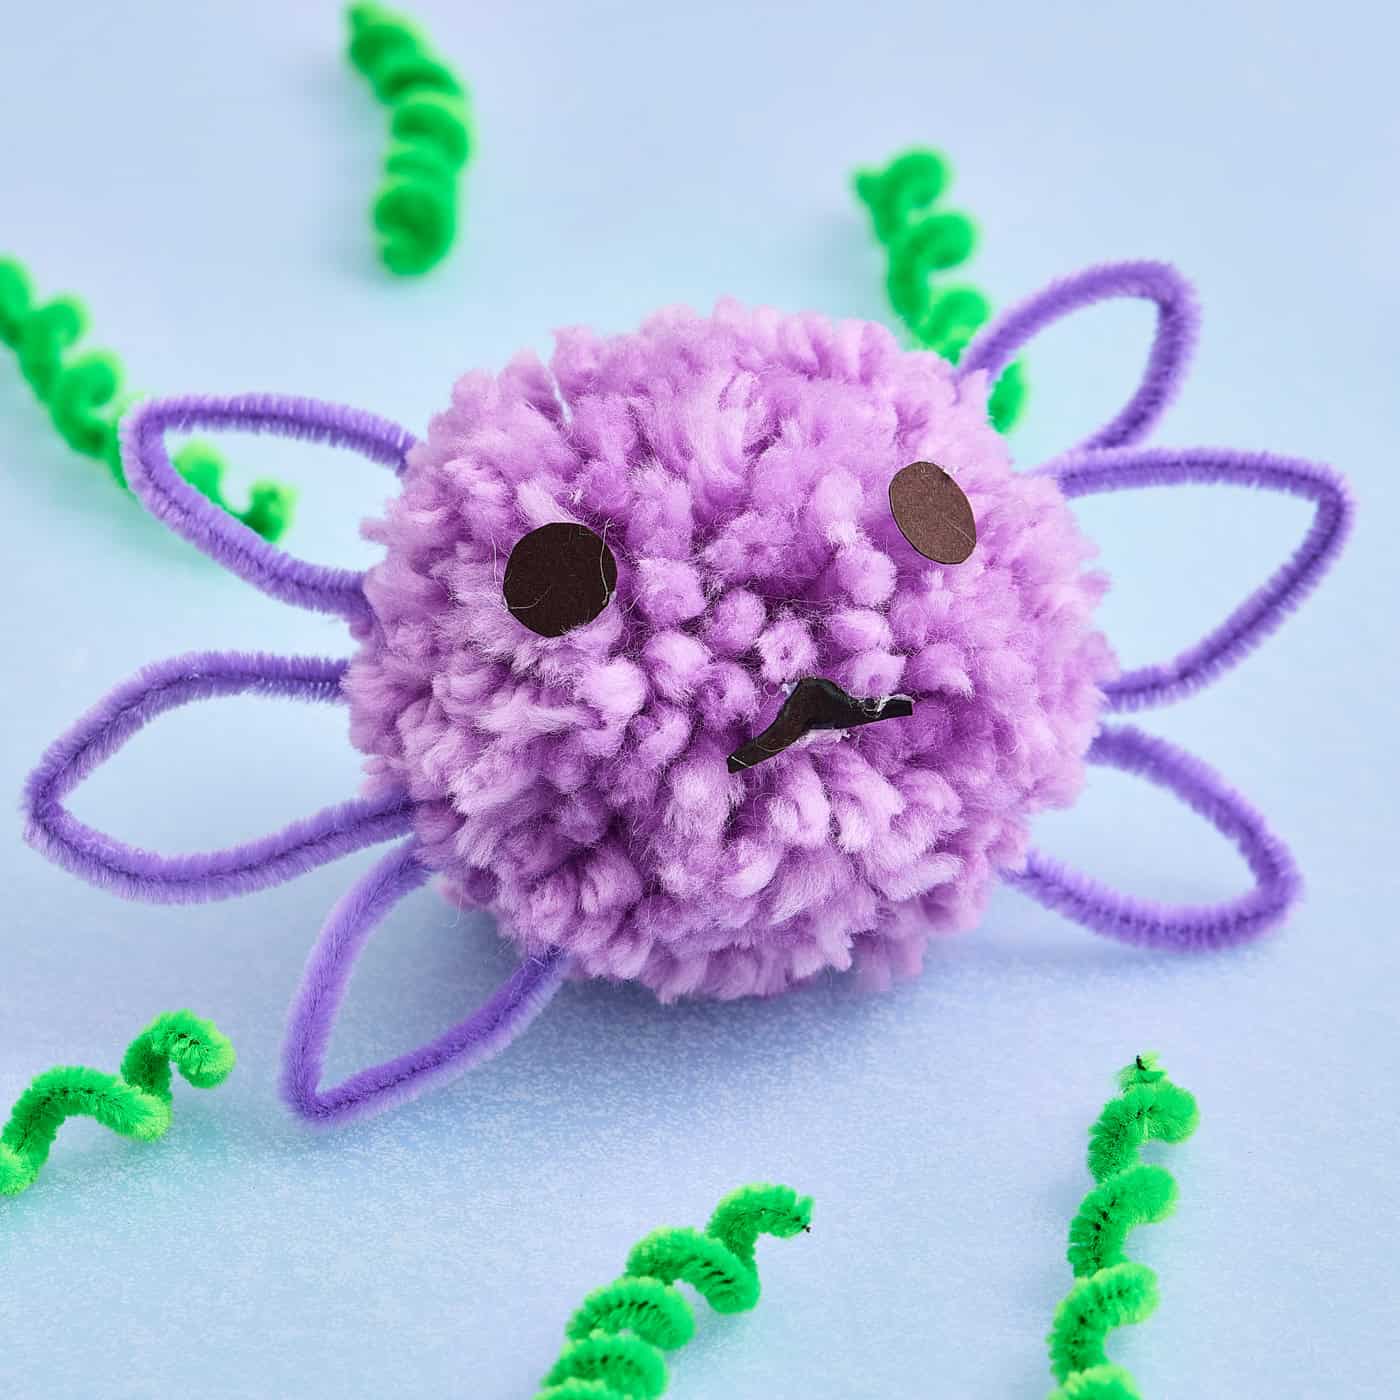
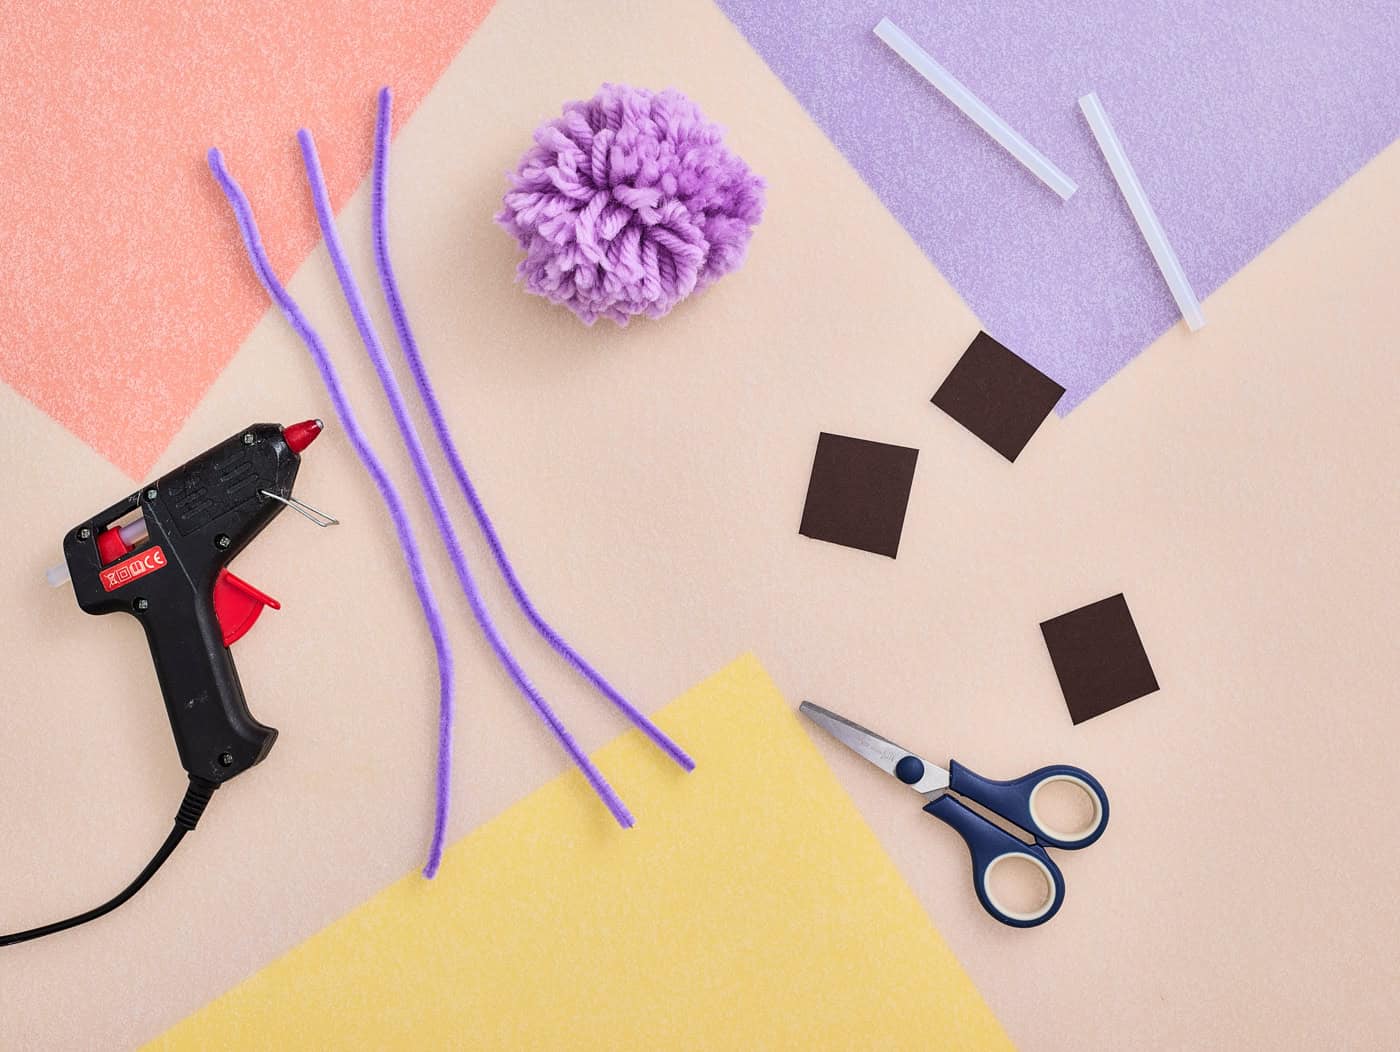
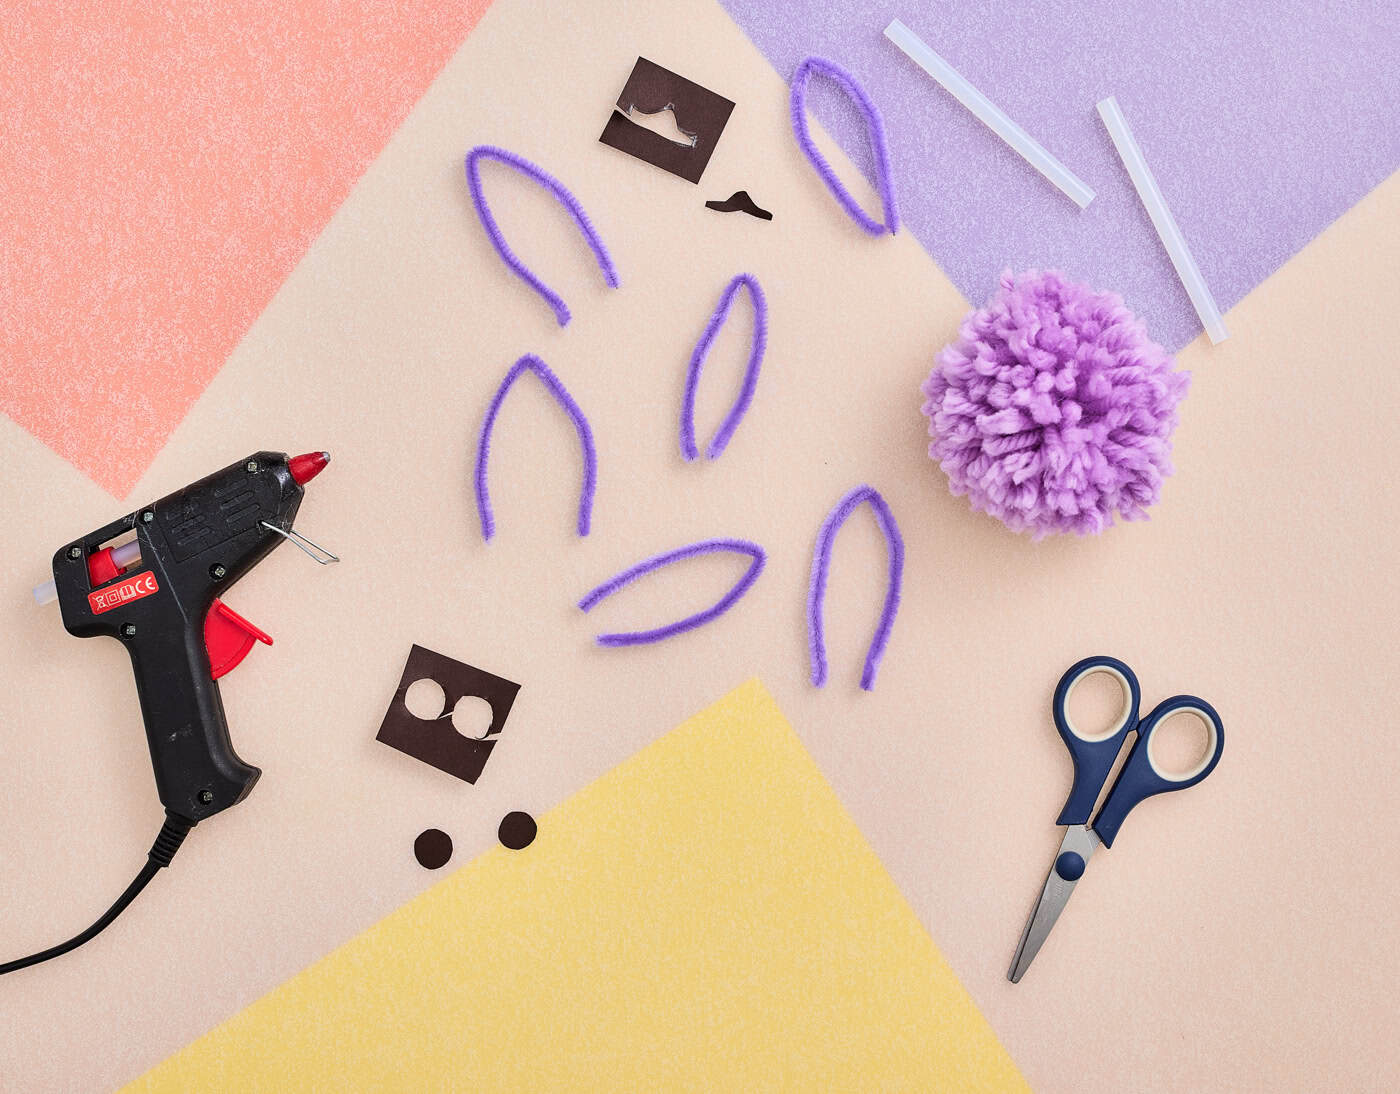
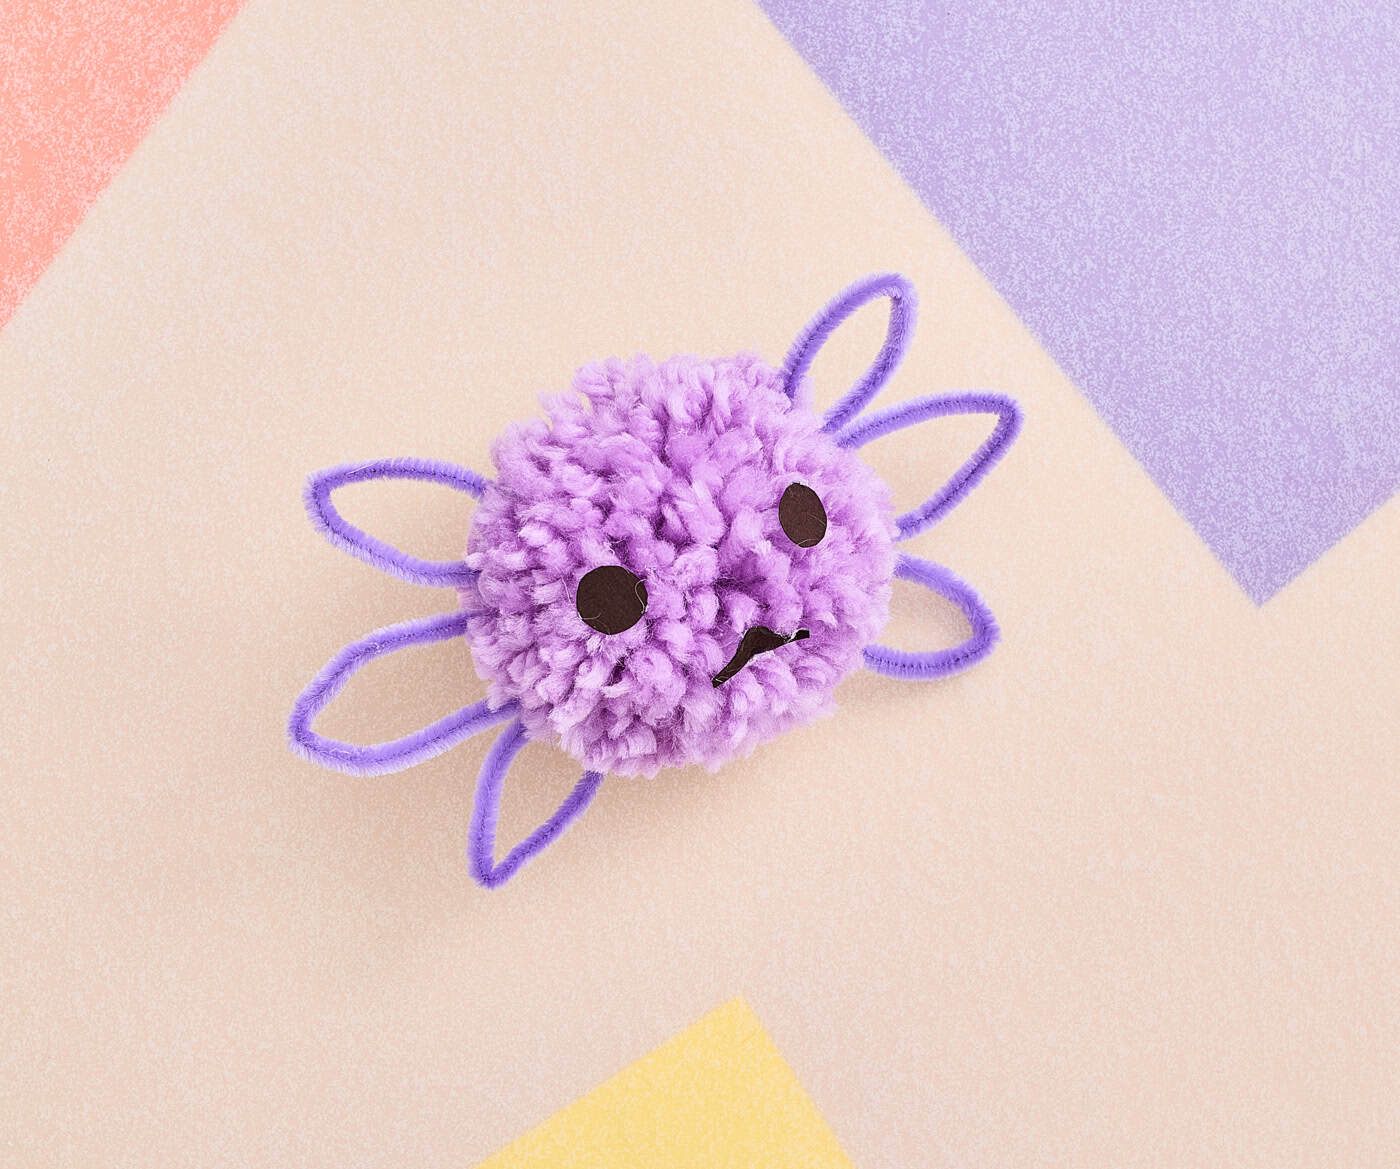
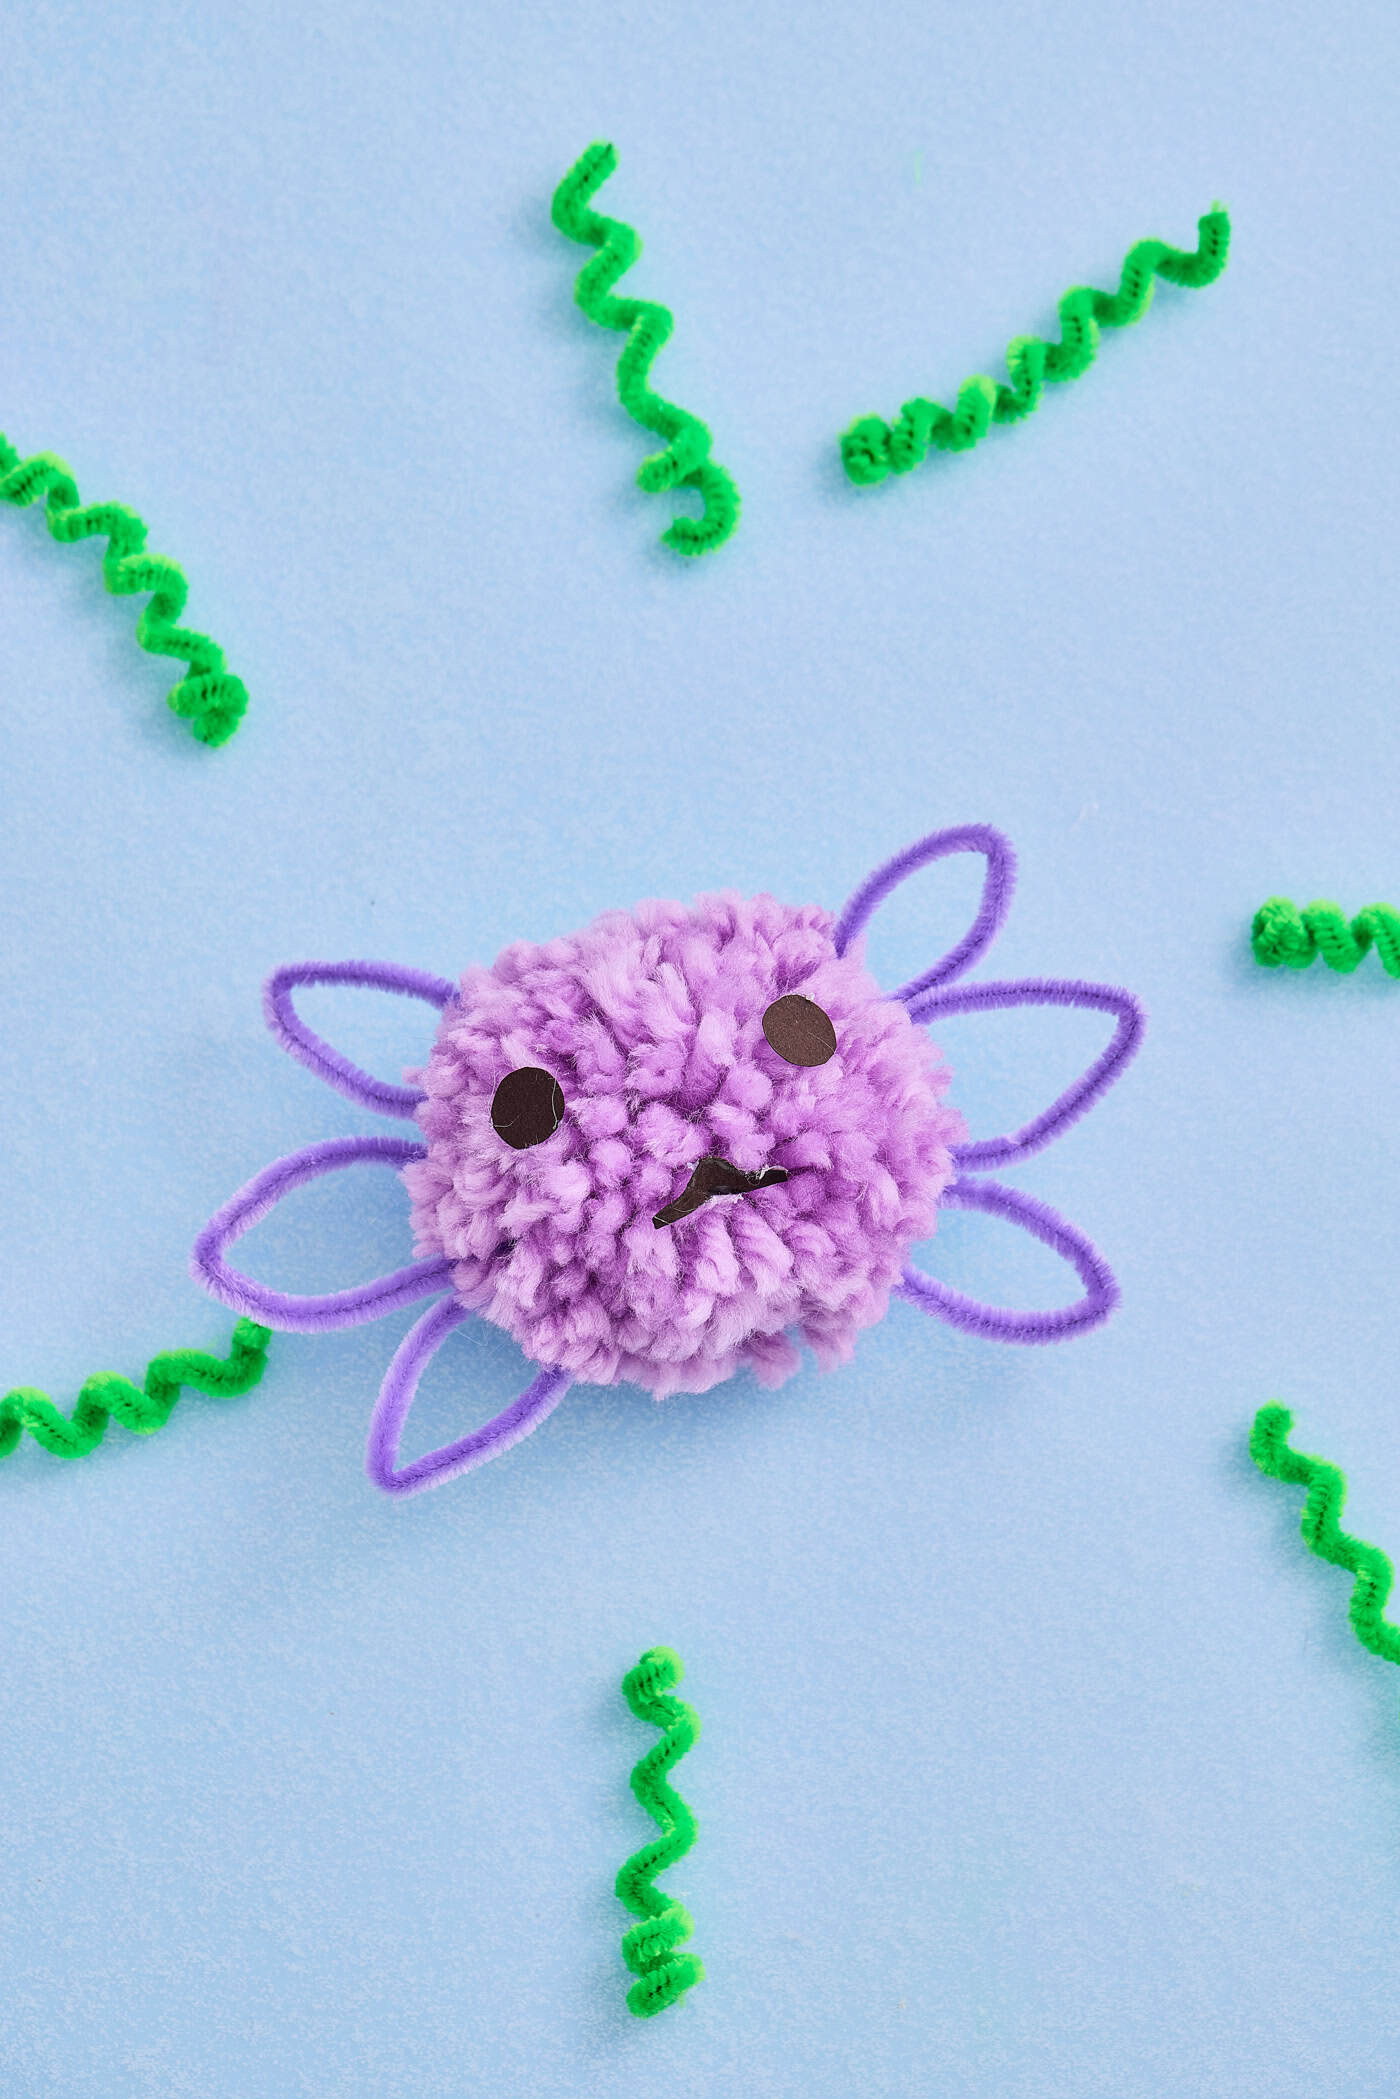
- 1 Large pom-pom: I used a 2-inch (5 cm) one. Pink is the classic axolotl color, but feel free to get wild with purple or teal!
- 3 fuzzy sicks/pipe cleaners
- Small piece of brown cardboard or card stock. An old cereal box or shipping box is perfect for this.
- Glue: I recommend hot glue for the gills and white glue for the face, but you can use hot glue here, too
- Scissors
I can't recommend finger protectors for hot glue enough!
They help keep your fingertips safe from the hot tip and the hot glue. We gave these Mr Pen hot glue protectors to everyone for Christmas a couple of years ago and we're still on our original pack. They hold up to use!
![Caydo [130pcs] 30pcs 2 Inch Large Pom Poms with 100pcs Wiggly Eyes,...](https://natashalh.com/wp-content/plugins/aawp/public/image.php?url=YUhSMGNITTZMeTl0TG0xbFpHbGhMV0Z0WVhwdmJpNWpiMjB2YVcxaFoyVnpMMGt2TlRGeGQyRXJlREJoZUV3dWFuQm58MTc4NDUzOTg3NA=)


How to Make Your Pom-Pom Axolotl
1. Prep the Signature Gills
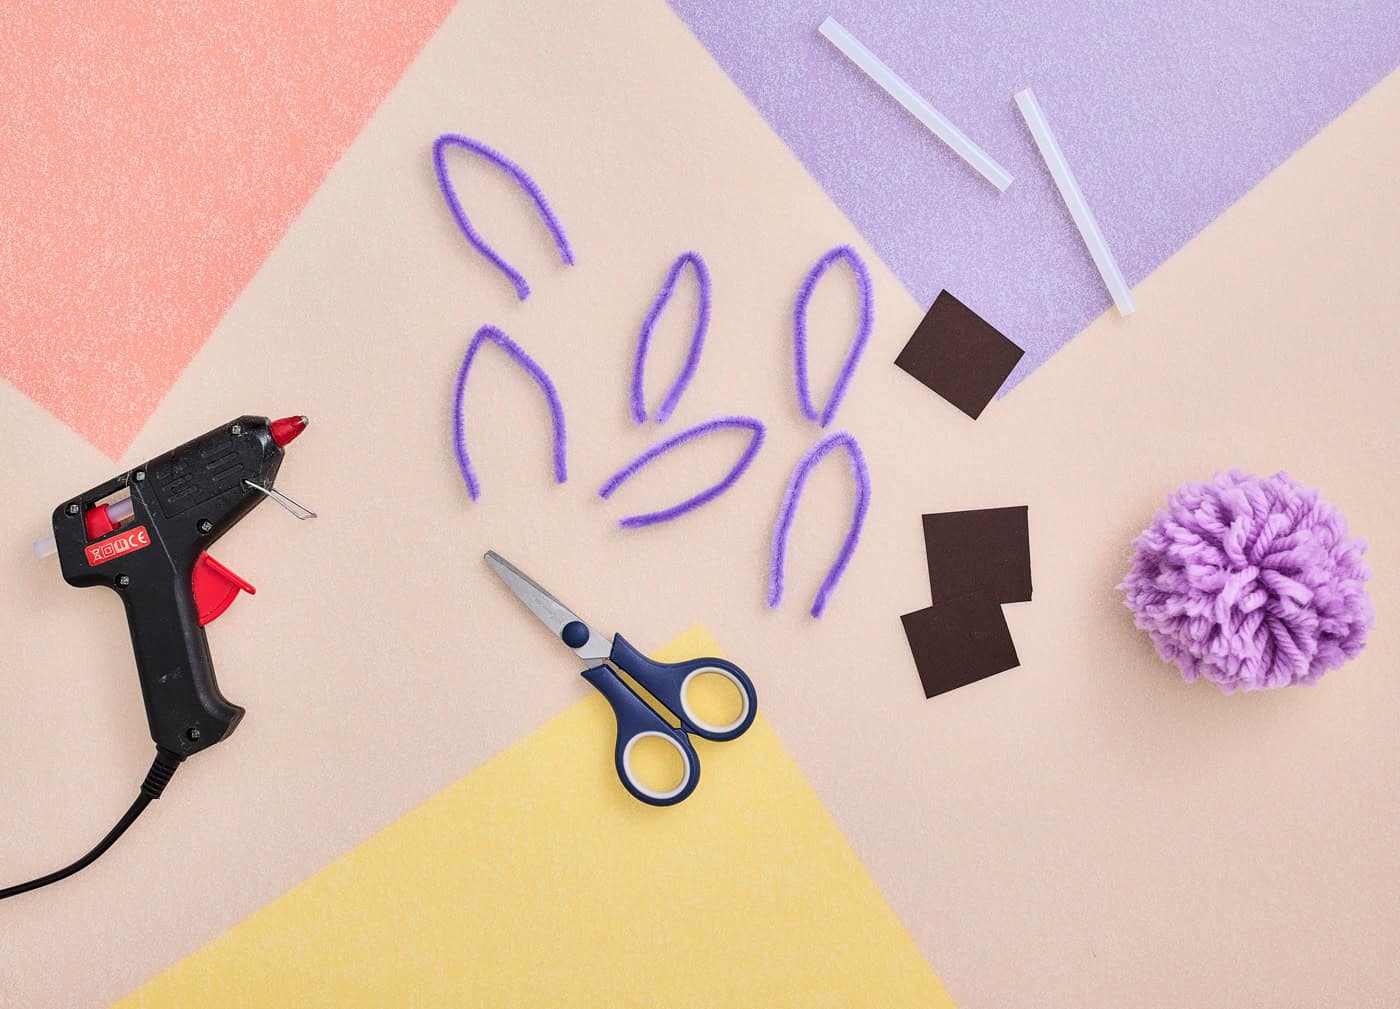
Axolotls are famous for those fuzzy pink gills on the sides of their heads. To make them, cut three 12" fuzzy sticks in half so that you have six 6-inch pieces.
Bend each piece into a little "ear-like" loop. You want them to look like tiny loops that will sit off the side of the head.
2. Secure the Loops
To make sure your gills don't spring open, use a small dot of hot glue to secure the tips of the pipe cleaners together. Now you have six perfect little loops ready to go.
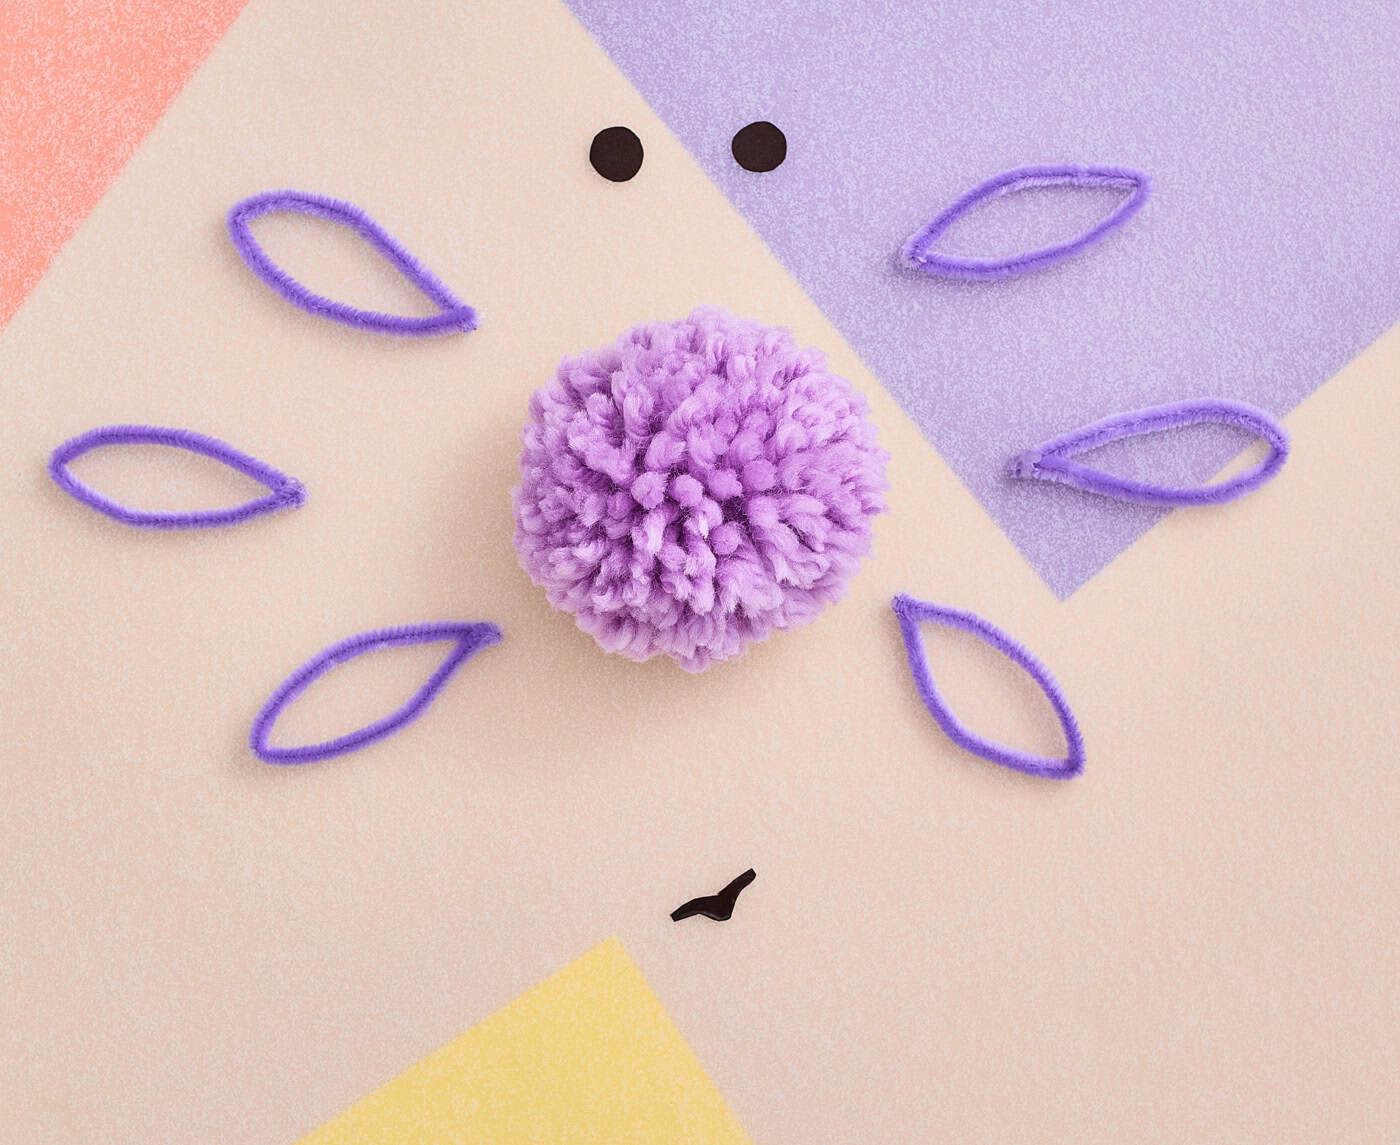
3. Make the Face
While your loops are drying, grab your cardboard. We’re going old-school here. No googly eyes needed for this craft!
Cut out two small round eyes and a tiny, simple curved mouth. The smaller the mouth, the cuter the expression!
Sorry the photos are a little out of order. I realized after the fact that you can save time by gluing the gills, then cutting the face pieces out. =)
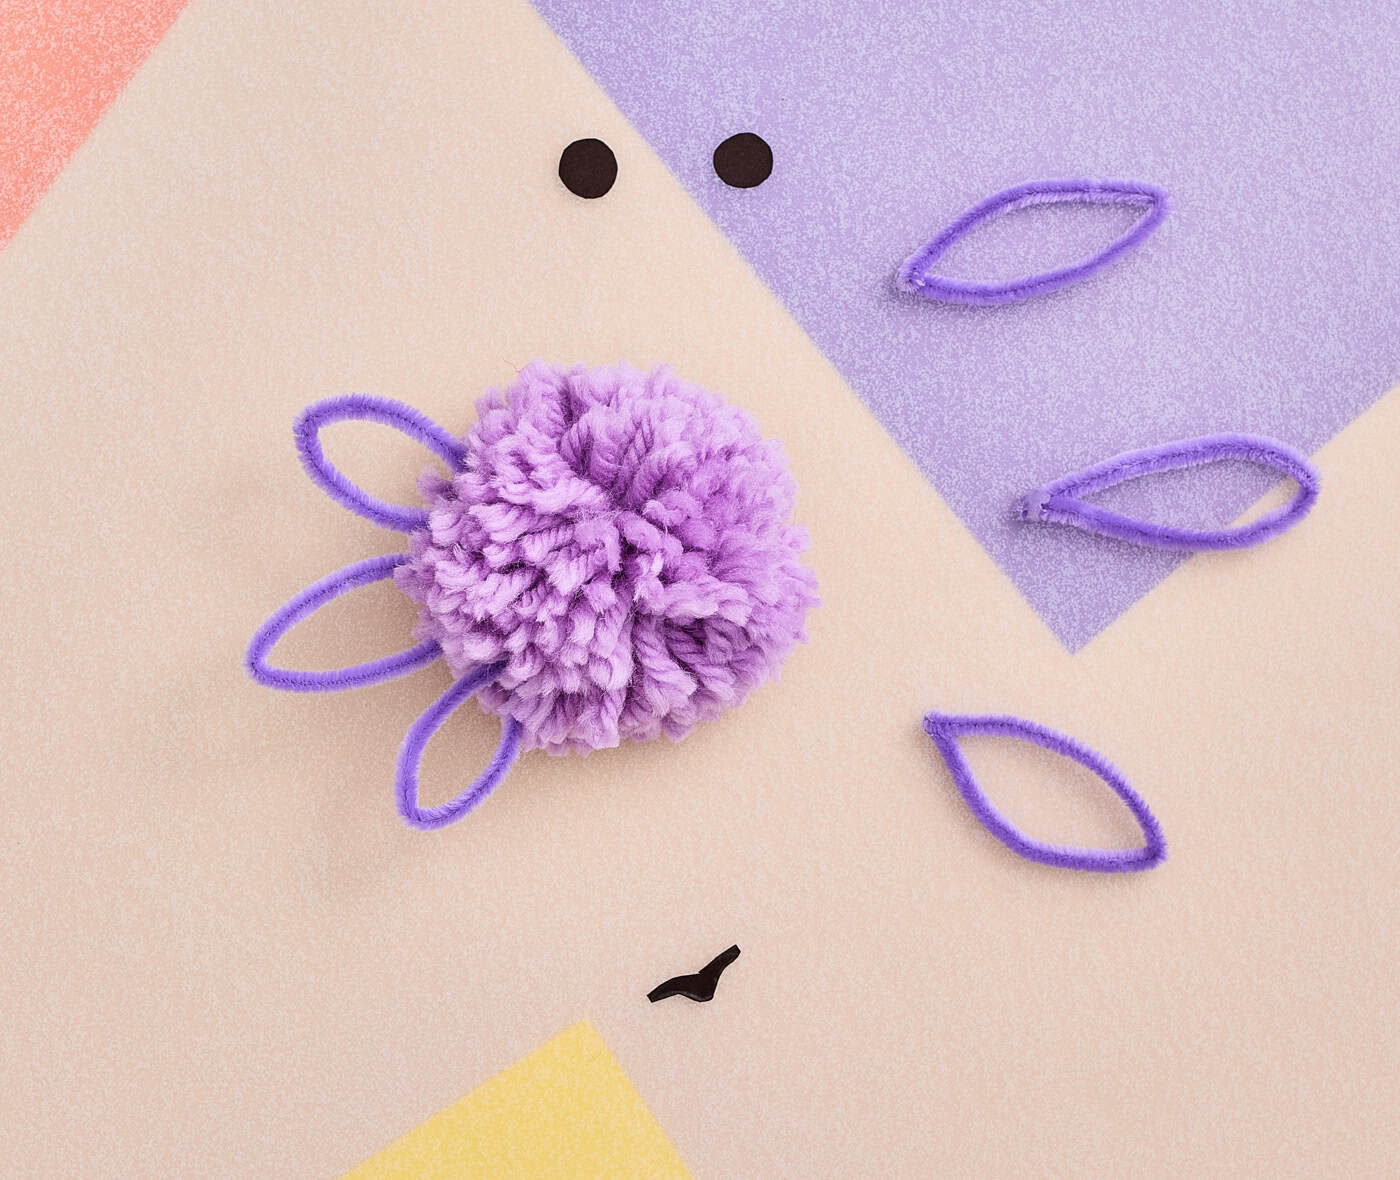
4. Assemble the Axolotl
Time to put it all together!
Grab your hot glue gun and attach three gill loops to the left side of your pom-pom, and three to the right. Try to fan them out slightly so they look nice and fluffy.
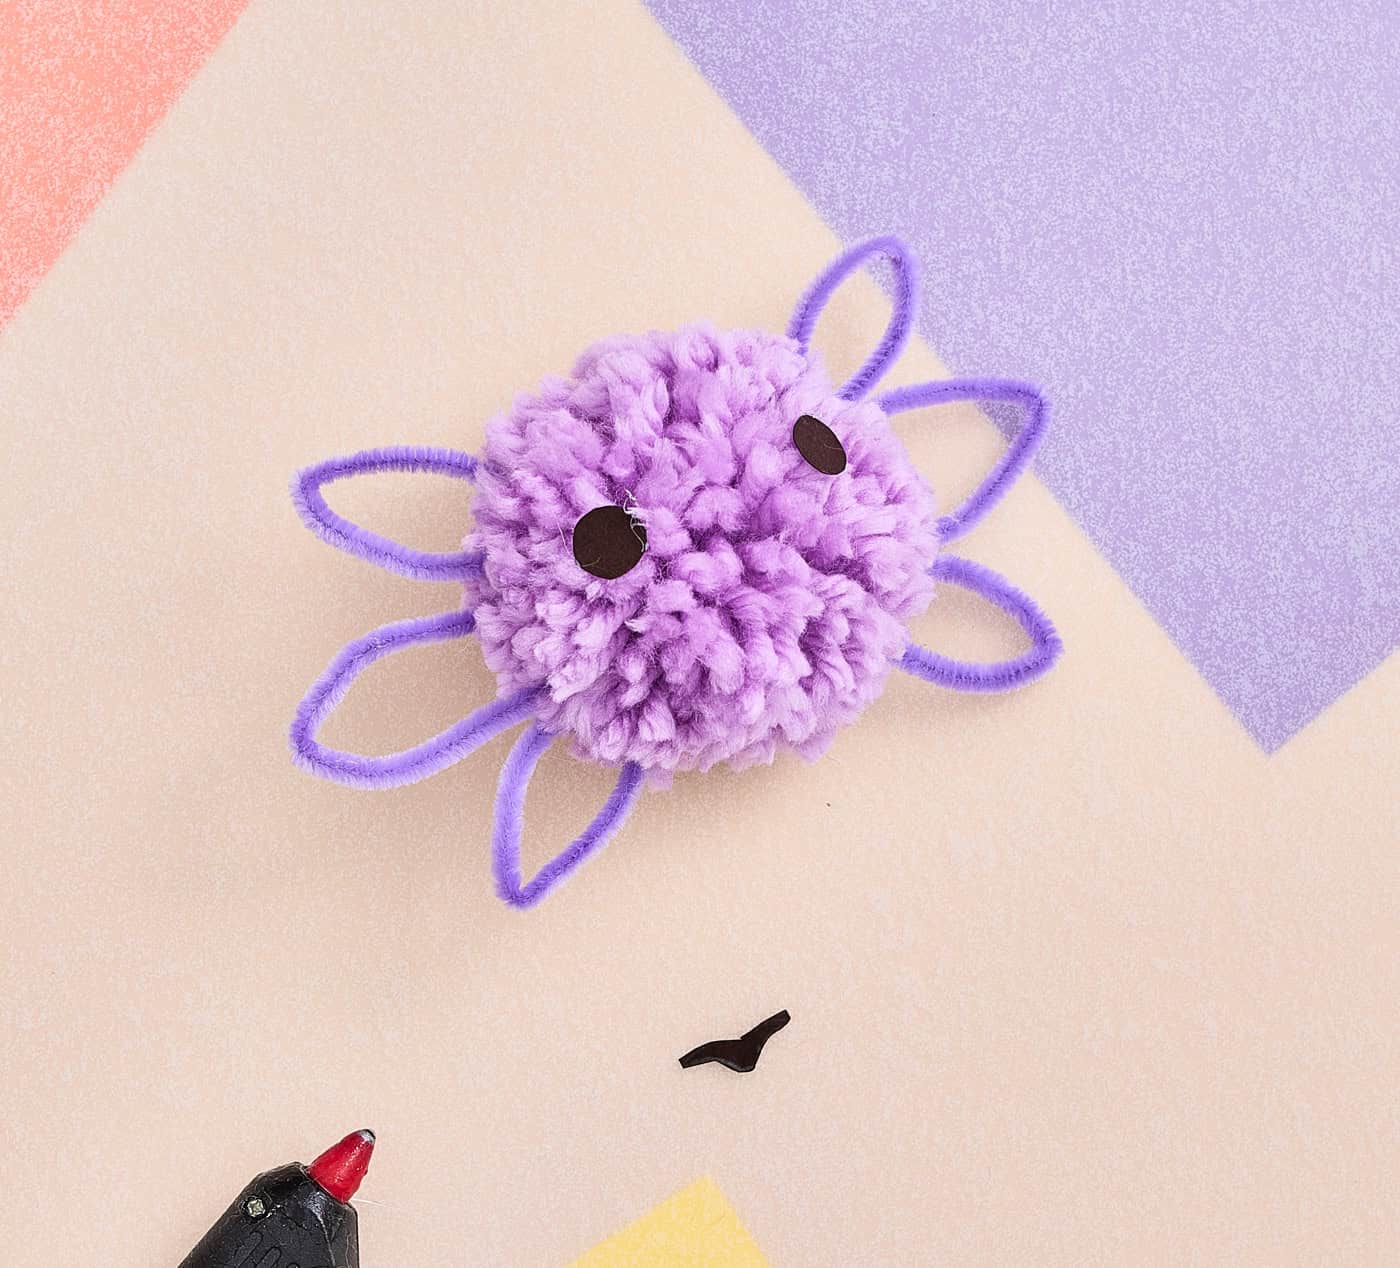
5. Give Him Some Personality
Finally, use your glue to attach the cardboard eyes and mouth onto the front of the pom-pom.
I find that placing the eyes a bit further apart makes them look even more like the real thing!
And You’re Done!
Let everything dry completely, and you’ve got yourself a tiny, fuzzy axolotl friend.
These would be so cute as "desk pets," or you could even glue a little magnet to the back for the fridge.
If you’re feeling extra creative, you could make a whole "axolotl family" in different sizes and colors.
If you enjoy craft tutorials, be sure to check out these additional posts:
Leave a Reply