This post may include affiliate links, which means I may make a commission on purchases made through these links at no additional cost to you.
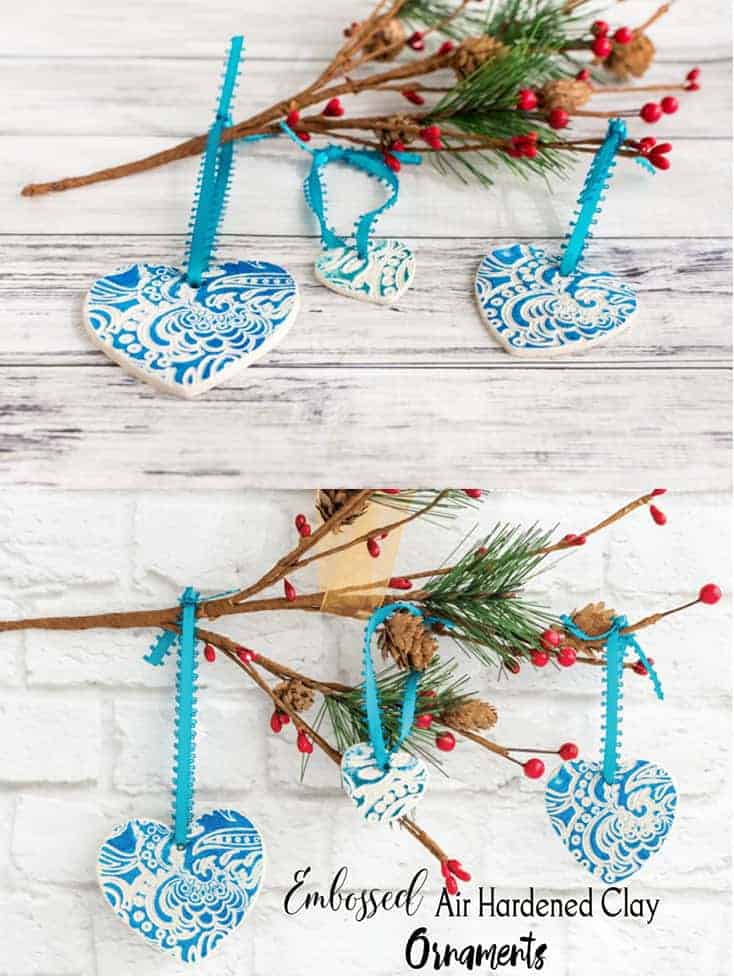
My husband tries to call me in the evening when he's working over night. A few days ago when he called I said "You know what I'd really like to learn? Polymer clay. I want to make things with polymer clay." "Me, too!" he replied. And that was that - now we're trying to learn more about using polymer clay. (Edit: We've done a lot of claying in the past few years. You can find polymer clay tutorials here!) This wasn't totally out of nowhere. We have played with clay a bit in the past, but we sort of bumbled along without reading up on anything. Today's tutorial uses air hardened clay, not polymer clay, but thinking about clay inspired me to drag out some Das we bought almost two years ago to see what I could make. These "embossed" clay ornaments were my favorite creation, so I decided to share them in today's tutorial!
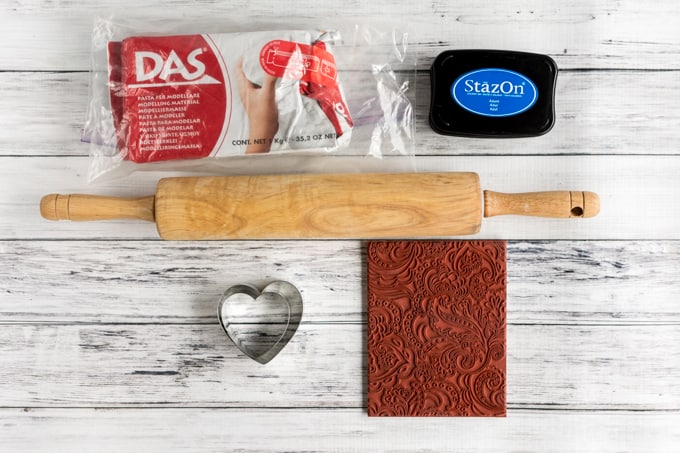
 While I call these ornaments embossed, you actually use a stamp. You could use any kind of stamp, but a large pattern or texture stamp works best. No matter what stamp you use, make sure it's as clean as possible and free of old ink, embossing powder, glitter, etc.
Supplies needed for air hardened clay ornaments
- Non-toxic air hardening clay (I used Das)
- A very clean work surface. This can be a countertop, plastic mat, or silicone baking mat & a piece of parchment or wax paper
- A rolling pin (an acrylic roller is a better choice than the wooden one shown!)
- At least one stamp (large texture/pattern stamps work best)
- Cookie cutters
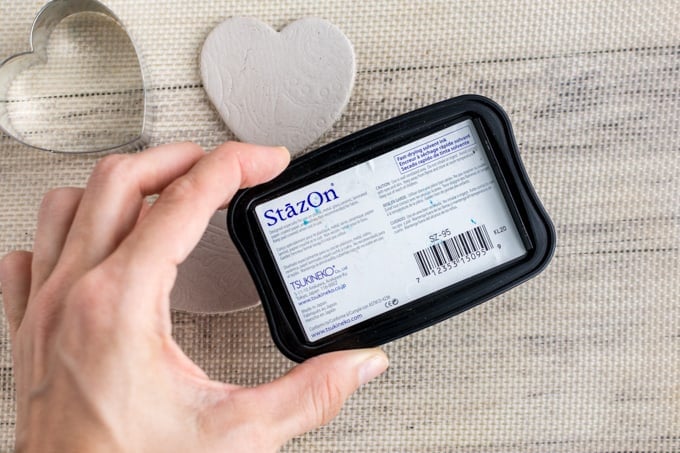
- Ink pads (I love and use Stazon)
- A wooden skewer or large needle
- Ribbon, baker's twine, or thread
- Fine sand paper, optional (I used 400 grit)
If you're a crafter or have kids, you probably already have most of these supplies at home! While I have not tried this technique with a salt dough/baking soda dough/etc, if you have a homemade air drying clay recipe you like and trust, feel free to use it in place of purchased clay.
How to make embossed air hardened clay ornaments
1. Tear off a piece of clay. The amount you need depends on how many ornaments you want to make and how thick you want them to be, but I recommend starting with a piece no larger than your fist.
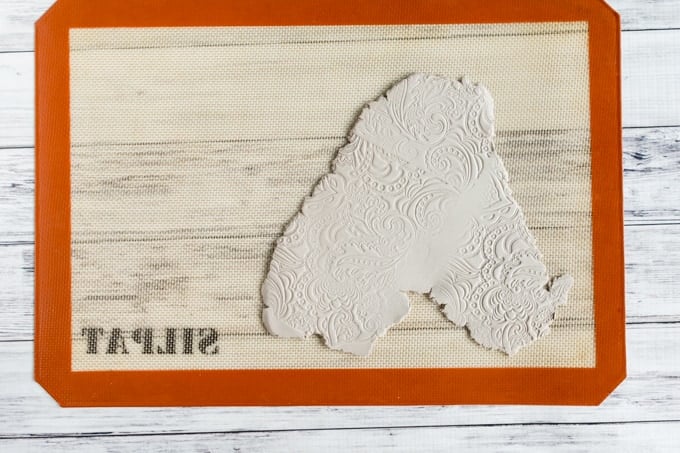
2. Using a clean work surface, roll your clay out to a uniform thickness of about ⅛". Thicker will be heavy and thinner more fragile. If you're using a silicone mat, like a Silpat, that has a woven texture, roll your clay out on a piece of parchment or wax paper if you want to avoid transferring mat's the texture to your clay.
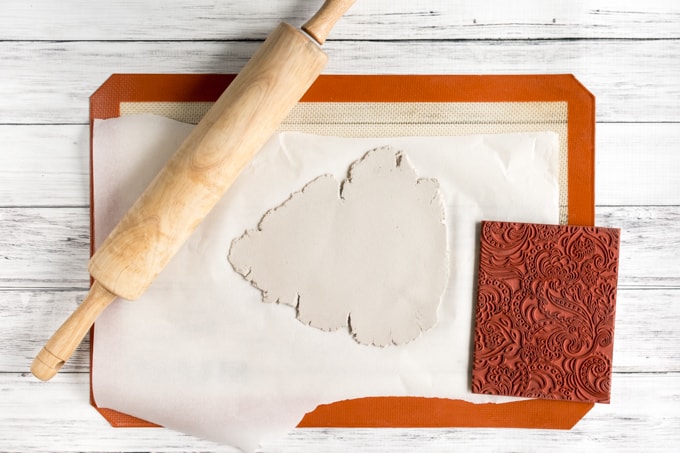
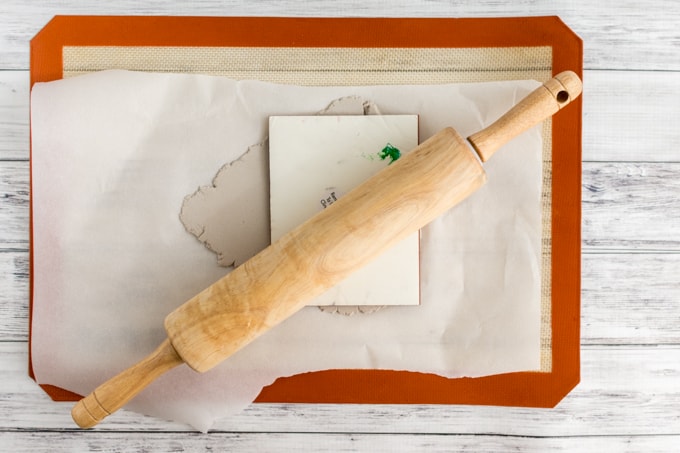
3. Position your stamp and use the roller to press it firmly and evenly into the clay. Don't try to completely squish the clay, but don't be afraid to apply a little pressure, either! You want the design to be visible. Reposition your stamp, as necessary, and roll again. If you used parchment or wax paper, immediately move the rolled/stamped clay to a non-porous surface (such as the un-covered silicone mat!). Parchment and wax paper will quickly begin to wrinkle under the wet clay, leaving unsightly marks on your ornaments.
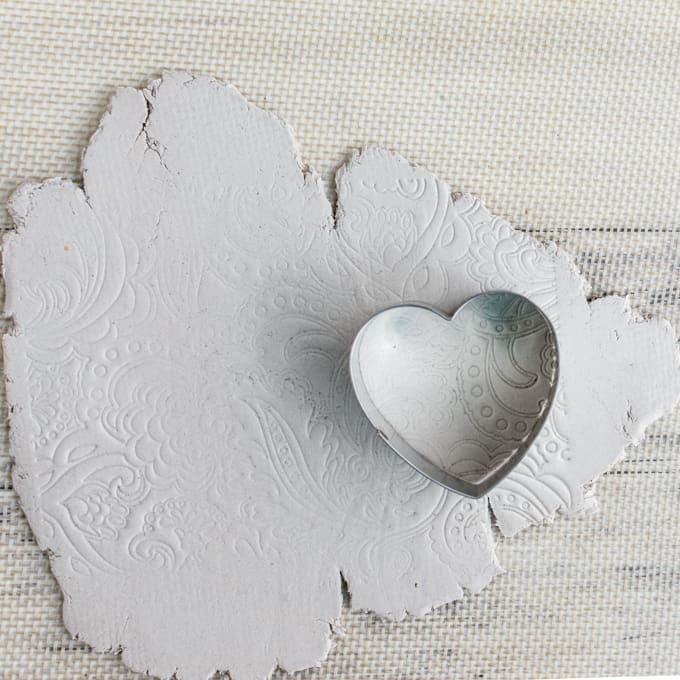
4. Use your cookie cutters to cut your ornaments.
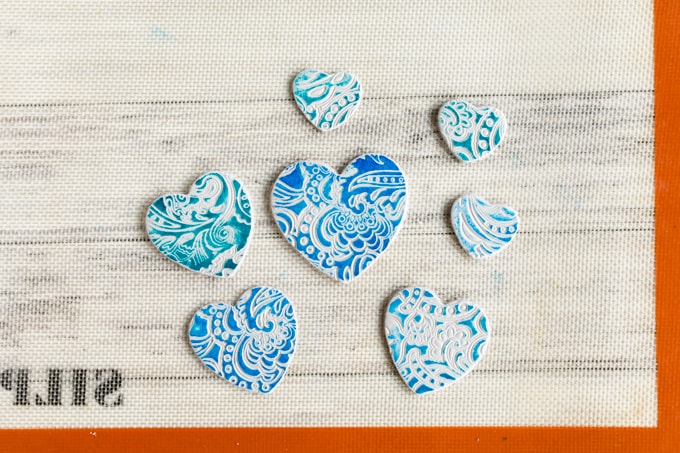
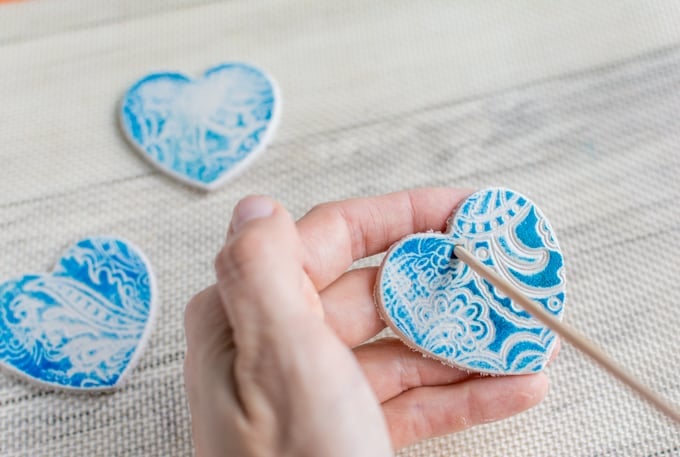
5. Open your stamp pad and lightly tap the pad on each ornament to transfer some color to the raised areas. I've found it's easier to hold the ink pad and leave the still-moist ornament on the work surface. Play around with colors! You don't have to make your ornaments monochromatic.
6. Carefully pick up each ornament and use a wooden skewer or large needle to poke a hole to hang it from.
7. Allow the ornaments to dry. This should take about 24 hours, depending on the air's humidity.
8. If you find there are any fuzzy edges on your ornaments (as seen in the photo above), lightly sand the dried ornament's edges with a fine grit sandpaper.
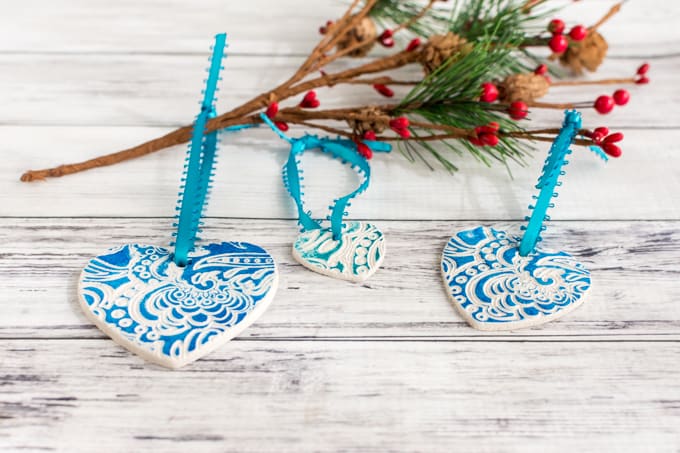
9. Now it's time to string your ornaments! I used narrow ribbon and singed one end with a lighter to make it hard and pointy. I then strung all the ornaments on one continuous piece of ribbon. This technique also saves time when you're using a beading needle because you don't have to rethread the needle constantly.
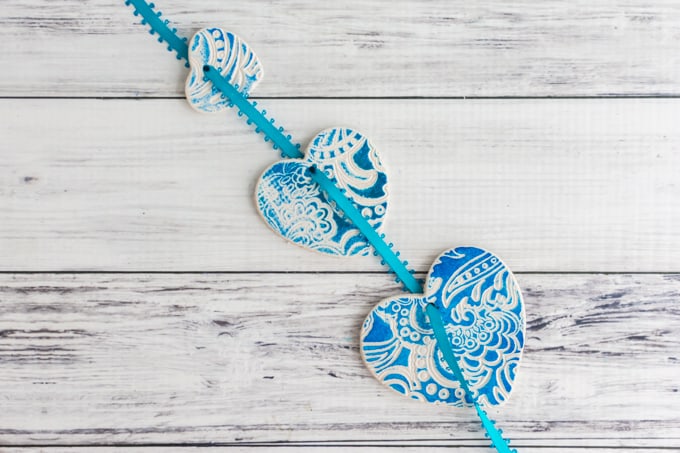
10. Once all the ornaments are strung, simply space them out then cut the ribbon or twine, tie the ends together, et voila! Your ornaments are ready to hang.
To protect your tools, make sure to throughly wash everything after using it on the clay. You don't want to ruin your stamp with bits of hardened clay. =)
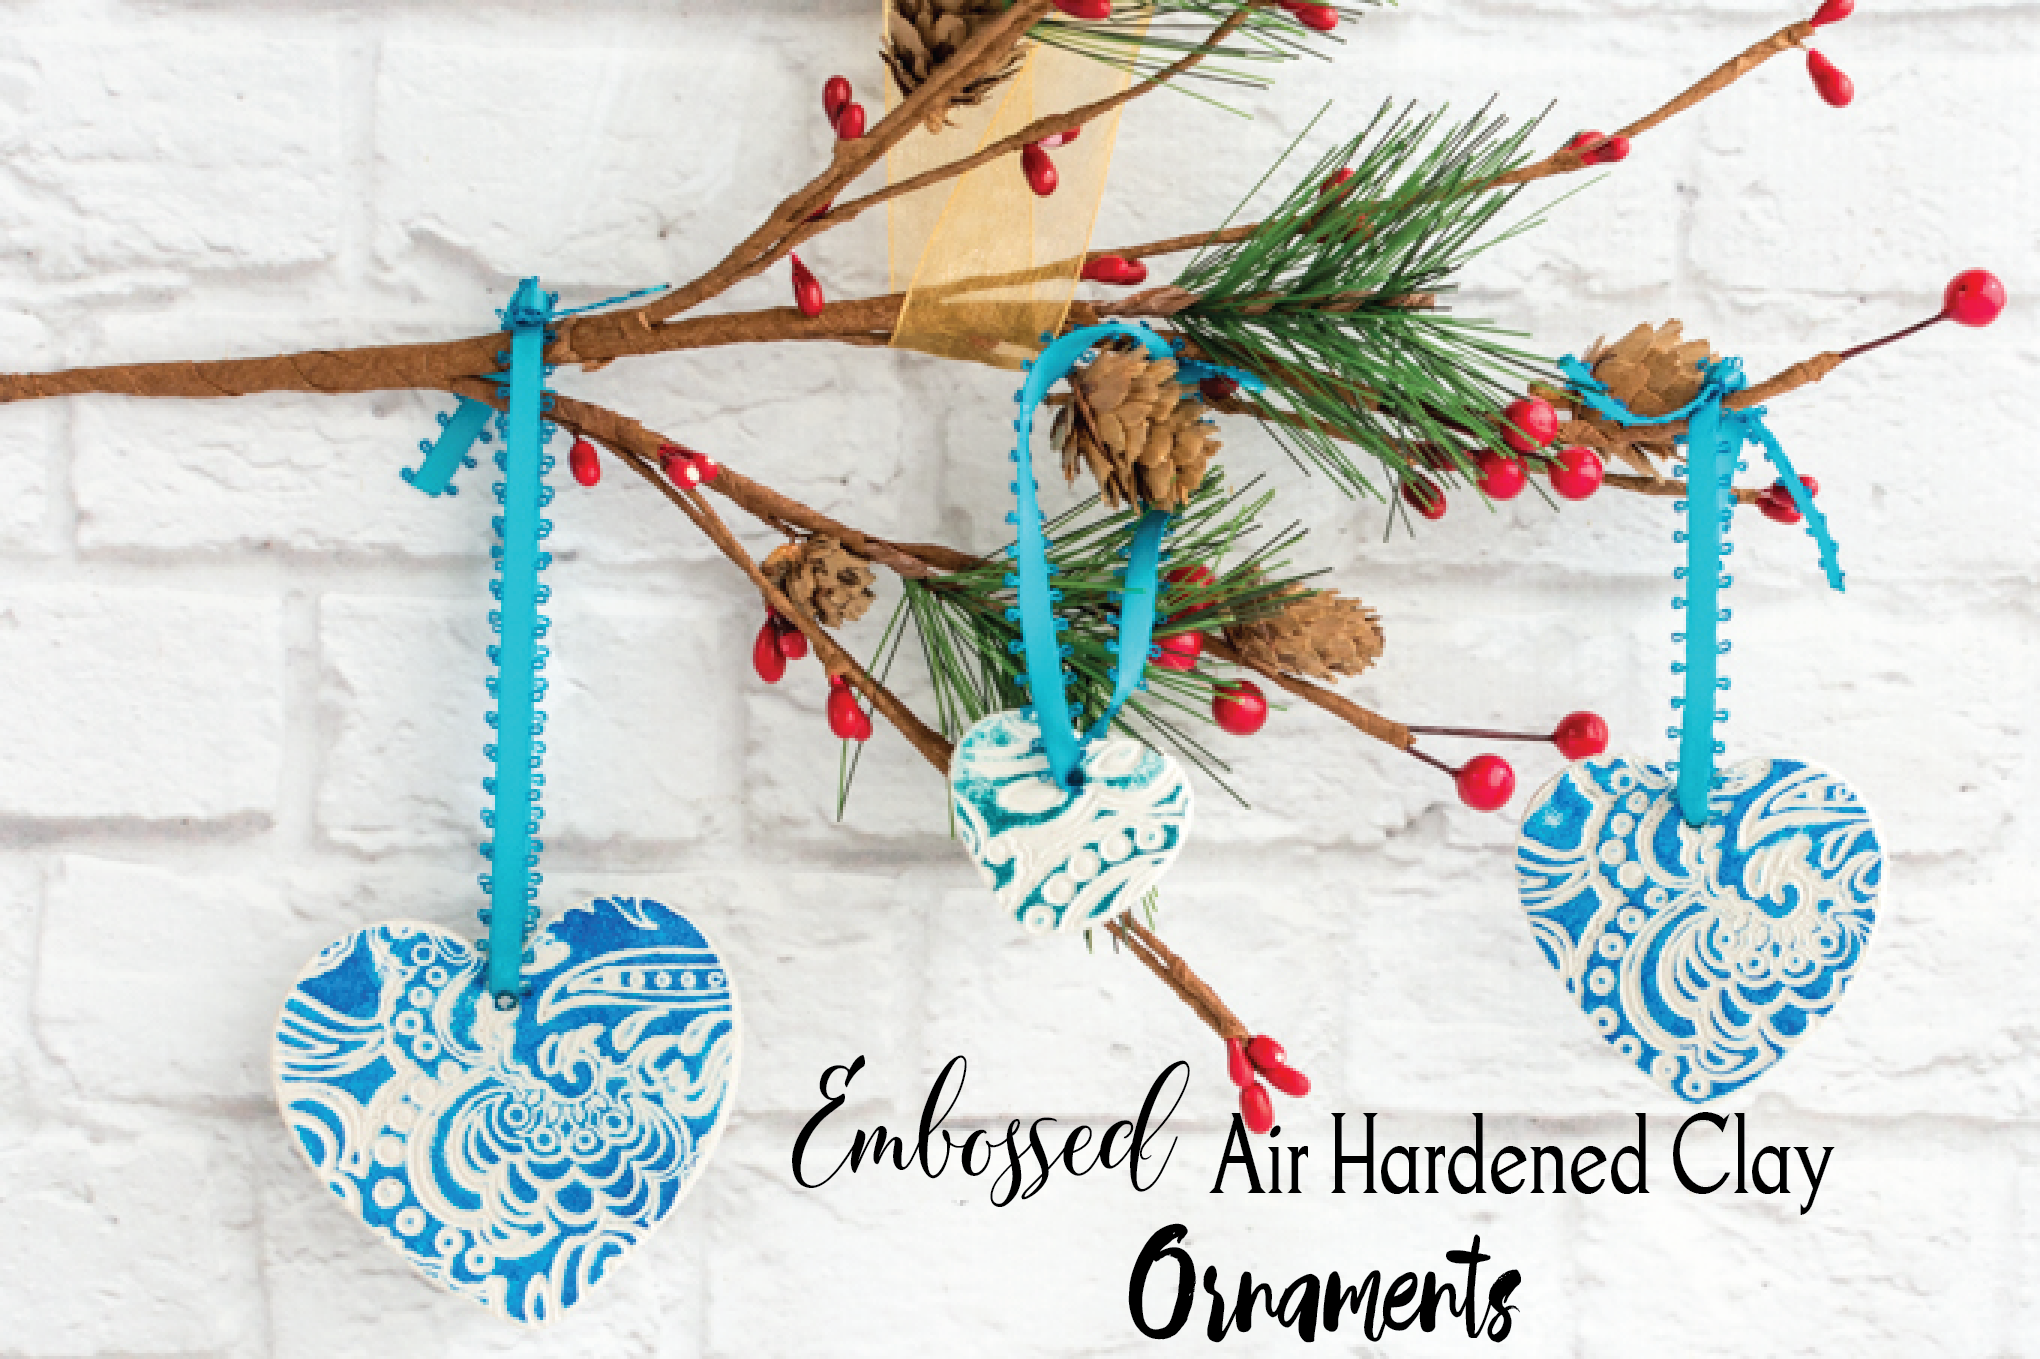
I love that this technique is so versatile! Depending on the cutters, stamps, and colors you use, you could make Christmas, Valentines, St. Patrick's Day, Easter, Halloween, or even Thanksgiving ornaments! They'd also make cute favors, if you're one of those people who likes to go all out for holiday dinners.
How would you use this technique? What shapes and patterns of ornaments would you like to make?


Julie
These are awesome!! I love how they turned out!!
Natashalh
Thank you! =)