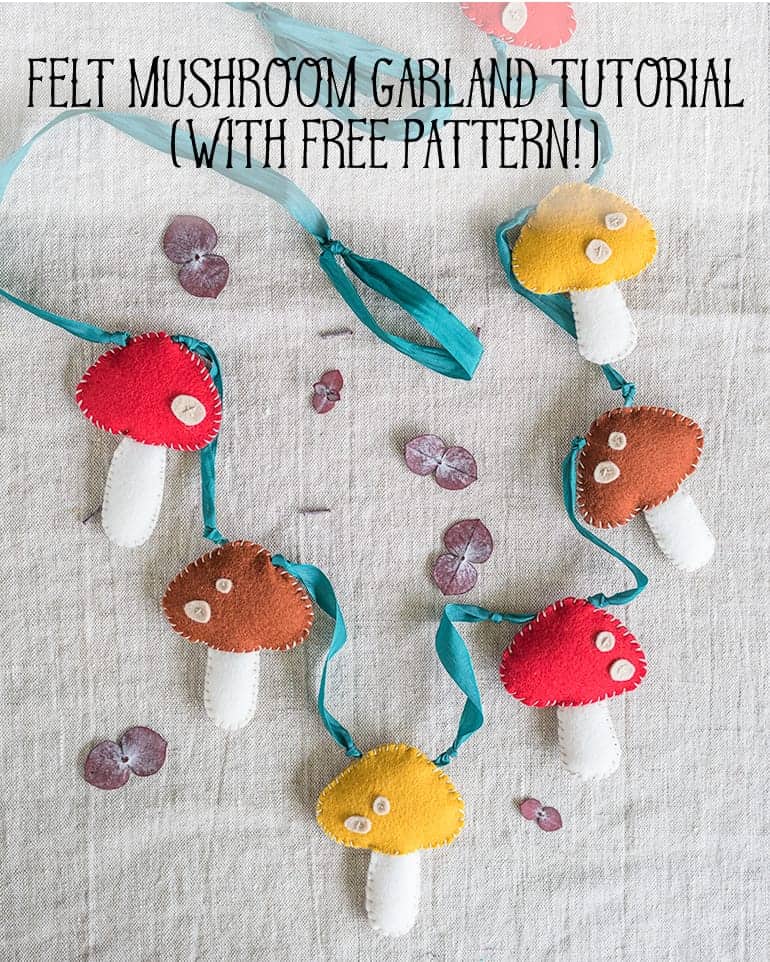
This felt mushroom garland is so easy to make with a free printable pattern!
This garland is so cute and perfect for fall or a baby's nursery! Learn how to easily make this adorable felt garland following this tutorial!
This post may include affiliate links, which means I may make a commission on purchases made through these links at no additional cost to you.
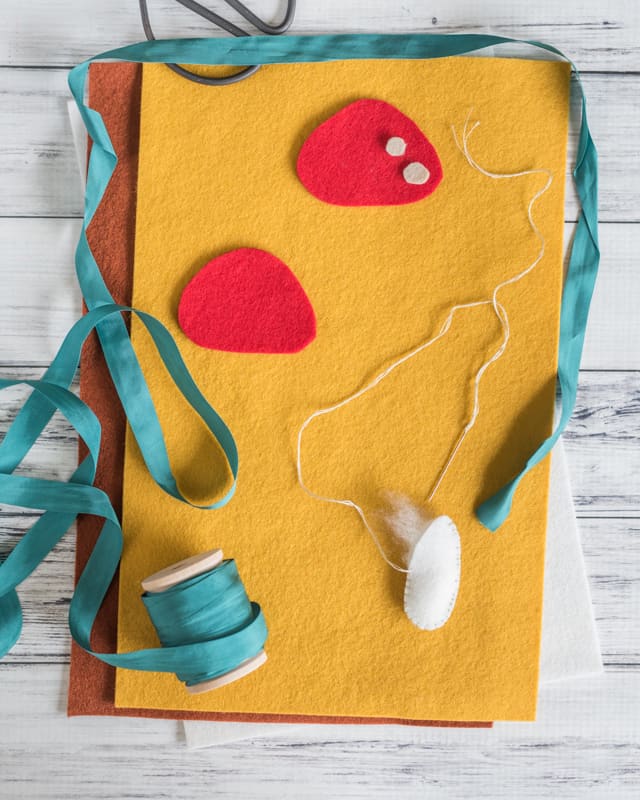
Materials for a felt mushroom garland
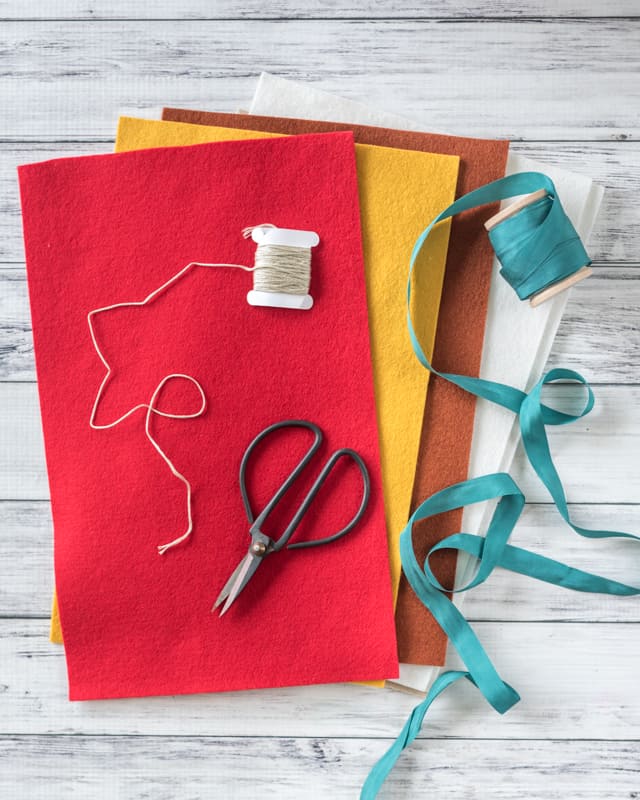
- Felt - I highly recommend using wool or wool blend felt instead of pure acrylic. Acrylic is inexpensive and easy to find, but it's not as nice looking or feeling, and it tends to pill easily.
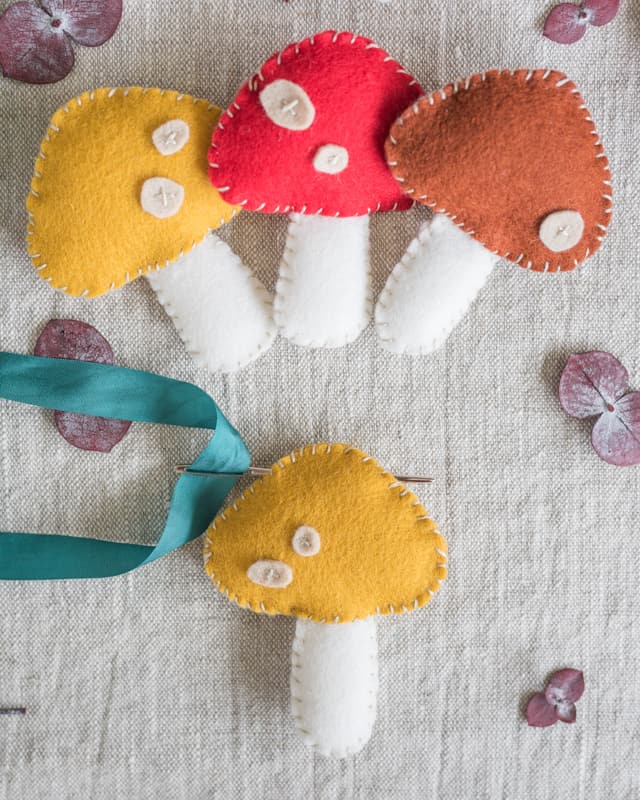
- I used red, gold, and brown for my mushrooms, white for the stems, and tan for the dots. Feel free to use whatever colors you'd like!
- A water soluble fabric marking pen or a ball point pen
- Printable mushroom pattern (below) or pattern of your own devising
- Embroidery floss in matching or coordinating colors. I used the same neutral floss for all of my mushrooms.
- A needle - I used an embroidery needle. Make sure your needle isn't too tiny or the embroidery floss won't fit through its eye!
- Another needle - a large darning needle or similar blunt, large eyed needle
- A small amount of stuffing/batting - optional
- About 10 feet of ribbon or cord. I used some lovely silk binding from The Shoppe at Somerset
I typically only provide printables and patterns for members of The Artisan Life, but I decided to make this felt mushroom pattern available right here! Just download the PDF from Google Drive and print. =)
Felt Mushroom Garland Tutorial
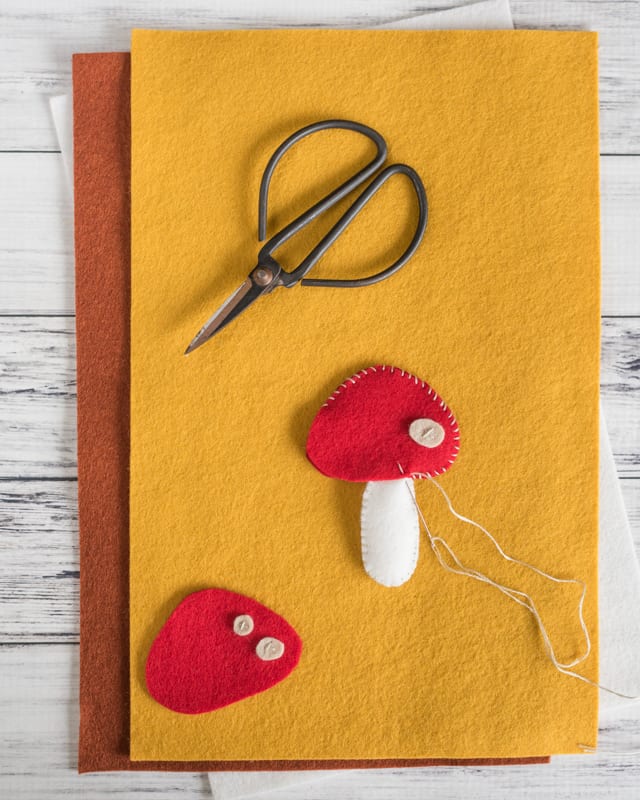
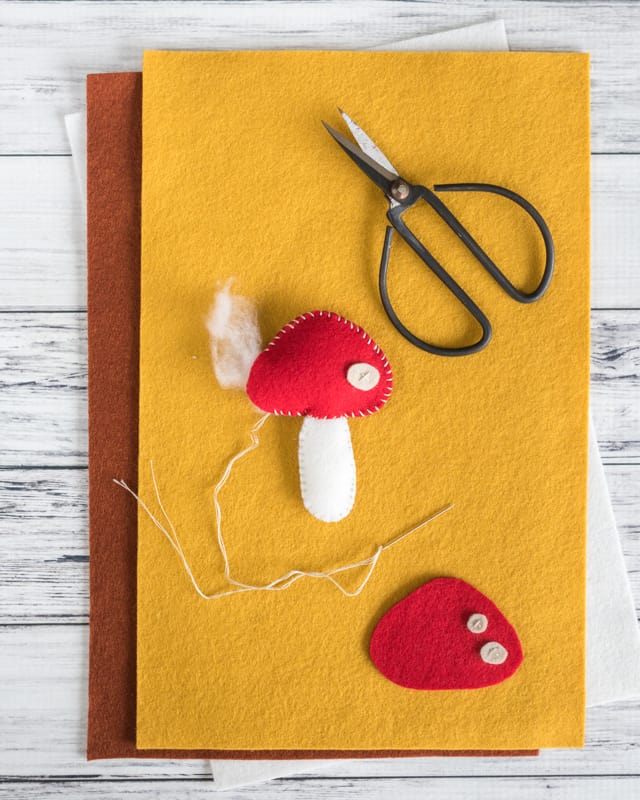
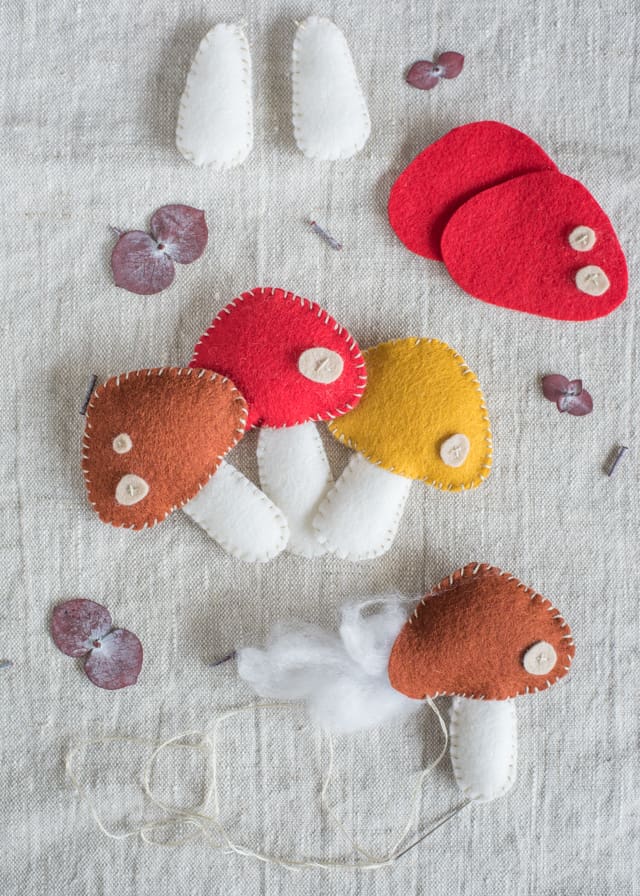
Trace your mushroom pieces using a fabric marker or ball point pen and then cut out along the lines. You will need two caps and two stems per mushroom. I used two slightly different stems - if you choose to use both versions, make sure you have the appropriate number of each!
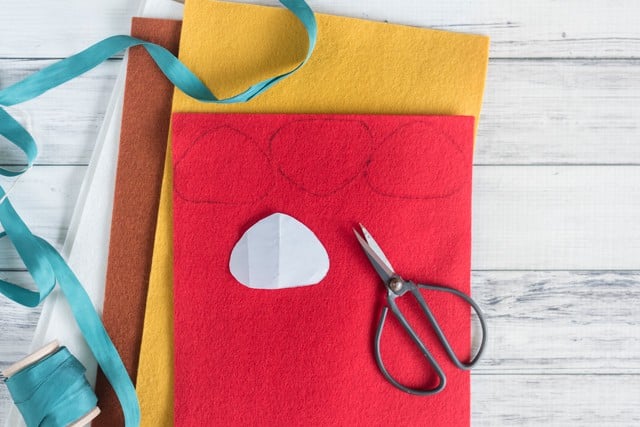
You may also want to cut out a few ovals and circles to use as spots on the mushrooms. I put 1 or 2 on the front only of each.
Cut a piece of floss (I usually cut about 3 feet) and separate two strands. Thread your needle and knot one end, then use a whip stitch to sew two stem pieces together, leaving about a 1" gap. Insert a small amount of stuffing, if desired, then finish stitching all the way around.
There's a very easy way to knot off your stitching by wrapping the thread around the needle a couple of times. If you're not familiar with the technique, the end of this quick clip shows you how to make this simple knot:
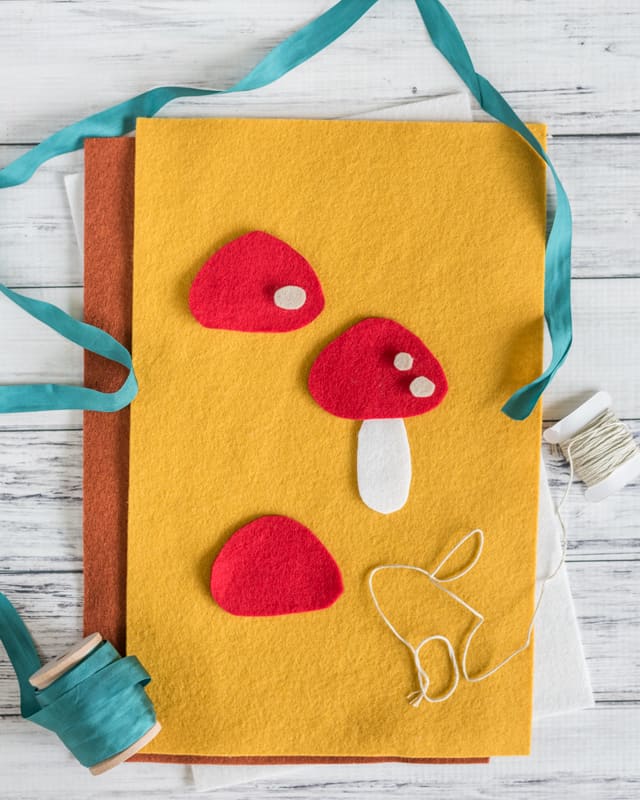
Stitch mushroom spots, if you're adding them, in place with a simple X.

Whip stitch two mushroom cap pieces together. When you get to the bottom middle, insert the stem about half an inch and stitch in place. You can make straight stitches across through all four layers of felt, but it looks nicer if you whip stitch the front cap piece to the front stem piece, flip the mushroom, and then stitch the backs together.
If you do this, you'll find yourself with your working end of thread on the side of the mushroom you've already stitched.
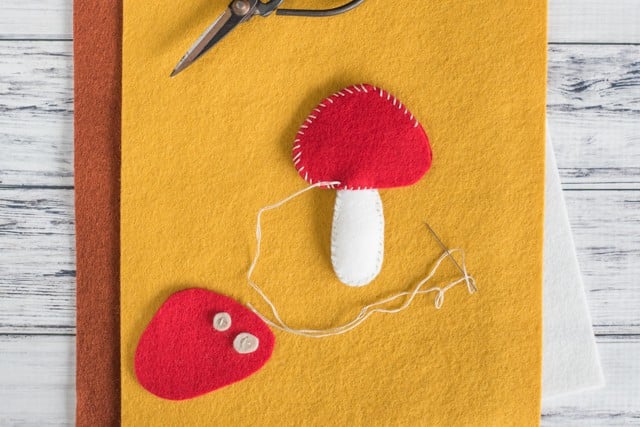
Don't stress - simply insert your needle into the mushroom and poke it back out again on the other side of the stem to continue stitching around the cap.
When your cap is mostly, but not all the way, stitched, add a little bit of stuffing.
Finish stitching, then knot off the thread. Instead of snipping it immediately, insert your needle into the mushroom and poke it back out again a little bit away, as shown. Carefully snip the thread close to the felt and then work the mushroom until the thread end disappears into the cap. This helps protect the knot from coming undone.
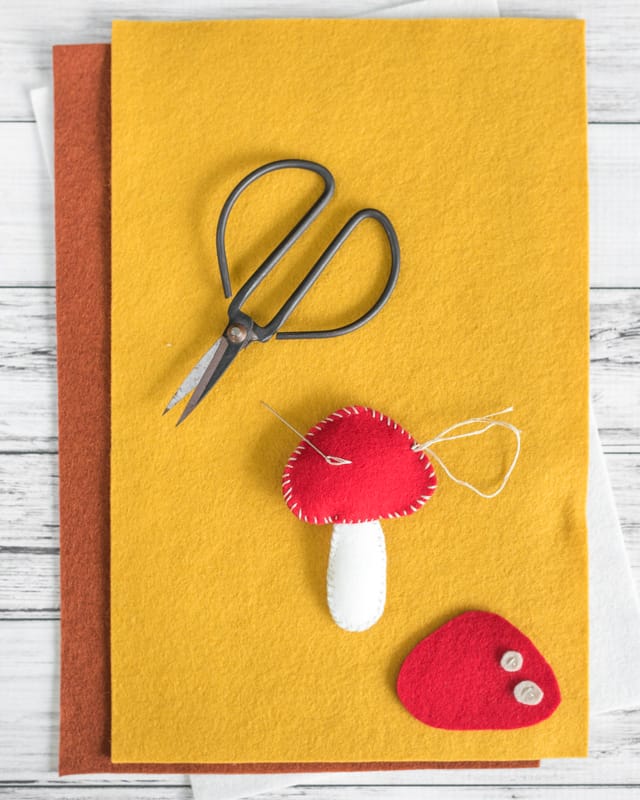
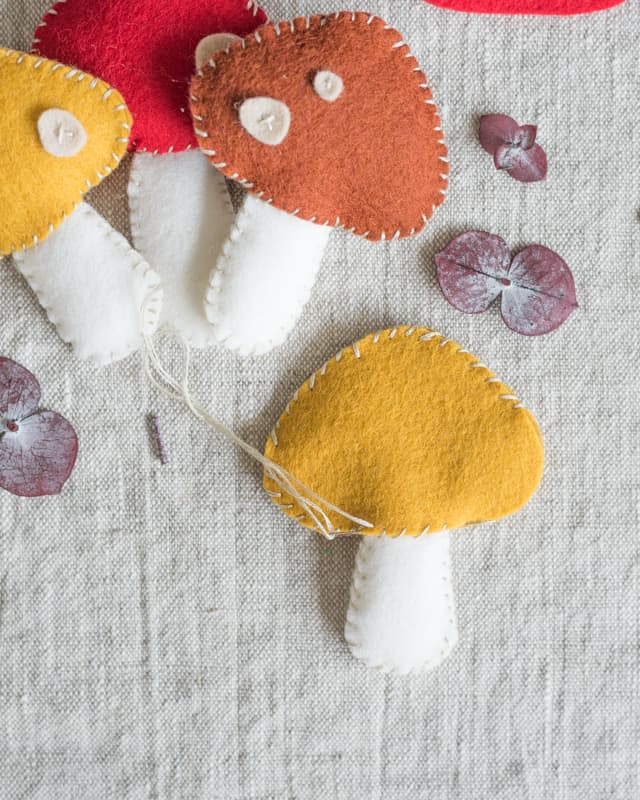
Keep sewing until all your mushrooms are finished!
Now you're ready to make your garland!
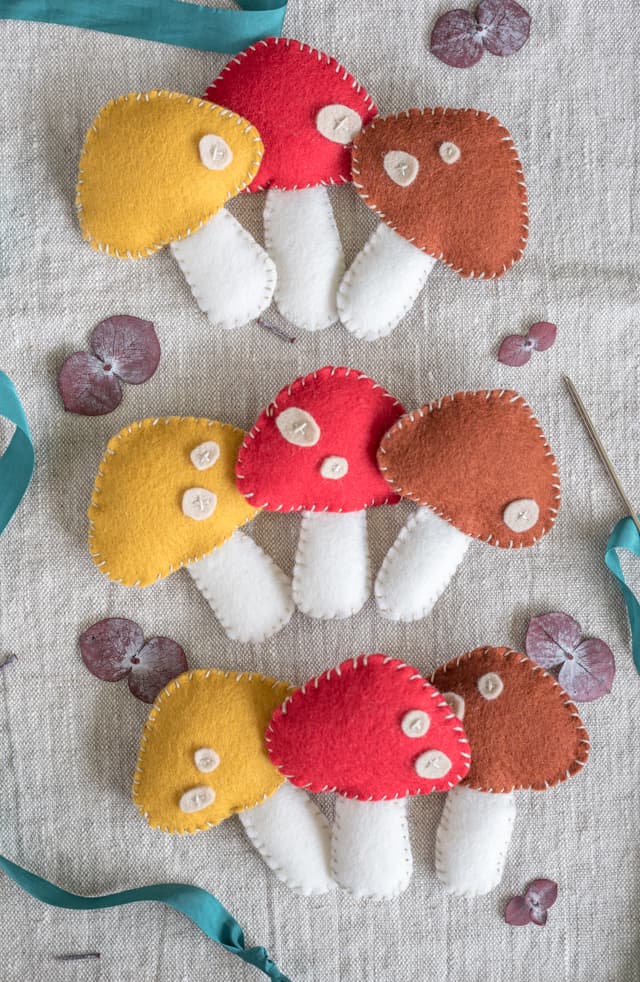
Cut a piece of cord, ribbon, etc. according to how long you'd like your garland to be. My garland has a finished length of a little over 6 feet and I cut about 10 feet of silk ribbon - you need to allow extra for making loops so you can hang your garland and for the knots.
Tie a loop in one end of the ribbon, move about a foot along the ribbon, and tie a simple overhand knot. Thread a large, blunt needle with your ribbon and then thread a mushroom onto your garland, as shown.
Tie another knot to secure the mushroom in place.
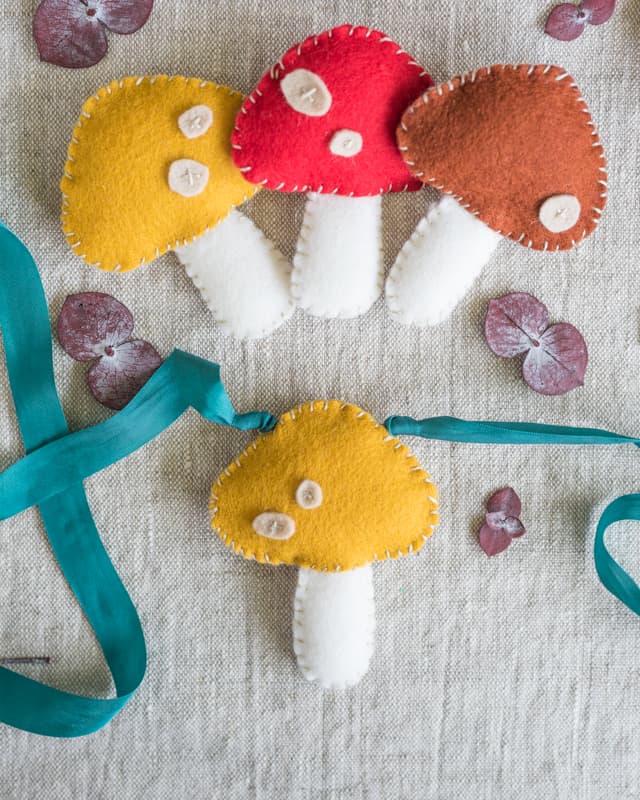
Tie another knot in your ribbon a few inches away and repeat the process. For mushrooms that are about 6" apart from center to center, tie your new knot about 5" away from the knot on the right side of the previous mushroom. Keep stringing mushrooms until you've added them all, then tie a loop. Your mushroom garland is finished!

Isn't it so cute and perfect for fall? I really love the combination of earthy colors and natural textures. I've been all about neutral colors and natural materials this fall while preparing for Baby!
More felt patterns and tutorials
No-sew felt Christmas ornaments


What are you making this week?
![]()
More Related Posts
[pt_view id=“15d429e15n"]
[catlist search="tutorial" numberposts=4 orderby=rand excludeposts=this]


Duni
This mushroom garland is super cute! I haven't been working a lot with felt, but if I ever do I will get the wool kind. It really does make a difference 🙂
Natasha
Working with wool felt is so much fun! I can't wait to make more things for our little one with felt.
jam T
Natasha, this is sheer ingenious... the end products are so colorful and vibrant.... just awesome... 🙂
Thanks for adding the video tutorial... cause i kinda stuck always when i only follow written directions... 😛
Natasha
Thank you so much!