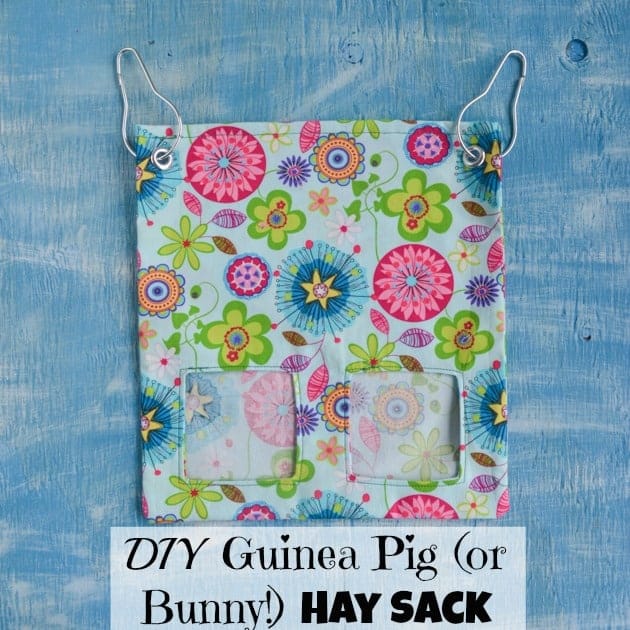
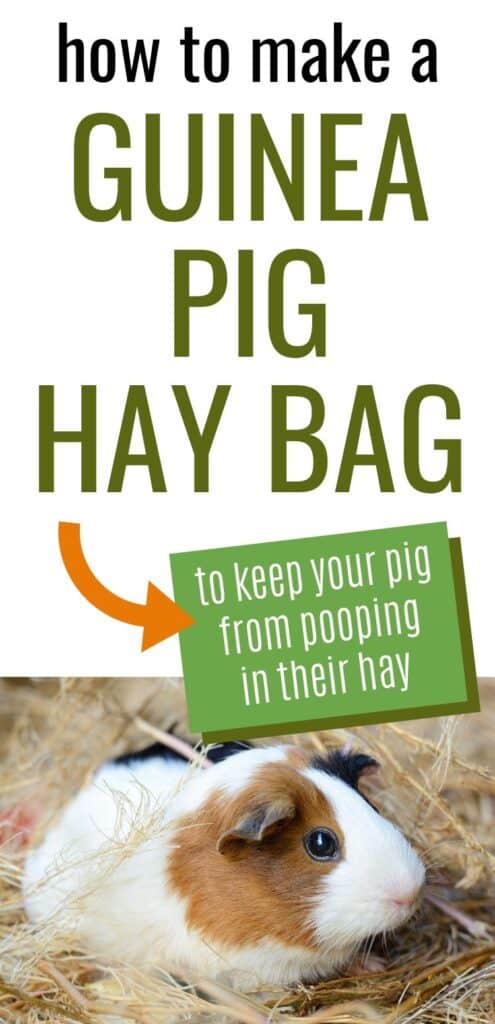
Learn how to make your own guinea big hay sack so you can minimize waste and keep your piggy's hay clean & poop free.
Guinea pigs are way cooler pets than I would have imagined prior to owning one!
This post may include affiliate links, which means I may make a commission on purchases made through these links at no additional cost to you.
When I still had an Etsy shop, this hay bag was one of my top sellers. Now that I'm no longer selling them, I'm pleased to bring you this DIY guinea big hay bag tutorial. It's a great way to tidy up your guinea pig's cage and keep it poop-free!
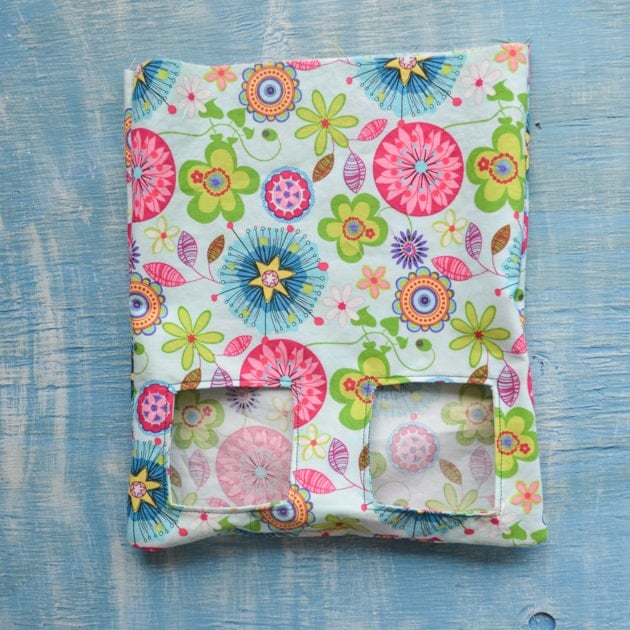
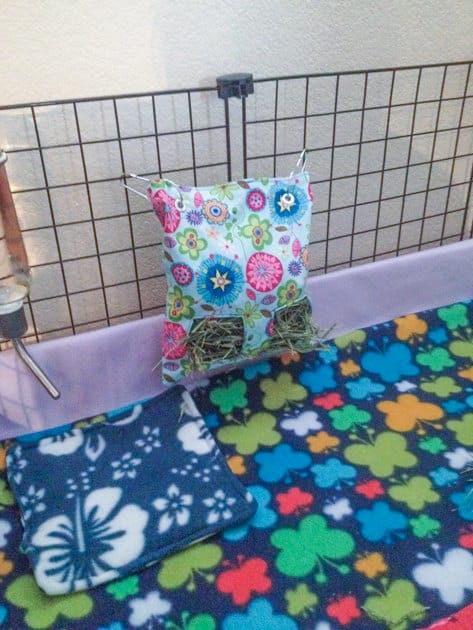
I've experimented with several different ways of making guinea pig hay sacks, but the pictured version is half lined and my favorite. The front panel is lined so the openings have nice, finished edges, but it's a little easier than creating a fully-lined bag (which is, by the way, a huge pain).
The bag, as shown, is sized for a single guinea pig, but you can change the dimensions to suit several cavies, or even a bunny!
I know it's easier to buy a hay manger and way less expensive to shove your piggy's hay in a toilet paper tube, but a hay sack is way more tidy than either option.
Yes, some hay will fall out on the ground beneath the bag, but there is way less mess than the cardboard tube method. Additionally, most wire/wood hay mangers that hang from a cage allow hay to fall out the back and into your room!
I don't know about you, but I prefer to keep as much hay as possible in the guinea pig cage and off the spare bedroom floor.
Supplies for DIY guinea pig hay sack
- ½ a yard of cotton fabric
- 2 sheets of plain printer paper
- Tape
- A paper trimmer or scissors
- A ruler or quilting square
- Matching/coordinating thread
- Sewing machine or needle for hand sewing
- Pins
- A pencil or fabric marker
- Iron/ironing board
- 2 metal eyelets/grommets
- A hammer may be needed, if you only have grommets and not a set that comes with setting pliers
- 2 shower curtain hangers, small clips, or other method of hanging the finished sack.
- One reader commented that she used binder rings because she didn't have shower curtain rings.


I really can't stress enough the importance of having a dedicated pair of cloth scissors. Cutting paper with scissors destroys them!
This project requires you to make precise cuts through two layers of fabric at once, which is harder than it sounds if your scissors are dull. I recently bought a pair of Gingher scissors and I love them! I wish I'd bought them ages ago.

- Longer cut ideal for patterns, seams or long swaths
- Knife edge cuts multiple layers
- Bent handle design holds fabric flat
Fabric hay bag tutorial
1. Before getting started, make sure your fabric has been washed and then dried without any dryer sheets. Iron it to ensure the fabric is completely smooth.
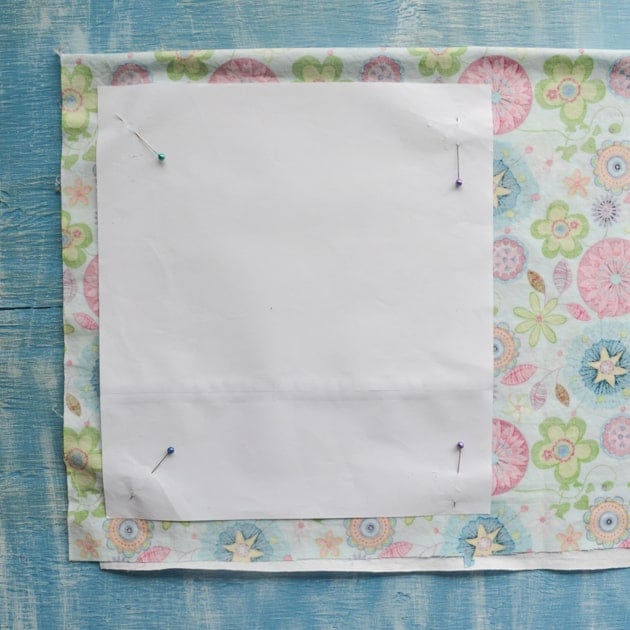
2. Create your pattern pieces with your two sheets of printer paper and paper cutter or ruler and scissors. I use two pieces of paper and tape to create a 9"x10" rectangle, but you can modify the measurements to match your critter needs. Next, cut out two pieces of paper that are each 2" square.

3. Cut out three main body pieces for your hay sack. I usually fold the fabric so the rights sides are facing each other, pin the pattern down, cut out two copies of the body piece, unfold the fabric, and then cut a third.
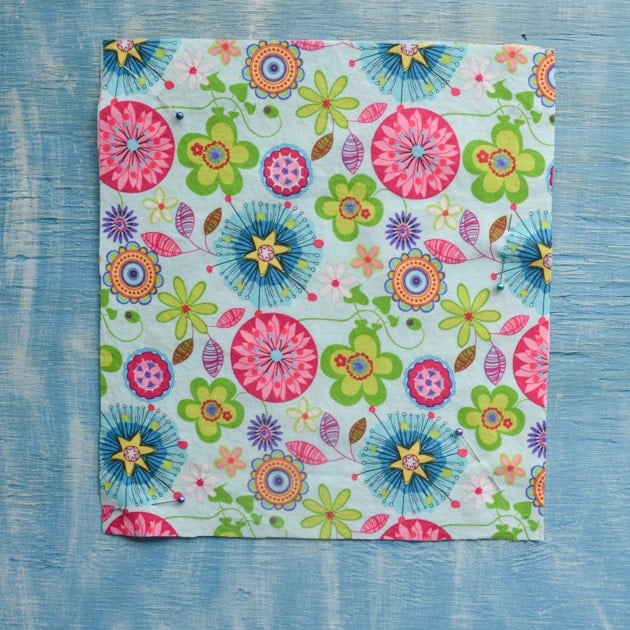
4. Place two pieces of fabric so they are on top of each other with right sides facing out and pin them in place with their edges matching as well as possible.
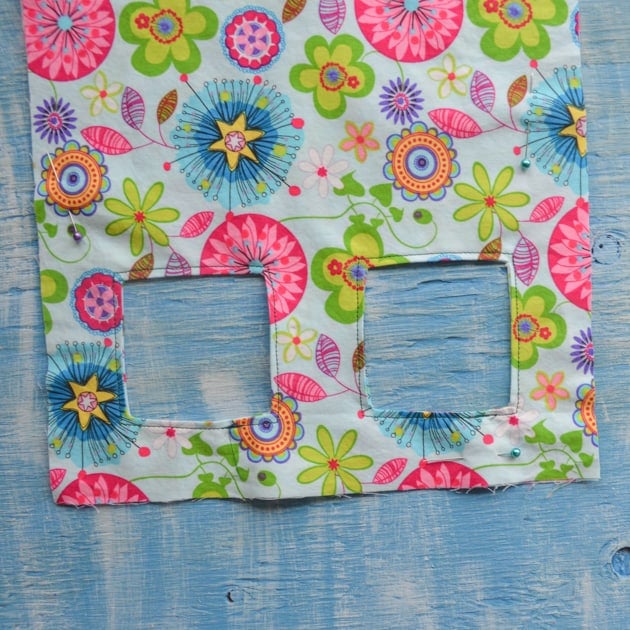
5. Position the two 2" squares on the bag wherever you'd like the openings to be. I like to place mine 1.5" up from the bottom edge and 1.5" in from the sides, but the choice is yours.
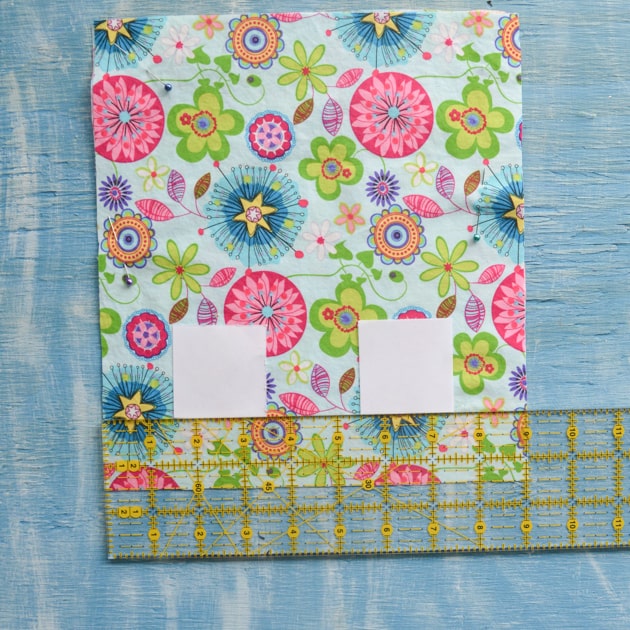
6. Using a pencil or fabric marker, carefully trace both of the squares and then remove the paper pieces.
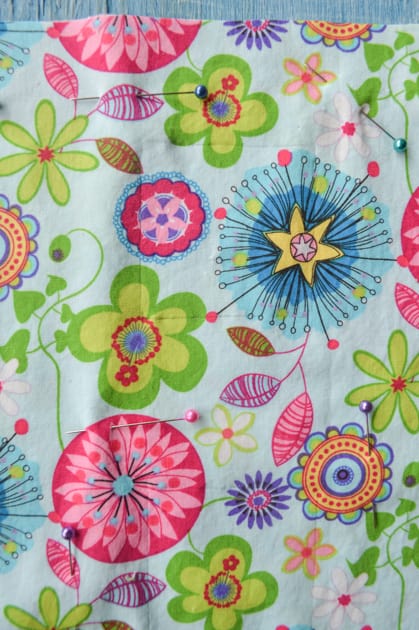
7. Pierce a hole in the middle of a square, making sure you cut through both layers of fabric.
Cut from there in a straight, diagonal line, so that you end up bisecting one of the drawn corners. Continue cutting about ¼" past the marked corner. Repeat this for the three remaining corners.
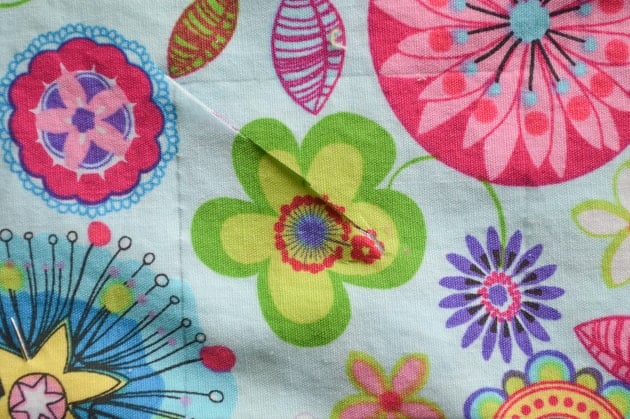
8. Once all the corners have been cut, carefully cut along the drawn lines to remove a 2" square of fabric from both thicknesses of cloth, as shown.
9. Repeat steps 7 and 8 for the second square.
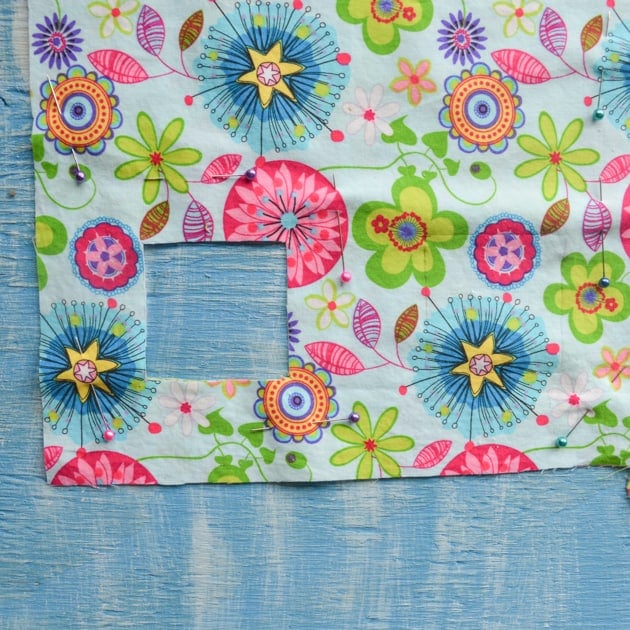
10. Next you need to fold and iron all of the flaps you created in the previous steps. All flaps need to be turned to the inside so they are sandwiched between the two fabric layers. I find it easiest to simply fold under one pair at a time, ironing and then pinning as I go.
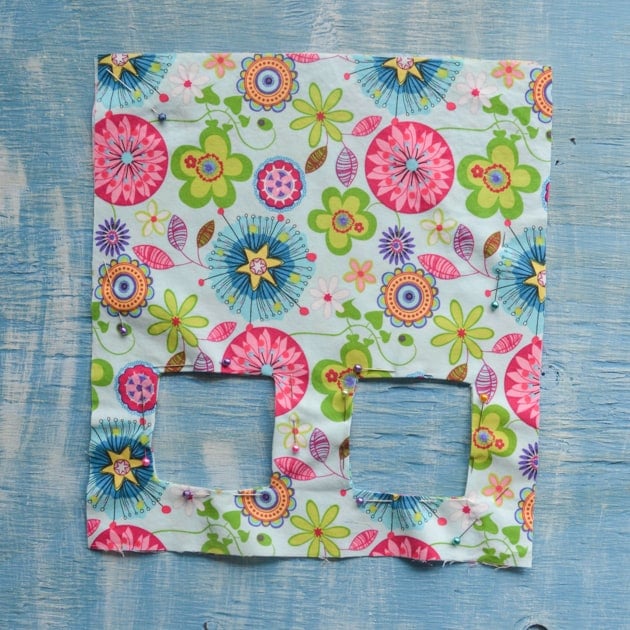
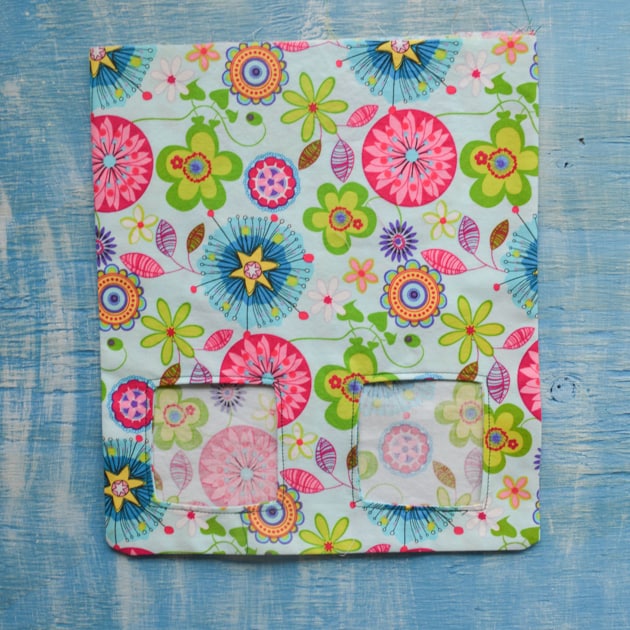
11. Once both squares are prepared, carefully sew around each opening with a straight stitch. I like to sew about 1/16" away from the open edge to ensure I catch both thicknesses of fabric and stitch them in place. From here on out, treat these two pieces as one single unit.
12. Take your third remaining body piece of fabric and pin it, right side in, to the front panel.
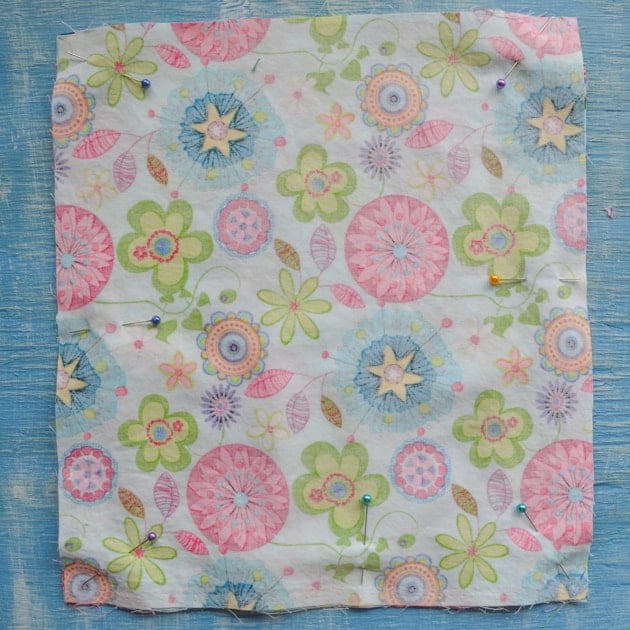
13. Sew the pieces together along the sides and bottom, making sure to leave the top open. I like to use a ¼" seam allowance.
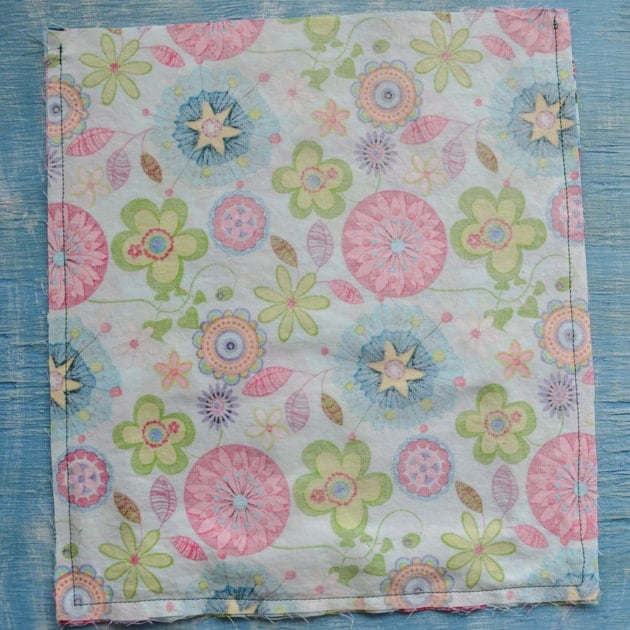
14. If you'd like, enclose the fabric edges with a zigzag stitch, blanket stitch, or a serger.
15. Turn the hay sack right side out.
16. Press the side and bottom seams.
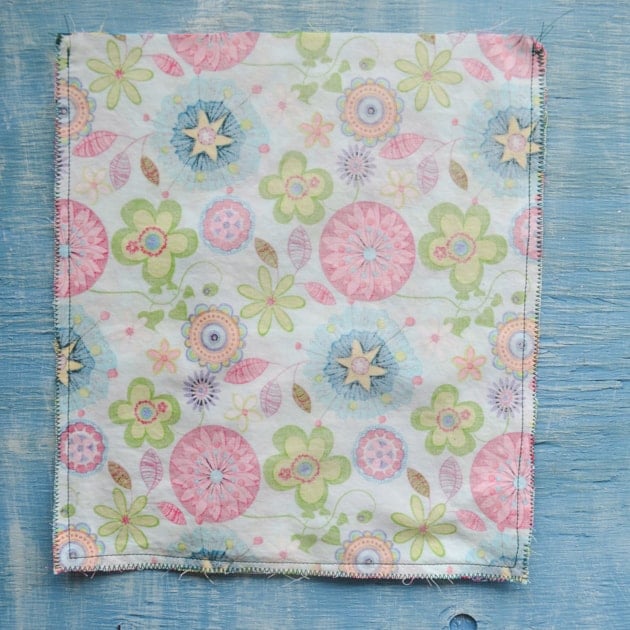
17. Turn under and press a ¼" hem along the top, then turn under and press another ¼" fold to encase the raw edges.
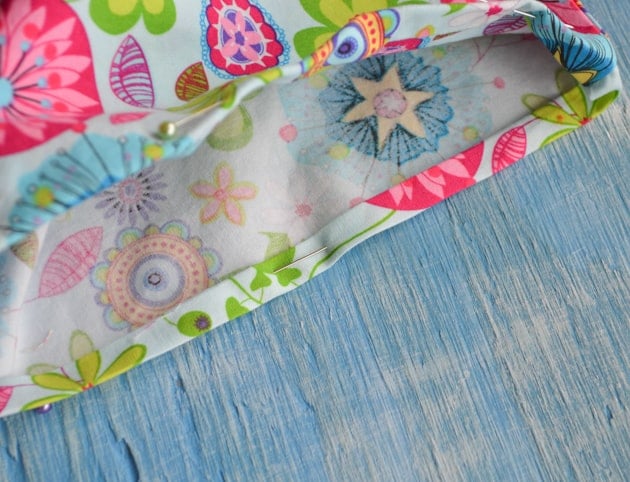
18. Top stitch along the top, sewing between 1/16" and ¼" away from the edge, depending on how wide you made your hem in the previous step.
19. Position your eyelets on the bag and then apply them according to the package instructions. I've made bags with four eyelets and bags with two, and I prefer using just two. Each eyelet goes through both thickness of the bag's front and the single layer of the bag's back.
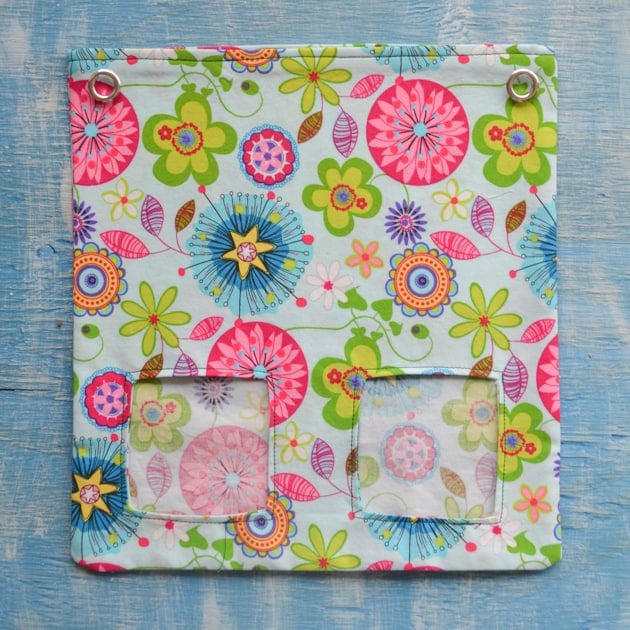

20. Stuff with hay, hang, and then watch your piggy wheek with joy!
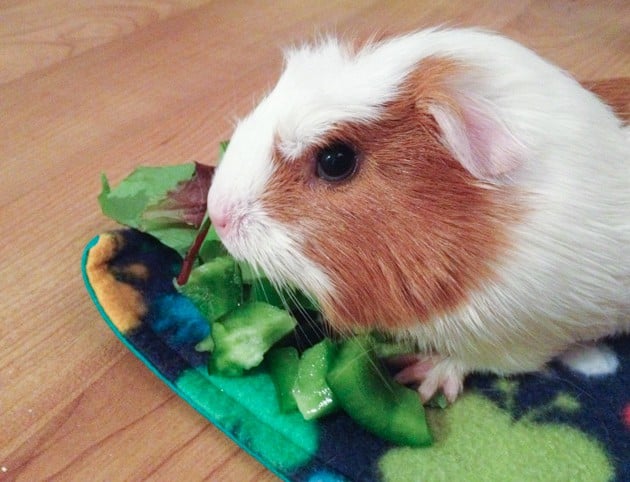
Can you tell that last photo was taken with my phone? That picture is a few weeks old now and Tiki wouldn't hang around to be in photos, especially if she heard a camera shutter click. I still only take pictures of her with my phone because she finds it much less nerve-wracking.
In addition to nibbling out of her bag, she also likes to use it to "hide" while drinking water. Silly piggy!
Not even the phone paparazzi can keep Tiki away from her fresh veggies, though! But she might give you the stink eye if you're getting to close and she thinks you're there to snitch something.
I hope you enjoy this tutorial and making your own critter a hay sack!
If you have a piggy and want to provide some additional tasty treats but live in an apartment like we do, please stop by my post on growing microgreens in your apartment.
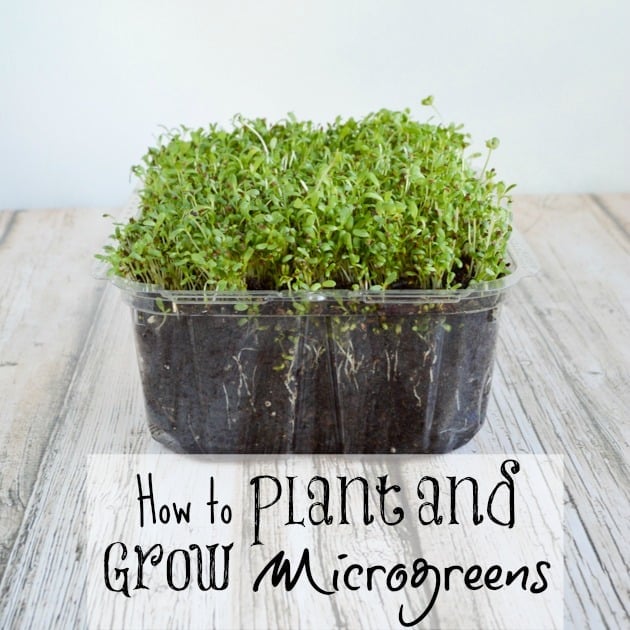
Piggies totally love fresh microgreens! Plus it's great to feed them produce you know is "clean" without any harmful pesticide residues to harm their adorable little selves.
Cindy
Hi, I noticed in one of your pictures you have a border around the bottom of your cage. Could you let me know how to make that?
Natasha
That's how I made the Coroplast cage bottom - it had sides that came up about 6". I followed this tutorial here https://www.guineapigcages.com/howto.htm
Lariza
Great tutorial, thank you! My piggies are happy 🙂
Natasha
Yay! Happy piggies are the best!