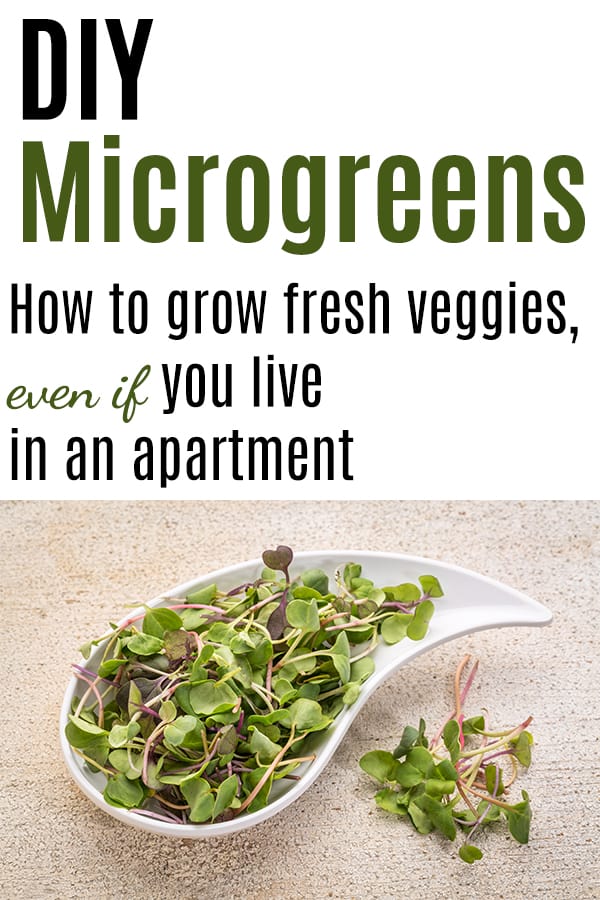
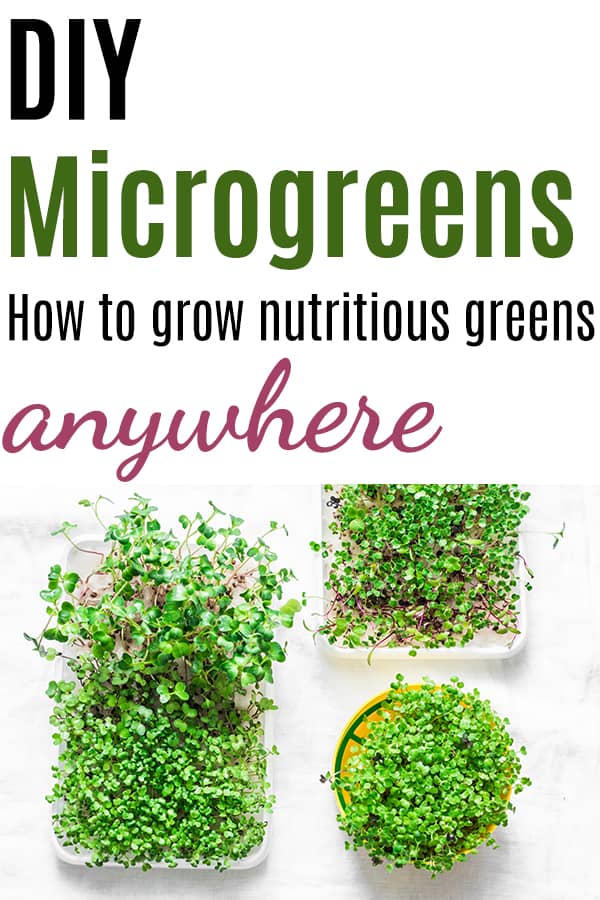
Growing your own microgreens is an easy and affordable way to have fresh greens all year long, even if you live in an apartment! Learn how to plant and grow your own microgreens with this handy guide.
Microgreens are popular at trendy restaurants and farmer's markets. They can be expensive to purchase, but they're cheap and easy to grow. Learn how to grow your own microgreens at home to add fresh, nutritious veggies to your diet any time of year!
This post may include affiliate links which means I may earn a commission on qualifying purchases at no additional cost to you.
Microgreens are tasty and nutritious. Microgreens are also great because you can grow them pretty much year round and they don't take up much space. Doesn't fresh produce in your apartment during winter sound awesome?
In addition to planting a Petomato and starting up an AeroGarden, we've also recently begun growing microgreens.
Are microgreens the same thing as sprouts?
No, microgreens are different from sprouts.
Traditional sprouts are not grown in dirt (people grow them in jars or special sprouting trays and wash them daily) and are typically consumed, roots and all, once their first set of "seed leaves" appear.
Since they are grown in a warm, moist environment, sprouts are at risk for bacterial contamination. Although the risk is small, there have been dozens of recorded cases of food born illnesses from eating raw or lightly cooked sprouts.
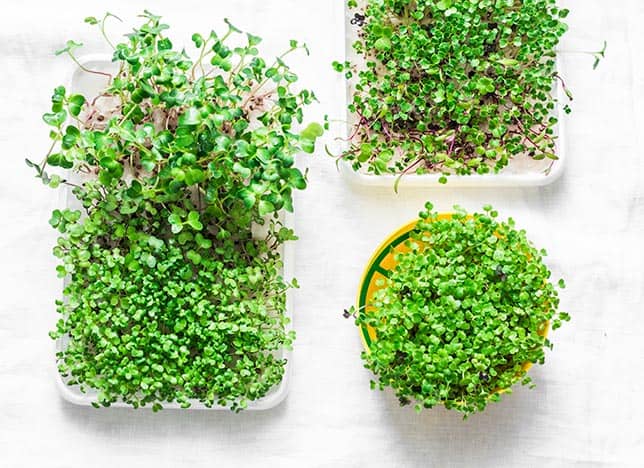
Microgreens are planted in soil and usually aren't harvested until their second set of leaves, which are also their first "true leaves" grow.
Microgreens can also be harvested later, after they have several sets of true leaves. Many of the microgreens I've personally seen at the farmer's market are harvested when the shoots have 4-6" of total length and several sets of leaves.
Microgreens do not cary the same risk for food born illness, which means they are safer to eat. This is especially true for people with weaker immune systems like children, the elderly, and pregnant women.
Benefits of microgreens
Microgreens are incredibly nutritious. In fact, a study published in the Journal of Agriculture and Food Chemistry shows that microgreens have a greater concentration of beneficial compounds like vitamin C, vitamin E, and beta-carotene than full grown plants!
According to these researchers, microgreens can contain up to 40 times more nutrients than mature plants.
Although microgreens are expensive to purchase, they are cheap and easy to grow at home. This can help you eat more vegetables on a budget!
Supplies for growing microgreens
Update: In a hurry? Simply grab a microgreens growing kit! These awesome kits weren't around when I first wrote this post, so I had to come back and include one!
No products found.
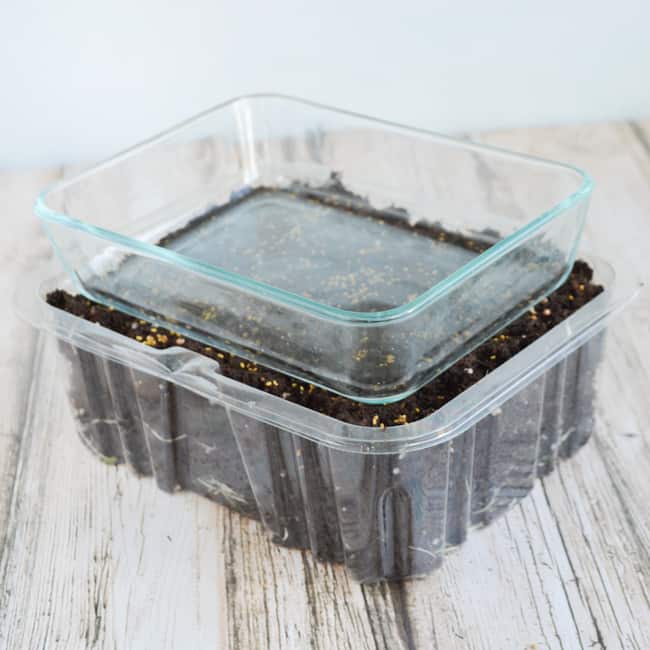
Containers - We simply kept the plastic clamshell containers from lettuce and strawberries. We had enough pretty quickly because my husband loves strawberries and the guinea pig munches through a lot of baby kale and spring mix!
You can buy seedling flats or other containers, but we didn't see the need since we could get what we needed for free by waiting a week or two.
We set the containers down inside large reusable plastic food containers (those lasagna-pan sized Tupperware-type things) to make sure water and dirt don't leak out and stain our furniture.
Potting soil - I know it costs a few dollars more, but look for potting soil, not generic "dirt" for filling in holes. If it's important to you, search out organic options.
Microgreen seeds - An amazing variety of plants can be grown and eaten as microgreens, but some are easier to get started with than others. Quick-sprouting seeds give you a great sense of payoff!
When looking for seeds, make sure to purchase seeds intended for sprouting or microgreen use. Don't rush to the hardware store and buy 10 packets of broccoli and radish. You should avoid these "garden variety" (hehe) seeds for a couple reasons. First, this gets really expensive because growing microgreens requires a lot of seed compared to how much is in those packages!
Furthermore, most seeds designed for planting in your garden have anti-bacterial and/or anti-fungal agents. Because you may end up eating the seeds, or at least parts of them, when you grow microgreens, it's best to avoid seeds that have been treated with chemical agents.
A spray bottle - This isn't totally mandatory, but I like using a spray bottle to water our microgreens. You can usually find one at a drug store or somewhere like Target for about a dollar. Just don't repurpose a bottle that used to contain a household cleaner!
Some sort of weight - We just use rectangular glass Pyrex dishes or the plastic container lids with books stacked on top.
This is optional, but helpful if you plant a whole lot of seeds.
Things you do not need include:
Grow lights - If you're just looking to grow a couple trays at a time, even weak window sunlight or an under-counter fluorescent/LED will work fine. Don't go drop lots of money on grow lights just to see if you enjoy microgreens!
Gardening experience - If you're using easy-sprouting seeds, you only have to keep things alive for about a week. Put past gardening failures behind you - you can do this!
Table could not be displayed.The best microgreens to eat
Virtually any seeds can be used as a microgreen, as long as the entire plant is edible. Some plants have inedible parts that contain toxins, to make sure to check if you're not sure!
Some of the most popular seeds to use for microgreens include:
- Alfalfa
- Arugula
- Basil
- Beet
- Broccoli
- Buckwheat
- Chia
- Green peas
- Radish
- Spinach
- Watercress
- Mustard
- Sunflower
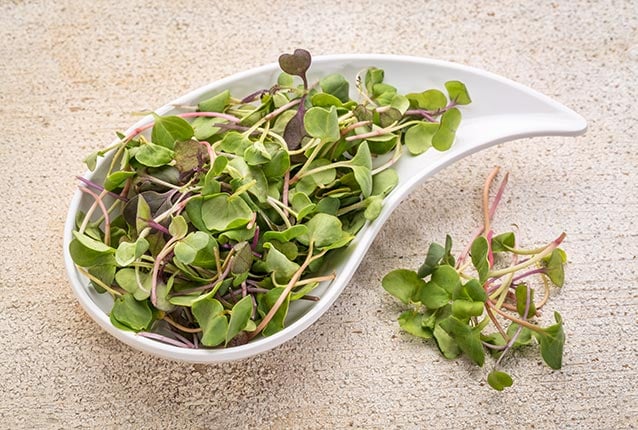
Many microgreens taste like their full-grown counterparts. For example, pea shoots taste exact like green peas!
Spicier vegetables like radish, mustard, and arugula taste spicy. Herbs like basil taste - you guessed it - like basil.
Because of their mild flavor, peas and alfalfa make good "beginner" microgreens for people just getting started.
How to plant microgreens
1. If needed, poke a few holes in your plastic container bottoms. Some containers (like ones for berries) already have holes, but other containers (like those for lettuce) do not. Just use a drill, pair of scissors, or even a hammer and nail to make at least half a dozen holes for drainage.
2. Mostly fill your container with potting soil and pat it down. You don't need to really compress the soil, but make sure it is somewhat firm.

3. Sprinkle a small handful of seeds across your prepared soil. The first couple of times, I really over-planted my seeds. They don't need lots of space, but there shouldn't be so many seeds you can't see the soil, either! You'll just need to experiment with your container to see what words for you.

4. Lightly spray the seeds with your water bottle. You want the soil to be damp, but not sodden.
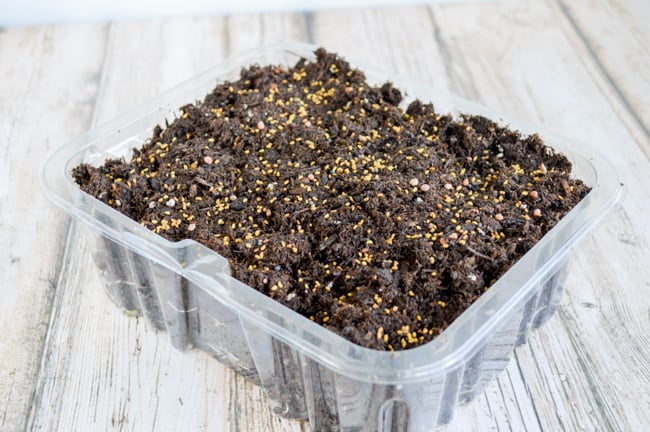
5. Cover the seeds with your weight.
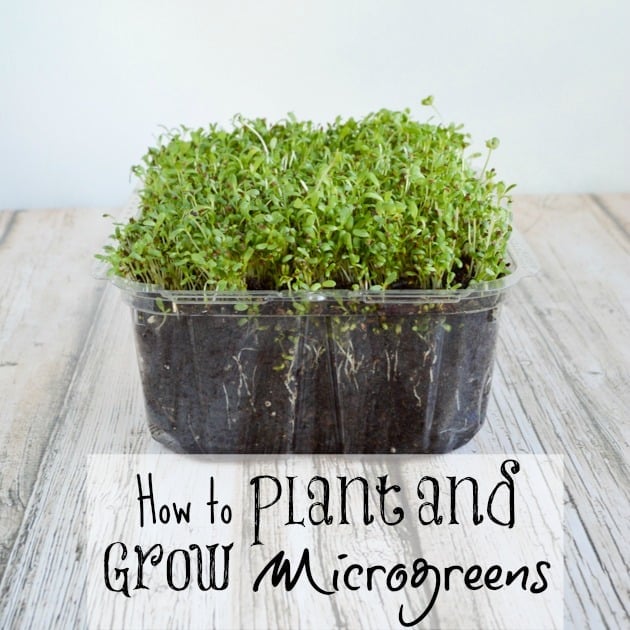
6. Set your microgreen container in a windowsill, on a table near a window, under a fluorescent kitchen light, etc. We have ours in a North-facing window and our seeds seem to get ample light.
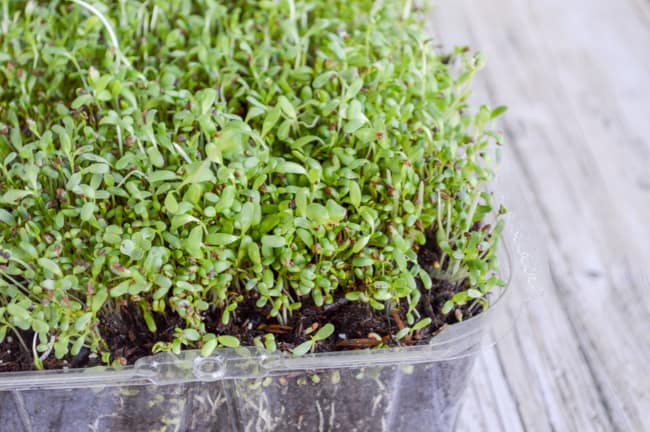
6. If you're using fast-sprouting seeds like alfalfa and radish, you'll start to see sprouts in under 24 hours. After 2 or 3 days, remove the weights. Remove them sooner if you start noticing lots of mildew/mold. Amazingly, our sprouts usually lift the Pyrex containers in 48-72 hours!
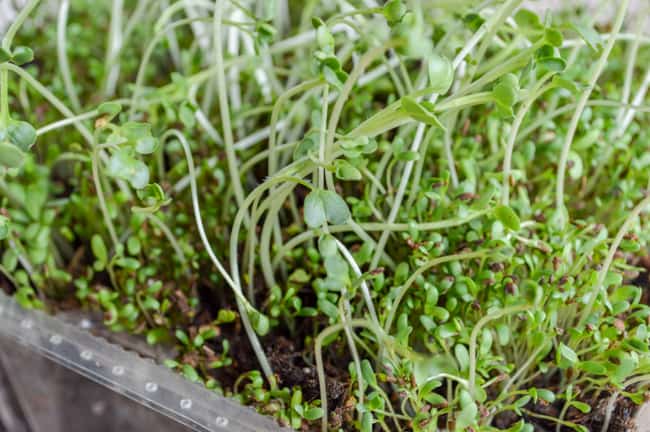
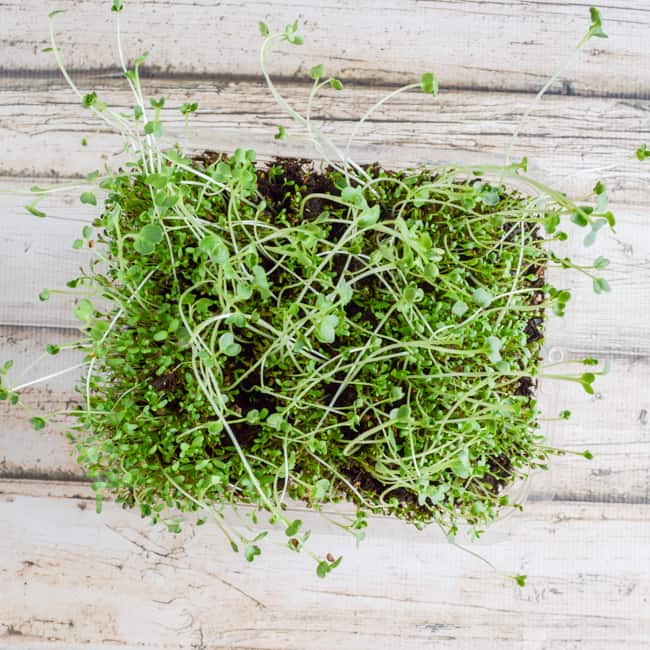
7. Allow your greens to grow, rotating as necessary if they lean excessively towards light. Harvest when you're ready to eat them! Microgreens are "traditionally" harvested right after the second set of leaves appears, but you can harvest them when they only have their seed leaves. It's up to you!
8. To harvest, simply cut the greens off at ground level using a pair of scissors. Wash and enjoy!
We usually end up cutting off/pulling out the radish greens long before we harvest the others. Radish grows really fast and towers over the other greens!
The first time we planted microgreens, we put them under a thin layer of soil. There were so many greens and they grew so fast that they lifted the dirt up as they went! Not adding soil and using a light weight really cut down on the amount of dirt we had to pull out of our greens before eating them.
Many people recommend soaking most seeds for a day before planting them in order to hasten germination. Since our mix sprouts in less than a full day, I haven't found that necessary.
If you purchase slower-sprouting seeds that specifically recommend soaking, you may want to add that extra step before planting. If you want to get into sprouting the more "difficult" seeds, picking up a microgreen book might be helpful.
Some seeds, like parsley and cilantro, can take up to three weeks to sprout and can be difficult to work with.
Books like Microgreen Garden and the others shown below show you how to deal with problems like mold and bacteria that are exacerbated by growing more difficult seeds and detail a variety of different seeds and what their microgreens taste like.
We purchase our microgreen seeds on Amazon, but there are other sprout/microgreen seed retails on the web that allow you greater flexibility and seed choice. Because we live in Hawaii, shipping for pounds of seed is prohibitive unless we can make our purchases on Amazon Prime.
No products found.
No matter what seeds you decide to use, I hope you enjoy growing microgreens as much as we do!
Don't lose track of this DIY microgreens guide - Pin it now!
If you're interested in creating a healthier home, you may also enjoy these posts:
Easy Swaps for a Healthy Home
Discover easy, budget friendly changes you can make for a healthier home!

Learn what to use instead of aluminum foil for baking, grilling, and food straoge in this comprehensive guide.

Save money and the environment when you chose a plastic wrap alternative!


Sandy
Hi it sounds fascinating growing micro greens. Once grown can they be given to Guinea pigs if so which are the best and which to avoid. Thanks. I am in the UK. But it shouldn't be a problem to get the seeds as you said Amazon sold them. Sandy.
Natashalh
Back before our piggy passed, I used to give her micro greens as a treat. Micro greens are more nutrient dense than the full grown plants and it's important for guinea pigs to not get too much calcium, so mainly I'd make sure to not feed too much (just as a treat, not as main veg source). Many common micro greens, such as radish, are cavy safe. This site has a good list of foods that are unsafe for piggies that may help you out =) https://www.happycavy.com/guinea-pig-dangerous-unsafe-foods/
Hope that helps!