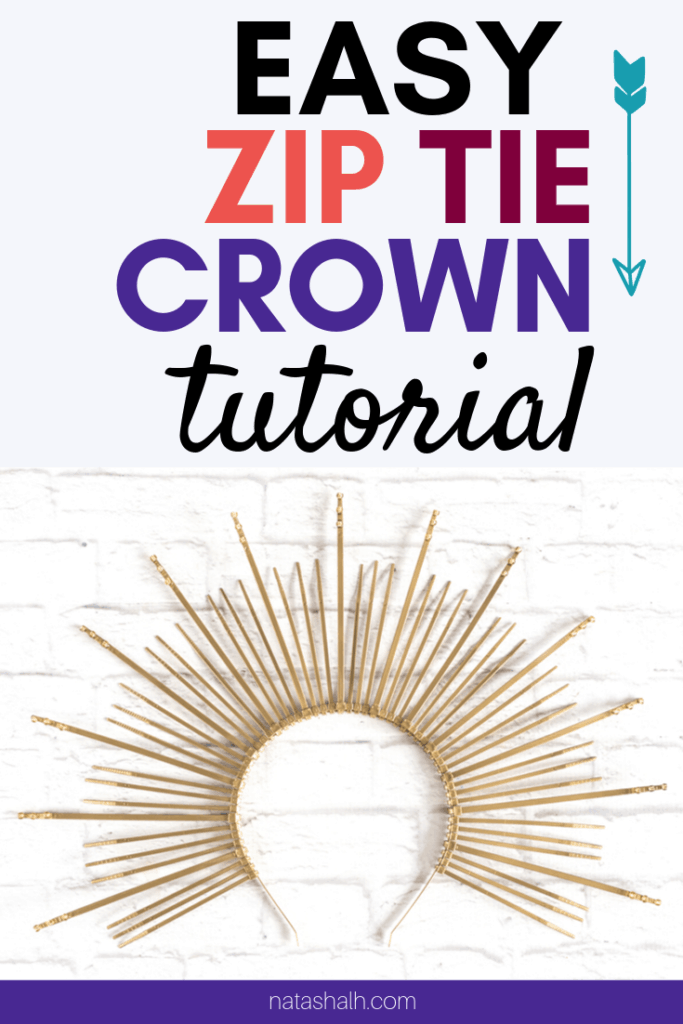
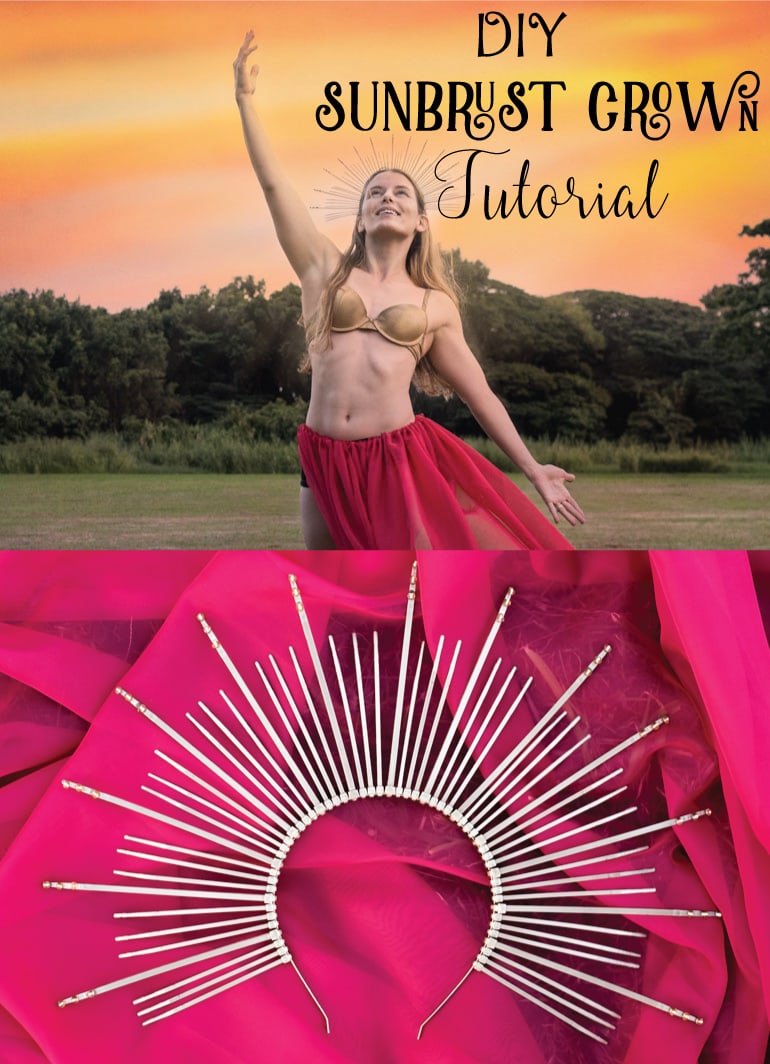
Discover how to make a zip tie crown that's perfect for a sunburst headdress or a saint's halo with this easy tutorial! It's a very easy DIY Halloween costume idea on a budget, plus it looks stunning and it's durable, too.
While looking at ways to make floral crowns, I came across this tutorial for making a spiked halo headpiece. I love her channel and she has wonderful costumes, but this headpiece just would not work for me with the materials I had.
A strange series of thoughts while rummaging through supplies led me to the idea I finally loved and what I'm sharing in today's DIY sunburst headdress tutorial using zip ties. I hope y'all enjoy because it's way super easy!
This post may include affiliate links, which means I may make a commission on purchases made through these links at no additional cost to you.
So, to make this sun ray halo headband thingie (there seriously has to be a better name for it. A nimbus headdress?) I used zip ties. Yes, zip ties! Zip ties and gold spray paint I got for free several months ago when someone was clearing out an abandon locker at the MakerSpace.
Since first writing this tutorial, I've realized that it's become very popular with people looking for a nimbus or halo headband for nativity scenes and church Christmas pageants.
If you make one of these halo headbands and use it for your nativity or play, I'd love if you could tag me @natashalhn on Instagram and @natasha5887 on twitter so I can see your work!
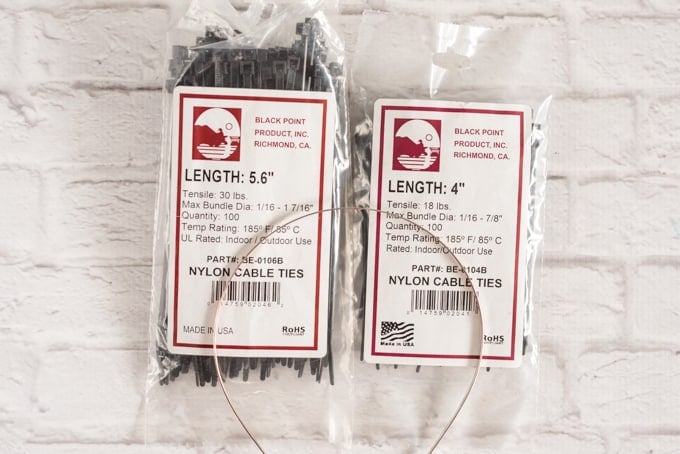
Materials needed for a halo headband with zip ties
- A plain headband. I used a very narrow metal headband from this package
- Zip ties! Any color will do in a pinch, but I recommend black. I used both 4" and 5.6" zip ties, but you an use one length if you'd prefer.
- Gold spray paint
- Sparkly accents (beads, sequins, glitter, etc. Optional but fun)
- Glue (Gem-Tac or thick super glue)
That's it!


How to make a sunburst headdress:
1. Find the upper center point of your headband and cinch down one of the longer zip ties in this spot. This will be the top of your crown! Really pull it down tight so you won't have to use any glue.
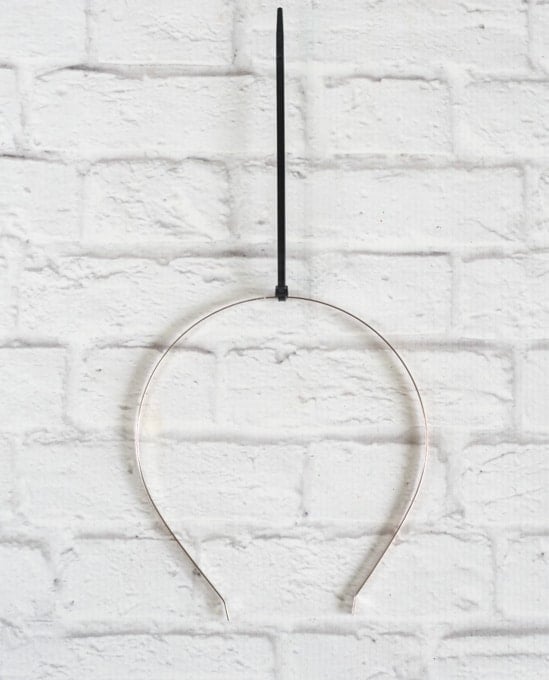
I guess if you really wanted to, you could stop here and have a very narrow unicorn horn. =p
2. Add 3 smaller zip ties on either side of your central long tie. Again, cinch them down as tight as possible and make sure they're all facing the same direction!
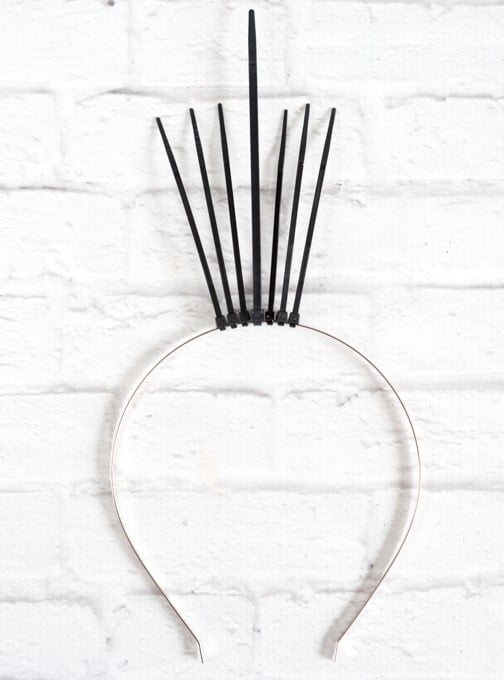
3. Add a longer zip tie on each end...
...then three more shorter zip ties on each side.
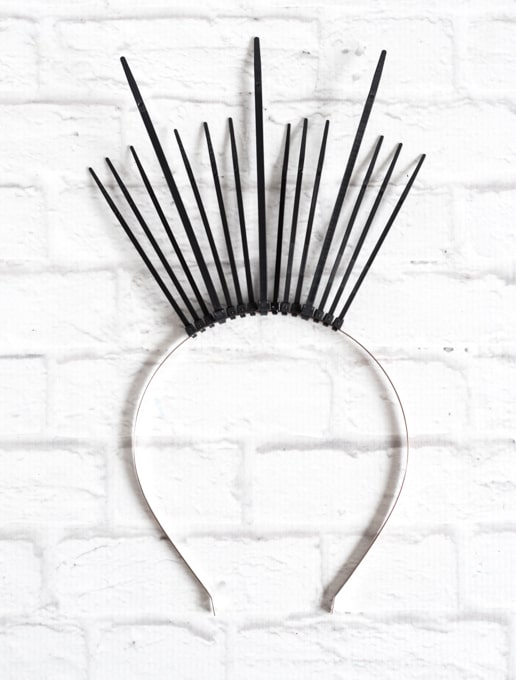
4. Continue repeating this pattern until you've covered most of the headband! It can get awkward to wear if you go all the way to the end, so I recommend leaving a few inches empty at the bottom.

5. Protect an outdoor work surface with newsprint, a large box, plastic, or something else to prevent spray paint from going everywhere, then spray one side of your crown with spray paint. Work with short sweeps of paint and layer it on slowly instead of spraying intensely on one spot before moving on. Too much spray paint at once can lead to unsightly drips!
6. Once one side is dry, flip your crown and spray the other side. It's okay if a little of the black zip tie shows through - I actually prefer to leave a tiny bit showing to add some visual depth.
7. Look for spots with inadequate coverage - there are always a few hiding somewhere on every project I've spray painted! Add some additional paint, as needed.
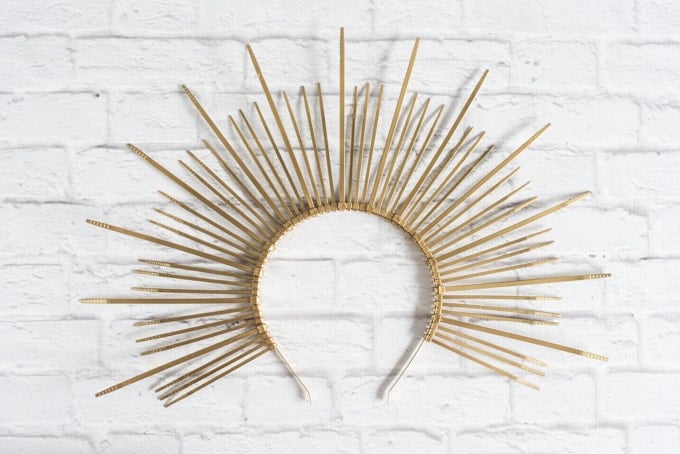
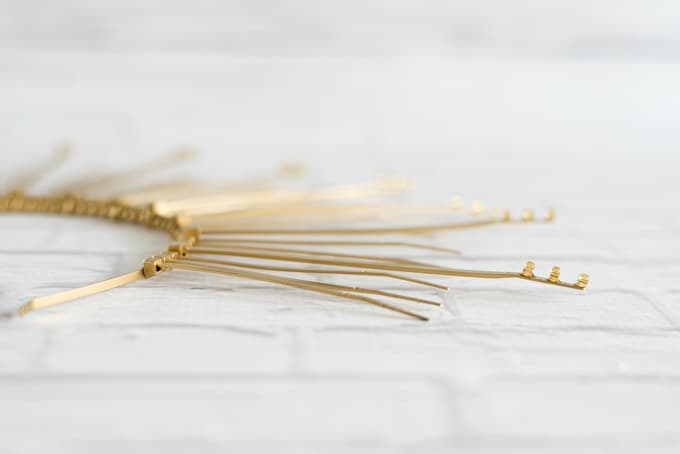
8. Once your crown is fully dry, bring it back inside to embellish, if you'd like. I used a tab of thick super glue to hold three gold beads on the end of each longer zip tie. Beads, sequins, and glitter would all look great!
Get out there and enjoy your new crown. =) It really flashes when it catches the light!
Don't lose track of this tutorial! Pin it to your favorite craft board now!

This crown would make a gorgeous addition to a sugar skull/Day of the Dead ensemble, don't you think? Or a nice accessory for a Renaissance saint costume? {{Because Renaissance Saint is super popular Halloween costume, right? =p }} It can also be worn as a sort of necklace...stay tuned for a sister photo to "Sunrise" above to see what I mean!
If you enjoy making costume pieces, you'll also like seeing a tutorial for the super simple chiffon cape/skirt in the photos!

I never would have expected to use zip ties to make a sunburst crown until I tried it! What unusual crafting supplies have you used in the past?


Maria
Hi Natasha, this is an awesome tutorial that I'd love to try for a socialite outfit to go to a James Bond Casino Royale event soon. One question, I would imagine that zip ties are a bit too floppy to stand up on their own once attached to a headband - did you use a specific type or do anything extra to get them to stand upright?
Thanks,
Maria
Natasha
That sounds like a fun event!
No, I didn't do anything extra to the zip ties to make them stand up. I used the pictured/linked zip ties that I ordered on Amazon.
I hope that's helpful and enjoy!
Julie
I LOVE this!! And actually so easy to do, like super easy!! Now, I just need to figure out why I would need to wear a sunburst head dress....! 😉
Natashalh
Halloween is coming!!!!
I wanted to take photos on this particular hike, but it turned out too windy when I got where I'd imagined. Because the headdress wouldn't fit in my bag, I had to wear or carry it while hiking. Back on the road walking towards the car, a lady stopped driving to roll down her window and tell me how cool it was, so you never know what kind of reaction you'll get. =)