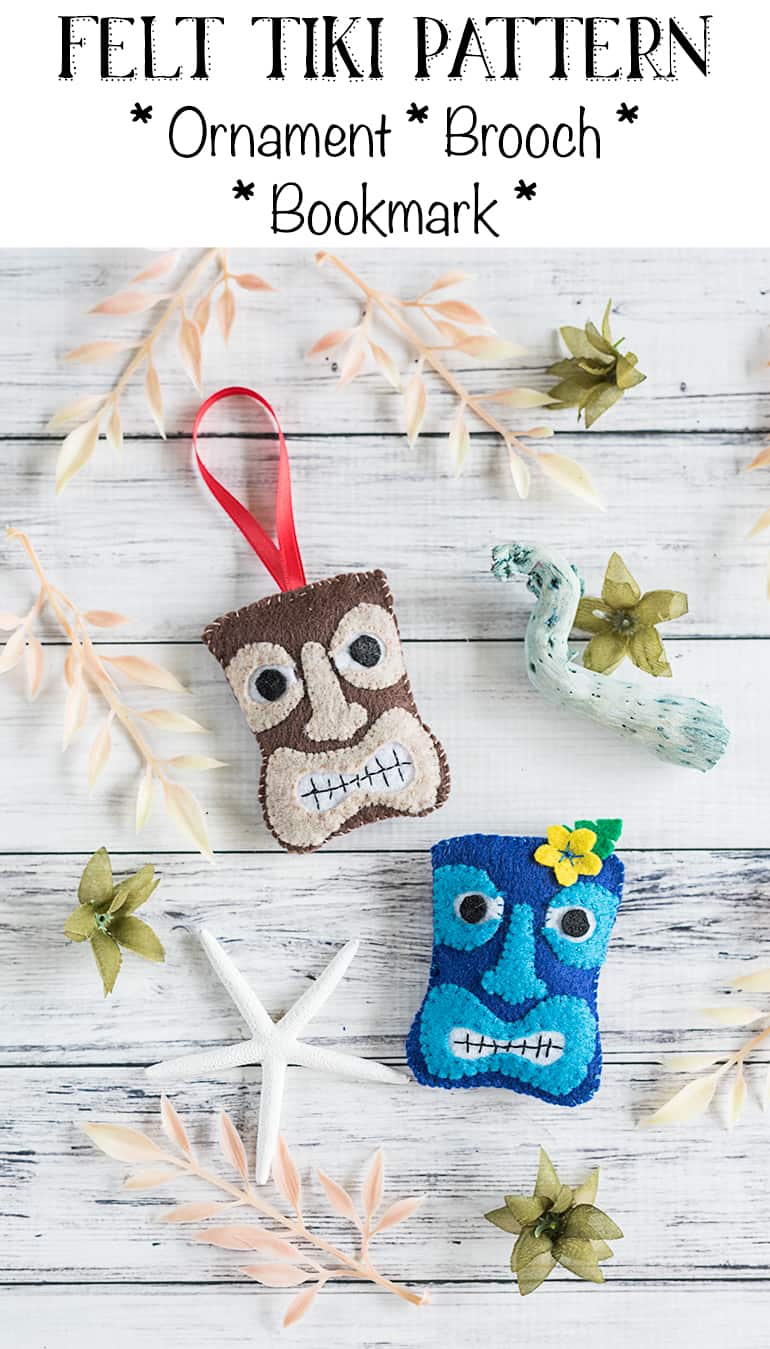
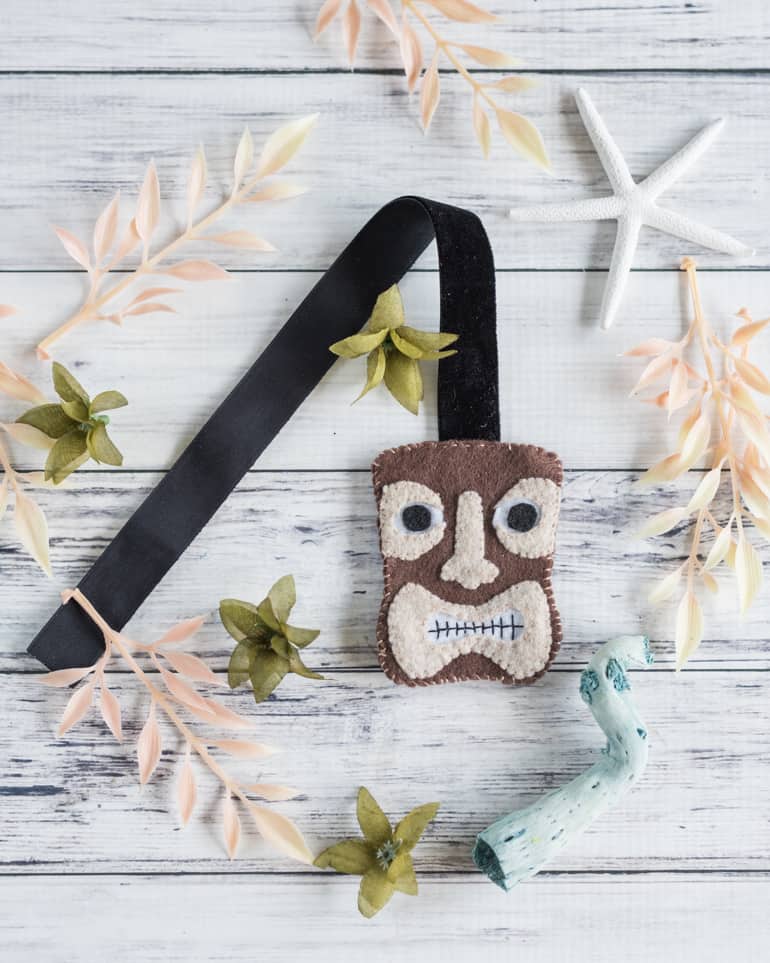
These felt Tikis are so fun and easy to make with a free printable pattern! Learn how to make a felt tiki brooch, bookmark, or ornament!
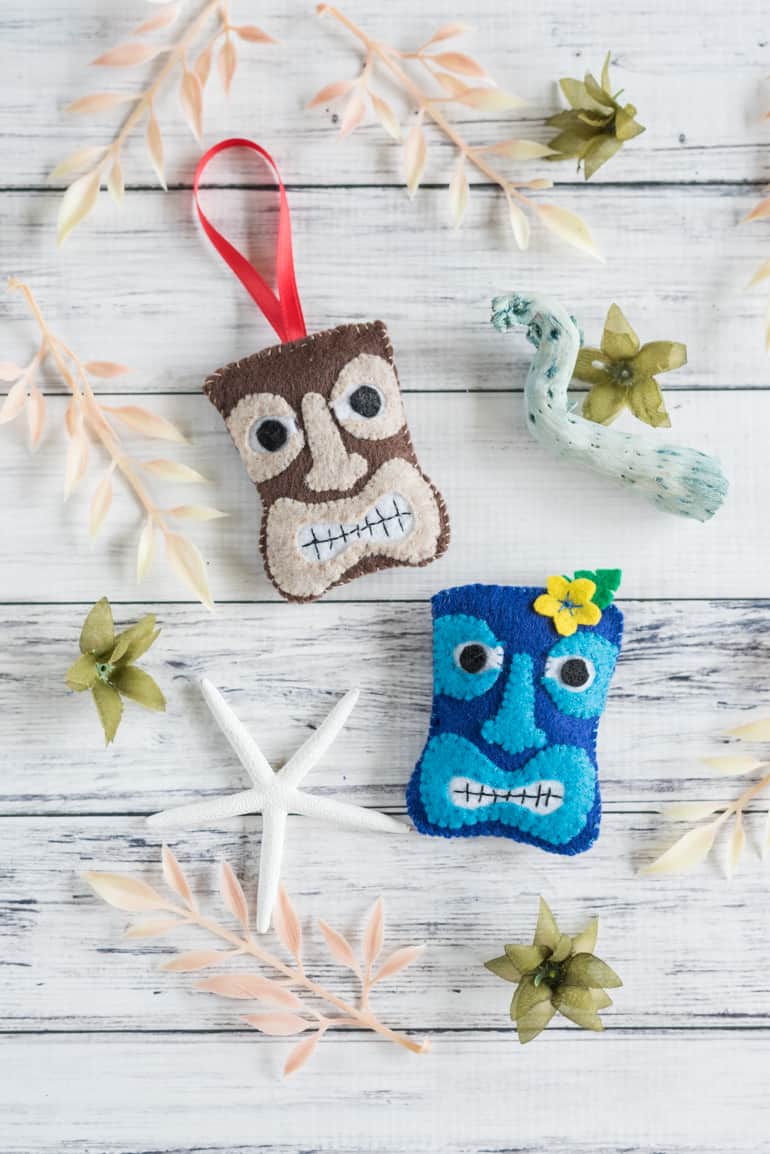
This felt tiki also makes a fantastic bookmark and a totally cool rockabilly-style brooch (plus I think he has some potential as an awesome gift topper, too!). I hope you enjoy this felt pattern. 🙂
This post may include affiliate links, which means I may make a commission on purchases made through these links at no additional cost to you.
Because I experimented with the pattern so many times, I ended up making this project with acrylic felt. Wool and wool blend felts are much nicer and more durable, though they do cost a bit more. If you're planning to give your tiki felt ornament as a gift, you may want to use wool felt.
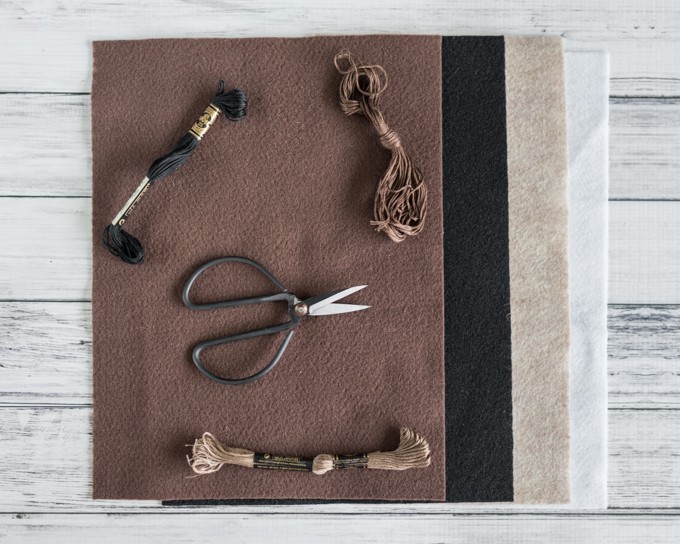
To make a felt tiki ornament you will need:
- Felt! I recommend a dark and a light in the same color family, plus white and black. You can use whatever colors you'd like, though! In the tutorial piece I used dark and light brown, but you can also see I made a blue tiki. You'll also need a small scrap of green and a flower color (yellow, pink, purple, etc.), if you decide to make the floral accent.
- Embroidery floss - black and a color to match your lighter colored felt. You may also want a third color to match the darker felt, if you don't want the stitches to show as clearly as mine. I think that's part of the charm of felt projects, though. =)
- A needle
- Scissors
- A small amount of stuffing - optional, but nice for the ornament and brooch
- Ribbon or a pin back.
- For the bookmark I used this velvet ribbon, but grosgrain also works well. For the ornament I used a small amount of satin ribbon. For the brooch I used a simple safety pin, but you can also use an "official" pin back.
- A pen or, even better, a disappearing fabric marker
- A Wonder Clip or two - optional but very helpful
- Your tiki ornament pattern!
How to make a tiki felt ornament
Begin by cutting out your paper pattern pieces. Make sure to cut out the inside of the lip piece, too! Cut the pattern pieces along the line.
Miss downloading the pattern above? Download at the felt tiki pattern here.
Trace the pattern pieces onto their respective felt colors. You can use a ballpoint pen, but a disappearing fabric marker is a better choice. Make sure you trace:
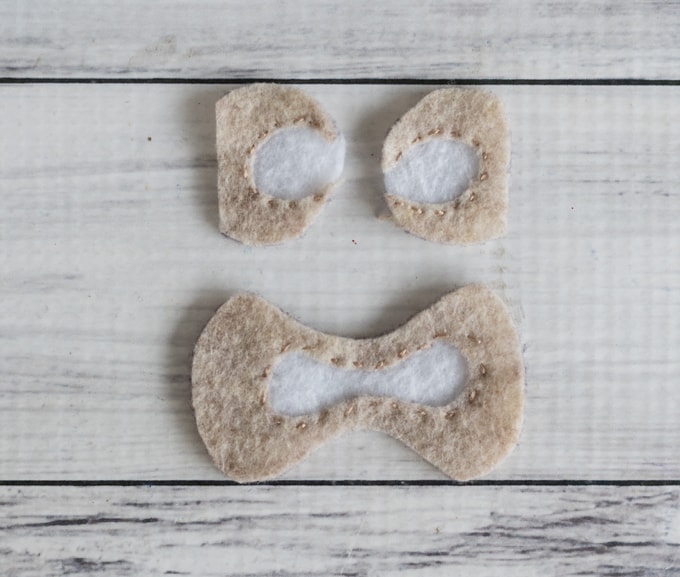
- Two of each eye piece. The crescent should be in your 'accent' lighter color, the larger circle in white, and the inner circle in black.
- One nose, in the accent color.
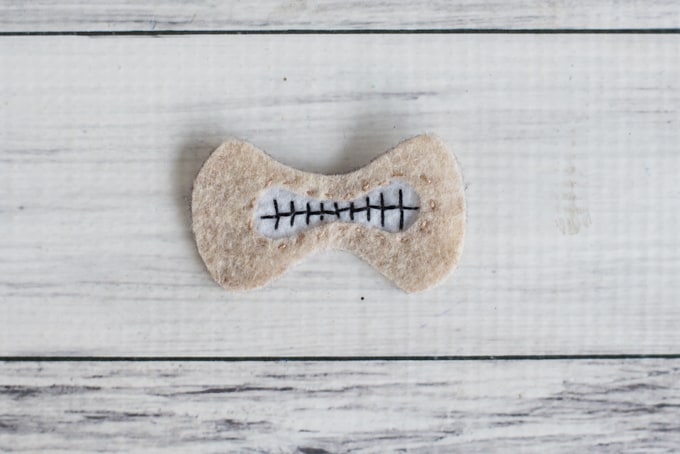
- The lips, in the accent color. Make sure to cut out the interior area
- The inner mouth, in white
- Two of the body, in the body color
- Leafs and flowers, if you're adding them

Cut the pieces out along the outer edge of the line. Your scissors should cut the line, but more to the middle/outside instead of the inside of the line.
Stitch the white inner mouth portion to the back side of the lips. Use two strands of embroidery floss and and a running stitch. I prefer to use a color that matches the lips, but go with whatever makes you happy!
Stitch the whites of the eyes to the backs of the eye crescents, also with a small running stitch.
Now it's time to embroider the teeth! You can trace out the teeth with your mark or just go for it. Make a line of back stitches across the width of the mouth with two strands of black floss.
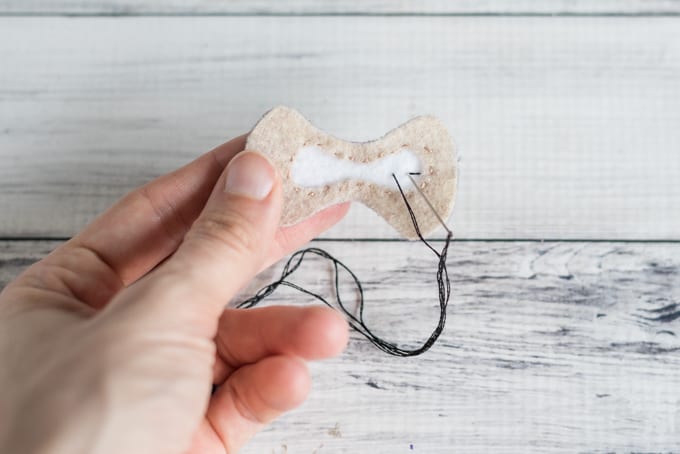
Go back across adding teeth. I made each tooth as one relatively long straight stitch.
While you have your black thread out, stitch a black inner eye to the white of each eye with a running stitch.
Now you're ready to appliqué the tiki's facial features! Play with positioning the eyes, nose, and mouth to make sure you know where everything will go. If you'd like, you can use a small dab of fabric glue or hot glue to hold the pieces in place for stitching, but it's easy enough without. The trickiest part is keeping the mouth level - I just use a WonderClip on each side to hold things in place.
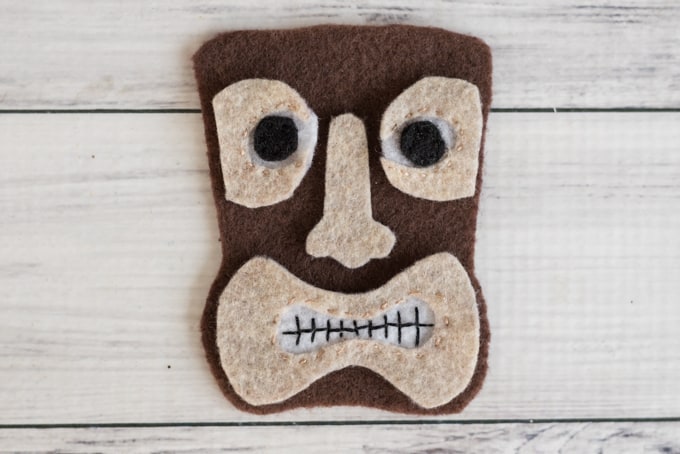
Appliqué the facial features using a whip stitch. For a nice, clean appearance, insert the needle into the body portion very slightly underneath the piece you're appliquéing. To see what I mean, just check out this video clip! I also demonstrate how to quickly tie off your thread.
At this point, you need to decide whether you're making an ornament, bookmark, or brooch (if you haven't decided already!). For an ornament, cut 6-8" of a narrow ribbon. For a bookmark, cut at least 12" of ribbon - I suggest using one of your favorite books as a guide to help you determine how much ribbon you need. For a brooch, you'll need to find a pin back or safety pin.
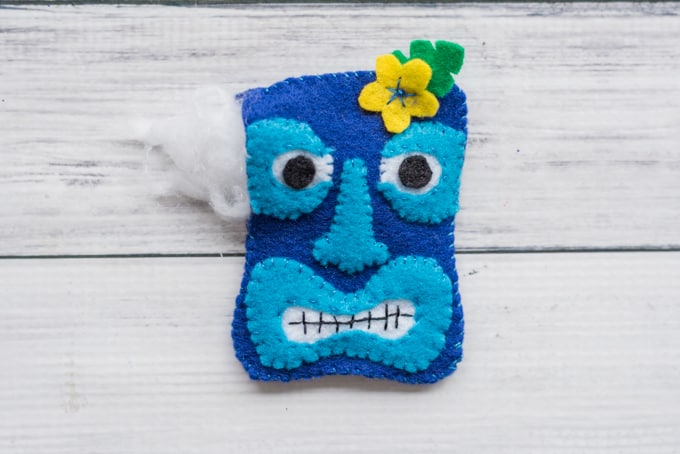
For any option, if you'd like to add a leaf or flower, make sure to stitch these elements in place before stitching the two body pieces together! I simply positioned the leaf behind the flower, placed them on the tiki's forehead, and made a few straight stitches to give the appearance of petals. This is sufficient for holding down both flower and leaf - you don't need to appliqué the pieces. {{For a picture of the flower and leaf, just look at the stuffing photo!}}
If you're making a brooch, attaching the pin before stitching the two halves of the tiki together makes life so much easier! A simple safety pin works fine - just stitch it in place, as shown, on the remaining body piece. Make sure to put a stitch or two through the "loop" opposite the opening to keep it from slipping around quite as much! I recommend placing your pin about ⅓ of the way down the body. Once the pin is secure and the thread tied off to the "inside" (so the knot is on the opposite side from the pin), clip the two body pieces together, right sides out.
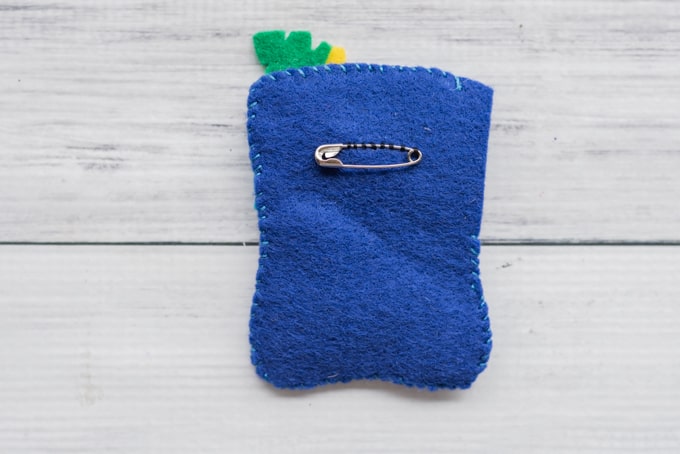
For the ornament and bookmark, the ribbon will attach at the center top, sandwiched between the two body pieces. Align the body pieces, appliquéd portion facing out, and hold in place with clips. You can either clip the ribbon in place now or remember to insert it when you get to that point in your sewing! As you can see in this image of my tiki bookmark, I used a straight stitch to secure the ribbon in place, but a whip stitch for the rest of the body.
For all of the options, use two strands of embroidery thread and a whip stitch to sew the body. When you have about an inch or inch and a half left open, grab a small amount of stuffing/fiber fill and stuff your tiki very slightly, if you'd like. I find that a small amount of stuffing looks really nice for ornaments and brooches.
Finish stitching the tiki closed, secure the thread, and then poke the needle inside the tiki as if you were making a 1 or two inch stitch through the body. Bring the needle through, pull the thread taught, then carefully clip the thread. Work the tiki a little to help the thread's tail slip inside. This helps protect the knot from coming undone!
Enjoy your awesome felt tiki!
I hope you enjoy making your own tiki felt ornament! Or maybe you'll be like me and make an ornament, a bookmark, and a brooch. 🙂
More felt craft ideas
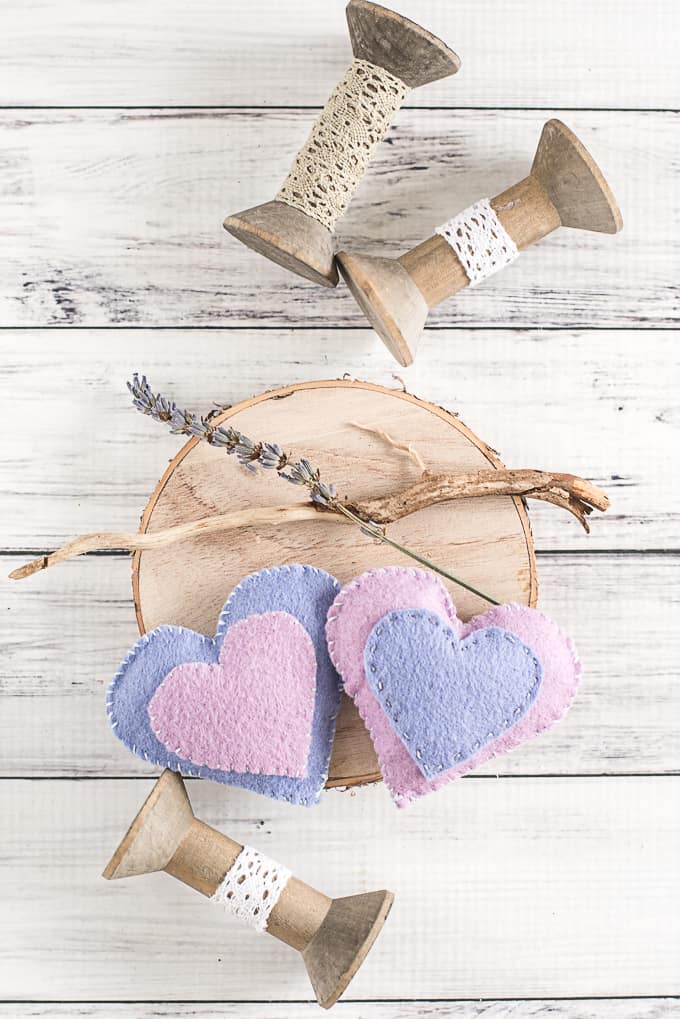
If you like working with felt, you may also enjoy this cute appliqué heart hand warmer project!
Felt-lovers will also want to stay tuned because I have several more felt projects in the works! I can't wait to share them soon. =D
Which version will you make? A tiki felt ornament? A brooch? A bookmark?


Sarah Leonard
I love this Natasha! Super cute and quirky too!
Natashalh
Thank you! BTW - I kept trying to comment on your post about Stardust. I don't think it ever went through, but I'm very sorry if a bunch of repeat comments showed up!
Rose
So much fun! I love the versatility here to create different tiki items.