This post may include affiliate links, which means I may make a commission on purchases made through these links at no additional cost to you.
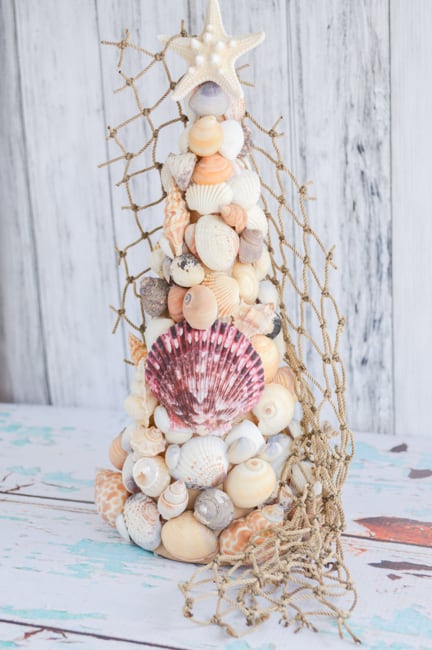
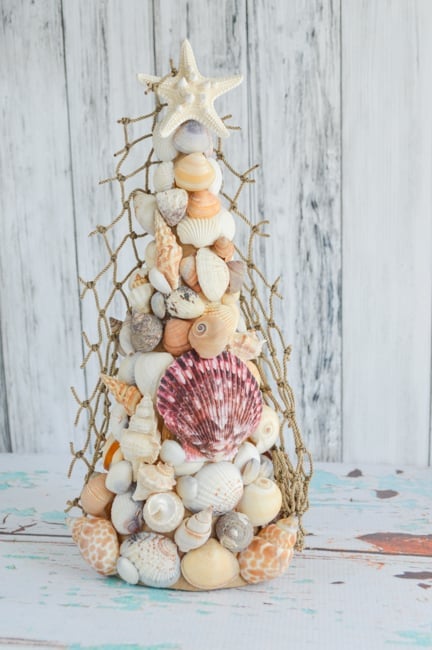
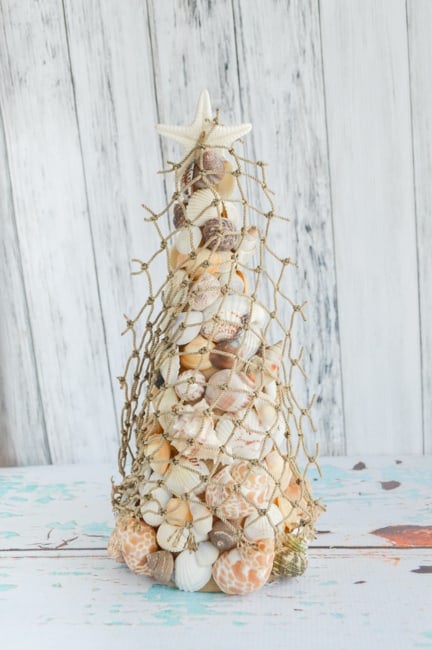
I've spent most of my life in costal states. Even though I don't really enjoy just sitting on the beach, being near the ocean is important to me and I definitely think of myself as a costal person. I happen to live in a warm costal place, but I know there are plenty of cold costal locations, too! That's why I decided to make and share a seashell Christmas tree topiary instead of making something more tropical or Hawaiian.
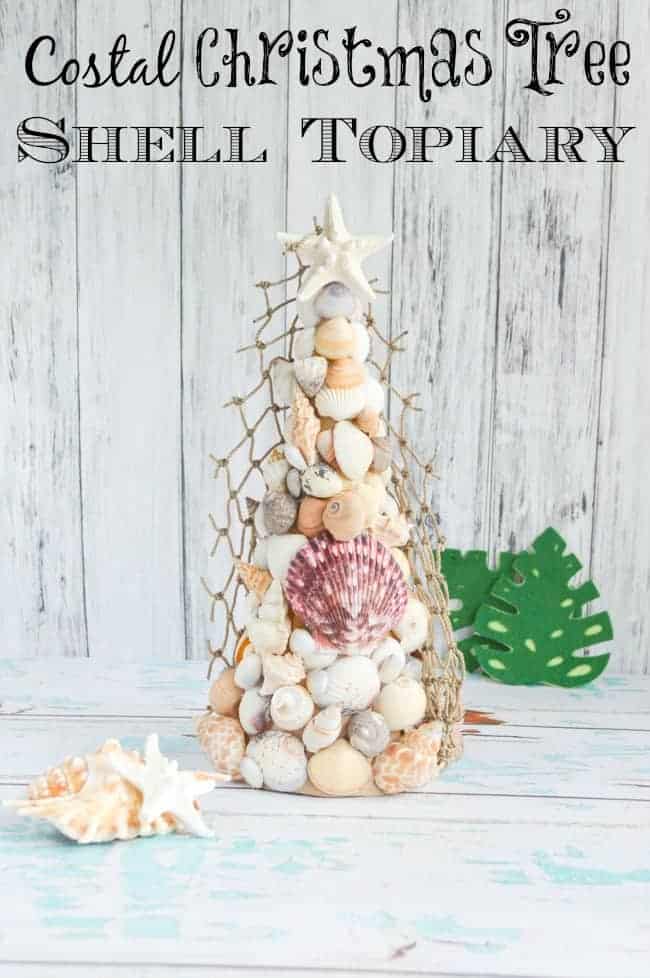
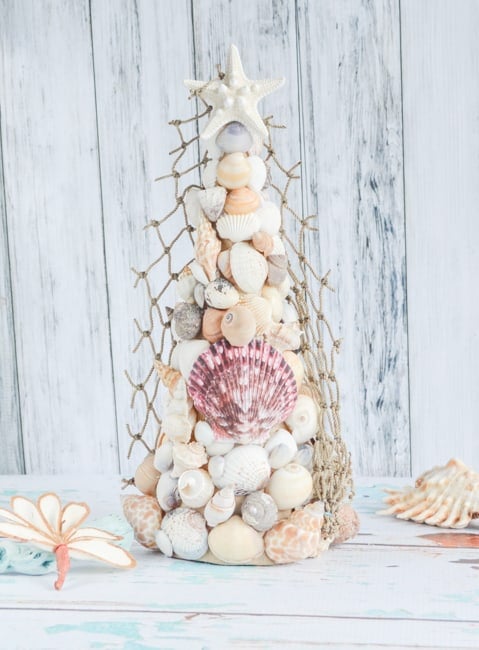
Even though my husband saw my finished project and immediately said "It's a Christmas tree!" I'm hoping to keep it on display past Christmas. I think if you left the starfish off the top it would be great any time of year, particularly at a beach house.
Materials for a Seashell Christmas Tree
- 1 paper mache craft cone
- Mixed sea shells
- Hot glue (Not sure what to use? Check out my top 10 hot glue tips & tricks!)
- A piece of craft fishing net
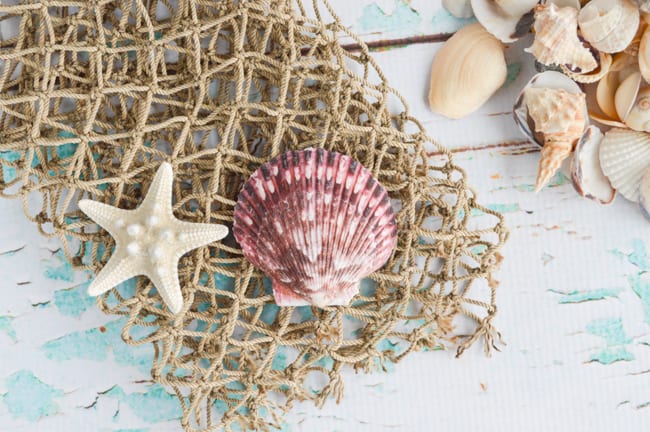
- A starfish
- A piece of embroidery floss or thread (optional)
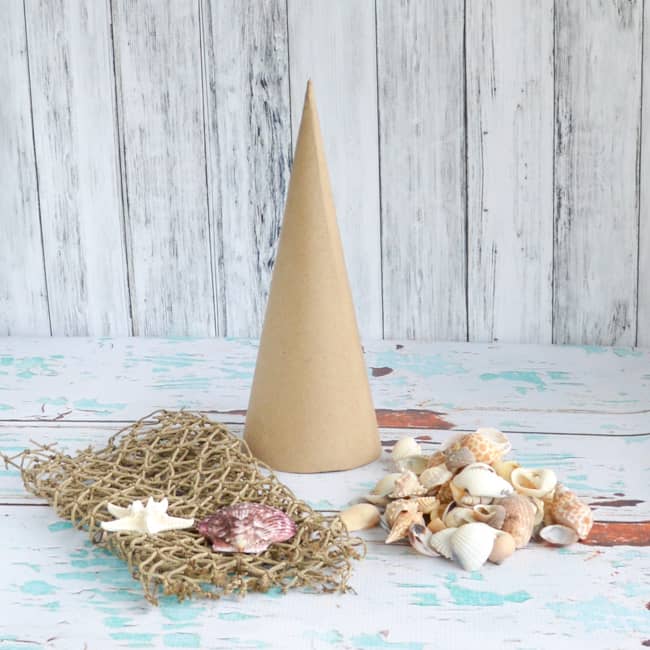
The amount of materials you'll need really depends on how big your cone is. Mine measured 10.63"x4" and I used about one and a half of those small net bags of sea shells they have at craft stores. I cut a strip of netting off a piece we were using to decorate one of our paddleboards (it hangs on the wall so my husband decorated it with netting and a few starfish), but ultimately only used a piece about 6"x10". If you use a smaller cone, you'll need fewer shells and less netting. If you use a bigger cone, you'll need more. Either way, you'll need lots and lots of glue sticks!
How to make a sea shell Christmas tree
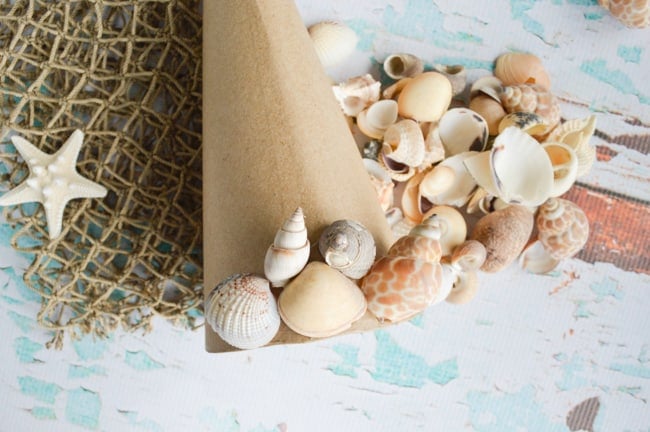
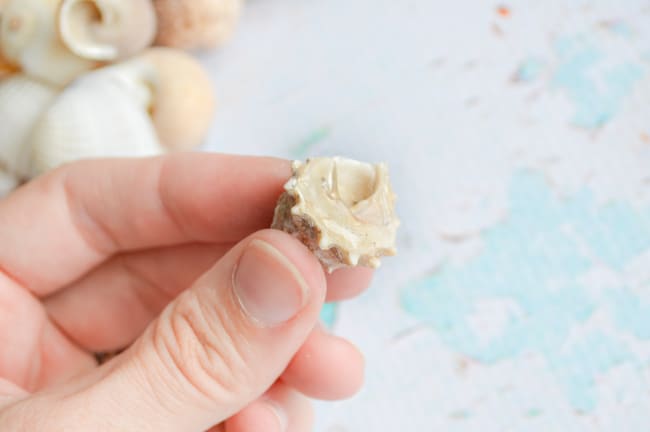
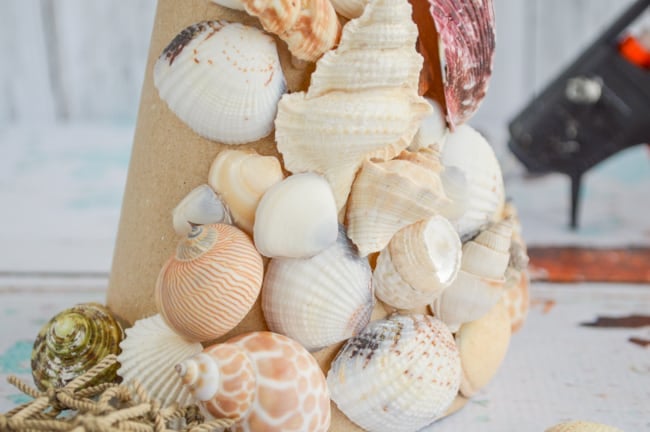
1. Take a look at your shells and sort them so you have easy access to the largest shells and the smallest, as well as any "centerpiece" shell you might want to use, like the scallop on my topiary. The largest shells should go on the bottom of the cone, but you'll need the very smallest for the upper portion.
2. Begin hot gluing shells to your cone from the bottom up. Glue your largest shells in the bottom two rows.
To make the gluing process easier:
- Dry fit shells make sure they fit and look nice before gluing them. This also allows you to see which parts of the shell touch the cone so you can apply glue in the correct places.
- Don't forget to put shells all the way around the cone, not just on the "front!"
- Apply your glue to the back of each shell, not on the cone.
3. If you're using a centerpiece shell, about half way up the cone is a good spot to glue it in place.
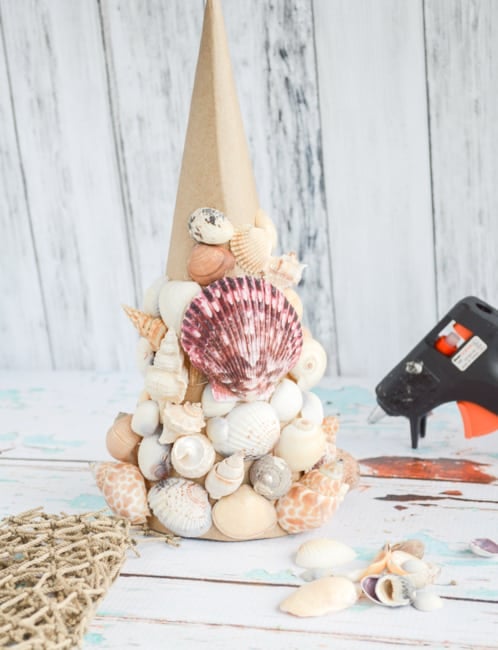
4. Work your way to the top, using smaller and smaller shells as you go. You can also use small shells and bits of broken shell to fill gaps between larger shells and cover exposed areas of cone.
5. Add your starfish at the very top!
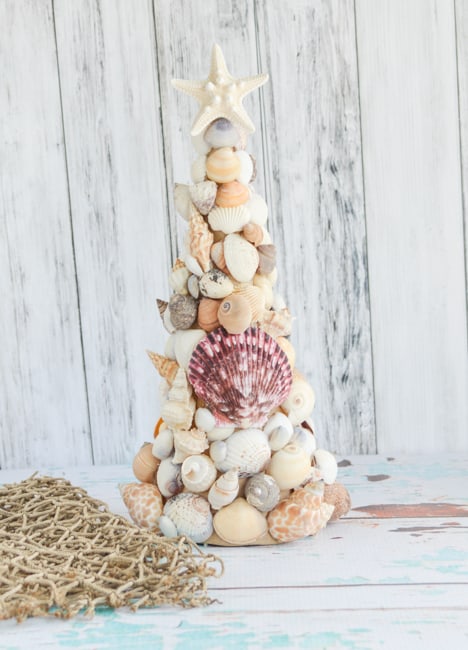
6. Play around with your netting to see how much you need to cut it down. I think it looks nicest when draped from one starfish arm and down around to the opposite side on the bottom, but do whatever you like best.
7. You can leave your net hanging, but I glued it in place. To do this, gather the bottom edge of the netting into a bunch and then tie it securely with a piece of embroidery floss or thread.
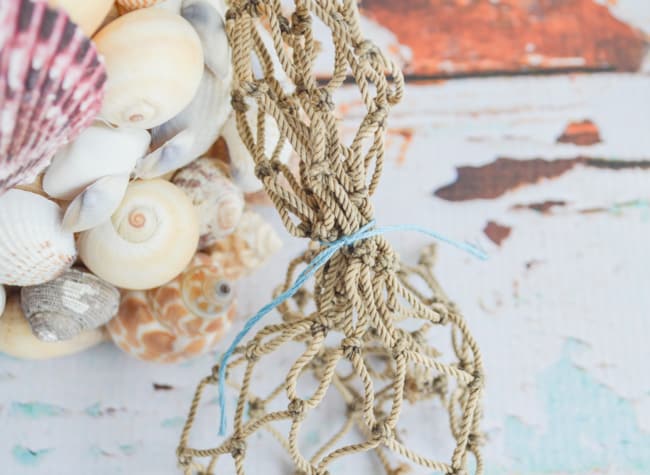
8. Trim away the extra thread and netting, then hot glue it in place. I glued it in a little crevice between two large shells.
9. Proudly display your awesome new costal Christmas decoration!
If you can't find large craft cones or sea shells in your local craft store, the amazing Amazon has it all! I did purchase my supplies in-store, but I rely on Amazon Prime so much. Hawaii is beautiful, but the product selection for most things is smaller and the prices higher than what I'm used to from the East Coast. It's too bad I don't really like papaya - I've seen them as cheap as 20 cents each at the farmer's market!
Do you incorporate a feel for where you live into your seasonal decor?


Angela
Thank you so much for the detail. You are awesome
Paige @ Little Nostalgia
This is SO you! Very cute, and it totally fits with your personal style. If I saw this in my Pinterest feed, I would know who made it without looking.
I'm not sure that I do a ton to incorporate the Midwest into my seasonal decor, but I do try to infuse some personal style. I'm going to use blue as one of our Christmas colors again this year, for example. Red and green would just look weird in here!
Natashalh
I haven't spent much time in the region, but I really don't even know what "Midwest seasonal decor" might even look like! I absolutely love blue and purple as Christmas colors. I'm glad I'm not the only one who likes less traditional holiday combinations. =)