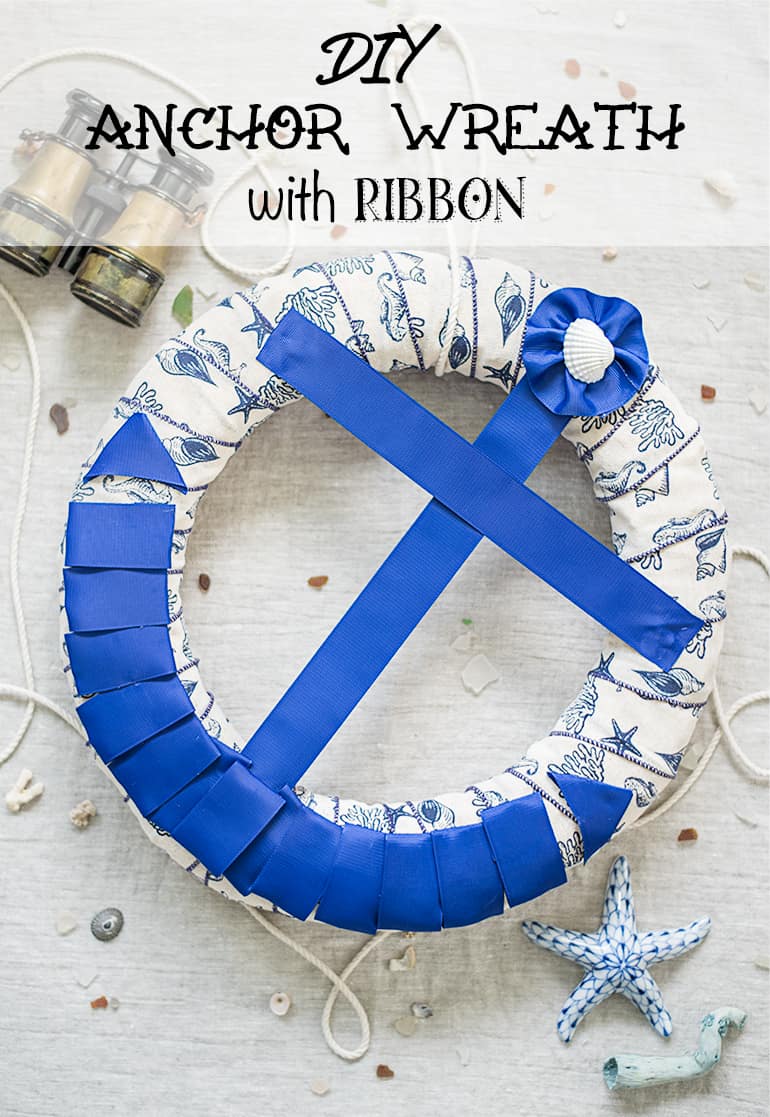
This DIY anchor wreath is cute and so easy to make with ribbon.
The anchor is made with ribbon, so you don't need to worry about finding any wood cut outs or securing heavy objects to your wreath. It's super easy to make and customize - I hope you enjoy!
This post may include affiliate links, which means I may make a commission on purchases made through these links at no additional cost to you.
You don't need any specialized materials or particular wreath-making knowledge for this anchor wreath tutorial. Yay! Here's what you do need:
Materials to make a DIY anchor wreath
- A wreath form! I recommend straw instead of foam for several reasons. They're less expensive, biodegradable, and thicker! I used a 16" straw wreath.
- A solid color ribbon without a wire edge - I recommend 1.5" grosgrain (I used blue. Two 4 yard spools are shown, but I only used one.)
- A solid or patterned ribbon to wrap the wreath. I used a 2.5" cotton print with a wired edge and still have ribbon left over from my 10 yard spool. You can choose ribbon with or without a wired edge - it doesn't really matter.
- Scissors
- Hot glue. I recommend using this post on hot glue tips and tricks!
- A button or shell
- A needle and thread (heavy duty or upholstery thread is best)
- 18-24" of rope, twine, or another ribbon
- A few straight pins
- A lighter - a grill lighter works best
Seriously, you need silicone finger protectors yesterday if you use hot glue!
No products found.

How to make a DIY anchor wreath with ribbon
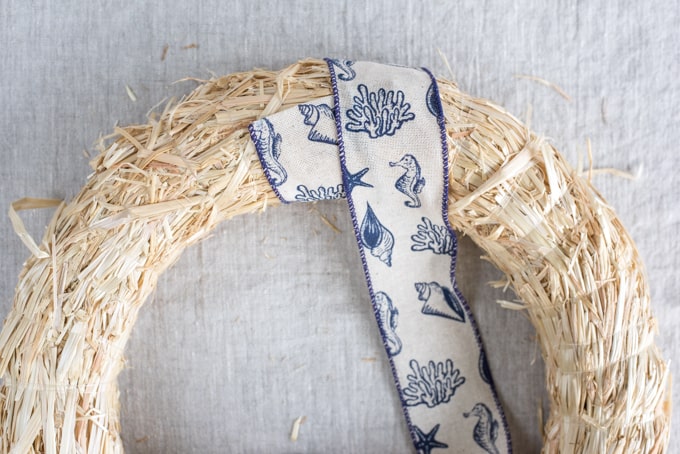
First, remove the plastic wrap from your wreath.
Before you start gluing, experiment with your ribbon a bit to find a nice angle for wrapping the wreath form. Using your background ribbon, play around with the angle of wrapping to find something that looks nice, doesn't leave gaps exposed, but also isn't so tightly wrapped you'll use lots and lots of ribbon. I used less than one full spool for my wreath.
Once you're happy with the angle, start gluing your ribbon in place. You don't need a solid line of glue along the whole ribbon - I used some on the "back" side of each wrap. This takes a lot less time and uses way less glue!
Continue wrapping all the way around the wreath. When it is fully wrapped, cut the ribbon. Fold the raw edge under for a neat appearance (and less raveling!) and glue it in place.

Flip the wreath so the folded under edge is now on the back.
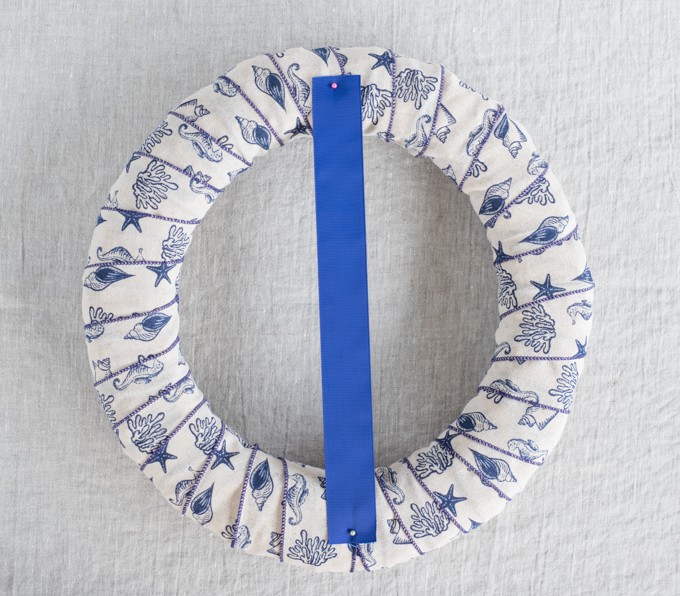
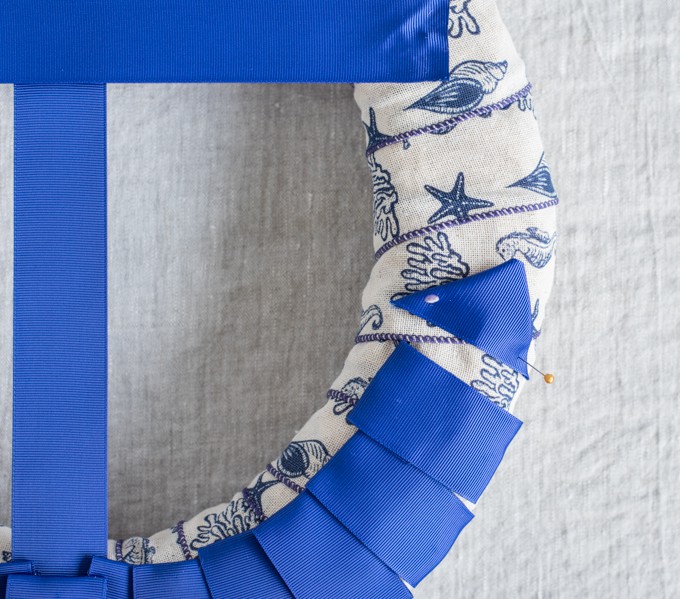
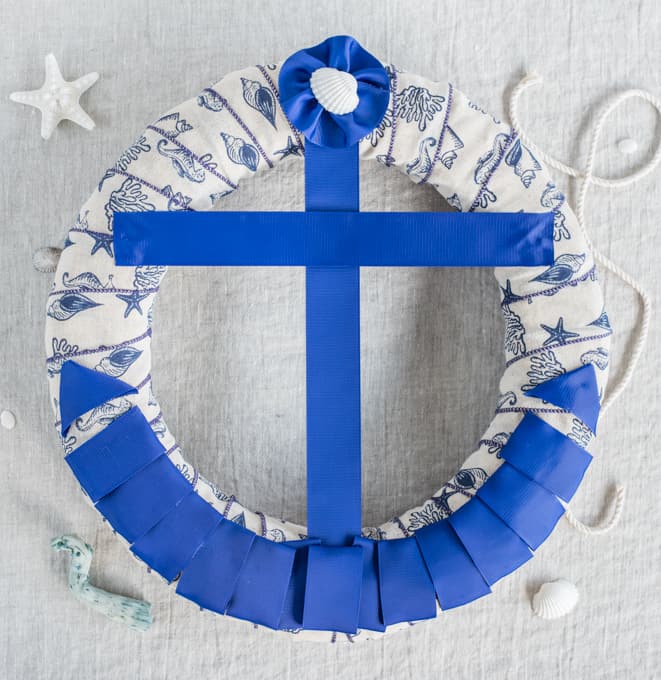
Cut a piece of your solid color ribbon so it can run straight across the wreath to form the central portion of the anchor. The exact length will depend on your wreath, but my piece was 14.5".
Carefully singe the ends with your lighter to prevent fraying. Glue this piece in place with hot glue, making sure it is as centered as possible. Pinning the ribbon before gluing can help you make sure the ribbon is centered.
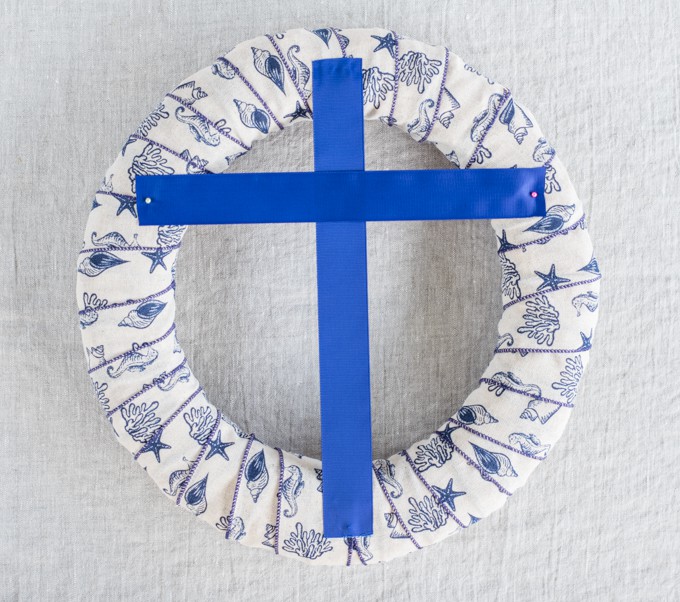
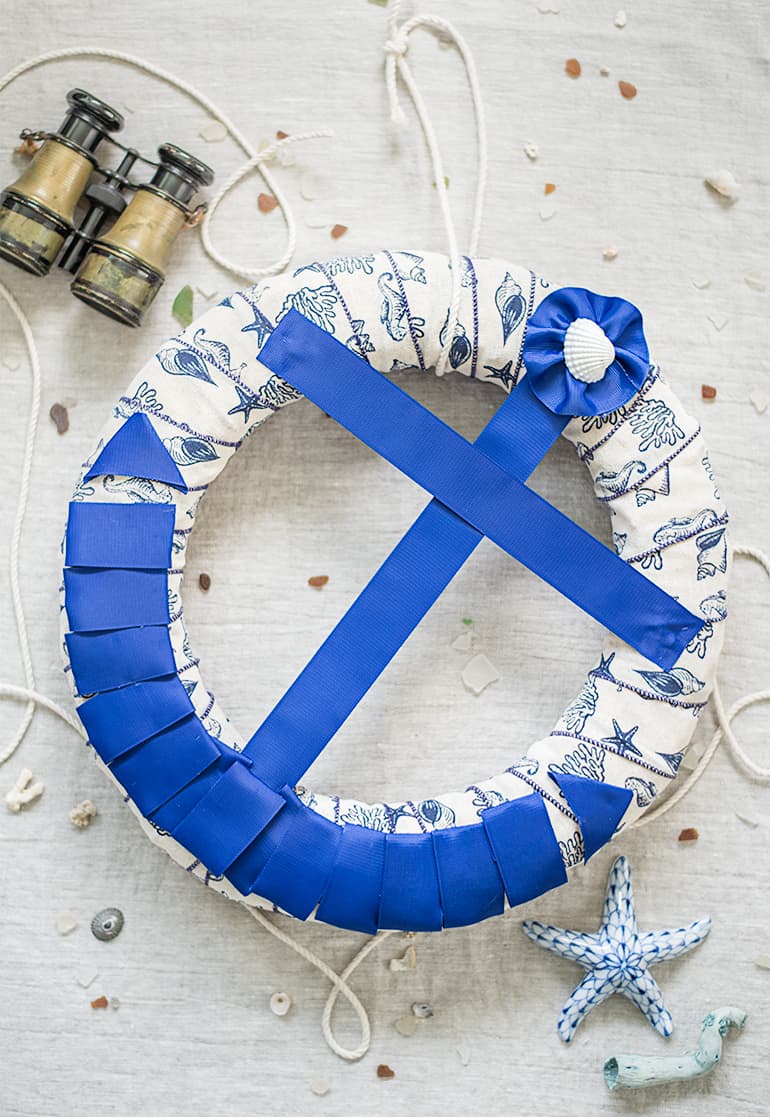
Cut a second piece of ribbon to form the anchor's cross piece. Play around with the positioning to make the anchor look how you'd like it, but about ¼ - ⅓ of the way from the top generally looks good. Again, singe the ribbon ends and glue in place.
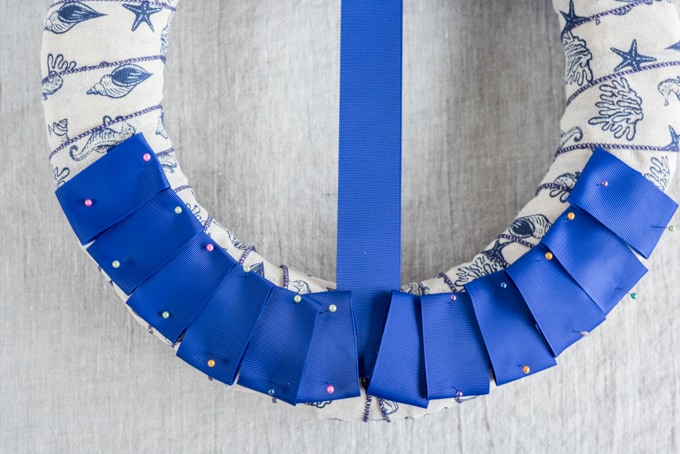
Now it's time to make the anchor's flukes! If your wreath and ribbon are the same size as mine, cut 13 pieces of ribbon that are 4" each. Cut two shorter pieces - about 3" apiece. Singe the ends.
If your wreath or ribbon are substantially different in size, you may need to experiment to figure out exactly how many pieces of ribbon you'll need and how long each should be! For my wreath, I used 6 pieces on each side to form the flukes and a 13th center piece for a more polished appearance.
Fold the ends of the ribbon under for a more finished, dimensional look and use pins to hold the ribbons in place to get your positioning right. Putting each piece at a slight slant and overlapping its predecessor by just a bit looks nice:
Once you're satisfied with the placement, glue in place.
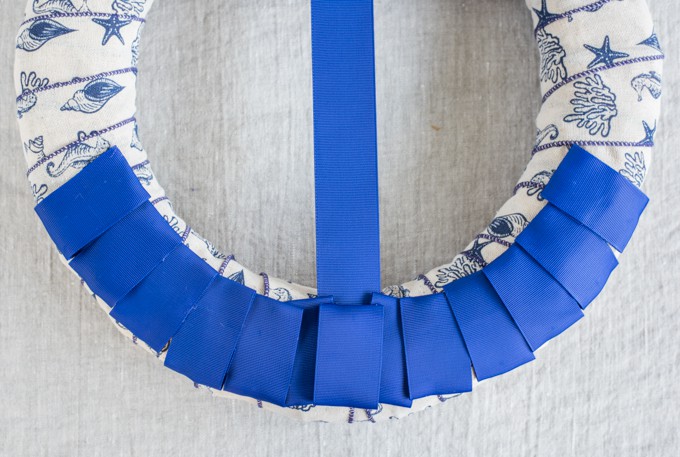
Fold the edges of the shorter pieces of ribbon under to form a triangle:
And then, of course, glue in place!
You're almost finished with the anchor now! To make a rosette for the anchor's top, cut about 12-14 inches of ribbon, singe it, and thread your needle with about two feet of thread. Tie a large knot in one end, them make a row of fairly large running stitches down one edge of the ribbon.
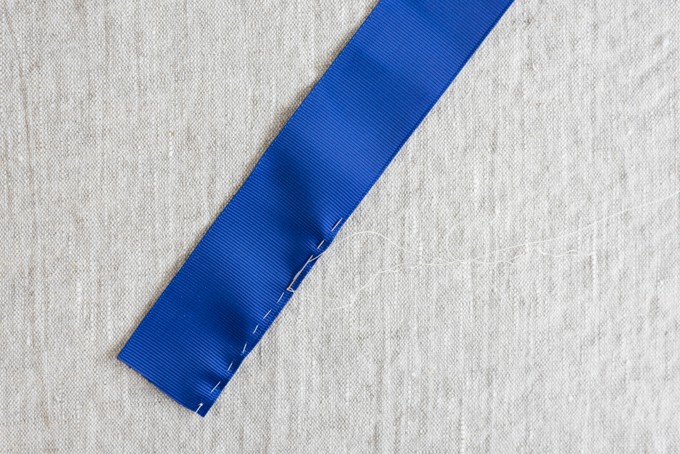
Pull the thread tight and secure with a knot:

Overlap the ends by a little and glue in place to form the rosette, then glue into position at the anchor's top:
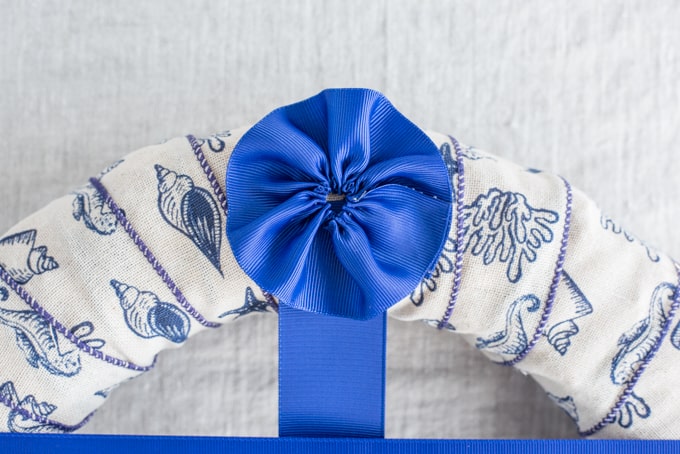
Glue a shell or button over the rosette's center:
Tie a piece of rope, cord, or twine around the wreath to act as a hanger, then enjoy your awesome new DIY anchor wreath!
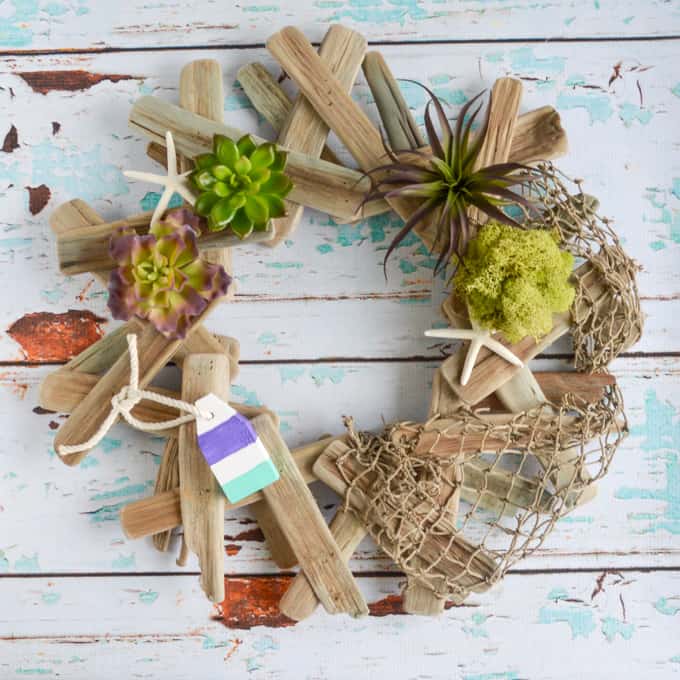
We can't hang anything on our door, but our ribbon anchor wreath is looking cute inside! My driftwood and succulent wreath from this tutorial had been up since I made it 2+ years ago, so it's nice to have something new on the wall!
I really hope you enjoy making a DIY anchor wreath for summer!


Duni
Oh how fun! I love crafting with ribbons 🙂 Nautical style is very much prevalent in northern Germany. I hang my wreaths inside as well 🙂
Natashalh
Hanging them inside certainly helps them last longer! I am just about to order some lovely silk ribbons with a gift card I received and I can't wait for them to arrive. Ribbons really are fun and versatile!