This post may include affiliate links, which means I may make a commission on purchases made through these links at no additional cost to you.
An important part of preparing the environment for weaning LG (meaning the introduction of solid foods, not the cessation of breastfeeding) was assembling appropriate tableware and linens for her use.
If you're not familiar with the Montessori method, saying that I made placements for my baby probably makes me sound a bit crazy!
In the Montessori method, infants are presented with placemats that have markings for their dishes and cutlery to help them learn where everything goes.
If you sew and you have the time, it's quite easy to make your own Montessori infant placemats. If you don't really sew or don't have the time to do so, this Montessori placemat tutorial is for you!
I used my serger to quickly and easily finish the cut edge, but you could use binding tape or the zigzag function on a 'normal' sewing machine. If you're not a sewer, simply use washable fabric adhesive to glue the tape in place for a very simple DIY Montessori infant placement!
The method I'm sharing is just one of many ways you can make your own infant placements. Hand embroidering a small towel makes a nice, absorbent place mat, for example. There really are so many different ways to achieve the same type of end goal!
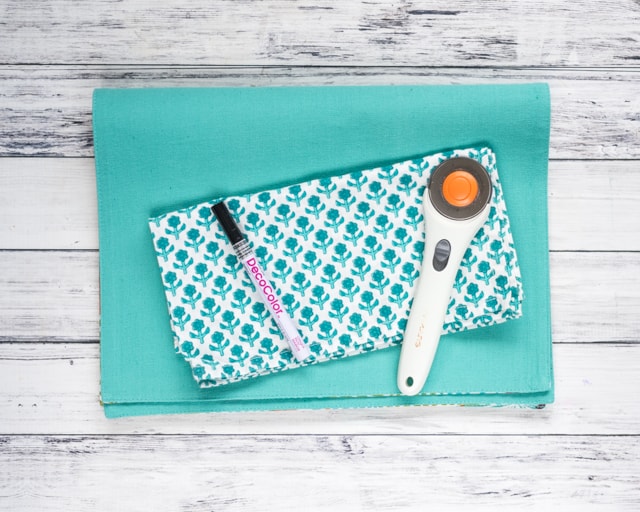
Materials needed for DIY Montessori infant placemats
- A fabric placemat for adults (I went ahead and got a pair of them to make four placemats so we have spares).
- A rotary cutting set (you could also use scissors with a ruler, but a rotary cutter makes things much easier!)
- A paint pen permanent laundry pen like this one or fabric paint. I used a paint pen I had on hand, but a permanent laundry pen would probably be a better choice because my ink is fading a little.
- Serger or sewing machine & thread or binding tape & fabric glue. (If you're in the market for a serger, I love my Juki portable serger. It gets the job done without taking up all the space!)
- A tapestry needle, or any tools needed for your favorite way to finish a serged edge (if you're using a serger)
- The dishes and silverware you plan to use with your little one.
- We use these espresso spoons from Amazon along with the Duktig dishes set from Ikea and Pokal glasses. (Yes, our baby has breakable dishes, which is quite normal for people who are inspired by Dr. Montessori.)
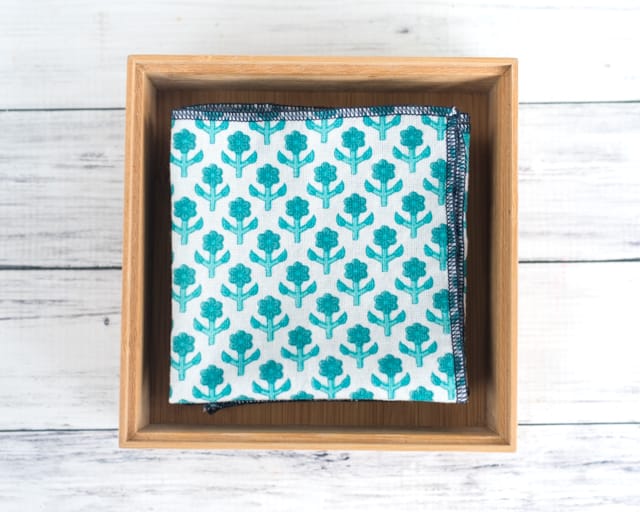
- Also pictured: a cloth napkin to make four infant-sized napkins.
DIY baby placemats tutorial
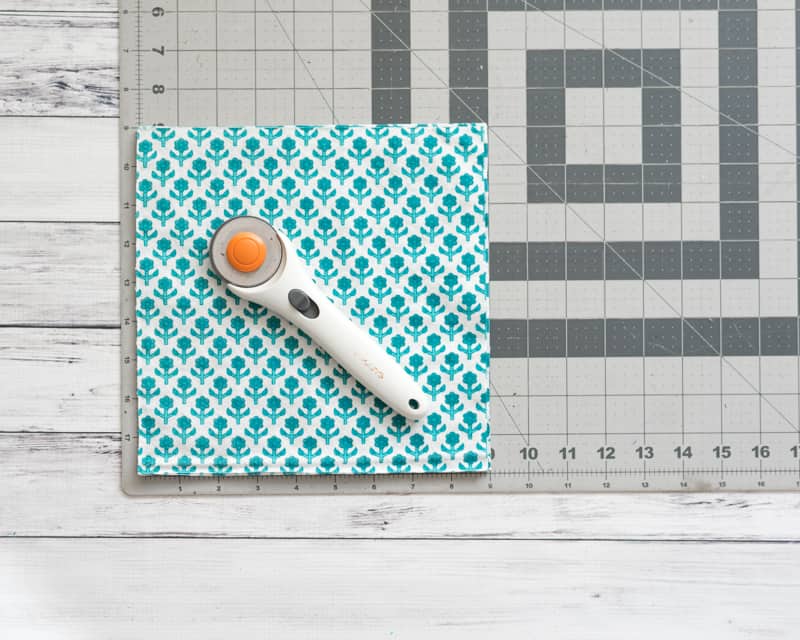
Measure your placemats and then use your rotary cutting set or scissors to cut them in half "hamburger style" to create two smaller placemats.
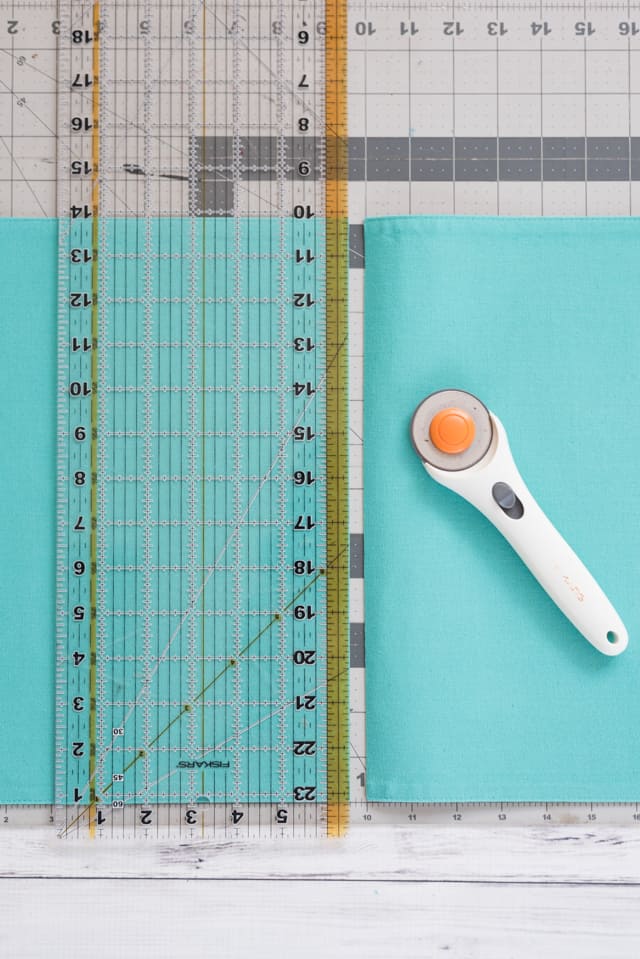
Finish the cut edge with a serger, zigzag stitch, binding tape, etc. For a more polished look, finish all four sides, not just the cut edge. But if you're a busy new mom like me, don't stress it! Make sure to bind off the serged ends with a tapestry needle or using your preferred method of finishing serged edges. (Not sure what to do? This post from Really Handmade has several easy to follow suggestions.)
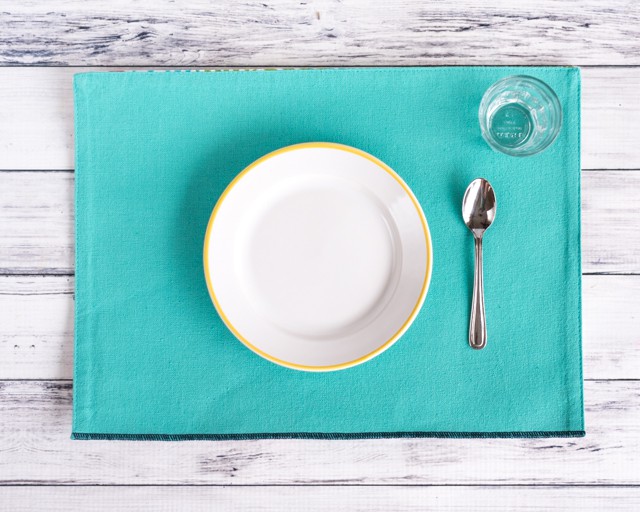
Place your baby's dishes on the adorably small placemat to see where everything will go.
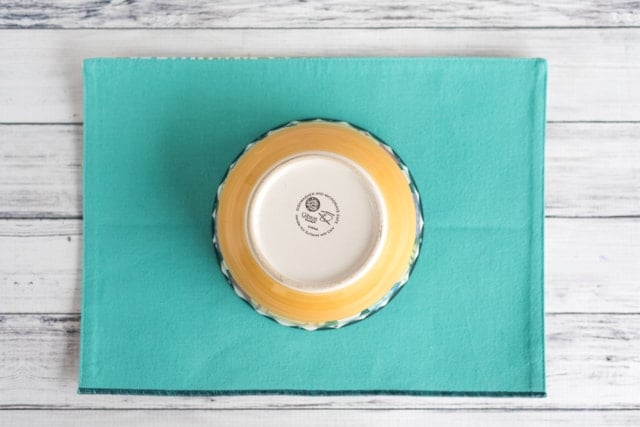
Flip the plate upside down and then trace an outline a little bit outside the dish's edge. Alternatively, you can find something circular that's slightly larger than the dish and trace it, instead. I used an adult bowl that was a bit bigger than LG's plates.
Repeat with a cup - flip it upside down and trace around, making sure the circle is a bit larger than the cup, itself. Again, you can find something slightly larger to trace.
Hold a spoon in place and trace roughly around it. Repeat with a fork, if using, making sure to add lines to denote the tines.

Allow the paint to dry then use and enjoy! For consistency's sake, I made sure the one serged edge was the "bottom" of all four placemats.
If you're curious about the napkin shown above, it was very easy to make while I had my serger out. I measured an 'adult' cloth napkin, then did the math to measure out four small square napkins using the material. I cut away the seams, used my rotary cutter to cut the squares, then serged all four edges.
Their official home is a square bamboo box, but they haven't been used at mealtime yet! We could only bring so much on the airplane with us, and these napkin and their box didn't make the cut. We've been using similar sized flannel wipes (also made using my serger), instead.
LG really loves playing with wet cloths, so she's been pretty successful at cleaning herself up after meals. She still needs some wiping down from an adult afterwards, but it's impressive how much she manages to remove from her own face and hands!
I've been pleasantly surprised by LG's use of her placemats. She finger paints eats one meal a day with us using her Abiie wood highchair, sometimes with the tray and sometimes without it while sitting directly up to the table.
We use this as an opportunity for her to explore small pieces of soft solids so we haven't used her placemat with the highchair yet.
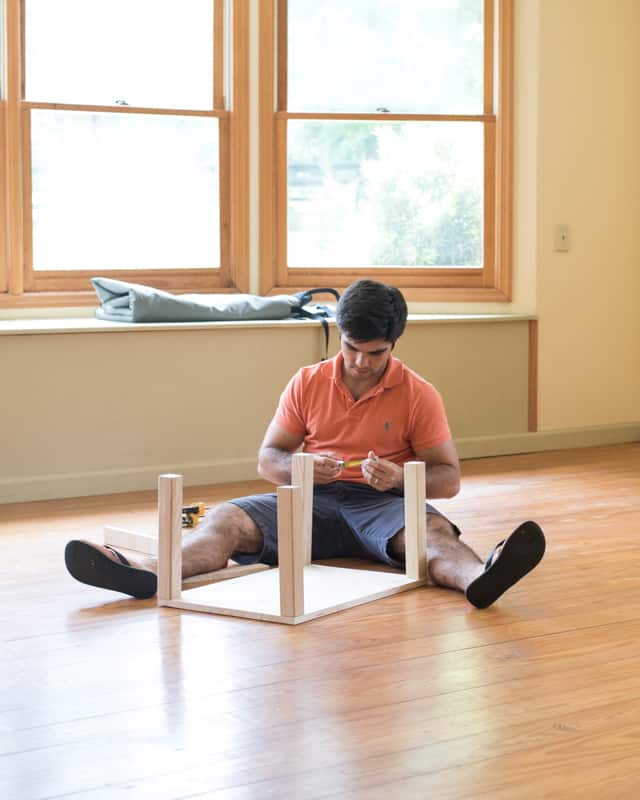
Any additional solids meals during the day are at LG's weaning table, a miniature table we built for her use along with a tiny cube chair that's just her size. Since my husband and I designed and built both the cube chair and weaning table, we'll be sharing tutorials for them soon!
Mealtimes at her table are when LG uses her placemats and dishes.
I've only had to remind her a few times "your placemat can stay on the table." She typically leaves it alone, even while waiting for her dishes.
She's had a little more trouble keeping her bowl mostly on the table, but we're getting there. She's permitted to conduct appropriate exploration with her glass, which, at first, meant dumping its contents on her lap while mouthing the bottom of it from the outside. Some days she really nails it, though, and brings the mouth of the glass to her lips and actually drinks some water!
I cried happy, proud mama tears the first time she successfully used her glass. It was so incredible to see. I saw someone write that if your baby does something perfectly on the first try, you waited to long to present the opportunity. I have to admit I was kind of questioning myself with the glass, but watching her actually get it 'right' is such an amazing experience that it makes all the practice worthwhile.
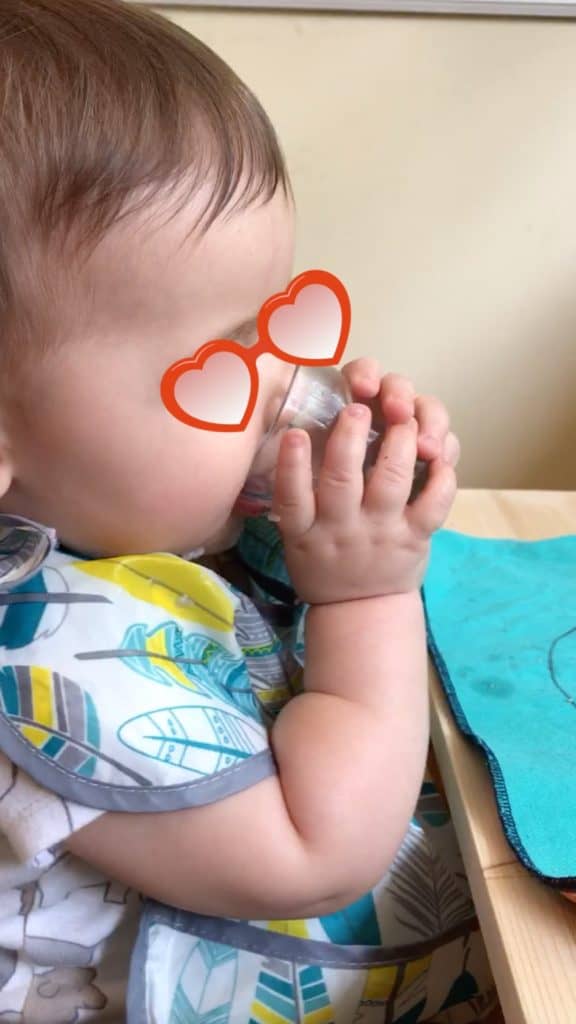
Sorry about the weird sticker glasses in the photo above, but there was a bit more of our LG's face showing than I was really comfortable with! (I wrote a little on why we don't show her full face online in this recent post.) Even if you don't chose to use glass, many experts these days recommend skipping the sippy cup and teaching babies to drink from an open cup (either a trainer cup with two handles or a very tiny one like our shot glasses) or a cup with a straw.
I hope you enjoyed this infant placemat tutorial and stop back in soon for directions on how to make your own cube chair and Montessori weaning table!
Do or did you use breakable materials with your baby? Have you used a baby sized table for some meals or activities?
More Related Parenting Posts
[catlist search="parenting" numberposts=4 orderby=rand excludeposts=this]


Sarah
Such a cute idea. I wonder if it would work on my messy kitties at all ... 😀
Natasha
You could always try! 😉