This post may include affiliate links, which means I may make a commission on purchases made through these links at no additional cost to you.
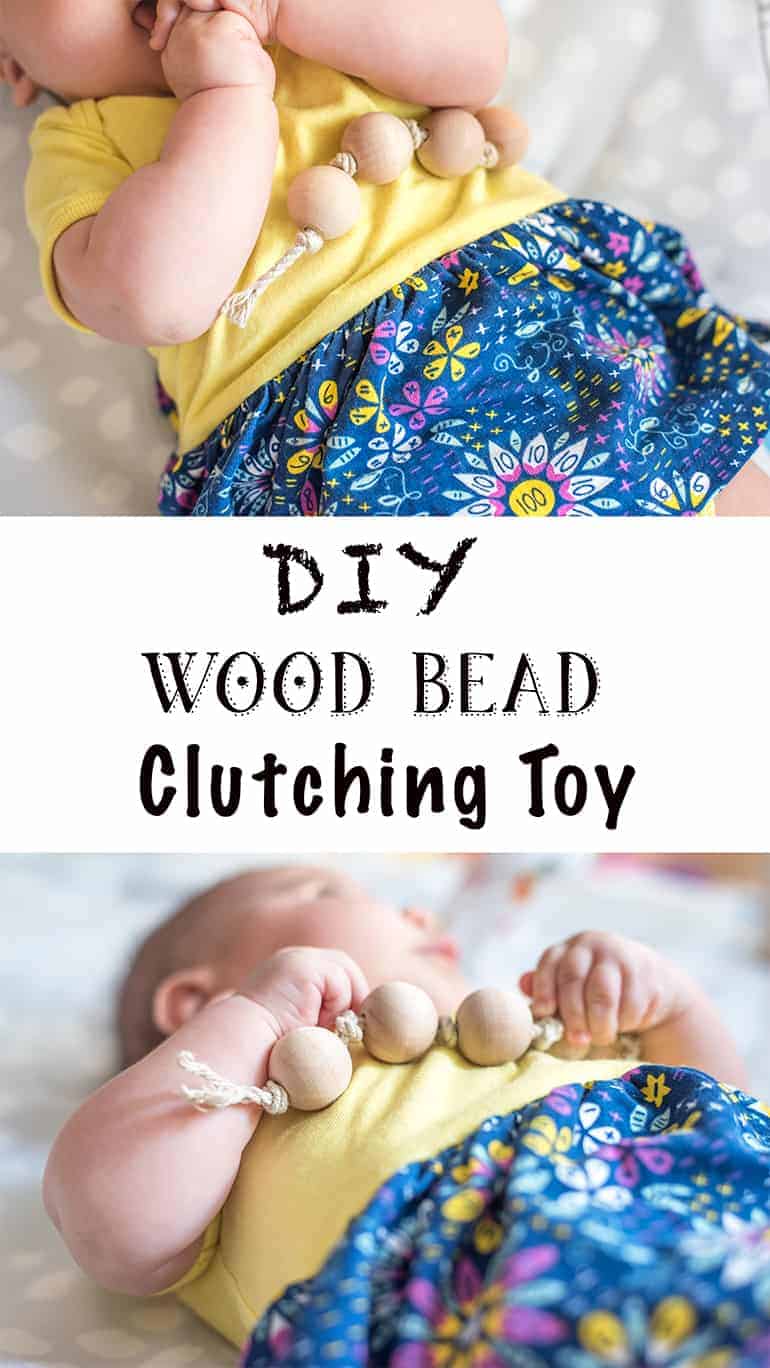
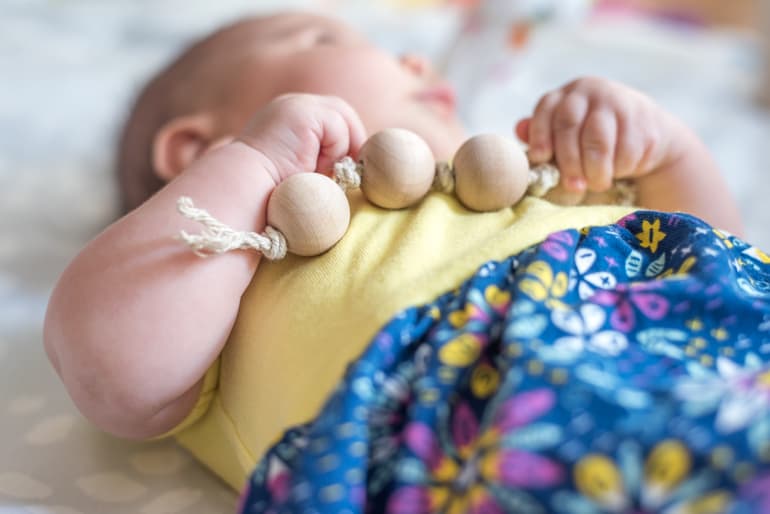
Learn how to make a DIY baby toy with wood beads!
The month before LG was born I went on a toy-making spree. Even though I knew she wouldn't be able to use them for a while, I also knew I wouldn't have the time to make them after she was born! I'm very glad I made them ahead of time so they were ready when she suddenly became interested in toys at about 12 weeks.
This wood bead clutching toy is one of several natural, wood toys I made. Now that she's starting to play with them, I'll be sharing tutorials for two more wood baby toys in the coming weeks!
Providing natural material toys for LG is important to us. My husband and I both enjoy working with wood and like making things for our baby, and we feel strongly about giving her natural materials whenever possible for several reasons. Organic wood products aren't going to be recalled for toxic materials that somehow made it into the plastic or paint. They won't contain lead, phthalates, BPA, or other things that really shouldn't be in children's products. We also feel that wood toys are more generally more durable and provide a much-needed connection to nature. Wood and other natural material items, particularly organic ones, don't release toxins in the manufacturing process the way synthetic materials can and they can decompose when they ultimately reach the end of their usable life. High-quality natural material toys do tend to be a bit more expensive, which is an odd sort of plus. More expensive = fewer items purchased, which is great of our small apartment. Additionally, we find natural materials much more aesthetically pleasing! (There are a few instances where we prefer non-natural materials, notably food-safe silicone. I'll be discussing some of these in later posts!) This is by no means a judgement on people who choose otherwise - there are plenty of great plastic baby and children's toys, we just personally want to limit the amount of plastic stuff in our lives.
Although natural material toys, in general, can be a bit more pricey, this wood bead clutching toy is easy and inexpensive to make!
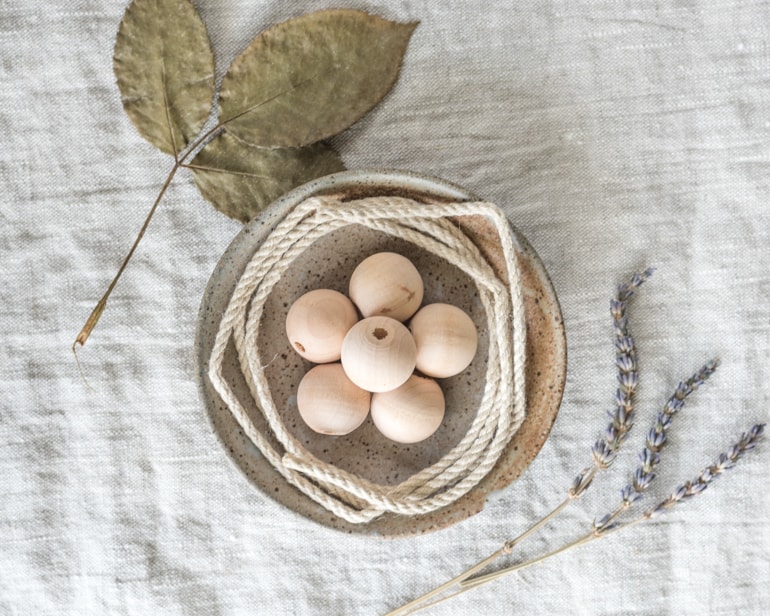
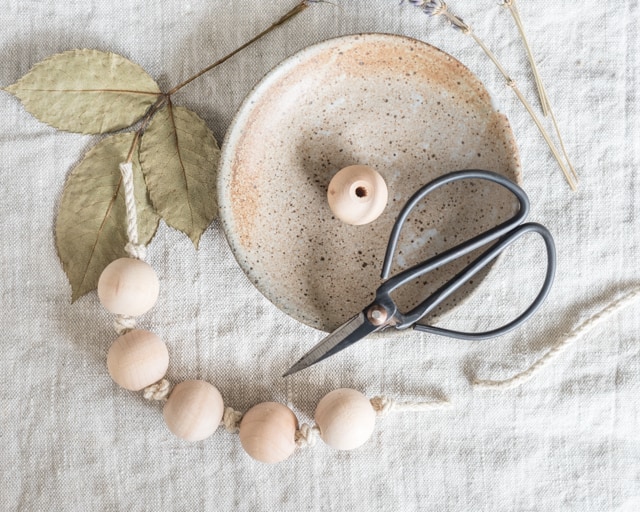
Materials needed to make a wood bead clutching toy for babies
- 4-6 large nontoxic beads. I used 1" maple wood beads, but you could use 1.25" or 1.5" wood or silicone. One inch beads are not suitable for babies on their own so it's very important that you only use them as part of a larger item and supervise your baby's play. I highly recommend shopping Alexa Organics because they have a selection of completely nontoxic wood and silicone beads suitable for baby toys. Please do not buy 'regular' crafting wood beads! They may contain chemicals that you do not want in your baby's mouth.
- A natural material cord or lacing. I used 4mm hemp for the pictured clutching toy, but suede lace works well, too. Again, Alexa Organics is a good choice because they have a completely additive free, nontoxic suede lacing (the craft store stuff is usually made in China and has loads of chemicals you definitely don't want Baby to ingest).
- A piece of tape
- Natural, food safe wood polish - completely optional. I did not polish this toy, but if you want to this all-natural polish would be a good choice.
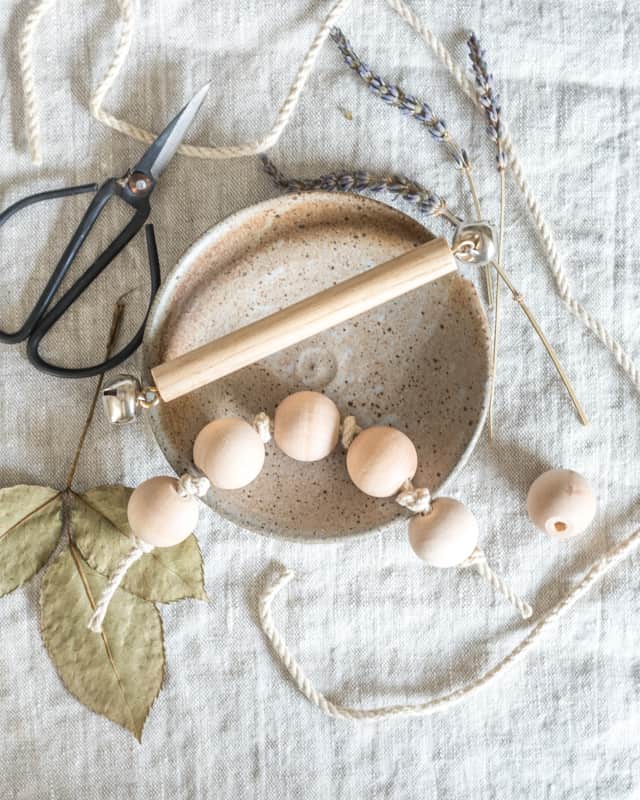
How to make a wood bead clutching toy for babies
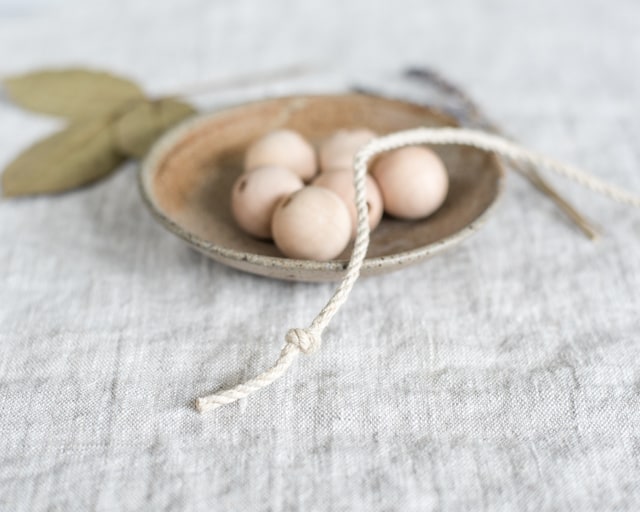
Tie a knot about 1" from the end of your cord or lacing. If you want, wrap a small piece of tape around the cord's opposite end to make a sort of aglet (an aglet is the plastic or metal tip on the end of a shoelace) to make it easier to lace your beads.
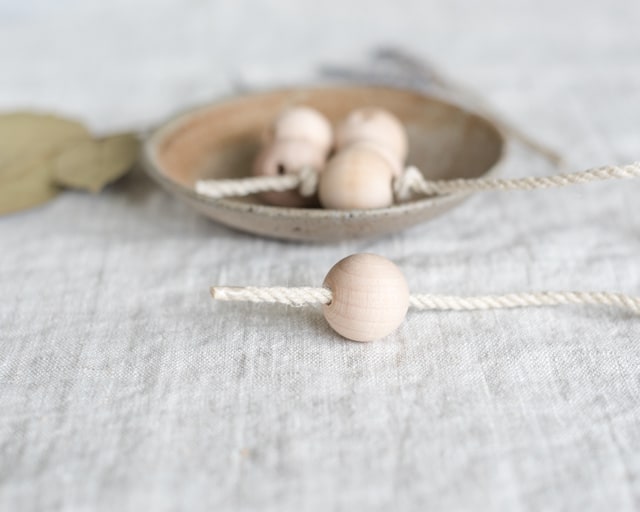
Lace one bead, then tie a knot to secure it in place. Continue lacing beads and tying a knot between each one until you're happy with the toy's length.
Tie one final knot, then cut the cord about an inch away from the last knot. These loose ends help protect the knot from coming undone.
Give the toy to your baby and watch them enjoy! Always make sure the end knots are still securely fastened before giving the clutching toy to your baby and make sure to supervise their play.
Completely unrelated, but the dress LG is wearing in the photos is from Princess Awesome. (Not an affiliate link, just a link because I love them!) They make, well, awesome items for girls that feature math, science, ninjas, dragons, robots, and more! I'd have wanted pretty much all of them when I was a kid. Their baby offerings are a little more limited than what they currently make for toddlers and older girls, but we already have a couple of their dresses and look forward to getting more for LG as she grows. Most of their clothing is made in Chicago at a factory that employs mostly women and ends the work day at 3 pm so they can pick up kids from school. How cool is that?
If you're interested in wood toys for your little ones, check out this guide to the best wood toys for toddlers!
How do you feel about natural materials vs manmade ones? Are you big into using as many natural materials at home like we are?
More Related Posts
[pt_view id=“15d429e15n"]
[catlist search="tutorial" numberposts=4 orderby=rand excludeposts=this]

Diane
Great idea! I never really thought much of going natural until my baby girl was born. Will definitely try this too, to engage the development of her motor skills.
Natasha
I was surprised by how instantly I became concerned about products and ingredients after getting pregnant! I've always been fairly naturally-minded, but it definitely became even more important to me. Thanks for stopping by and I hope you and your girl enjoy if you decide to make a clutching toy!