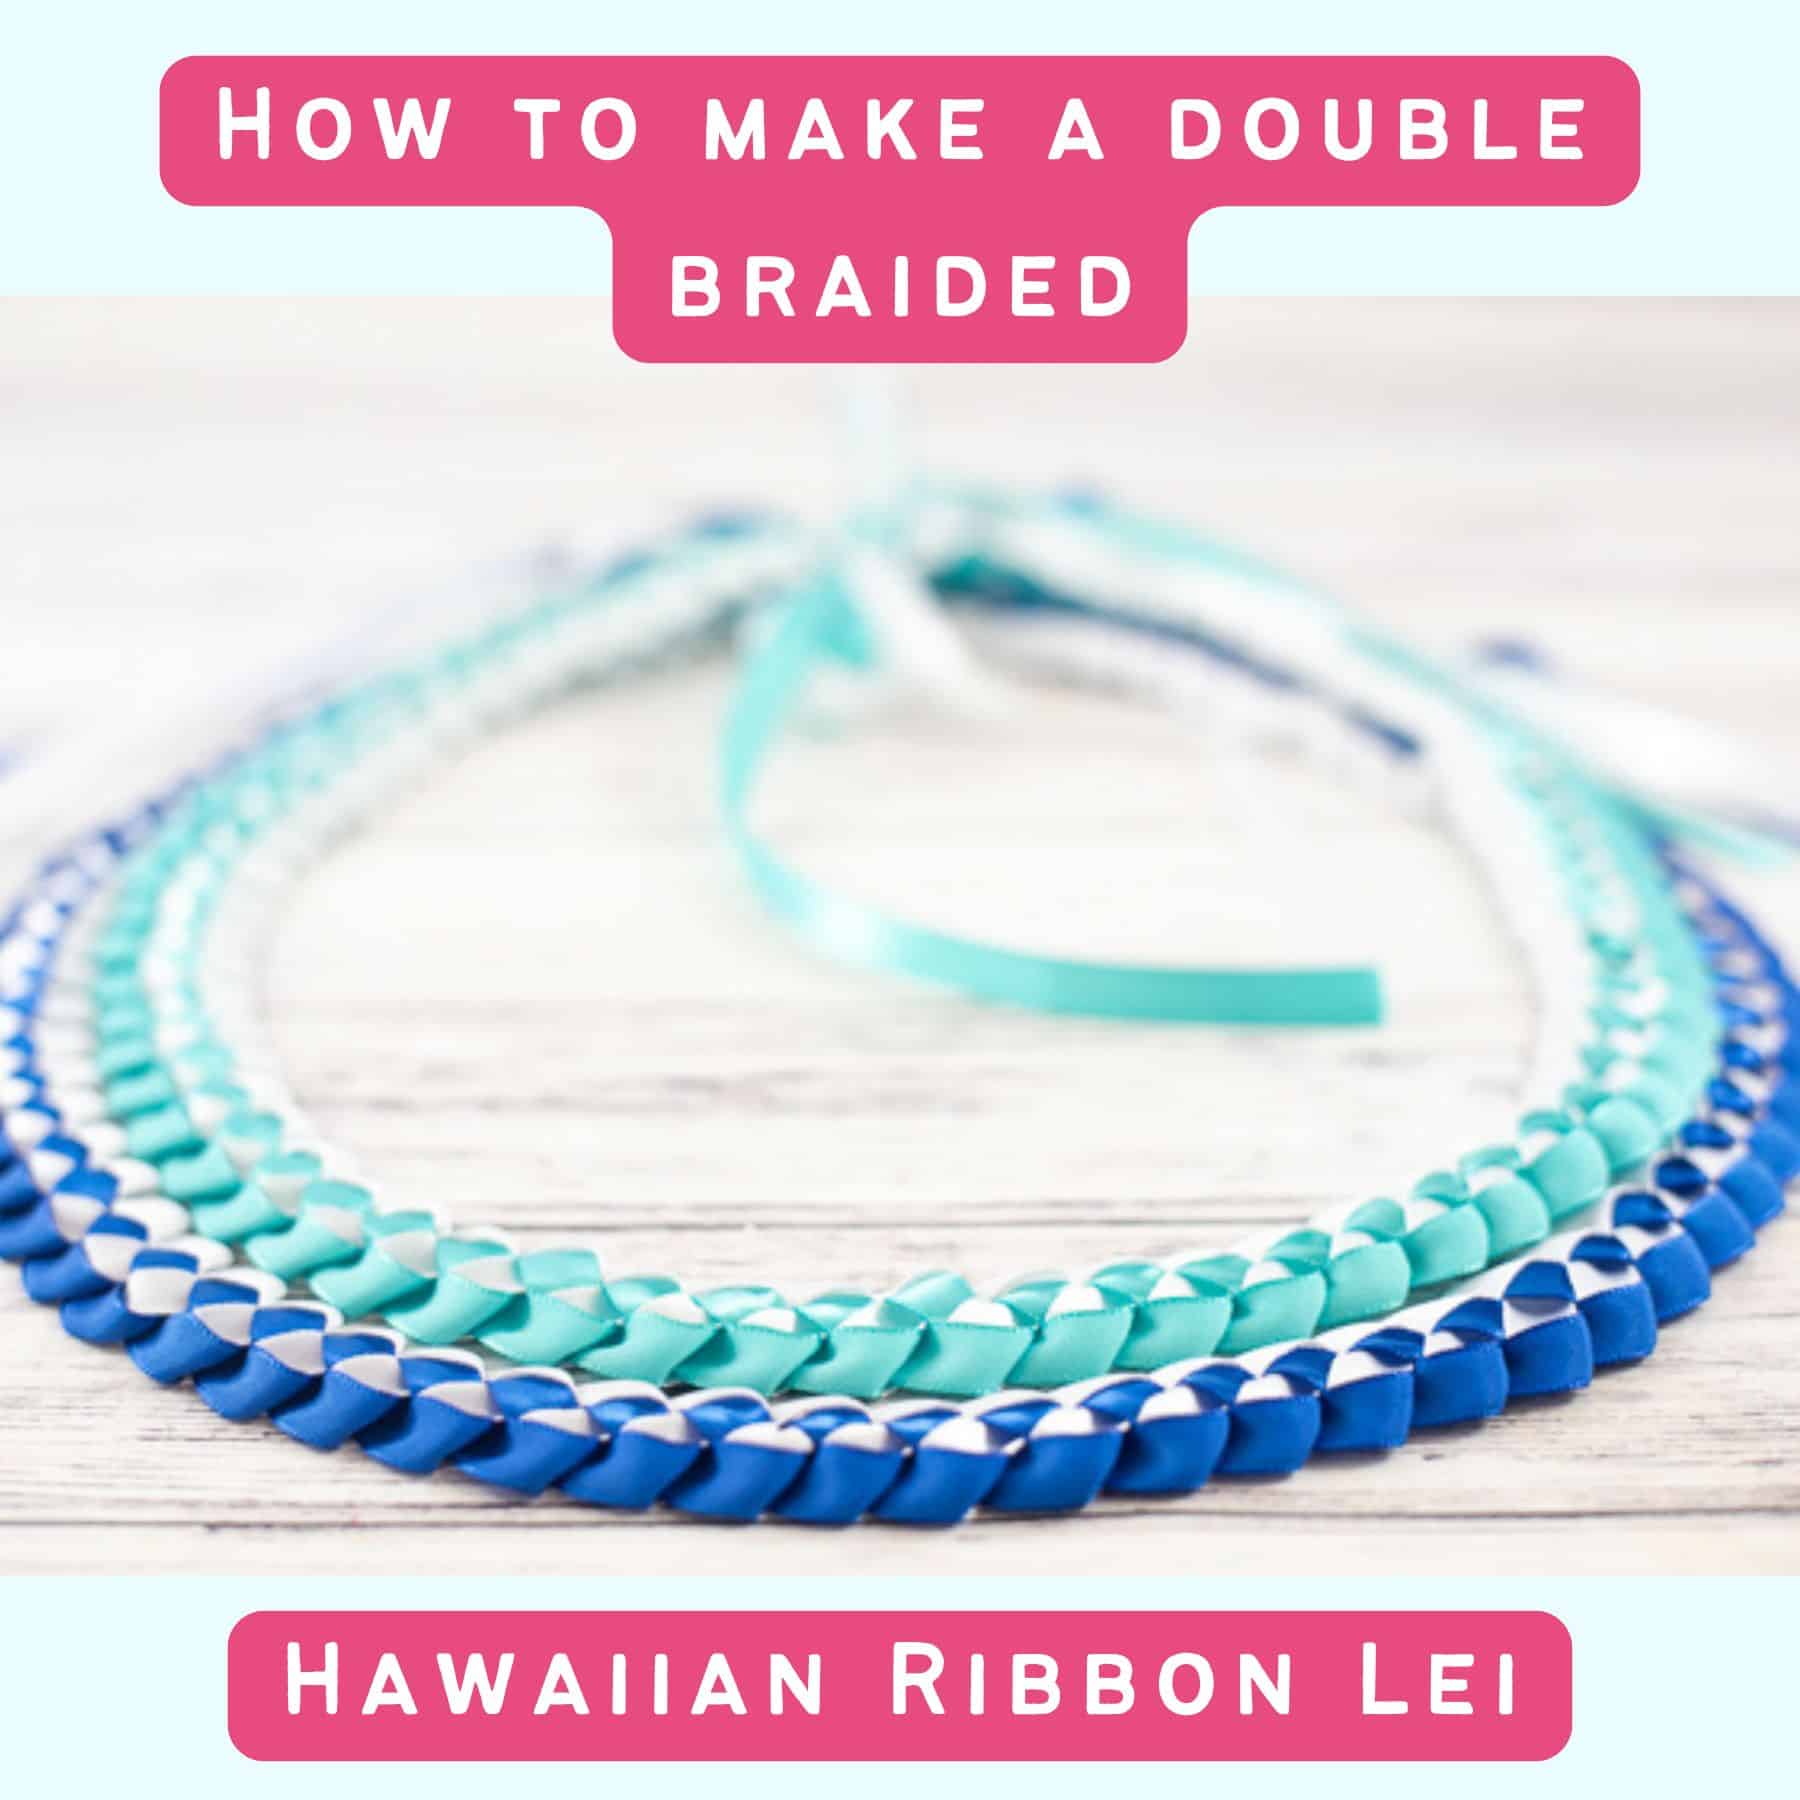
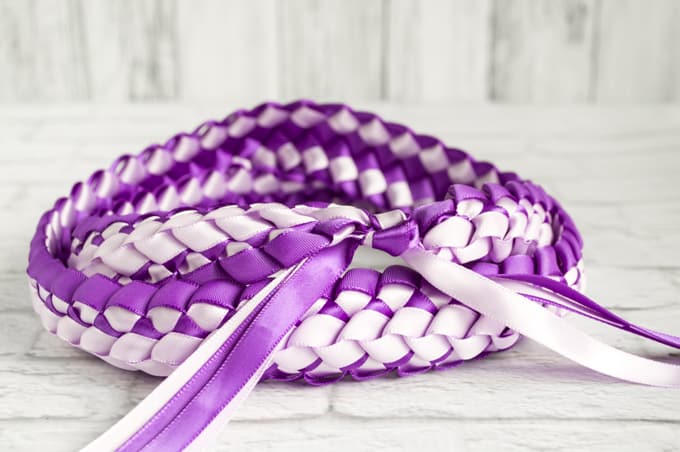
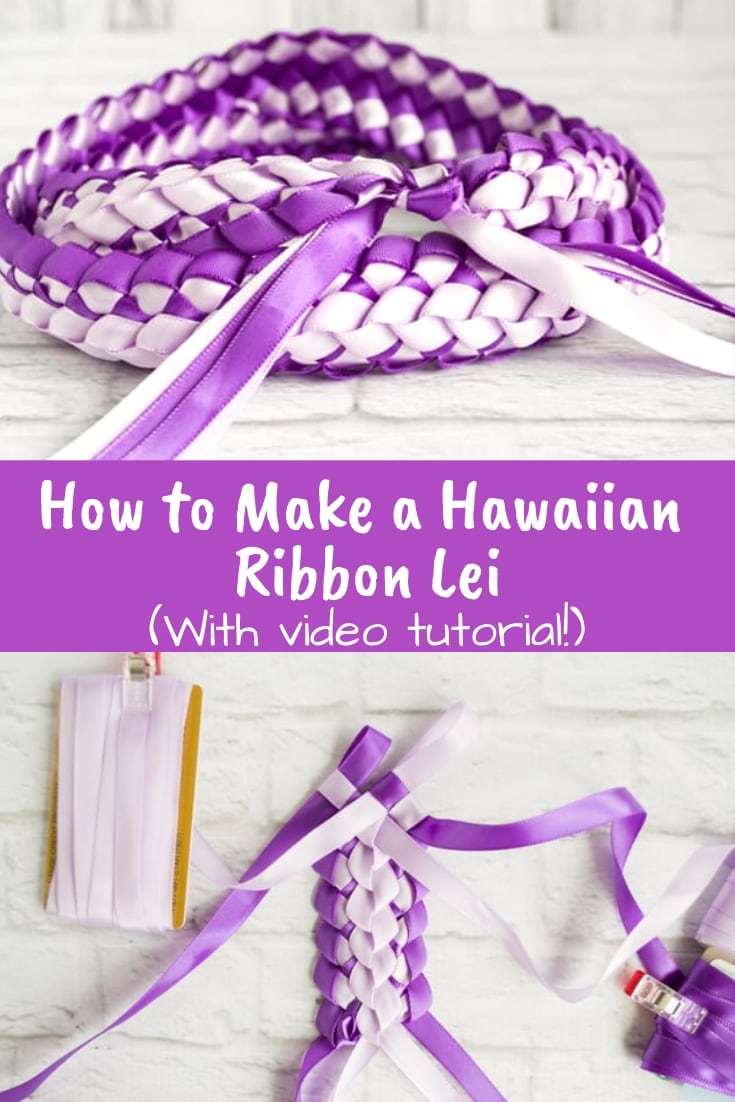
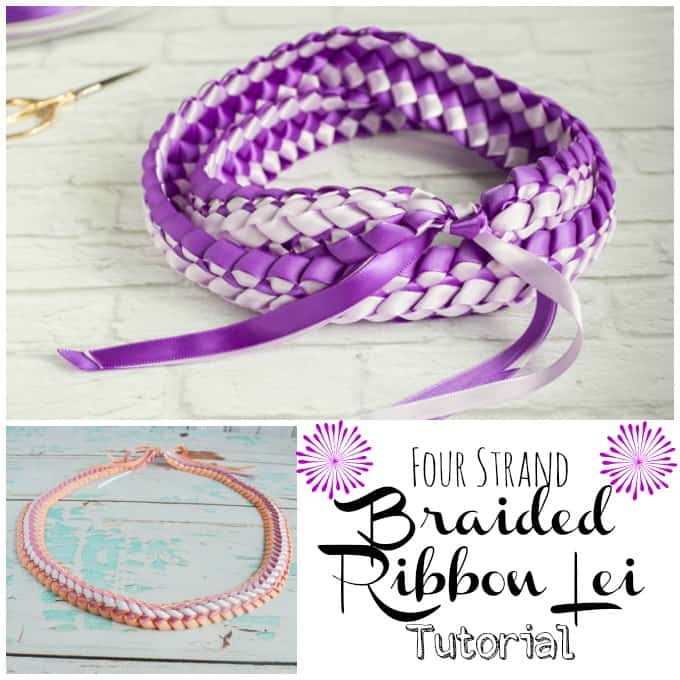
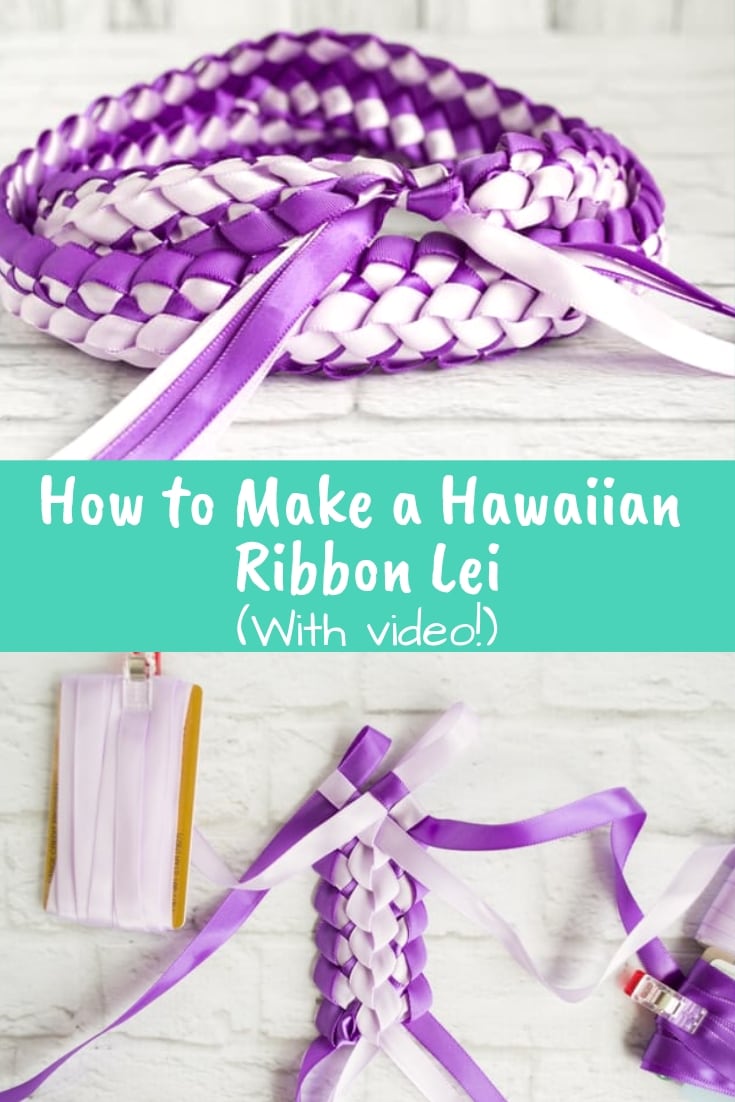
This easy tutorial shows you how to make a double braided Hawaiian ribbon lei with four strands!
This lei is classic and classy, as well as inexpensive and easy to make. Discover how to make your own ribbon lei with this step by step tutorial!
This post may include affiliate links, which means I may make a commission on purchases made through these links at no additional cost to you.
This lei is slightly tricker than the two strand braided ribbon lei, but it is still quick and easy to learn.
It's perfect for occasions like Mother's Day, graduation, or even weddings. Wouldn't these be cool as wedding favors? Or even as a make and take project for a summer birthday party?
Because this lei uses four strands of ribbon, you can us anywhere between one and four different colors. I think two or three look best, but the choice is yours.
The example is made with two colors of ⅜" ribbon. Using ⅜" ribbon for this project creates a pretty wide finished lei (mine is about 1.5" across) that shows up really well in photos.
The exact amount of ribbon you need depends on how wide the ribbon is and how long you want your lei to be. Most lei have about a yard of actual braiding, but you can make them longer or shorter.
I recommend starting with pieces of ribbon that are at least 6 yards long.
Basic satin ribbon is pretty inexpensive. This project is all about the time you put into it, not the cost in dollars. I think it's better to waste a few feet of ribbon than the 45-ish minutes you put into perfecting the technique and making a lei!
Cut your ribbons at least 6 yards long, preferably 7 or even 8.
Once you figure out how to do this four strand braid, it isn't that difficult. Explaining it in words and figuring out exactly where everything goes the first time around...well, that can be a little tricky!
Don't give up. Once you figure it out, you will be making these in 15 minutes! Just take your time, look at the pictures, and watch the video clip. =)
Materials needed for four strand braided ribbon lei
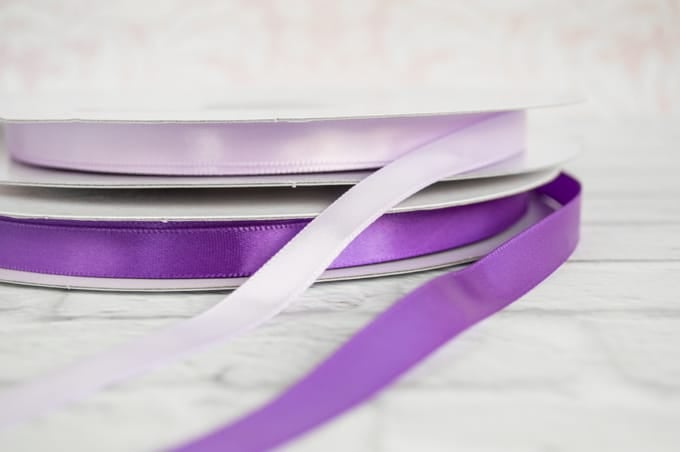
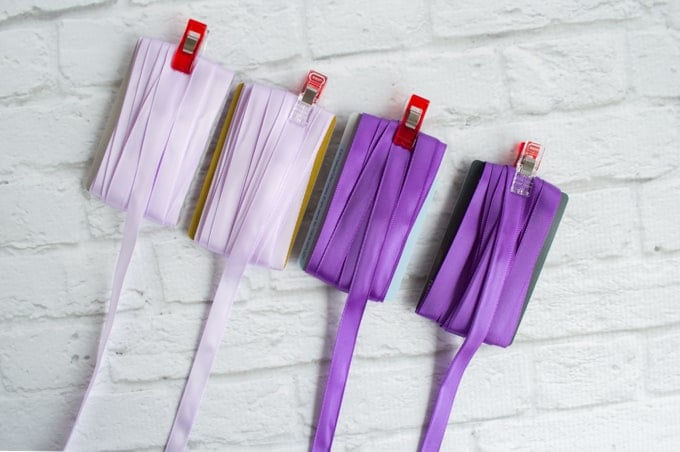
- Four pieces of ribbon, at least 6 yards each. I used ⅜" satin ribbon, but ¼" satin ribbon is a great tool to learn with
- Four old gift cards, rewards cards you hardly use, etc. You can also use ID badges or ID badge blanks like these
- Four binder clips or quilting quilting clips
- Scissors
- A lighter, to singe the ends and prevent fraying


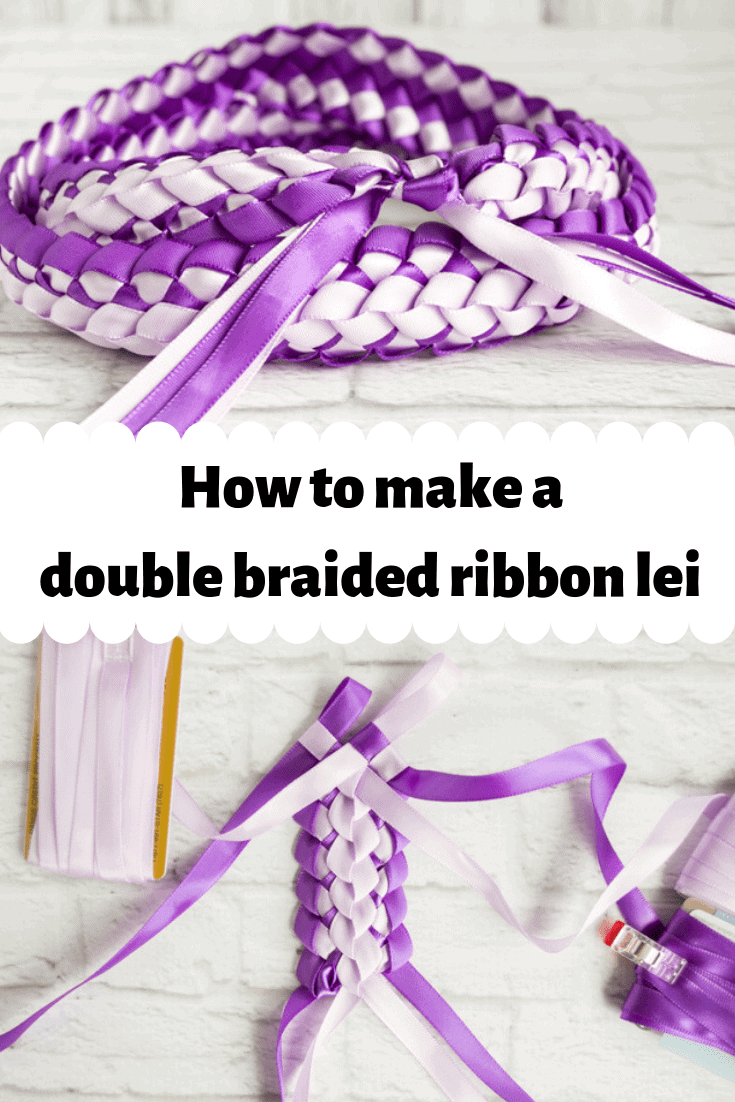
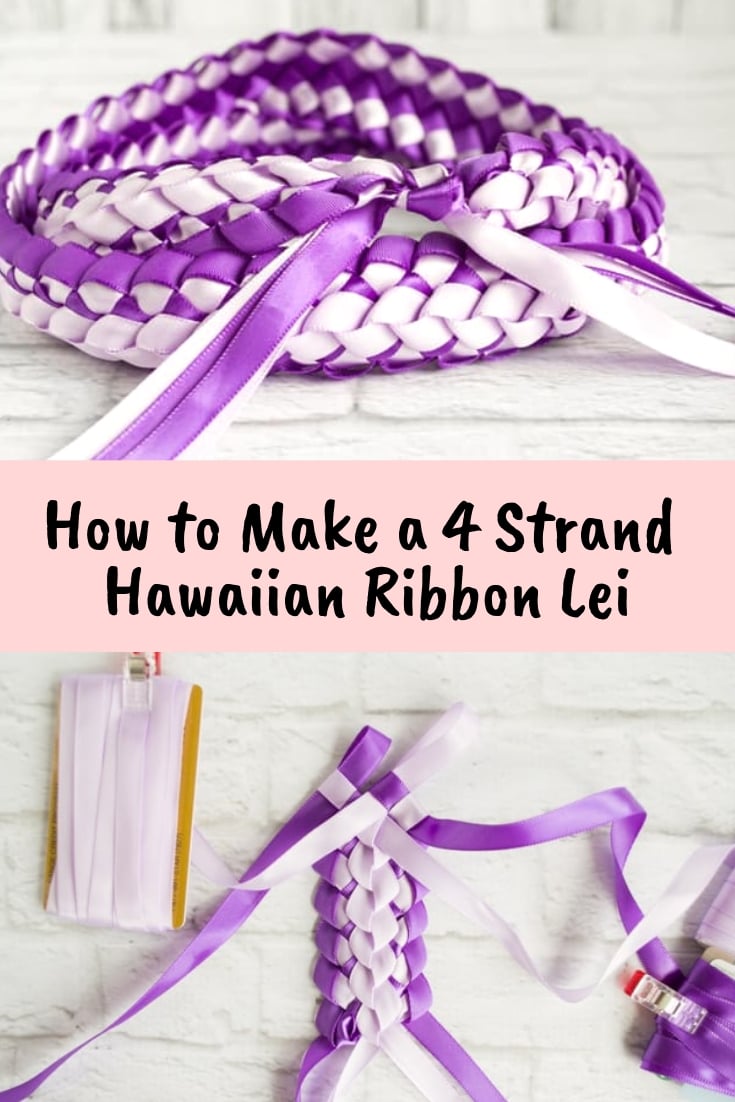
How to make a four strand double braided Hawaiian ribbon lei
1. Prepare your ribbons.
Use an old gift card (or something similar) as a bobbin to wind up each piece of ribbon. Wrap the ribbon securely, but don't pull it super tight around the card or you'll end up with odd creases.
Make sure to leave about a foot of extra un-wound and secure the ribbon with a binder clip or Wonder Clip. Wrap each piece of ribbon around a separate card.

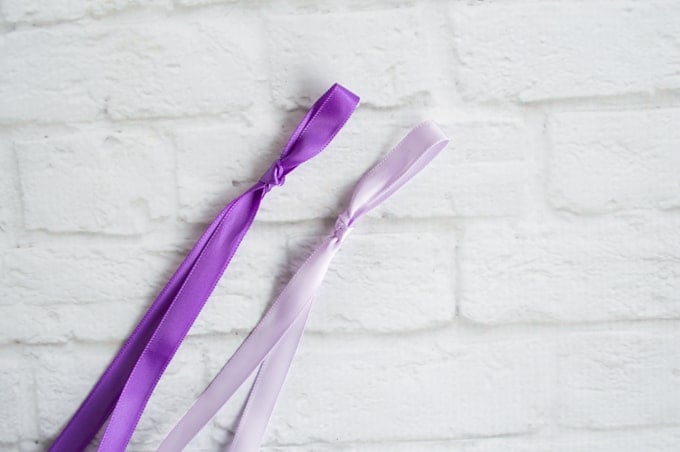
2. Pair off your ribbons. I used two pairs with a light and a dark purple each. These ribbon pairs will be buddies for the rest of the lei! They'll interact with the other pair, but only ever actually truly work with their ribbon partner.
3. Tie a slip knot in one ribbon from each pair, making sure to leave a good 6-8 inches in tail (or more, if you'd like to tie a fancy bow).
This is really important: tie the knots on different colored ribbons. I tied one on a light purple and the other on a dark purple. If you tie both of one color and leave both of the other color loose, your lei won't look like mine.
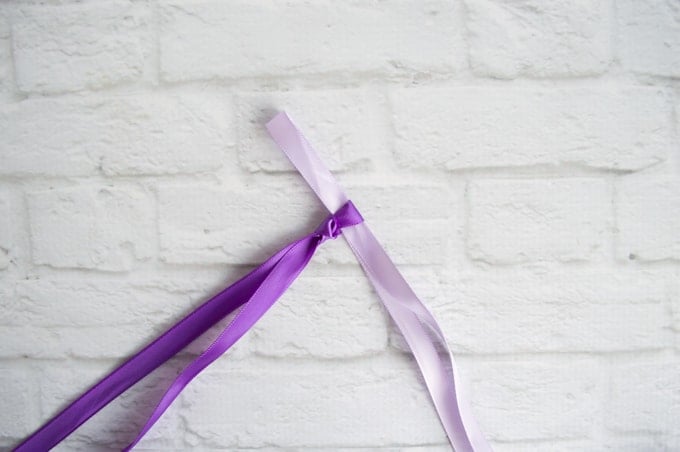
4. Fold over a little bunny ear loop, as if you were making a bow while tying your shoes, and insert this loop through the slipknot of its ribbon partner. Snug the slipknot down. Repeat with the other set.
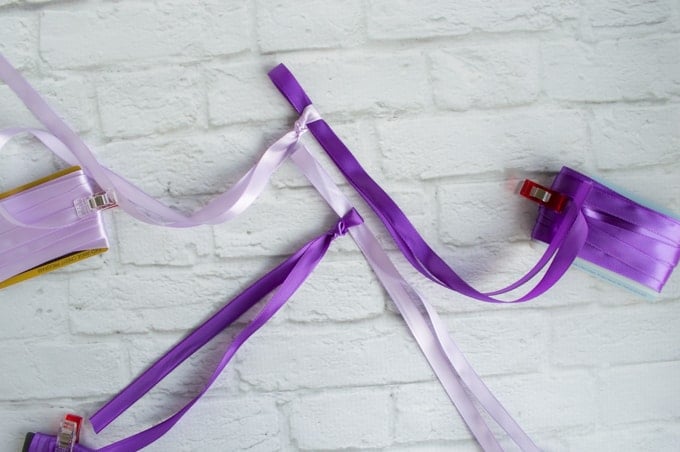
5. Now it's time to get set up for your braid. This step is very important. If you don't set your ribbons up as shown, your lei probably won't stay together in one strand.
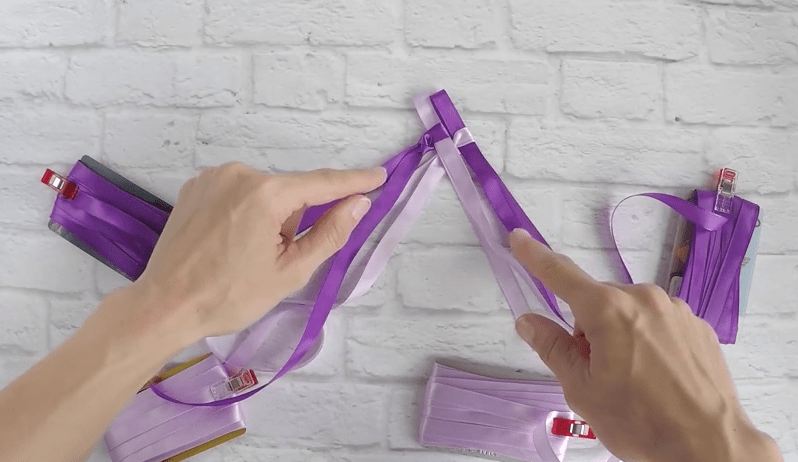
6. From here on out, it is important to remember you always work with the top loop first. Make a bunny ear loop in the partner ribbon that goes with the top loop, insert it through the loop, and then pull tight.
Repeat, repeat, repeat until you reach the end. It is so much easier to share a video instead of a zillion pictures that don't show the movement, so here it is:
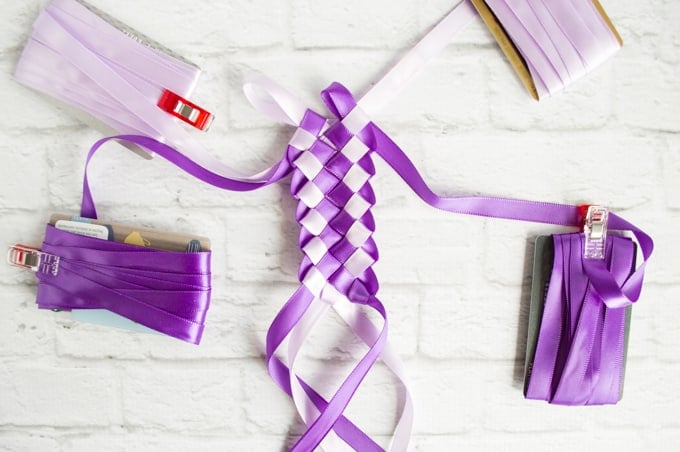
You'll start to see the pattern develop quickly. Here's what it looks like on the front:
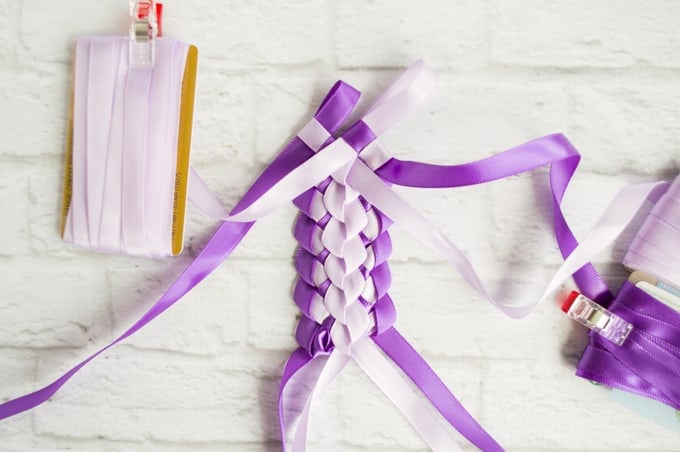
And the back:
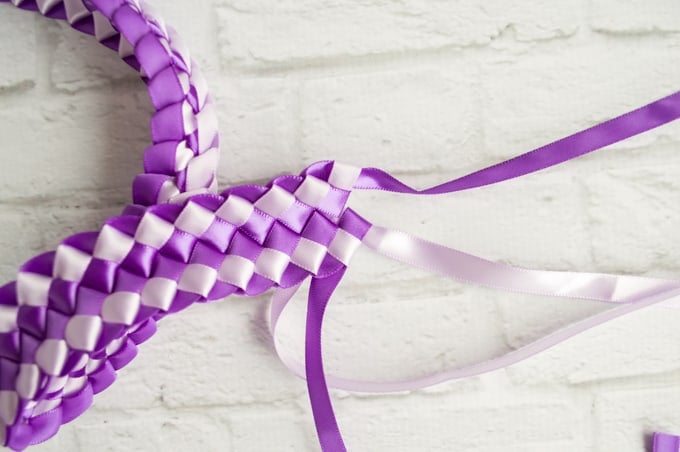
7. Keep going until your lei is as long as you want. On the very last loops, pull the ribbon all the way through instead of leaving a little bunny ear sticking out.
8. Tie the ends together and finish with a bow. Trim the ends and singe them quickly/carefully with a lighter to prevent fraying. Satin ribbon will fray, so this is an important step.
9. Gift your beautiful new lei or keep it for yourself. I'm not telling. 😉
More lei tutorials
If you'd prefer to make something a little quicker and easier, check out the simple braided ribbon lei tutorial right here!

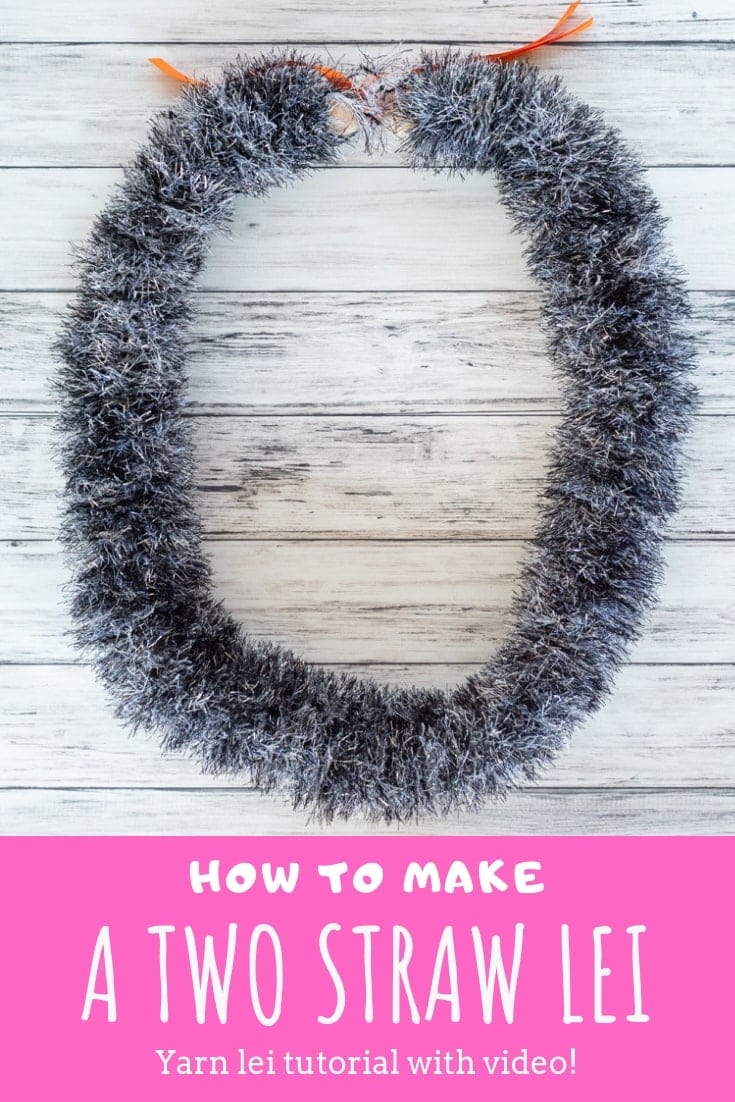
You might also be interested in this lovely two straw yarn lei. It's another great option when you want to use several colors for a graduation lei!
Who will you make a lei for?
Jeanne
Thank you for sharing this tutorial! I just made my granddaughter a two strand ribbon lei for her 10th birthday .. I was wondering how I could make it wider .. (it turned out beautiful but I want the option to make one wider) !! Thanks again!!
Natasha
I love the double braided lei! It's my favorite and definitely wider than the single. You can also use wider ribbon for either style. Pretty much any width grosgrain or satin ribbon will work (as long as it doesn't have a wired edge).