This post may include affiliate links, which means I may make a commission on purchases made through these links at no additional cost to you.
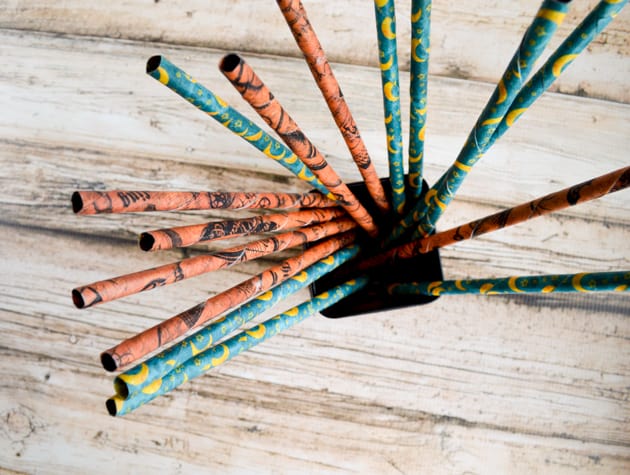
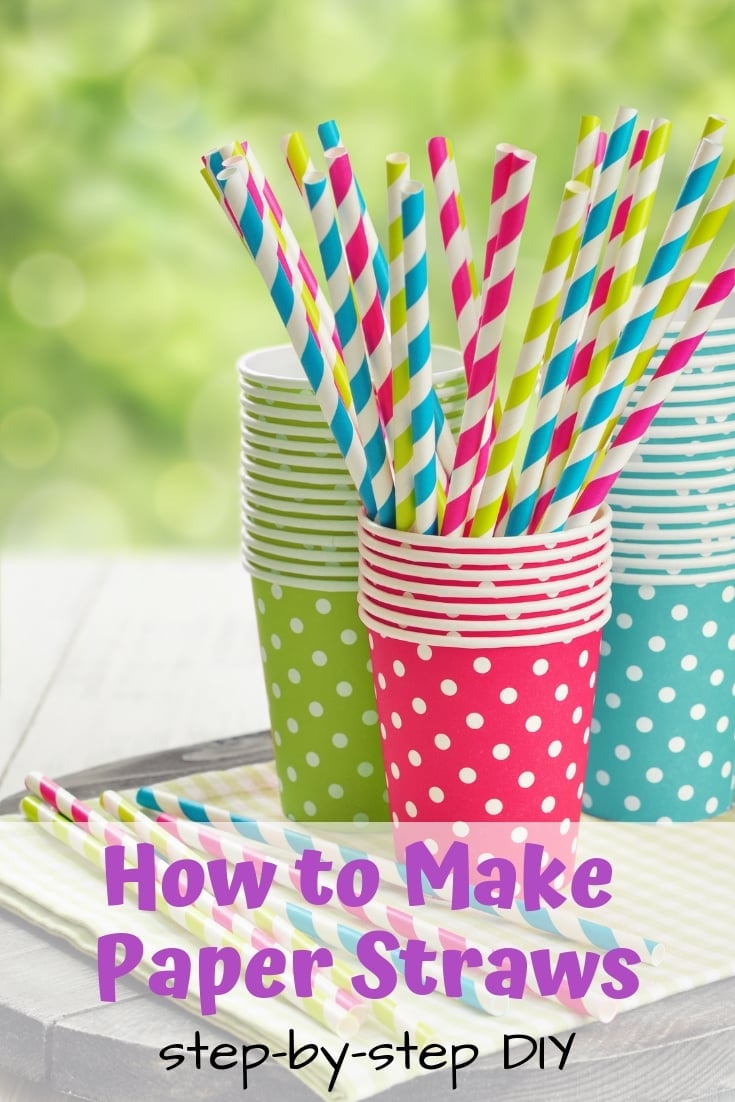
These DIY paper straws are so cute, easy to make, and budget-friendly!
Decorative paper straws are too cute! Unfortunately, a lot of times they're literally too cute, plus they can be too expensive if you don't buy them in bulk.
What do you do if you want just a few paper straws or something that isn't stripes, chevrons, or polka dot? Make your own, of course! I hope you enjoy making DIY paper straws as much as I did!
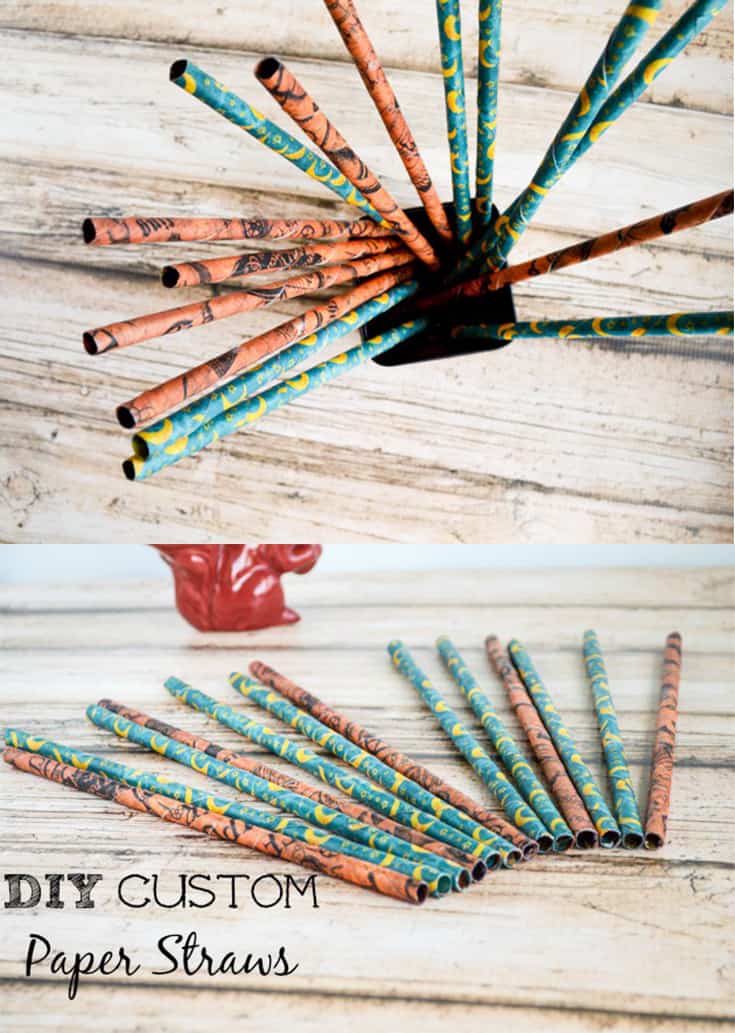
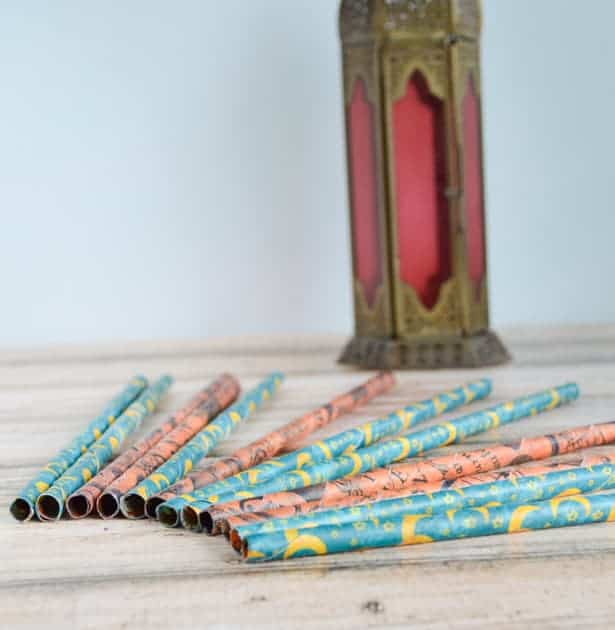
These straws have a Halloween theme, but you could make them for any holiday, shower, wedding, etc. They're really inexpensive, too!
When you only buy a couple dozen decorative straws, they can easily cost $4-5 a package. Each 12" piece of scrapbook paper makes 8 straws and I actually got the two pieces used in the tutorial for free along with the papers I ordered for our wedding, making my cost pretty much nothing. Even if you have to buy the paper, you should still come out ahead. Plus there's the added benefit of being able to make the straws with whatever colors and patterns you want.
If you're even casually crafty, you probably have most of the needed supplies at home already. If not, they're inexpensive and easy to find!
Supplies for DIY Paper Straws
- Scrapbook paper (1 12"x12" sheet should make 8 straws)
- A paper trimmer (This trimmer is the best because the wire guide shows where you'll be cutting.)
- Non-toxic white glue. Original Tacky Glue is my current favorite, though Elmer's is pictured.
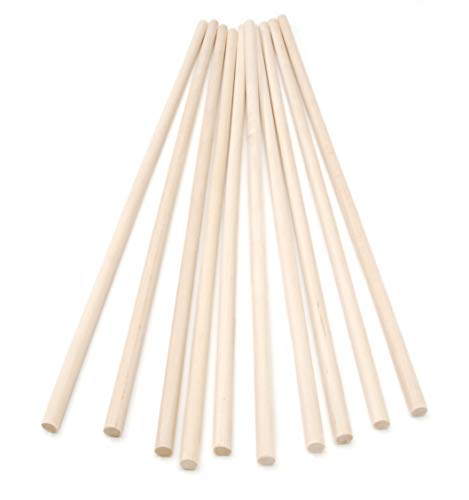
- A ¼" wood dowel. If you have a full-length dowel, you'll also need a small hand saw. Save yourself trouble and just get some pre-cut dowels like these!
- Scissors
- Paraffin wax
- A tall glass container you don't mind filling with wax. I like to reuse jars from things like sauces or olives.
- A cooking pot
- Paper towels

If some of these supplies seem a little bit strange, let me explain:
-I've seen a couple other tutorials for straws that have you roll the paper around a plastic straw or a chopstick. In my opinion, plastic straws are a little flimsy and difficult to work with and most wood chopsticks change diameter, which makes for an odd-looking straw. I got a 48" long ¼" wide wood dowel for about a dollar and have 36" left over for another project.
- When you get your paraffin wax, go for the basic canning wax. It is food safe and cheap. You could also use beeswax, but your straws will taste and smell like beeswax! I don't mind that, but my husband does. Soy wax tends to have a low melting point and feels greasy to me, so I decided not to use it.
- If you don't have an official 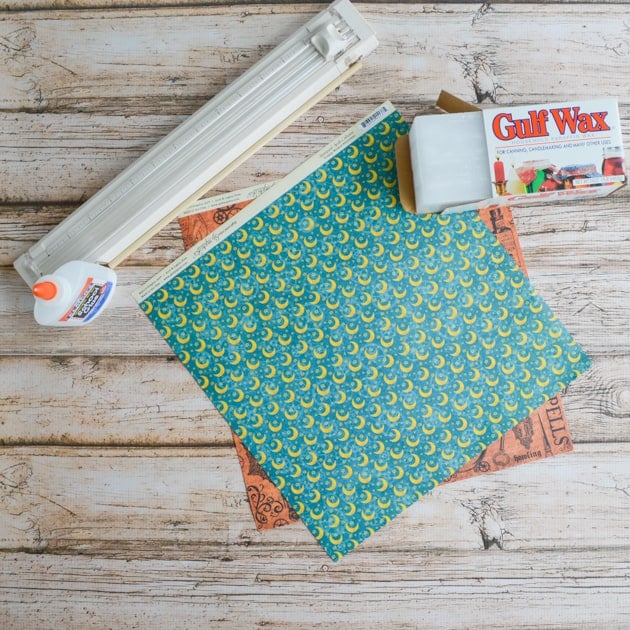
How to Make Paper Straws
1. Cut a 12" section of dowel. I held it in a vice and cut through it quickly with a handsaw, but I've also used hedge trimming shears and even tough scissors on dowels in the past. Alternatively, save yourself the trouble and just get 12" craft dowels like these.
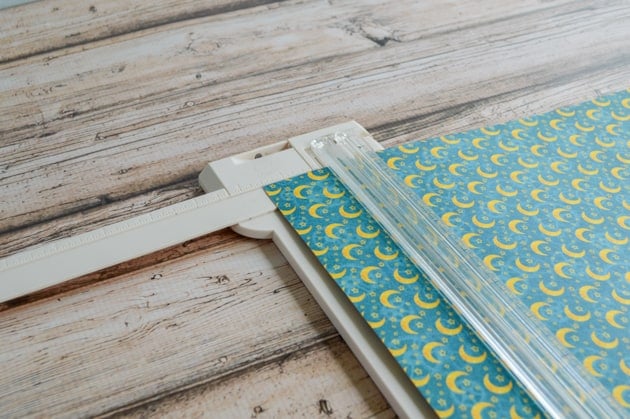
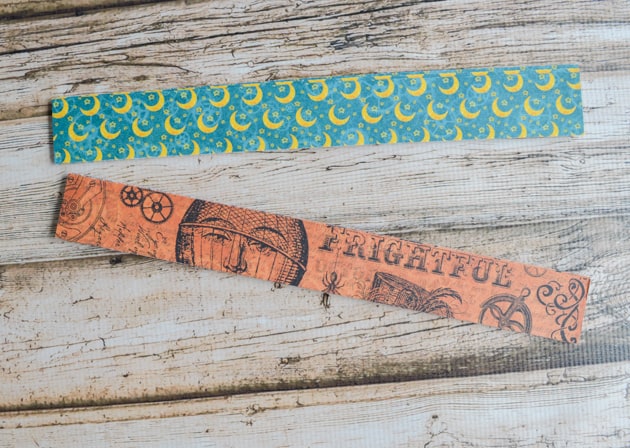
2. Cut your paper into 1.5" strips. You should be able to make 8 12"x1.5" strips from each sheet of scrapbook paper.
3. Working with one strip of paper at a time, lay a thin bead of glue about ¼" inch in along one long edge on the "wrong" side of the paper. This will be the inside of the straw, so if your paper is double sided, make sure you put the glue on the side you don't want showing.
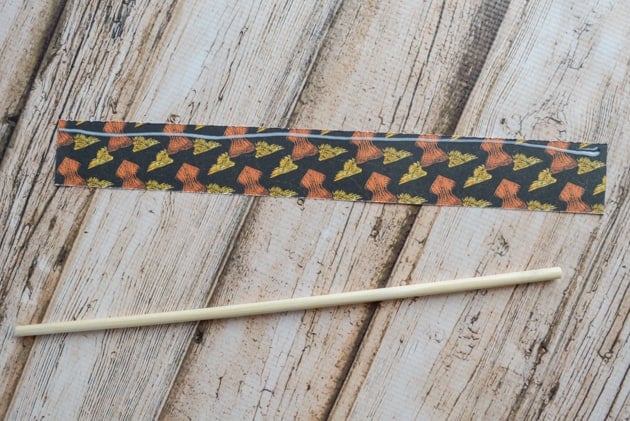
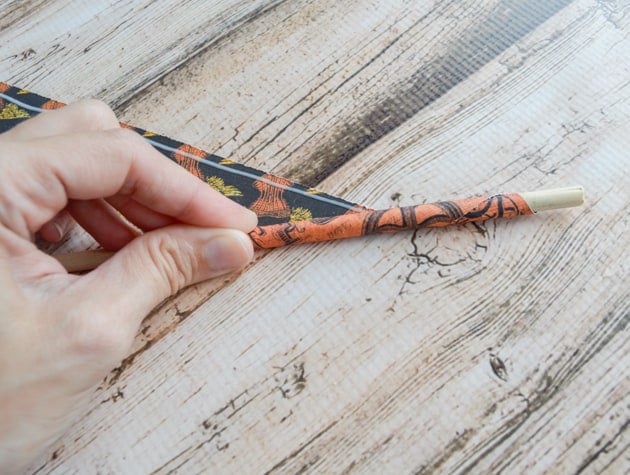
4. Place one end of your dowel at an angle across one end of your paper opposite from the glue, as shown. You can experiment with what angle ultimately works best for you, but an approximate 45 degrees seems to work well. Begin rolling the paper, using the dowel as your guide.

5. Continue rolling the paper. It should stay at an angle so that each wrap overlaps with the wrap before it. Make sure the roll is snug, but making it extremely tight will make the straw difficult to remove from the dowel later!
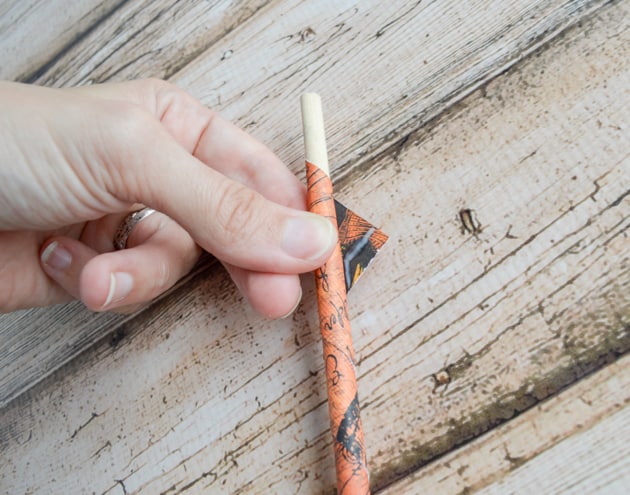
6. When you reach the end, you may need to add an extra dab of glue to the final tab. Press the end tab down, wipe up any excess glue along the straw with a paper towel, and hold the end in place for a few seconds until the glue starts to bond.
7. Remove the dowel from the paper straw and begin again with the next strip of paper!
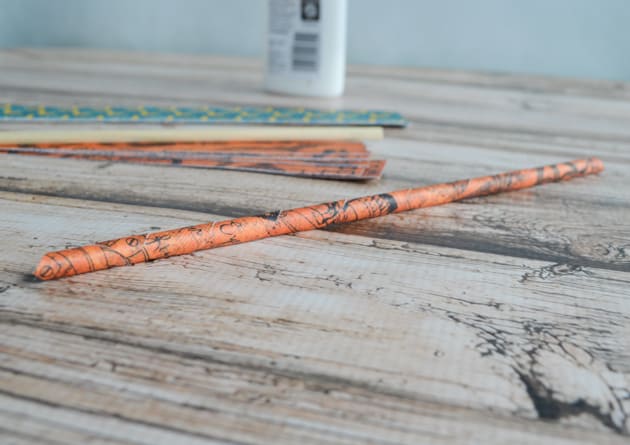
8. After you're done rolling all your straws, it's best to let them dry fully before cutting or coating them. I let mine sit overnight before continuing.
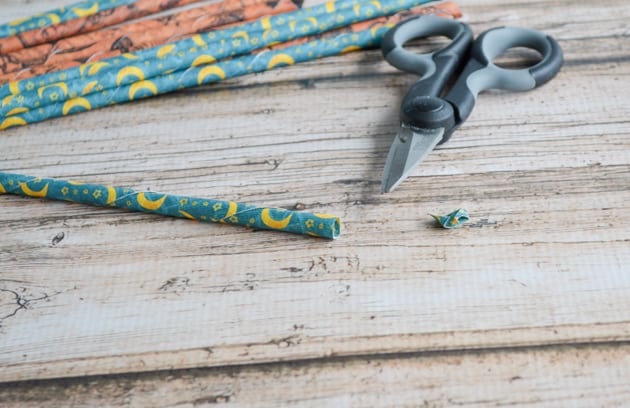
9. Trim your straw ends to get rid of the pointy bits. You'll notice your straws aren't all exactly the same length - this is also the time to cut them to size, if you're like.
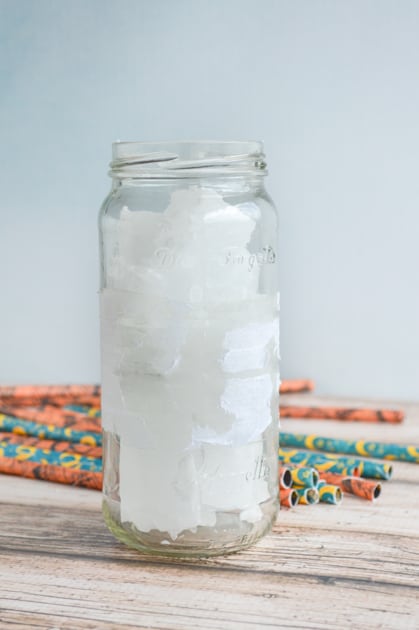
10. Break up chunks of your wax and put them in your glass vessel. I used two of the 4 sheets in my box of wax in order to get the melted level high enough to coat the straws.
11. Place your jar of wax in a cooking pot with high sides and pour water into the pot until it is almost full or the water comes most of the way up the jar, whichever happens first.
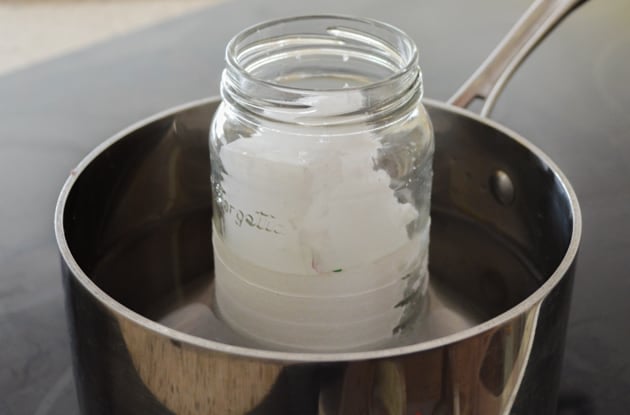
12. Heat the pot over low to medium-low heat until the wax melts. This will take several minutes, especially because you need to turn down the heat if the water tries to simmer.
13. Working with one straw at a time, dip one end into the wax and then lift it out. Let a little wax drip back into the container and then gently wipe the excess off with a paper towel. Repeat with the other side of the straw. The wax on the straw will harden pretty quickly, but you can set freshly-coating straws on a plastic bag or piece of wax paper if you're worried about getting your counters waxy.
14. Continue dunking your straws in the melted wax until you're finished.
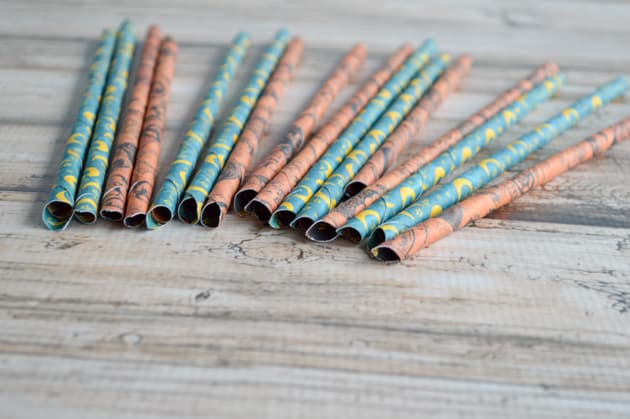
15. Use your cool new straws!
 And that's all, folks! It seems like a lot of steps, but they're very easy to make and most of the steps only take a minute or two. You can practically make these in less time than driving to the store to buy some! Plus, of course, there's that whole "make them in any color you want" part that's pretty darn cool.
Remember to Pin this to your favorite craft board so you can find it again later!
More Related Posts
[pt_view id=“15d429e15n"]
[catlist search="tutorial" numberposts=4 orderby=rand excludeposts=this]


them8triark
Natasha, can you please tell me why the paraffin wax is needed if the straws aren't being used to drink through?
Natashalh
You certainly don't have to coat them in wax if you're not planning to use them for liquids, or you could use beeswax if you'd rather use something more natural.
Kristen
Is the scrapbook paper you used non toxic (if so, where did you get it from)? Is it important to make sure that the paper used is non toxic or no?
Natashalh
Honestly, I didn't worry about that too much because the paper was entirely costed in paraffin wax and I intended for them to be a one-time use item. If you plan on using them a lot, you might want to look into non-toxic papers. Whatever you feel comfortable with =)