This post may include affiliate links, which means I may make a commission on purchases made through these links at no additional cost to you.
Folks who know us also know that Papi Chulo and I tend to be pretty active people. We love heading to CrossFit, but also enjoy hiking, paddling, surfing, and rock climbing. All this activity means waking up with sore arms and legs is at least a once a week occurrence around here!
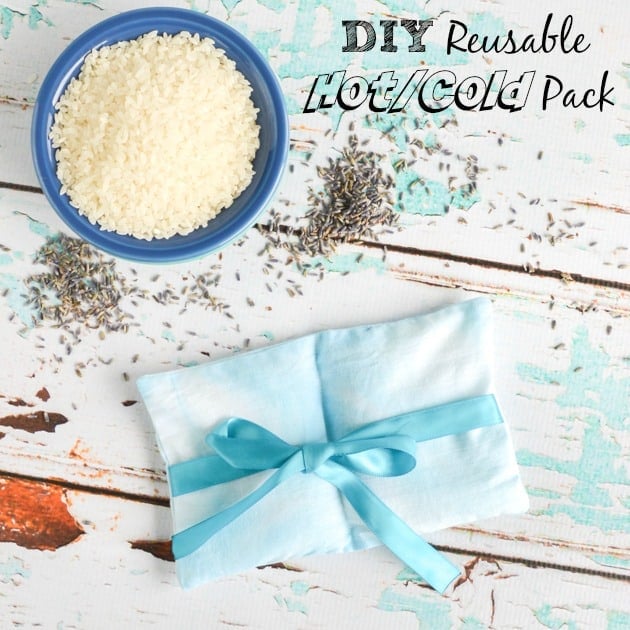
For me, the best way to soothe aching muscles is with a hot pack, but I got sick of buying boxes of them. Remembering a reusable hot pack I used to own (it was a furry, stuffed animal fox that draped over your shoulders!), I decided to make a versatile, reusable hot/cold pack for myself. It's great for sore muscles, headaches, toothaches, and more! I hope you enjoy this DIY heat therapy rice bag!
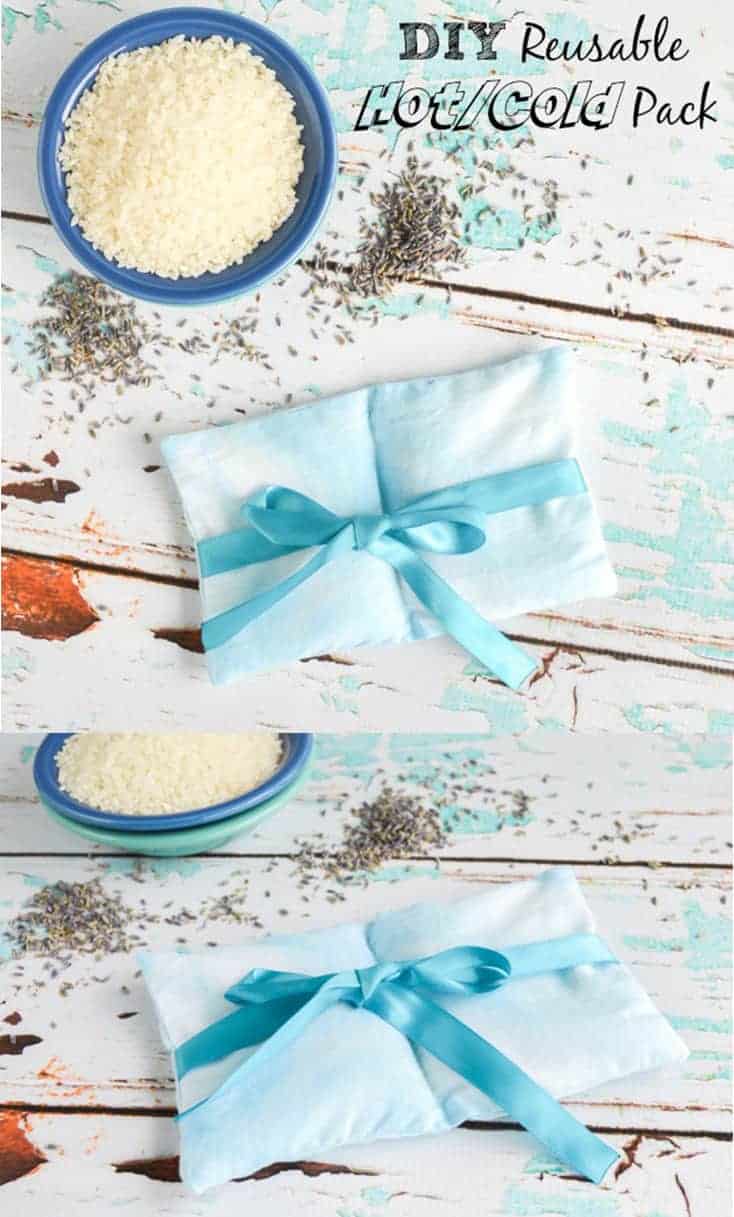
Homemade hot and cold pack tutorial
I designed this particular hot pack for this tutorial because it is very easy to make the pattern. It's also a convenient size - almost exactly the same as my favorite non-reusable hot pack.
You can make your hot pack larger or smaller - it's up to you. You can also choose your favorite fabric. I used cotton, but wouldn't this be cozy done in fleece?
Throughout the tutorial, I usually refer to it as a hot pack or heat therapy pack, but it's really a reusable hot/cold pack. Typing that every time gets a little cumbersome, though! To make it hot, toss it in the microwave for about 30 seconds (or however long your particular microwave needs). To make it cold, store it in a Ziplock bag in the freezer.
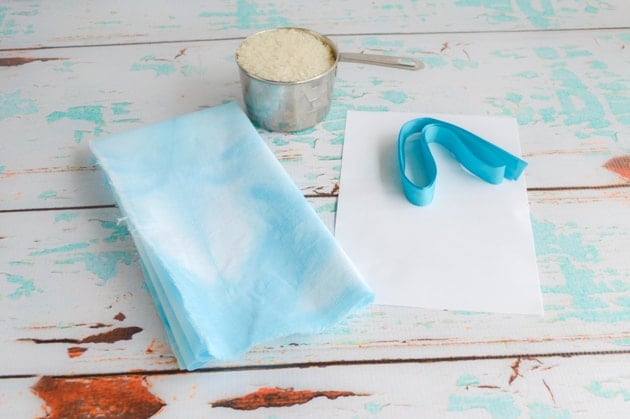
Materials for making your own reusable hot/cold pack
- A sheet of printer paper
- A paper trimmer (or paper scissors)
- Fabric (you need a square foot or less total). My favorite fabric shop is fabric.com
- Fabric scissors
- Sewing pins
- Coordinating or matching thread
- A needle
- A sewing machine (optional, but makes the project way faster!)
- Two feet of ribbon or twill tape (optional)
- A generous cup of rice or other natural stuffing material (see below)
- Dried lavender or essential oils (totally optional)
What can you use for a homemade heat therapy pack?
You can also use something like black beans instead of rice for your stuffing. I've successfully used both beans and rice in reusable hot packs! Whole buckwheat groats make for a delightful hot/cold pack.
Oh, and in case you're curious, I can't really recommend using corn as a filling. 😉
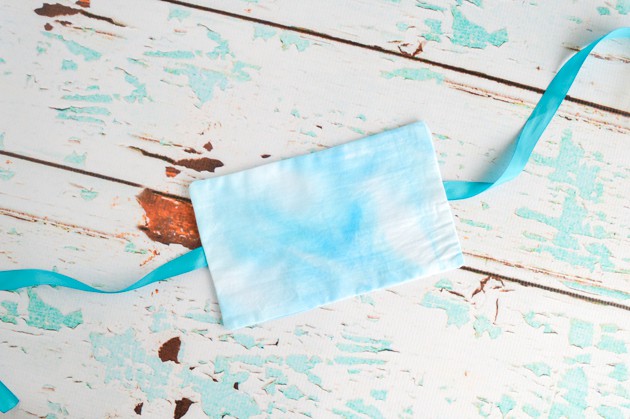
I think adding ribbon ties is pretty useful, but you can leave them off if you'd like. The segmented design means you can drape this hot pack over your shoulder, for example, without using the ties, but ribbons make things more secure. Adding longer ribbons also means you can tie it around you and use the hot pack to soothe lower back aches, too.
How to make a reusable hot/cold pack
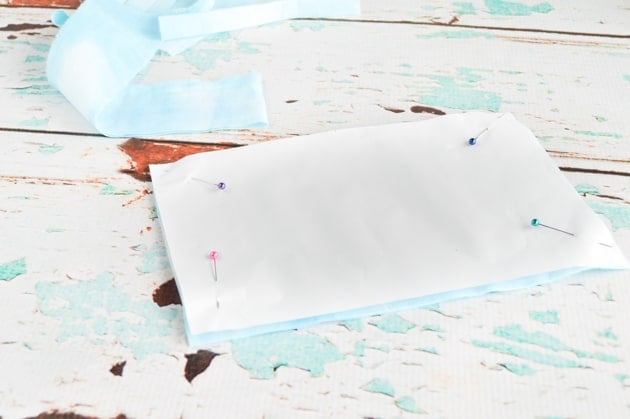
1. Cut your sheet of printer paper in half "hamburger style" so that you're left with two pieces of paper each 8.5"x5.5". One of these half-sheets will be your pattern. If you have a paper cutter, just go ahead and cut it in half. If you're using scissors, fold it in half and then carefully cut along the line.
2. Fold your fabric in half and then pin the pattern in places that you'll be able to cut both thicknesses of fabric simultaneously.
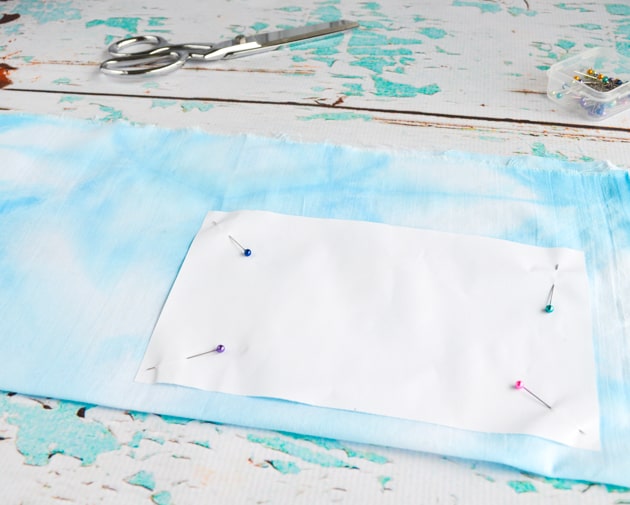
3. Carefully cut out the fabric.
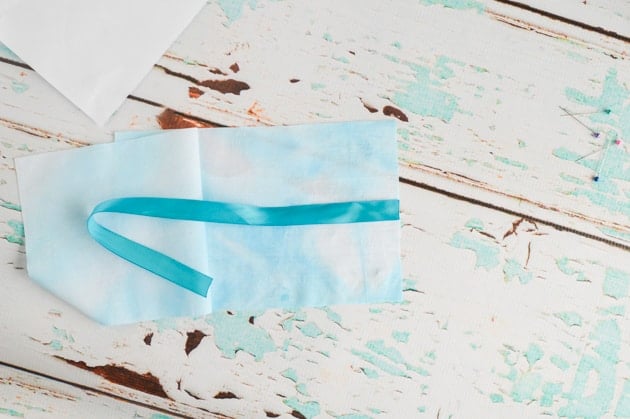
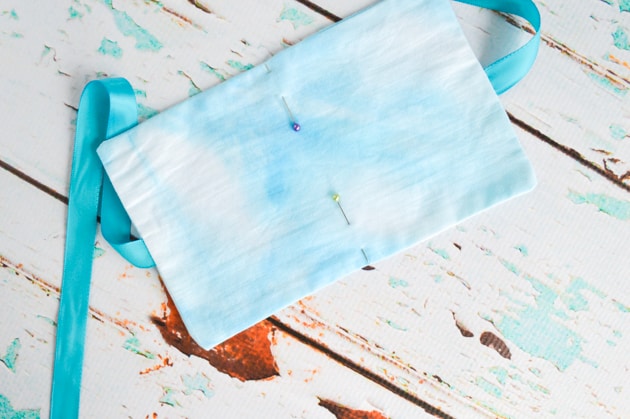
4. Unpin the pattern and position your two fabric pieces on top of one another "right sides together." If you'd like to use ribbons or ties, fold the top layer of fabric back. Line the end of the ribbon up with the center point of the bottom fabric piece's short edge with the main length of the ribbon to the inside, as shown below. Repeat with the second length of ribbon on other short end and then pin the second piece of fabric in place. Make sure the ribbons are fully contained within the pinned up fabric.
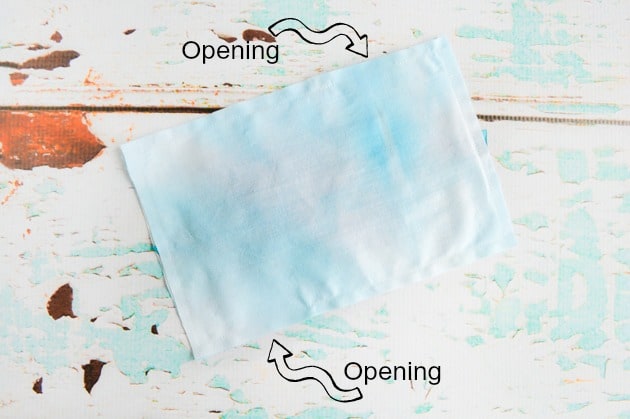
5. Stitch around the fabric either by hand or machine. I used a ¼" seam allowance, but you can use whatever you're comfortable with. Make sure you leave two openings in the seam on opposite ends of the long edges. This will allow you to easily fill the pouches with rice. Just check out the picture below!
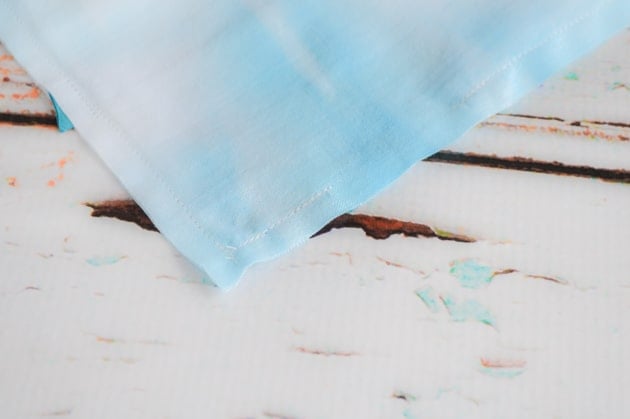
6. Pull the material and ribbons through one of the openings to flip the pouch "right side out." Iron, if needed.
7. Find the pouch's midpoint along the long edges and then stitch straight across from seam to seam in order to form two separate compartments. The easiest way to do this is by folding the pouch in half and then marking it midline with pins or chalk.

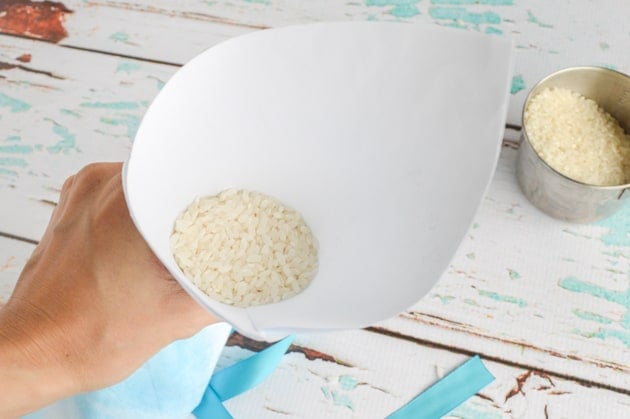
8. Use a funnel (or a makeshift funnel like mine!) inserted into an opening from step #5 to add about ½ a cup of uncooked white rice or small beans to one of the pouch segments. It won't seem "full," but it's way easier to use your hot pack if it isn't packed to bursting. If you want to add any dried lavender or essential oils, do so now.
9. Stitch the opening shut using your favorite method. The easiest way, but (I think) also the least attractive, is simply closing it up with a straight stitch on your machine or a backstitch by hand. A hidden stitch or "blind stitch" is a nice way to close open seams. To sew a hidden stitch, simply thread a sewing needle and tie a knot in one end. Draw the needle from the inside up so that the thread comes up at one end of the open seam.
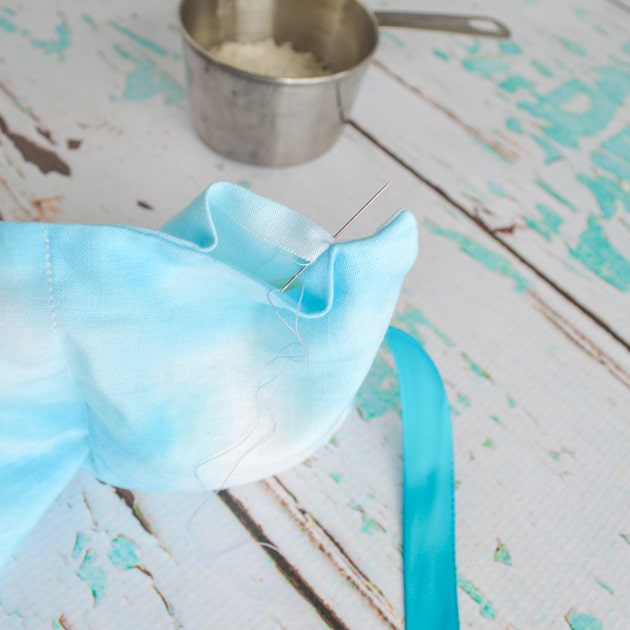
Insert your needle directly across from the initial exit point and make a small stitch along the opposite top edge, as shown.
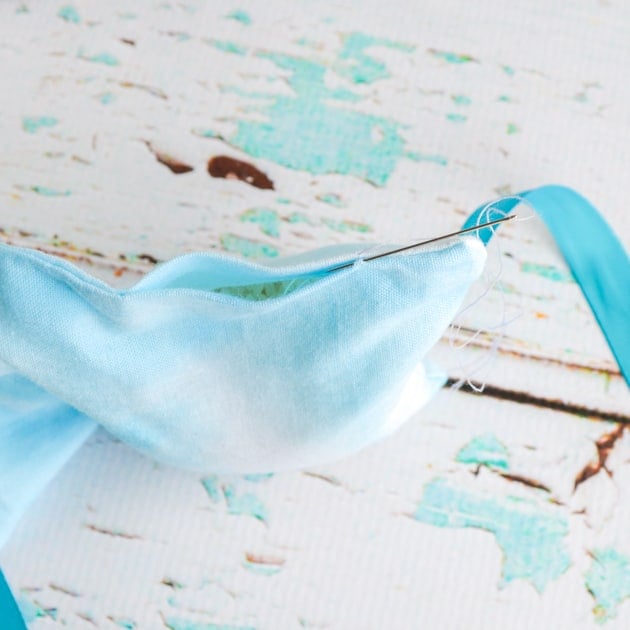
Go straight back across the opposite side and make another small stitch.
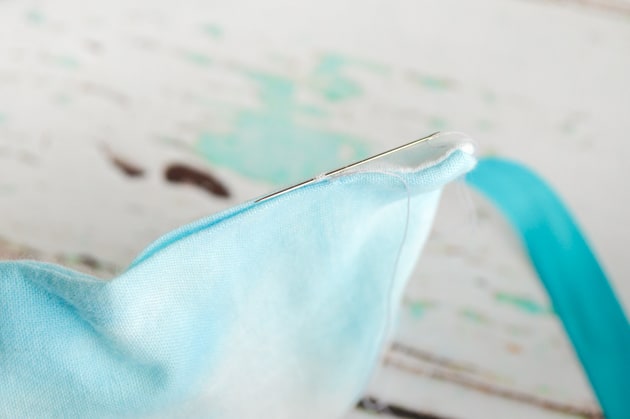 Continue stitching like this, pulling the thread snug (but not overly tight) every few stitches, until you reach the end of the opening. Secure the thread. If you want to avoid a thread tail sticking out, stick the needle into the pouch and then out through the fabric's front an inch or so down. Pull the thread tight, allowing the fabric to bunch up, and then snip it close to the cloth. The tail will vanish inside!

10. Repeat steps 8 & 9 with the second section.
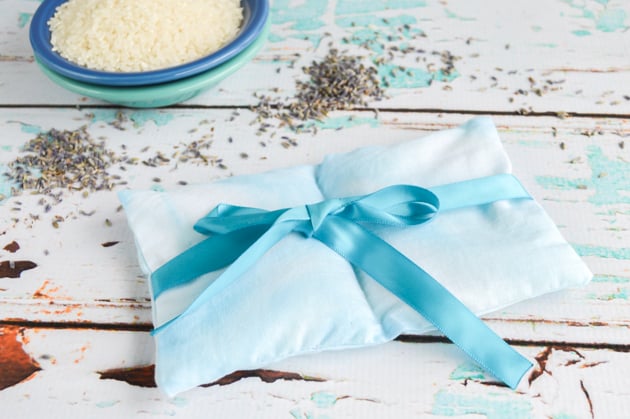
11. Use and enjoy!
As noted above, microwaving this for about 30 seconds will heat it nicely, or you can store it in the freezer (inside a ziplock bag). It doesn't stay hot for 8 hours like the store-bought ones, but it also only takes a few seconds to heat up again!
If you want a smaller, handheld heat pack, check out this adorable felt heart hand warmer tutorial!

I've done way too many deadlifts in the past week, so my reusable hot pack has been put to good use! What's your favorite way to soothe aches and pains from sore muscles or headaches?


Cathy
Been around for ages, nobody is stealing. Quick do: rice or dried beans in a mismatched sock, tie if long enough, sew otherwise. can also be decorated if you so desire. I'm 58 and I learned this in my twenties.
Natasha
Yes, that certainly is a quick and easy way to make a hot/cold pack! I specifically made this one so I could tie it around myself, though, which is a bit trickier to do with a sock. Happy New Year!
Kassandra
Please do not use Fleece for this project, things that are not 100% cotton, this includes thread, can catch fire in the microwave. I am always very careful to use 100% cotton fibers when making a microwaveable anything because I know people who have had microwave fires.
Natashalh
Good call. =) I just edited the wording to make it clear that I mean natural materials fleece (you can get some really nice stuff that's cotton and merino!)