This post may include affiliate links, which means I may make a commission on purchases made through these links at no additional cost to you.
I've been having fun with paper recently, and not in the way you might guess! No, I haven't suddenly found the time for scrapbooking or art journaling - I've been making things with paper.
It started with my origami leaf earrings, and then progressed with paper gift bows.
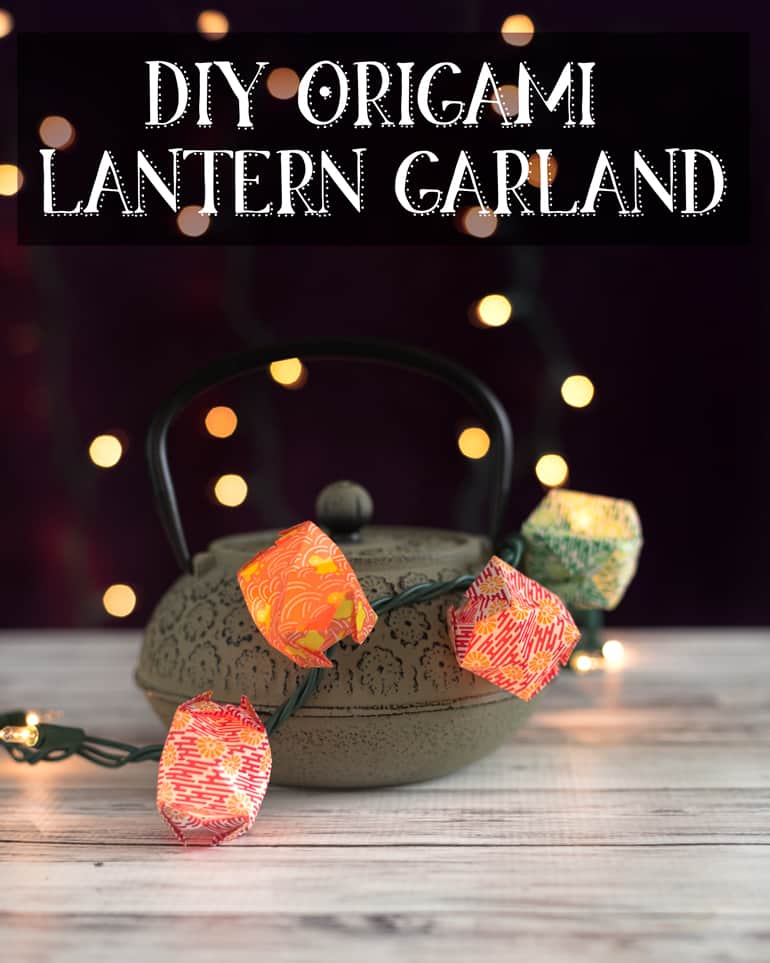
All this folding experimentation lead me to fold paper lanterns and deciding it would make a great way to avoid putting away the Christmas lights decorate for New Year's or other, non-Christmasy festive occasions.
The realization that most origami instructions are little line drawings made me decide on creating a tutorial with step by step photographs of the folding process to make it easier to follow. I think you'll be surprised how easy folding paper lanterns really is!

Supplies for origami lantern string lights
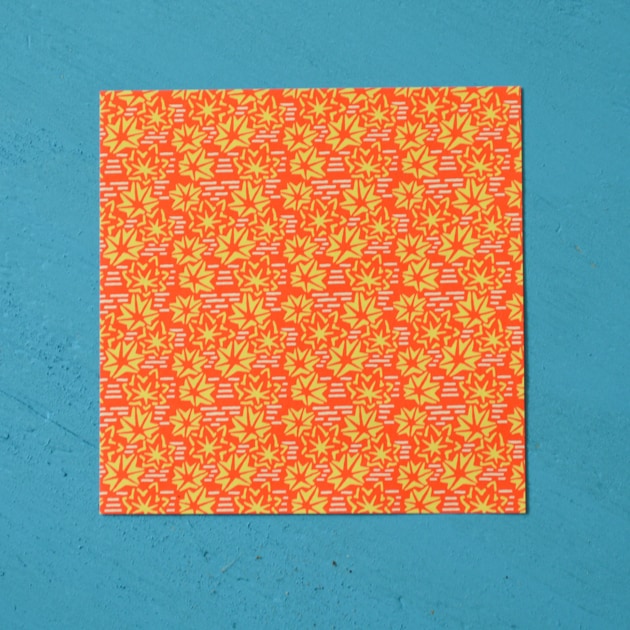
- Origami paper -I've found that the 4 ⅝" origami paper works well for these balloons/lanterns, but you can go a little larger. I wouldn't recommend choosing a 6" sheet or anything smaller than 4", unless you have really small or large lights. You'll need as many sheets as you want to cover the lights you desire to transform!
- A strand of white lights - LED lights don't produce heat and are a better choice if you intend to leave the lights on for a long period of time and/or unattended.
How to fold origami balloon lanterns
Describing origami folds in written words can be tricky! I've done my best, but the photos may be more helpful. You can click on each photo to enlarge it. ***2016 update*** I've made a video showing the steps! If following the static pictures is difficult for you, please watch the video. =)
If you don't feel like watching a video, here's a photo tutorial for how to fold origami lanterns:
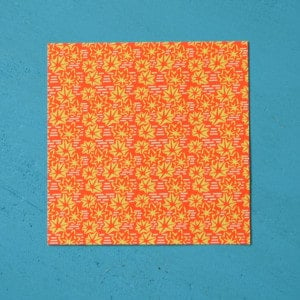
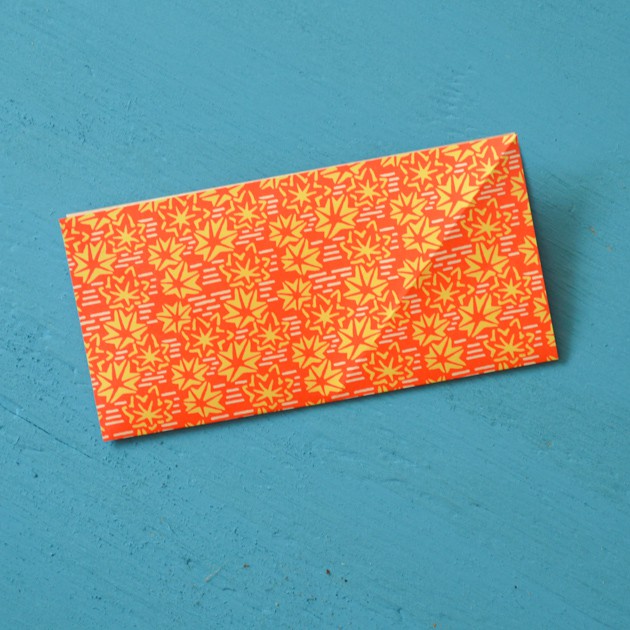
1. Fold the paper into a triangle.
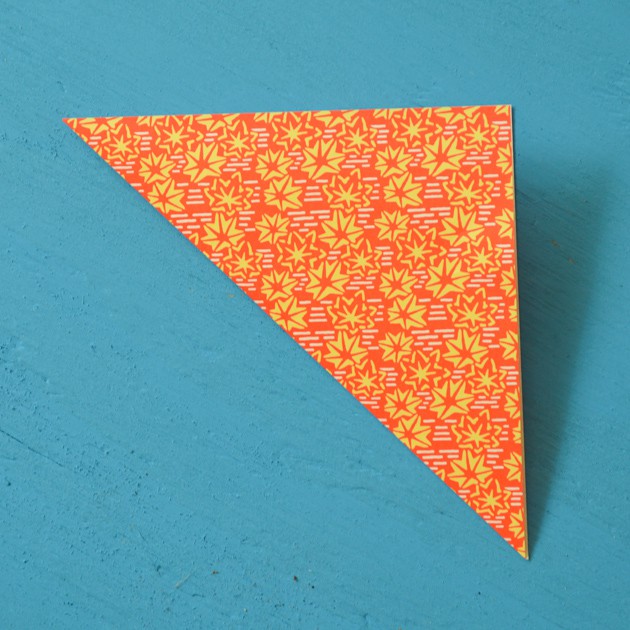
2. Unfold step 1 and fold a new triangle using the previously unused corners.
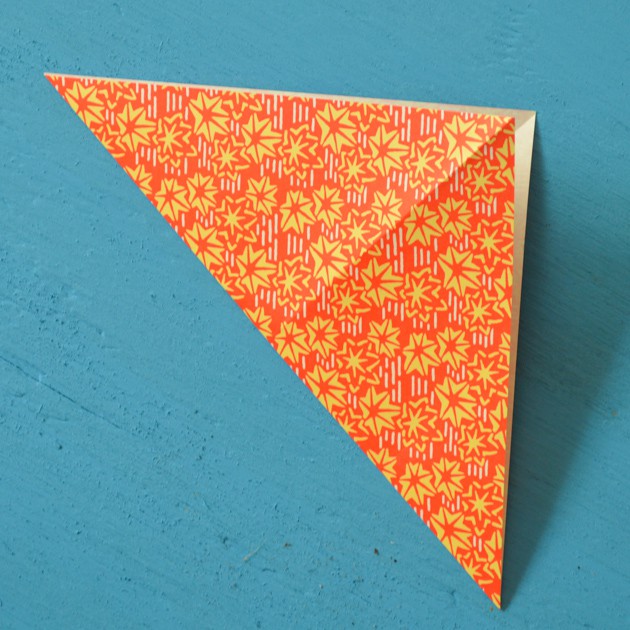
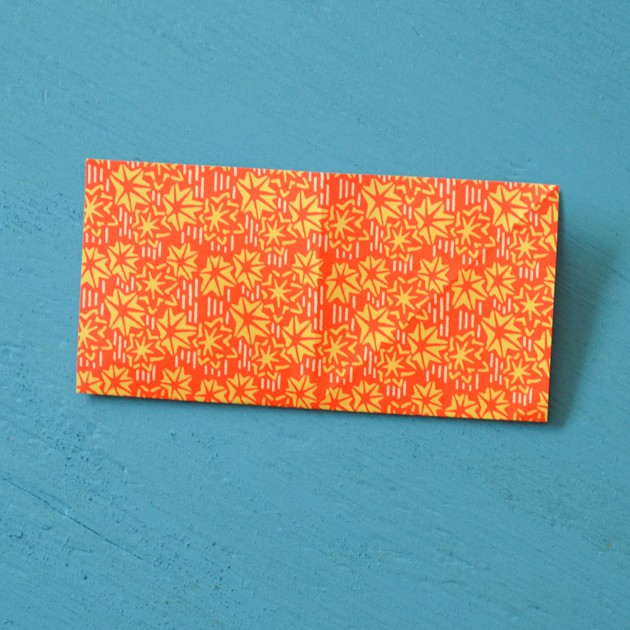
3. Unfold step 2 and fold the paper in half to form a rectangle.
4. Unfold step 3 and fold in half the other way.
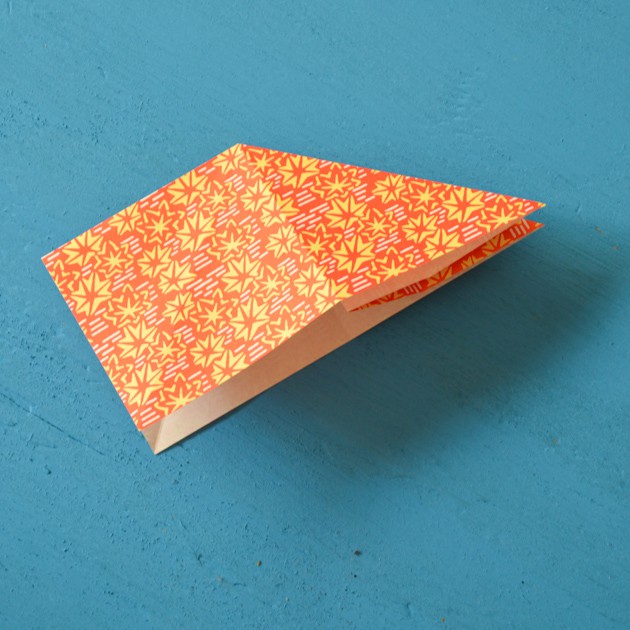
5. Unfold step 4 and then fold one side of the paper inside, following the creases, as shown below. Basically you take the midpoint of one side and then fold inward along the diagonal creases until the original midpoint comes together with the midpoints of the sides to its left and right.
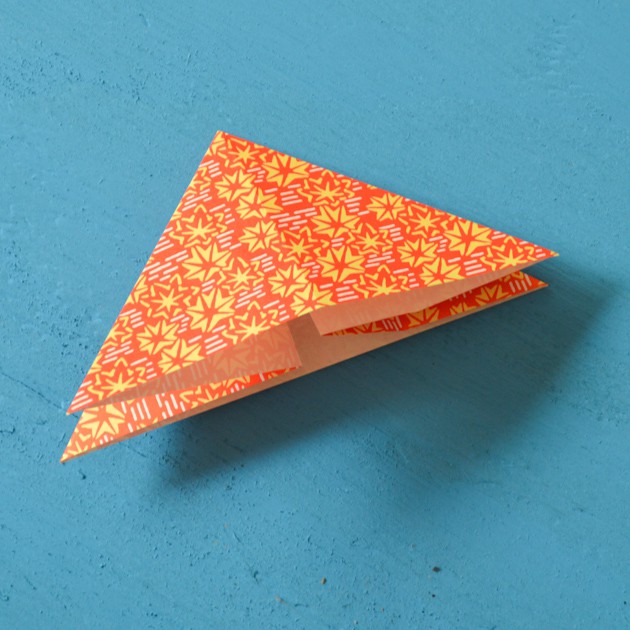
6. Fold the opposite side in, to match, to form a triangle.

7. Fold one of the triangle's points up and to the center point and crease firmly using your nail.
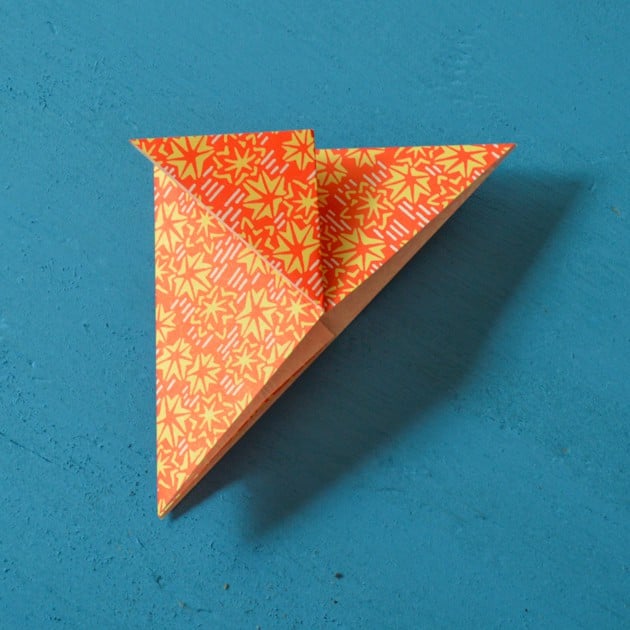
8. Fold the remaining three points up and to the center.
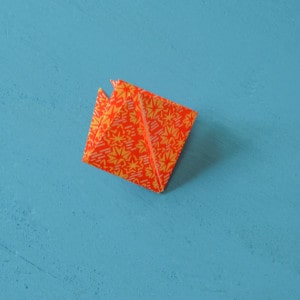
9. Fold the outside corner of each newly-formed triangle in to meet the central midpoint of its center line. Fold two points towards you, flip the model over, and then fold the remaining two points towards you.
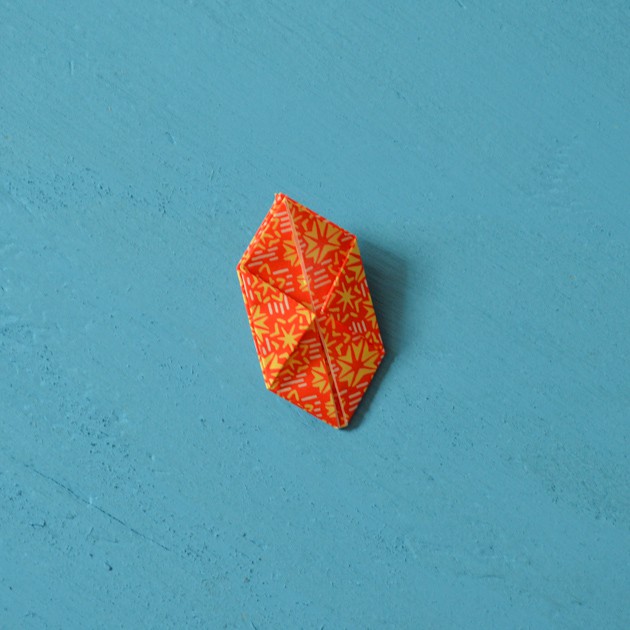
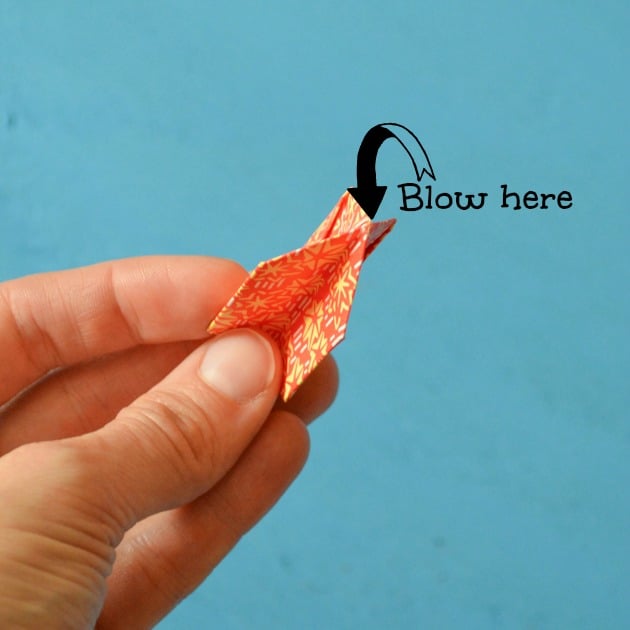
10. Tuck the free points up inside the flaps you just folded to the center and crease firmly. You need to open up the flaps, not tuck the point under the flap.
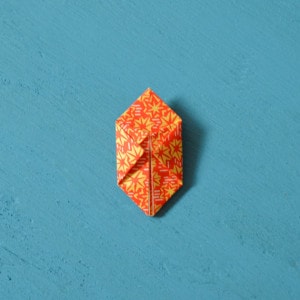
11. Carefully blow into the hole while gently pulling the balloon apart, as needed. It make take a couple of tries to fully inflate the lantern. If you inflate too hard too quickly, the tabs may pop out of the flaps and you'll have to re-tuck them, as in step 10.
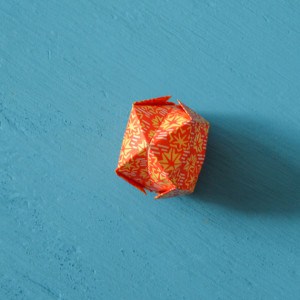
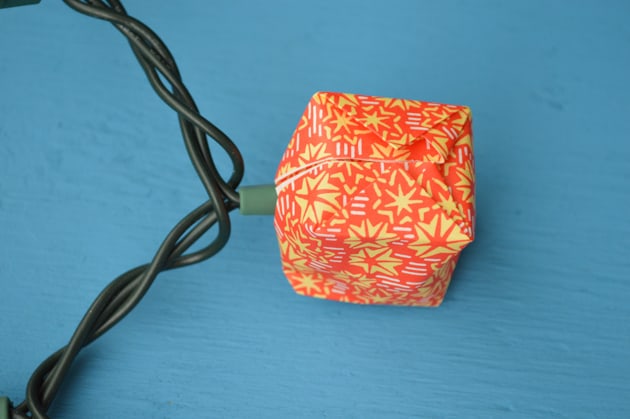
12. Gently slide a strand light in through the hole to create your lighted lantern! I've found the balloons are more secure if you press them all the way over the light's base, not just over the bulb.
13. Continue steps 1-12 until you have enough lanterns.

It may take you a minute or two to make your first balloon and get it inflated, but it's really easy once you get the hang of it. Plus, it's a very inexpensive way to redecorate for any holiday!
You can carefully fold the balloons back so they're flat and reuse them a time or two before they become too loose on the lights, and they don't take up much storage space.
They're not just good for holidays and parties - I've worked at a lot of weddings and they're a popular, economical DIY wedding idea, too!
What decorations do you like to make at home?
![]()

Karyl
These are so cute but I have a question.
Do you use one sided paper or does two sided work as well? It seems the two sided may not let the light show through.
Natasha
I used one sided. I haven't experimented with two sided. I imagine that whether or not it would work would depend on your lights. Some led string lights are more powerful than others - it might work just fine with more powerful lights!