This easy silicone teething necklace tutorial will show you how to make a nursing necklace at a fraction of the price compared to buying one!
Recently LG started to get distracted and grabby while nursing. And, of course, like all babies she loves putting things on her mouth.
I decided I wanted a silicone nursing/"teething" necklace, but realized that I could get the materials to make several for the price of buying one already assembled necklace. Since making a simple necklace from large silicone beads is basically the easiest thing in the world, I went ahead and got the supplies to make a few necklaces!
I was really proud when our pediatrician pointed to my necklace as a great thing to keep on hand for chompy four month olds during our last appointment. Score!
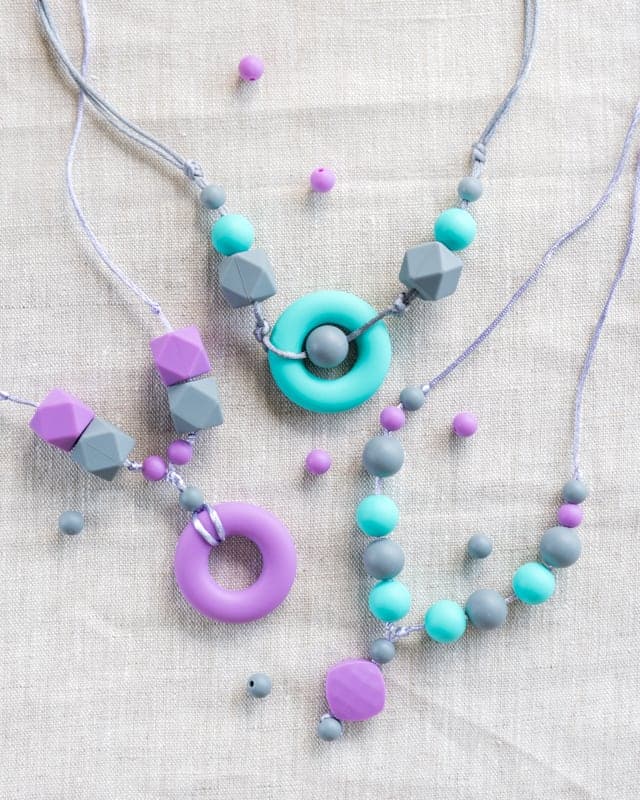
Most teething necklaces I've seen are simply beads on a string, so I wanted to make something a little more interesting. Even if you don't have a baby eager to gnaw on your everything, you can use the same process to make a large statement necklace and use some of the tips for other beading purposes. I hope you enjoy this easy silicone teething necklace with tips on how to thread beads more easily!
This post may include affiliate links, which means I may make a commission on purchases made through these links at no additional cost to you.
Have you ever wanted to put a bead or button on a piece of yarn, string, or cord but had trouble getting it through the hole even though you absolutely know the stringing material would actually fit through the bead?
It's a problem I recently encountered while working on my knitted bracelets. The yarn wouldn't just 'poke' through the holes, but the holes weren't big enough to permit the eye of a needle large enough to use with the yarn.
The secret key to success is...dental floss! Yep, dental floss. It's amazing and great for getting larger cords, yarn, etc. through beads. Although I'm showing you how to make a couple of cool silicone teething necklaces using the dental floss threading trick, you can easily apply the technique to other projects.
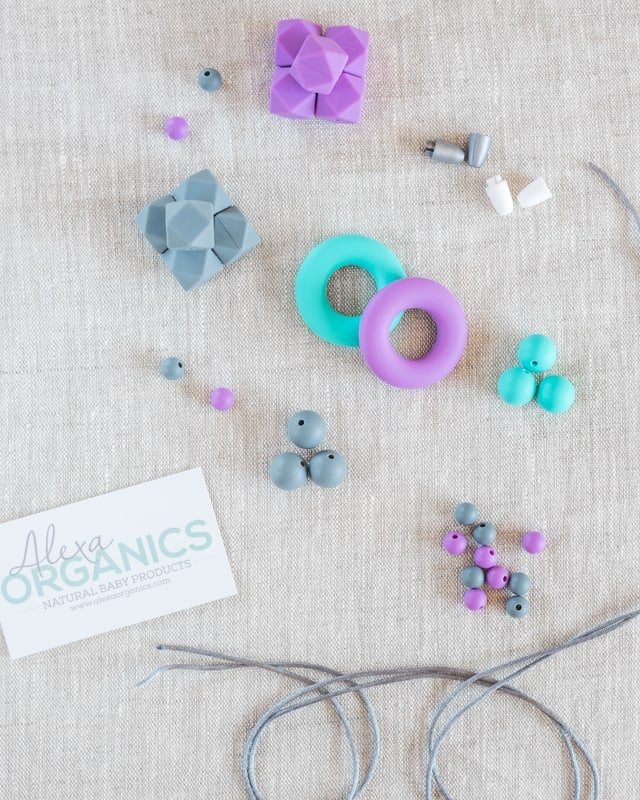
If you want to make yourself a handful of silicone necklaces, I highly recommend you head over to Alexa Organics.
They have a variety of lovely silicone beads, necklace kits, organic wood components, and more. They also sell cords with break away clasps. I ended up using some of my own cord for two of the necklaces so I could make them a little longer, but break away clasps are an absolute must if you're margin a teething necklace. If you want to use other materials to make an entirely different necklace, rock on and keep reading!
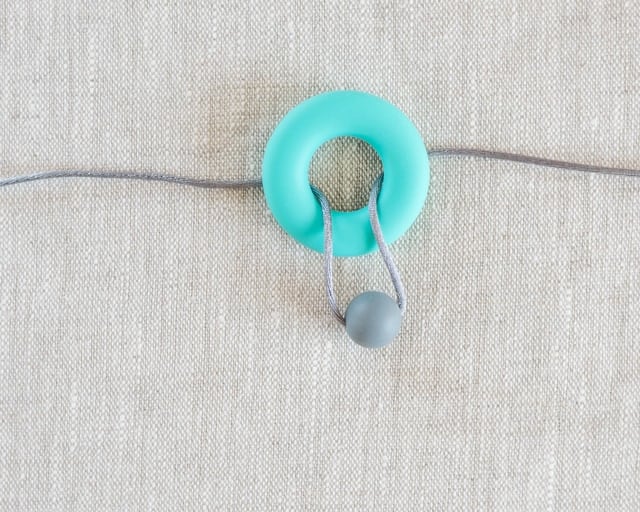
The necklace with the teal ring in the center is a great example of how using floss can help you make a really neat piece that probably wouldn't be possible, otherwise.
My husband asked for a necklace and, when I inquired about how he wanted it to look, he said he wanted a ring with a bead in the center for the focal point. He didn't know that he was asking for something tricky!
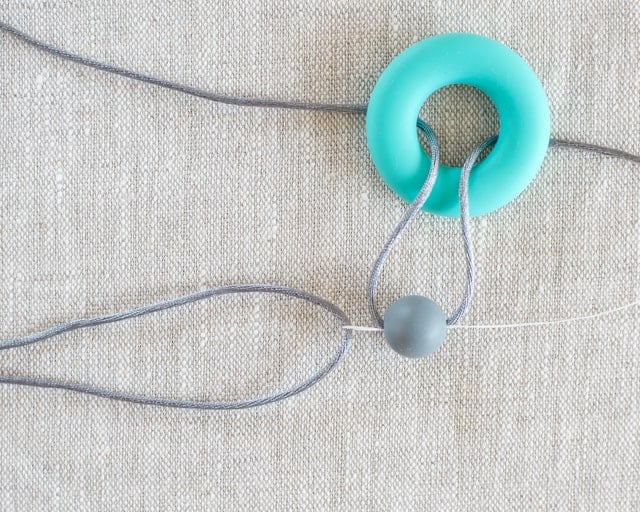
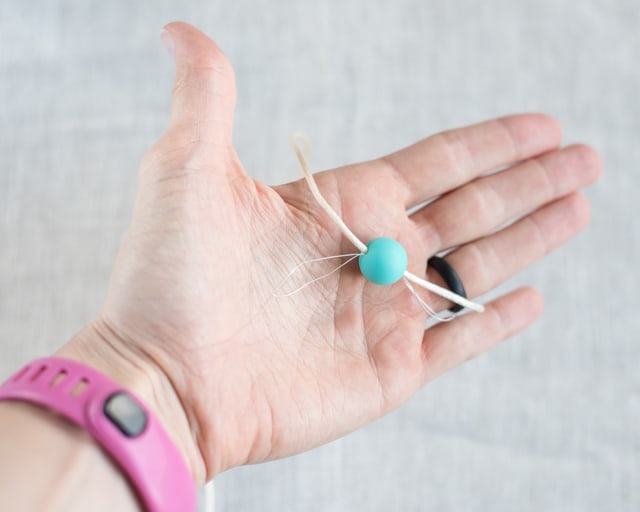
To create something similar, whether you're using silicone pieces, wood, polymer clay, or some other material, begin by threading your focal bead on a piece of cord and center it. Place it under the ring, then pull the bead out a bit, as shown:
Cut a 10-12" piece of dental floss and fold it in half. Send the portion with the loop through the bead. I know you can't tell it's looped over in the image below, but the loop portion is sticking out to the left:
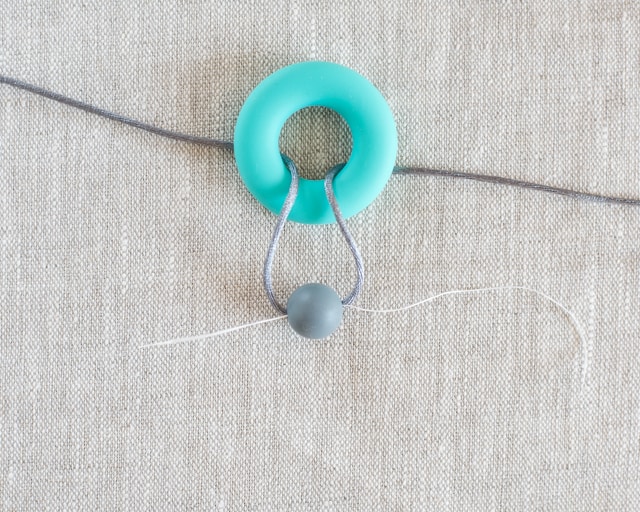
Thread your second piece of cord through the floss's loop:
Then grab onto the floss and pull the second cord through the bead. Depending on your cord and bead, this may be tricky! Silicone is squishy, so it isn't usually too hard. If you're having a lot of trouble, consider putting on some gloves and wrapping the floss around your fingers a couple of times for a better grip.
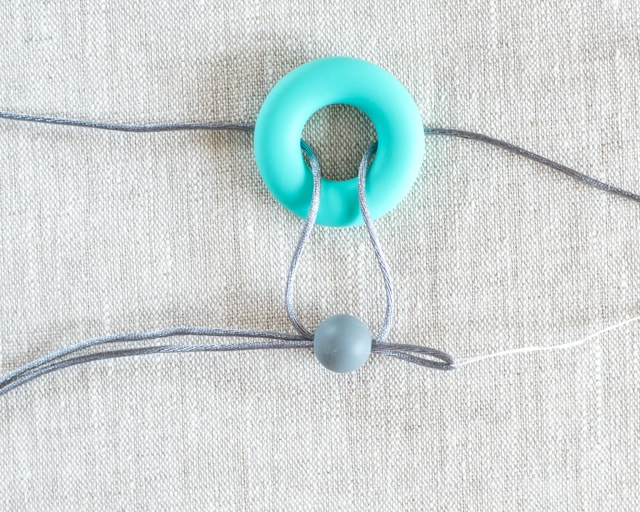
To keep the focal bead and ring from sliding around, secure them in the center of the cords. I used a simple overhand knot on either side of the ring.
 Yay - your centerpiece is complete! Now, unfortunately, you have two strands of cord to deal with for your entire necklace. You could send one cord through each bead and the other around, knotting between beads, macramé style like I did for this necklace:
Or you could send both strands through each bead. If you have a really large bead, you may be able to pull both through at once with floss. If you don't, thread each bead on to a single strand, then send your looped floss through the bead so that the loop is running back "down" the cord towards the center. In the photo below, the tail end of the cord is on the right side of my hand and the loop of floss in on the left:
Put your second piece of cord through the floss loop and pull it through, as before.
Keep repeating until you're finished adding beads to your necklace!
For a teething necklace, I recommend tying a couple of knots after you're done adding beads to keep them from sliding all over the place.
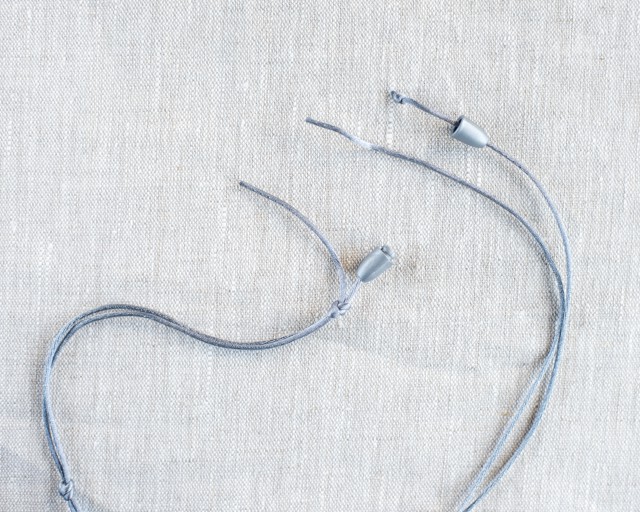
Although I was eventually able to get both cords through the hold in my breakaway clasp, the clasp wouldn't close with both strands knotted inside. If you're making a teething necklace with two strands of cord, knot one of them securely right before the clasp. Send the second cord through, knot it off, and add a dab of glue to keep it from coming undone.
Satin cord is very slippery stuff and the knot will probably come untied if you don't add some glue! I used my favorite, Eileen's Original Tacky Glue. It never lets me down! Allow the glue to dry before pulling the clasp piece up over the knot. Singe the cut ends carefully to prevent fraying.
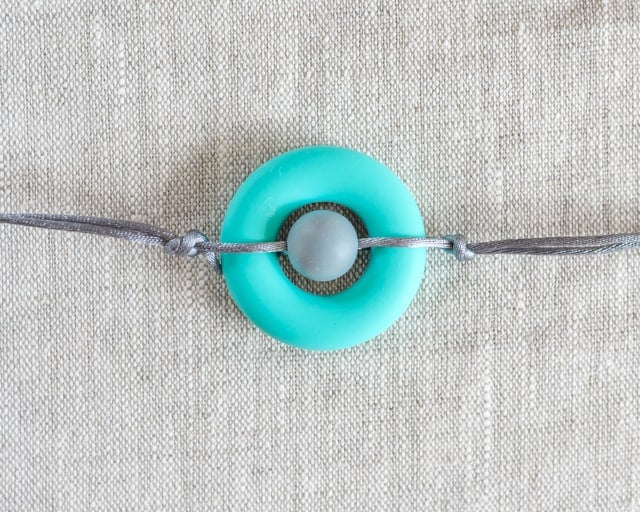
And there you have it! A cool necklace with a bead and donut focal point:
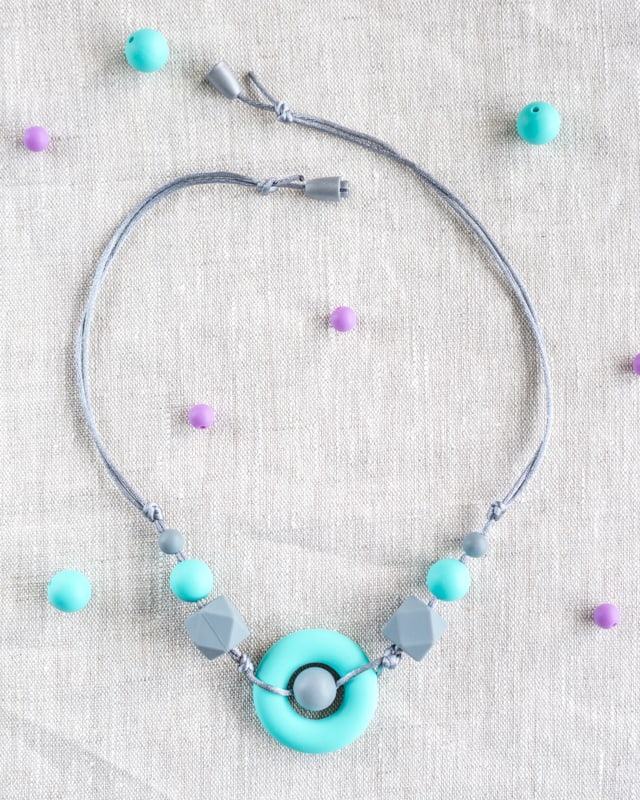
I used the dental floss trick to make the beaded 'pendant' for the necklace with the purple square bead (bottom right). The necklace with the purple ring didn't have any fancy tricks - just a simple loop with a bead and a knot to hold the ring in place and some nice, large beads for LG to chomp on!
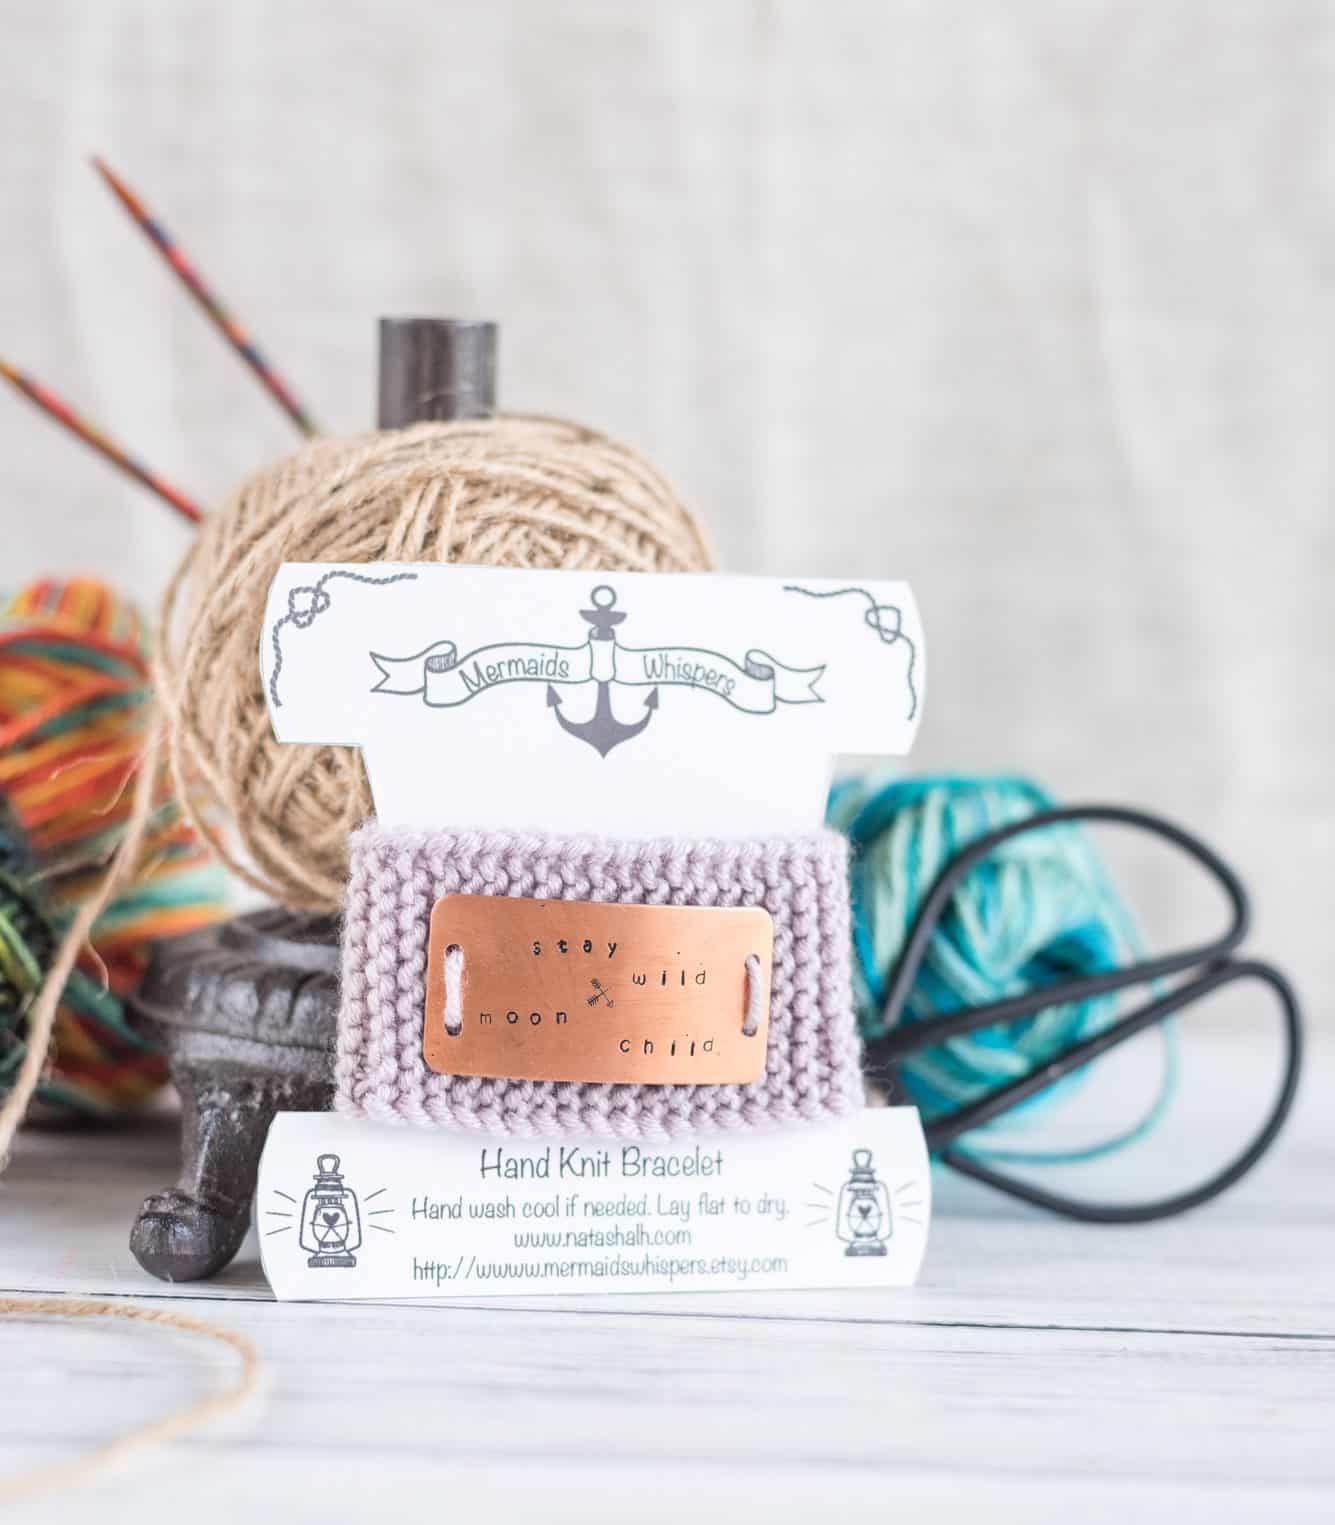
Whether you're making a teething/nursing necklace or using the floss trick for another project, I hope this tutorial's been helpful for you and that you enjoy! Just to give you another idea of how you can use the technique, I employed floss to get the yarn through the copper piece on this knitted bracelet:
How do you strand difficult beads? Do you use floss or have another favorite trick?
More Related Posts
[pt_view id=“15d429e15n"]
[catlist search="tutorial" numberposts=4 orderby=rand excludeposts=this]


Caroline Gilbert
New mom gift photo permission request for The Artisan Life
Hi Natasha,
I wanted to let you know your photo was chosen to be featured in a post on Shutterfly about gift ideas for new moms!
The images we chose can be found here:
https://i2.wp.com/www.natashalh.com/wp-content/uploads/2018/03/DIY-silicone-teething-necklaces.jpg?w=640&ssl=1
https://i1.wp.com/www.natashalh.com/wp-content/uploads/2018/03/pull-bead-through-center-ring.jpg?w=640&ssl=1
I'm reaching out today to ask permission to use this image. Of course, we'll give full credit under the image to "The Artisan Life" and a link to your website.
Please respond to this email no later than EOD Thursday, August 23rd if you do or do not wish to be included.
Thank you and looking forward to sharing the final project with you!
Caroline Gilbert
Community Outreach, Shutterfly
Natasha
Thank you so much! That would be fine. I appreciate you asking. =)