This post may include affiliate links, which means I may make a commission on purchases made through these links at no additional cost to you.
We've all seen those DIY Sharpie custom dishes on Pinterest. Color, bake, enjoy. Or, so the theory goes. Sharpies are permanent, so it makes sense you could color dishes permanently with Sharpies. Unfortunately, a large number of people report that these dishes are only hand washing safe, not dishwasher safe. I hardly ever use my dishwasher, so this isn't a big issue for me, but I realize that most people do regularly use a dishwasher.
Other folks on the web reported markers changing color in the oven and that Sharpie oil paint pens work better than regular sharpies. I probably couldn't draw my way out of a paper bag. I do, however, love stamping and stenciling, and have great faith in alcohol inks.
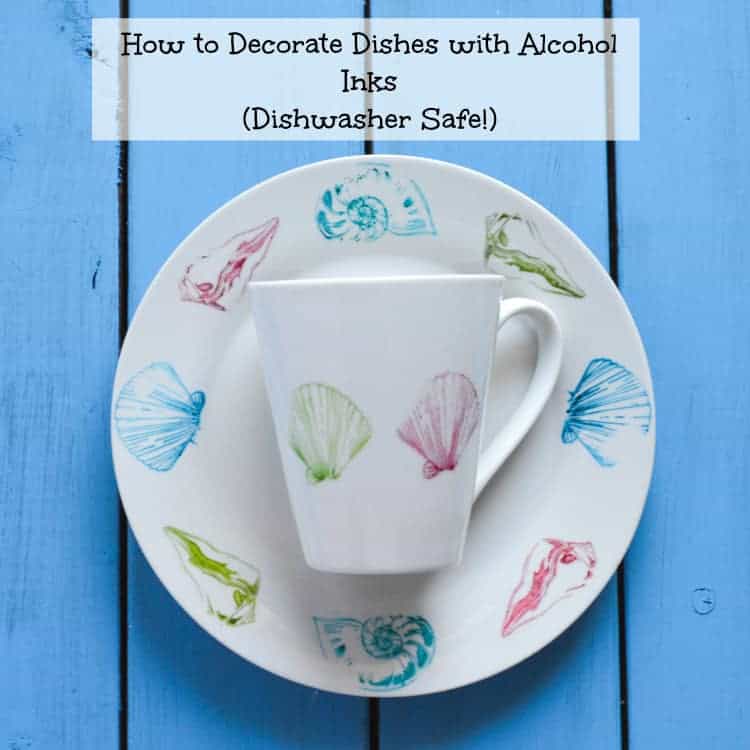
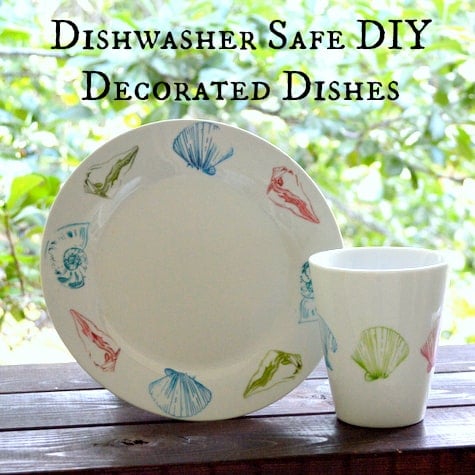
I decided to conduct some experiments to see if Sharpie paint pens or Stazon alcohol inks were up to the task of creating long-lasting, dishwasher safe custom mugs and plates. I hope you enjoy this DIY dishwasher safe decorated dishes tutorial I created based on my experiences!
Materials Needed for DIY Dishwasher Safe Decorated Dishes
- Dishes to decorate
- Rubbing alcohol
- Stazon alcohol inks
- Stamps
Brands other than Stazon may work - I don't know because I haven't tried them! I do, however, know that Stazon inks to work and I can recommend them without hesitation. The colors shown below are some of my favorites!


Update! If you're decorating a mug for a gift, you might be interested in this unique coffee mug gift ideas guide!

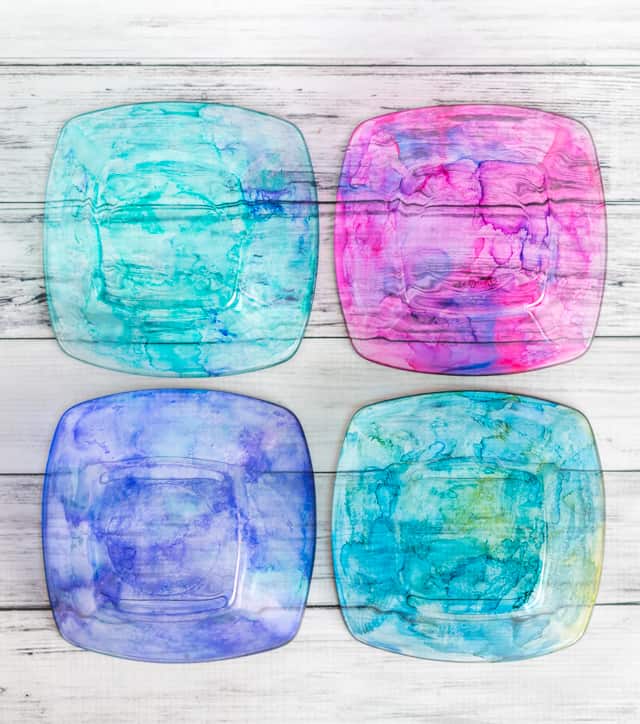
Update 2!!! Due to the number of people asking over the years if these dishes are food safe, I designed a new tutorial showing a way to decorate dishes in a food safe, dishwasher proof way! This method does not show using stamps, but you could totally substitute stamps and Stazon inks for the alcohol inks I demonstrated.
Alright, now that I've shared updates made to this post/topic since this tutorial was originally published, let's get to it!
DIY Dishwasher Safe Decorated Dishes Tutorial
1. Carefully clean the surfaces you plan to decorate with rubbing alcohol. This is very important! Grime and finger oils can prevent the ink from sticking well, and small stains, like coffee stains, become more prominent and permanent after you bake the dishes.
2. After the dishes are dry, carefully stamp them with your desired designs and colors. Here are a few tips:
- If you use cling stamps, mount them on a flexible piece of plastic, like the plastic they usually come attached to, instead of a rigid stamping block. This allows you to curve the stamp in place again the dish's surface without having to rock the stamp.
- If you are using rigid, wood mounted stamps, carefully place one edge of the stamp flat on the dish's surface and then gently roll the stamp out across the dish. I start by placing the stamps left edge down and then rock it to the right until each part of the stamp has made contact with the dish.
- After stamping a design, let it dry for a couple of minutes before you handle that area. This was not a problem for me when working on the plate, but I had to wait for each shell to dry before I could hold the mug in my lap to stamp the next color.
- If you make a mistake or are unsatisfied with the design, quickly and carefully remove it with more rubbing alcohol. Wait for the alcohol to dry before restamping.
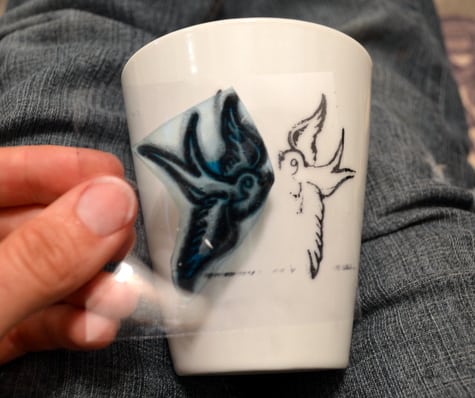
I took several in-progres photos, as well as a handful of 'before' pictures, baking photos, and pictures of the items before being washed. I saw these pictures on my camera when I started the import to my computer, but then something mysterious happened and I lost everything after my first couple of shots! Grr. All I really have from the process is this (barely acceptable) photo showing me using a flexible piece of plastic instead of a stamping block. This swallow mug does not appear in other photos because it was my 'control' to test for hand washing durability in the event that the others were destroyed in the dishwasher. I am happy to report the other, more attractive pieces passed all the tests!
3. Once the dishes are stamped and dry, place them on the middle rack of your oven. It is easiest to place mugs up side down on the rack. Turn the oven to 400 degrees Fahrenheit (or, if that makes you nervous, you can go for 350).
4. Once the oven reaches temperature, set a timer for 30 minutes. Or look at your watch - whatever makes you happy! At the end of 30 minutes, turn off your oven and wait a very long time.
5. Allow the dishes to cool in the oven until they are cool enough to touch. Removing them too quickly may result in cracking! It will depend on your oven, the temperature of your home, etc., but this may take a couple of hours, so don't plan this project right before you need to bake!
6. Enjoy your new custom dishes!
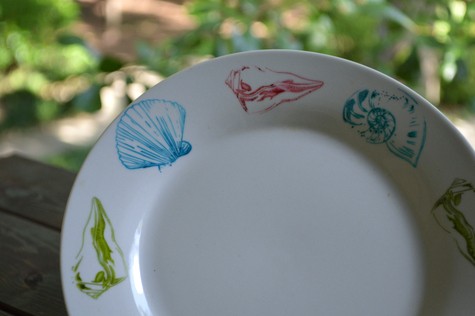
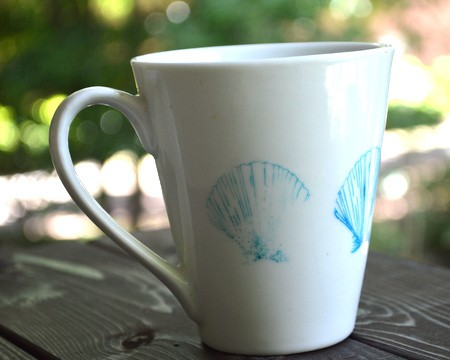
The decorated shell dishes are shown after being washed in my dishwasher. I washed them on a full cycle with soap and no other dishes, so they endured the full power of the machine. I wish the 'before' photos hadn't vanished so you could see the small gaps in some designs were because of my stamping job, not the dishwasher! The only exception is that one of the shells on the mug was slightly faded after being washed. Since the same color of ink worked find on the plate, I suspect this was my fault. I had cleaned away a mis-stamped design on the same spot and probably didn't wait for the alcohol to full dry before applying the new stamp, weakening its bond to the dish.
What about Sharpie paint pens? Well...they are certainly dishwasher safe and allow you to use stencils, but they may not turn out the same color. Again, I wish my 'before' photos had survived, but this reddish anchor mug shown below was decorated with the bright purple pen lying in front of it!
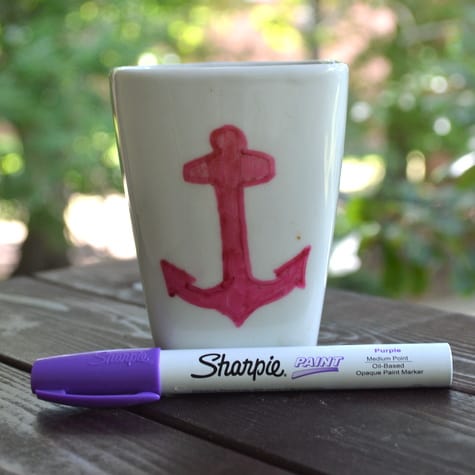
It survived the dishwasher just fine and the red anchor makes more sense than a purple anchor, but it's not the color I painted it. If you want to use Sharpie paint pens, I recommend either testing them first, or just accepting that your design might come out a different color. My sister also reports she had marker colors change on her once when she made a Sharpie dish.
I am so impressed with the stamping results and so pleased that Stazon inks are dishwasher proof! I am not surprised - Stazon ink pads are one of the coolest things ever created. I use them all the time for Shrinky Dink projects and as a resist when I want to acid etch metals. I am also very pleased that they maintained their color in the oven.
If you're looking to decorate a plain mug, you may also enjoy this dishwasher safe galaxy mug tutorial!


Katy
This post is what I have been looking for! I know it’s been a while but I have a question. If I want to use stencils instead of stamps with the alcohol ink, how would that work? Could I use a brush to pick up the ink or is there a different applicator to get the color on to the surface?I’m hoping to use it on etched glass and ceramic ware and thought applying then wiping off on the non etched surface might work. Thoughts? Thanks!
Natasha
I think a stencil is a neat idea! You'd probably want to use an adhesive stencil or apply temporary spray adhesive, but you probably already realize that. To apply the ink you could probably carefully tap the ink pad on the item's surface. There are applicators for alcohol ink (like this one https://amzn.to/2F8yWLG). I don't know if you could pick up enough from a pad to be useful. They're typically used on the type of alcohol ink that comes in bottles. It's available in a zillion different colors and does adhere to glass, though I haven't personally tired it in the dishwasher. There is a Mod Podge dishwasher sealant you can use, but it takes about a month to fully cure. You can remove alcohol ink with rubbing alcohol so you could use something like a q-tip to clean up your design if you needed to. I hope that's helpful!
Katy
Thanks for the reply! I’ll try the stamp pads either directly or maybe with an applicator of some kind and let you know how it goes.
Katy
I’m so excited to share how well it worked with the stencils. But I also tried Metallic Mixatives by Ranger. That turned out excellent as well using your heat setting instructions. I ran both through the dishwasher, by themselves and no difference! I wish there was some way to,share the pictures with you. Thanks again!
Natasha
That is awesome! Thank you for letting me know and I'm so glad it worked out!!
Jacqie
On the post I'm looking at, it shows 4 glass plates that are completely painted. What was used to completely cover the plate.