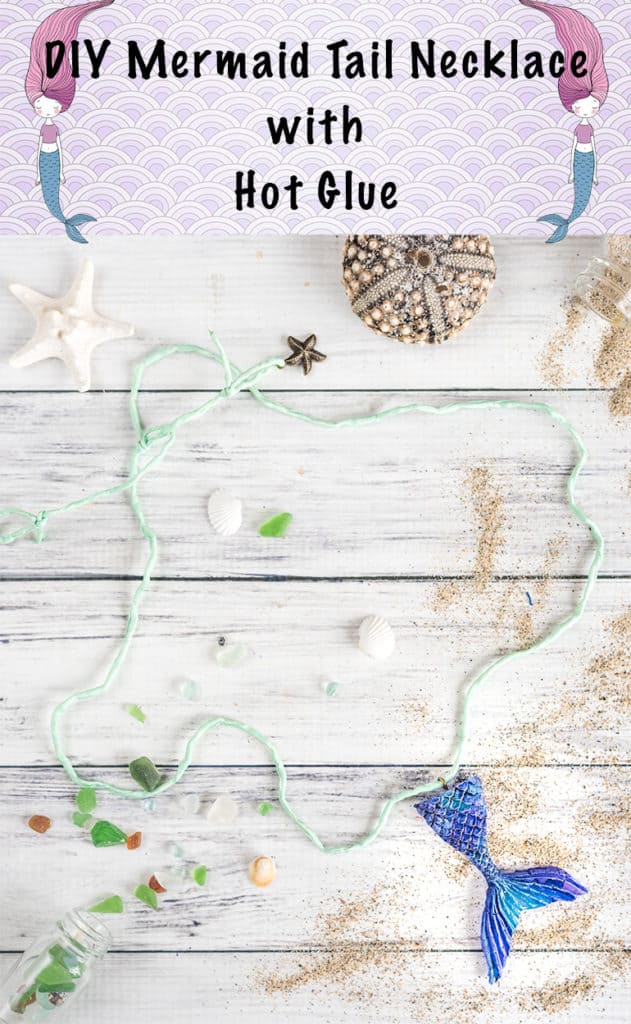
Learn how to make an amazingly easy hot glue mermaid tail necklace with this tutorial!
Over 90% of the ocean remains unexplored - you can't prove there aren't mermaids! If you want a fun and easy mermaid necklace to celebrate summer, then this tutorial is for you. Today I'm demonstrating how to make a hot glue mermaid tail necklace and then turn it into a fun necklace that's 'splash proof' so you can wear it to the beach.
 This mermaid tail necklace is easy to make and fun to color - I hope you give it a try!
This post may include affiliate links, which means I may make a commission on purchases made through these links at no additional cost to you.
Materials needed for a hot glue mermaid tail necklace
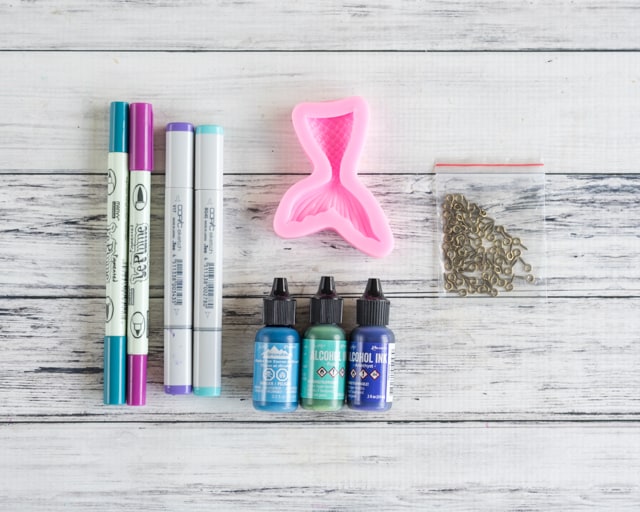
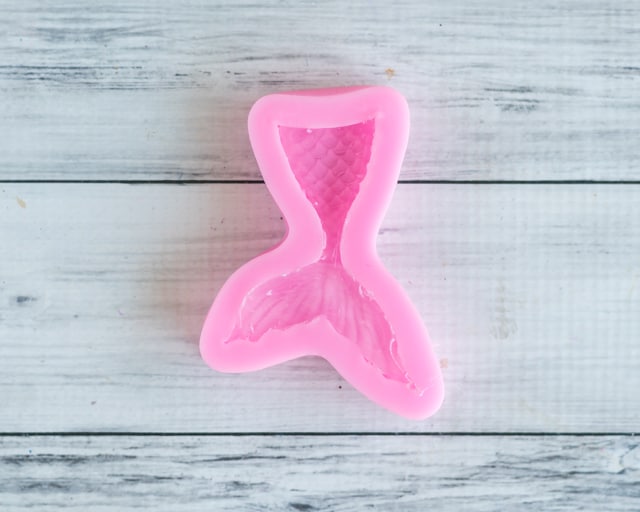
- A silicone mermaid tail mold. Make sure your mold is silicone, not plastic! I used the smaller tail from this set (and it's pretty large!) From the top to the longest tail point, it's 3". I do not recommend going any larger than this; smaller will be easier to work with.
- Hot glue gun and sticks. I highly, highly recommend a mid or full sized hot glue gun. You can use a mini, but it's more annoying/difficult.
-
- High temp hot glue has a shorter 'open time,' but will be more durable in the long run.
-
- Low temp is easier to work with, but your necklace won't be able to withstand the hot summer sun as well.
-
- You can use colored glue sticks and skip the alcohol inks/markers, but I used plain hot glue.
- Alcohol inks in mermaid colors.
-
- You can also use alcohol or pigment based markers. Copics, especially more vibrant colors, work on hot glue but tend to look better on smaller projects. Le Plum markers work okay and will do in pinch.
- Piece of foil or crafting mat, if you're using alcohol inks.
- White acrylic paint and a flat paintbrush - optional but recommended.
- Hobby knife - optional.
- A small screw eye for jewelry.
- A cord, chain, etc. for stringing your necklace. I used a silk cord from Etsy seller Jamnglass.
If you work with hot glue a lot, you absolutely need to have silicone finger protectors! I don't even know how many times I've burned myself with hot glue, but these little things can keep your fingertips safe!
No products found.
How to make a hot glue mermaid tail with a silicone mold
Heat your hot glue gun and have a couple spare sticks on hand.
When it's good and hot, begin filling your mold.
I worked from the 'deep end' out to the tail, filling the body to about half the mold's depth before moving on the tail, then returning to fill in the body.
Try to work in a continuous sweeping motion to keep the 'open' end of the glue connecting to the new glue, but don't stress too much because it will all stick together, anyway. The hot glue will also level itself out pretty well if you work quickly, so don't fret over every little lump and bump on the back.
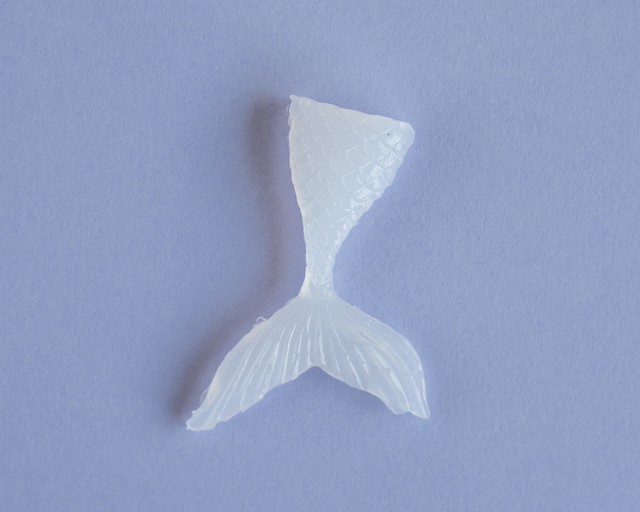
Wait for the glue to cool completely before demolding the tail. I was impatient and ruined my first attempt because the middle of the body portion wasn't cool! I suggest waiting 10 minutes or so to be safe.
Remove any strings or bumps, if necessary. You can frequently just pull them off, but a sharp hobby knife can help, too. It doesn't look like much now, but magic is about to happen!
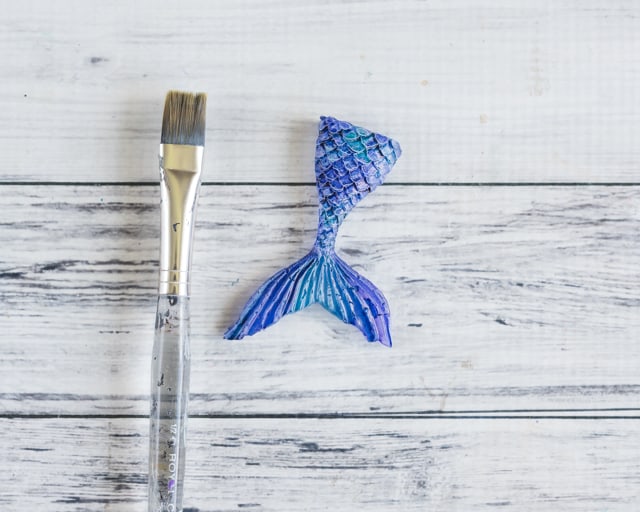
If you're using markers, start coloring! I tried to blend the Copics on one experimental tail, but they didn't blend very well and the colors weren't as vibrant as the alcohol inks. I ultimately used my Copics for a little shading on the sides and back of the tail, but not the front.
To use alcohol inks, protect your work surface with foil or a crafting mat. I like to make a sort of dish with foil by bending up the edges to contain any excess ink. Drop ink on and watch it do its thing! Alcohol inks do blend well on the tail.
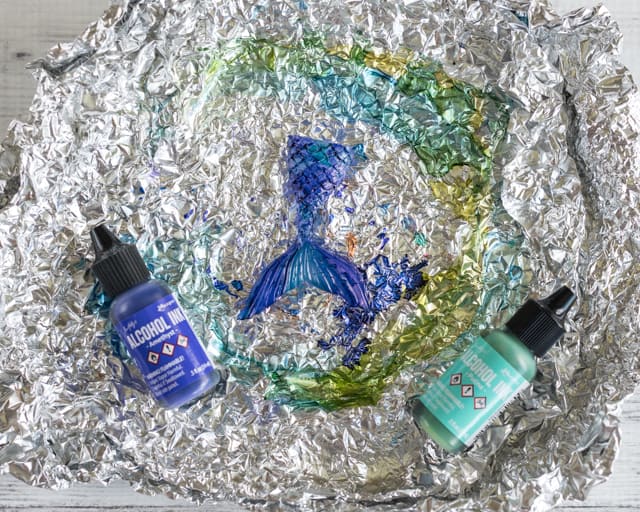
Allow the ink to dry before touching the tail. For a heavy application this can take a little while (several minutes to half an hour or more, depending on how much ink you've used. If it feels tacky, it isn't dry.)
Layer on more inks, if you'd like, or flip the tail and add some on the back. As I mentioned above, I used alcohol inks on the tail's front but used Copics to lightly shade the sides and back.
Once all your inks/markers are dry, you can very lightly dry brush some white acrylic paint on the raised areas to really make the details sing. To dry brush, get just a little bit of paint on a flat brush, wipe most of it off on a paper towel, then highly run the brush across the raised areas. Repeat as needed. Because acrylic paint is water based, don't hop in the pool with your necklace if you go with this option! It won't instantly melt away from a little splash, though, so don't worry about hanging out near the water. If you want your necklace to be totally 'splash proof,' you can use a q-tip dabbed in a little rubbing alcohol to carefully scrub away some ink on the raised areas for a similar effect.
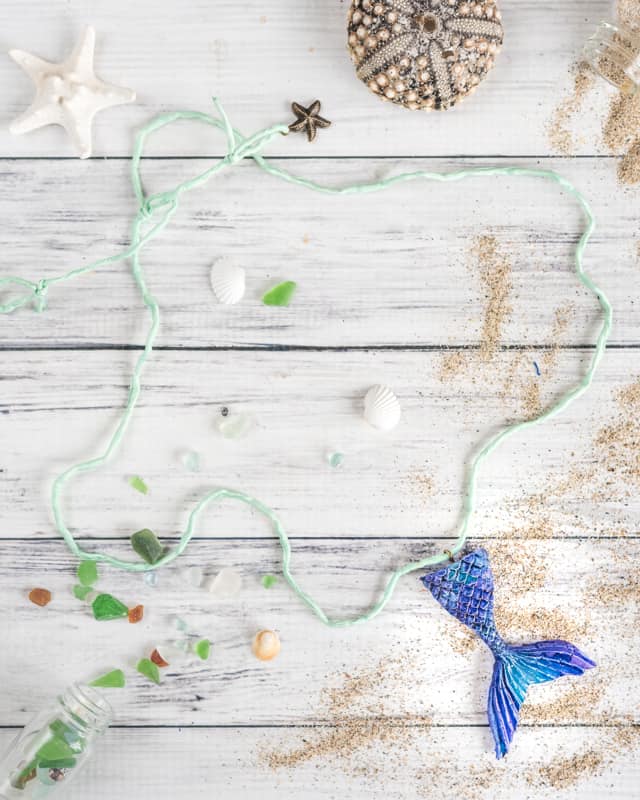
Screw your screw eye into the top of the mermaid tail, string on cord or a chain, and enjoy!
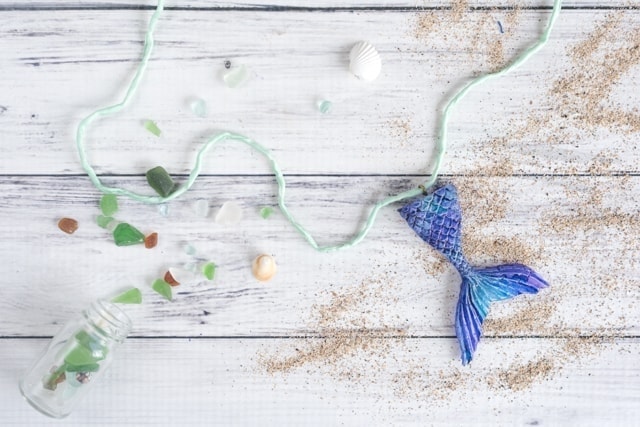 I attached a starfish charm to each end of my cord to add a bit more beachy flair.
More mermaid projects
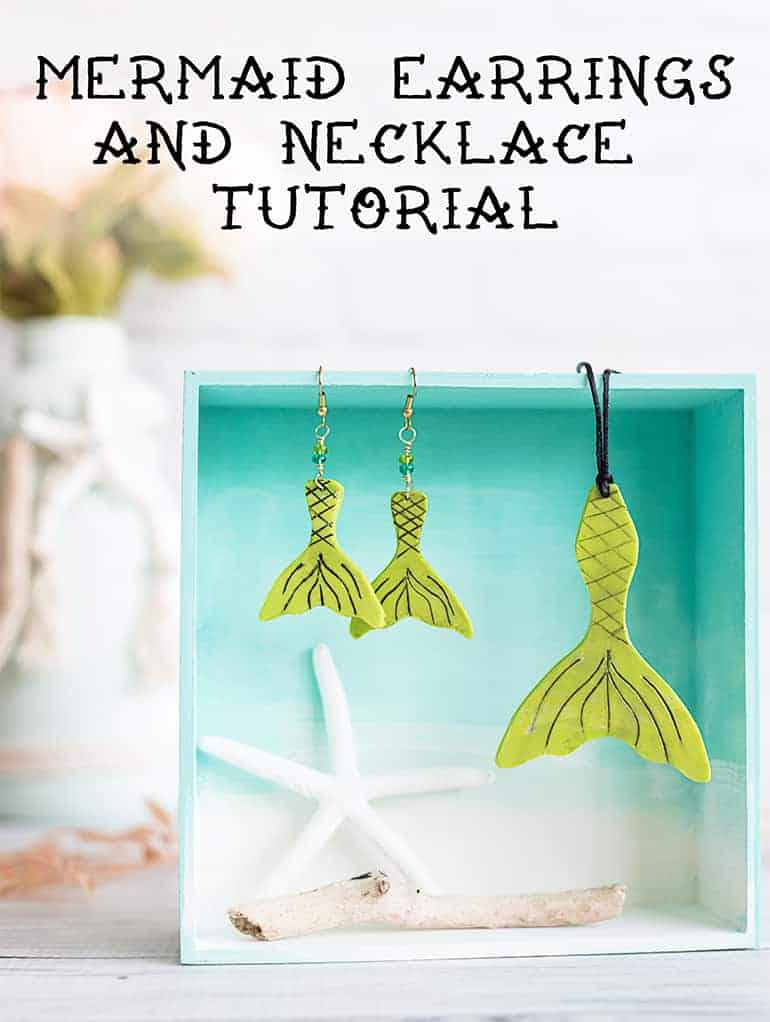
If you love mermaid tail projects, I have more tutorials for you! You can learn how to make these earrings and mermaid tail necklace from polymer clay:
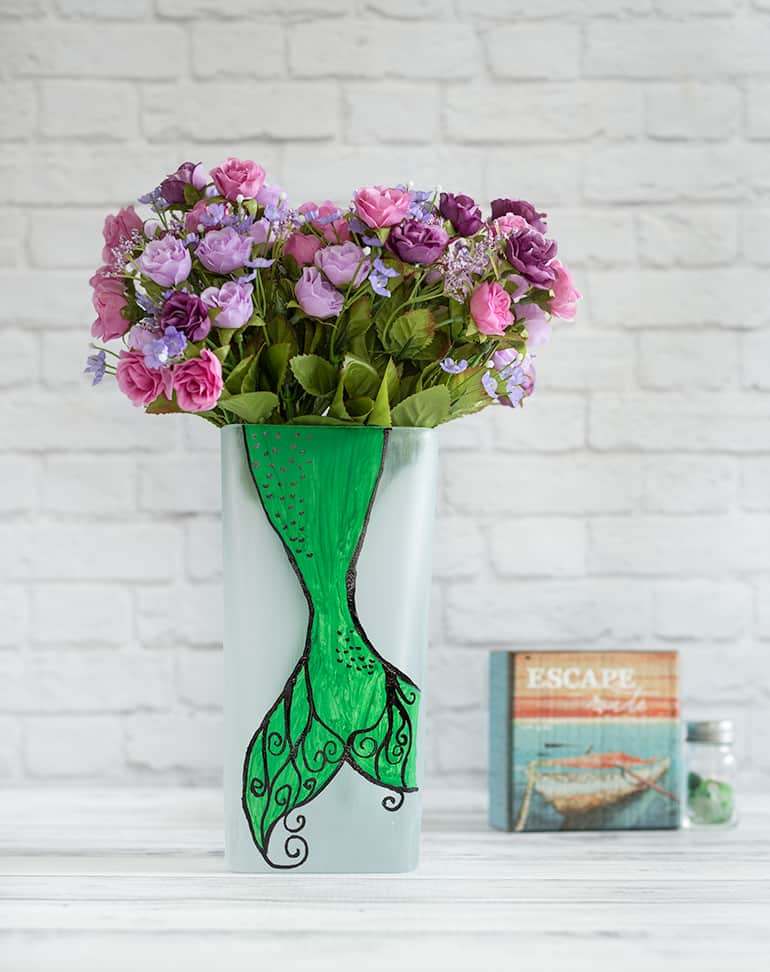
This mermaid tail vase is also quite easy to make with a printable tail pattern you can trace:
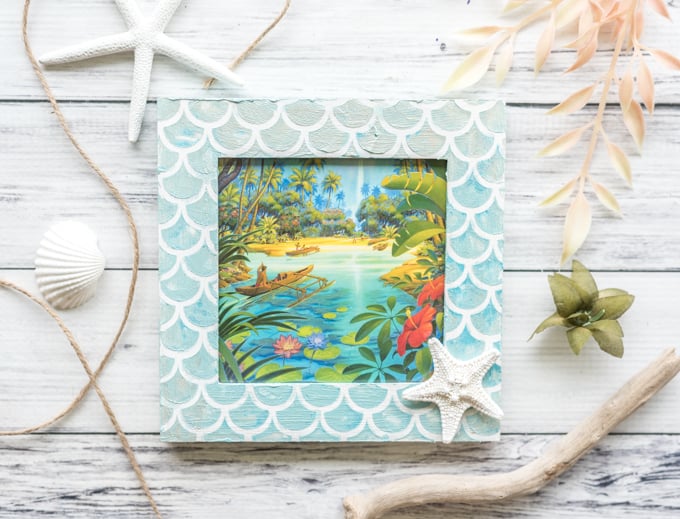
My favorite might be this mermaid picture frame. It's so lovely and shimmery!

More Related Posts
[pt_view id=“15d429e15n"]
[catlist search="tutorial" numberposts=4 orderby=rand excludeposts=this]


Duni
I would never have guessed that was hot glue! It turned out beautiful and makes me long for the beach 🙂
Natasha
Thank you! I really want to make more with hot glue after we get our household goods back - it's surprising how nice hot glue items can look!