Basil is a fun, aromatic herb that's easy to grow at home or in the classroom. Keep reading to discover how to harvest basil (without killing it the plant) and the secret to having huge basil harvests all season long.

This post may include affiliate links which means I may earn a commission on qualifying purchases at no additional cost to you.
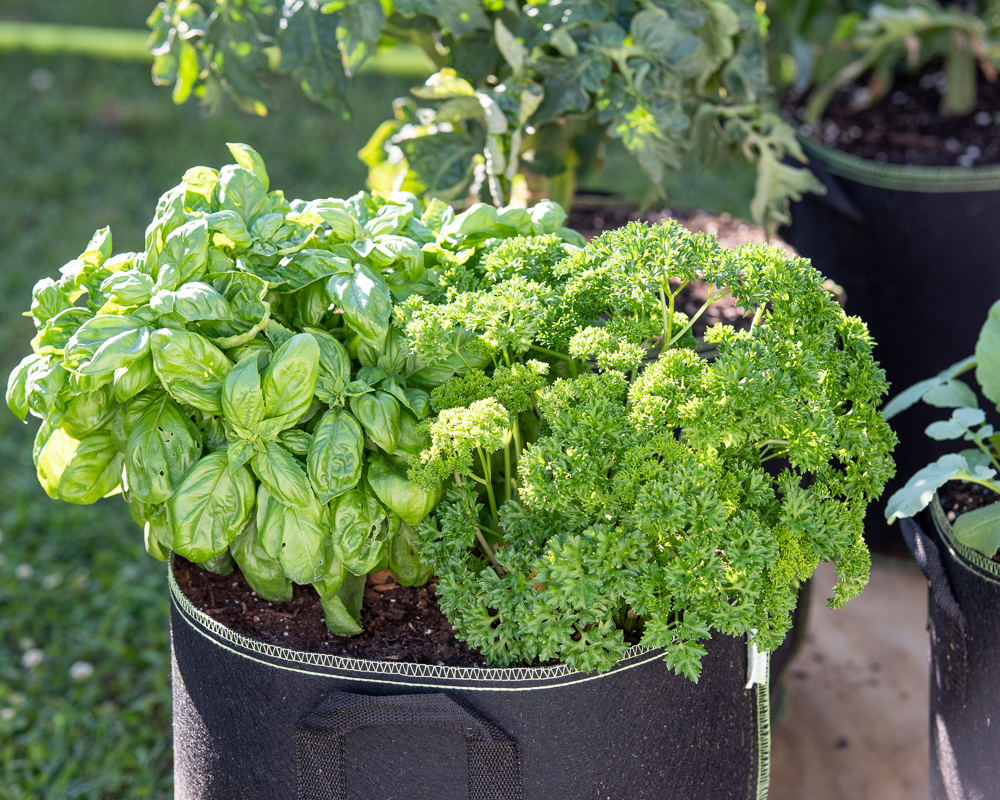
Basil is one of the easiest herbs to grow with many tasty and unique varieties to choose from. You can enjoy it practically all summer long and store your last big harvest to hold you through the winter months.
Why you need to harvest basil regularly
Before we get into how to harvest basil, let’s talk for a minute about the benefits of harvesting regularly.
Of course, the biggest benefit is that you get to enjoy freshly picked basil leaves! Harvesting is also good for your plants. Regular pruning makes your basil plants get bushier and keep putting out new leaves.
Regular pruning also delays flowering. Flowering turns leaves tough and bitter. The longer you keep your basil from sending out blooms, the longer you can keep getting tasty leaves.
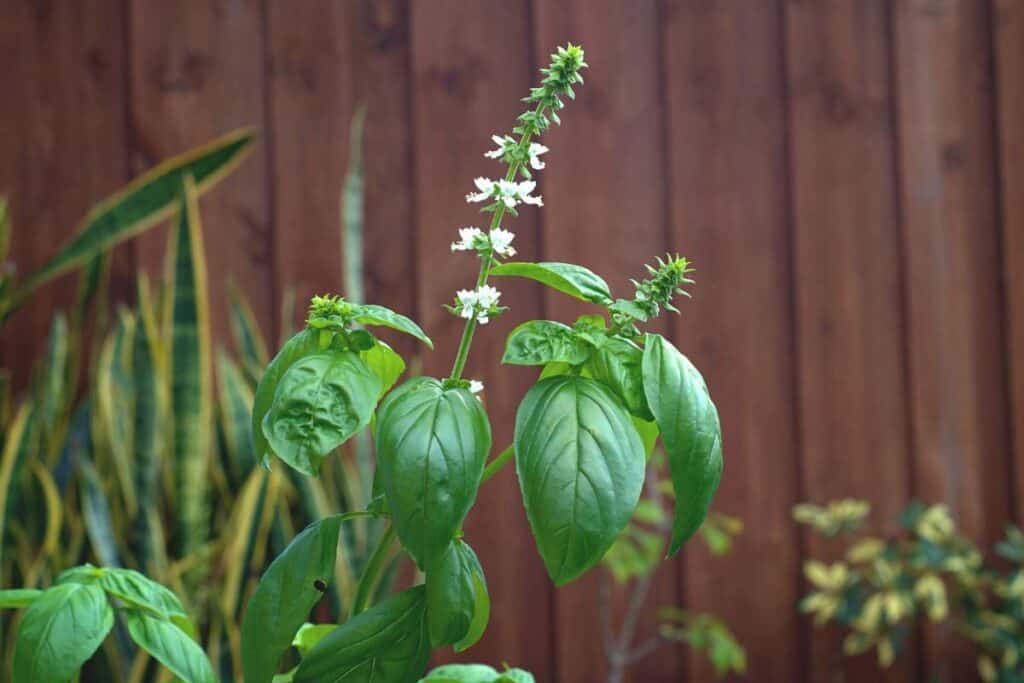
After you've enjoyed a few harvests, you may want to let some of your basil blossom. It's pretty and great for the bees! This is particularly good for outdoor school garden spaces and pollinator gardens.
When to harvest basil
You can harvest basil at any point starting from when plants are about 6 inches tall and have 6-8 leaves per branch.
As long as you don’t take off too much of the plant, you can continue picking throughout the summer.
If you purchase a large live basil plant, you'll be ready to harvest very soon after repotting. If you grow your basil from seed, you can expect it to be about 60 days before your basil is ready to harvest.
The best time to harvest most herbs (including basil) is in the morning. Picking them before the heat of the day will give you the juiciest leaves, but you can still pick them any time of day if you can’t get out in the morning.
How to harvest basil for increased yield
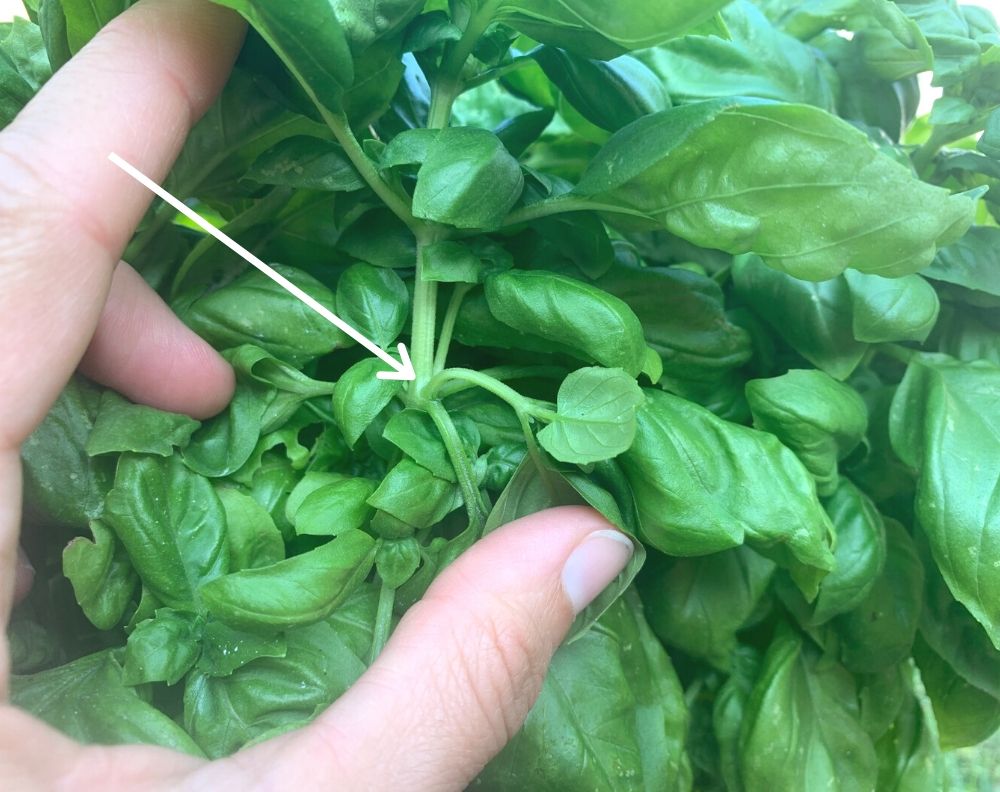
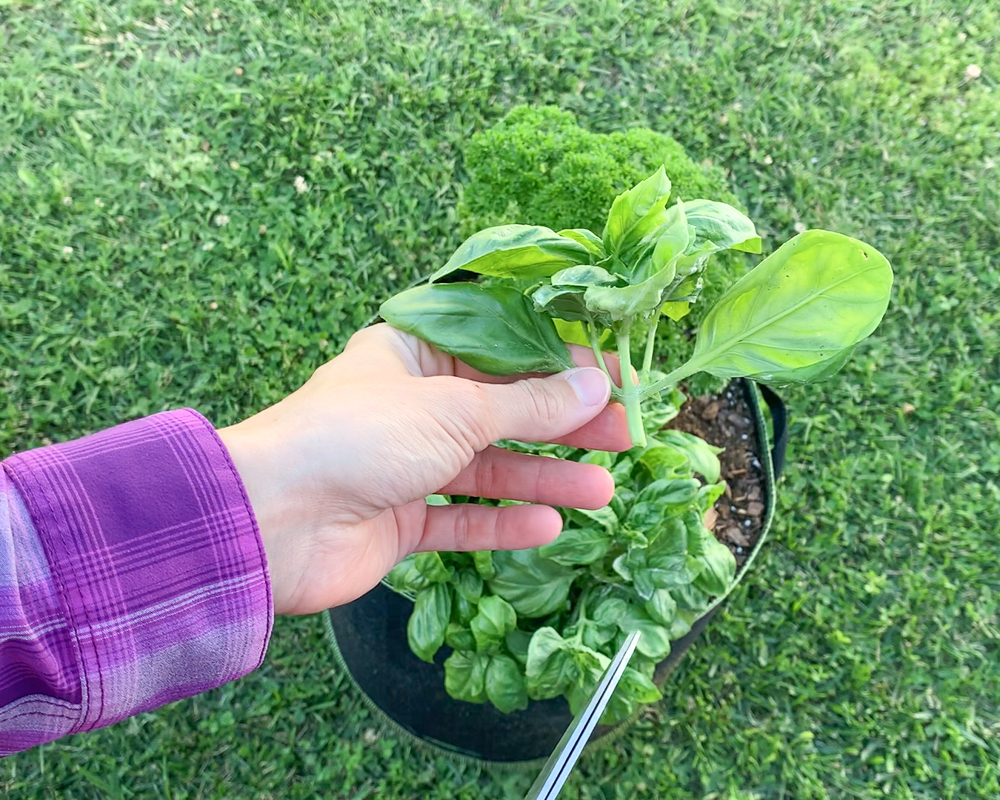
The biggest “secret” of how to harvest basil is to always make your cuts right above a node.
Basil plant nodes are easy to find. Look for places on the stems where sets of leaves are growing out at either side. If you look really closely, you’ll see very tiny leaves sticking out from each side of each node. These are the leaves that will start growing once you do your pruning.
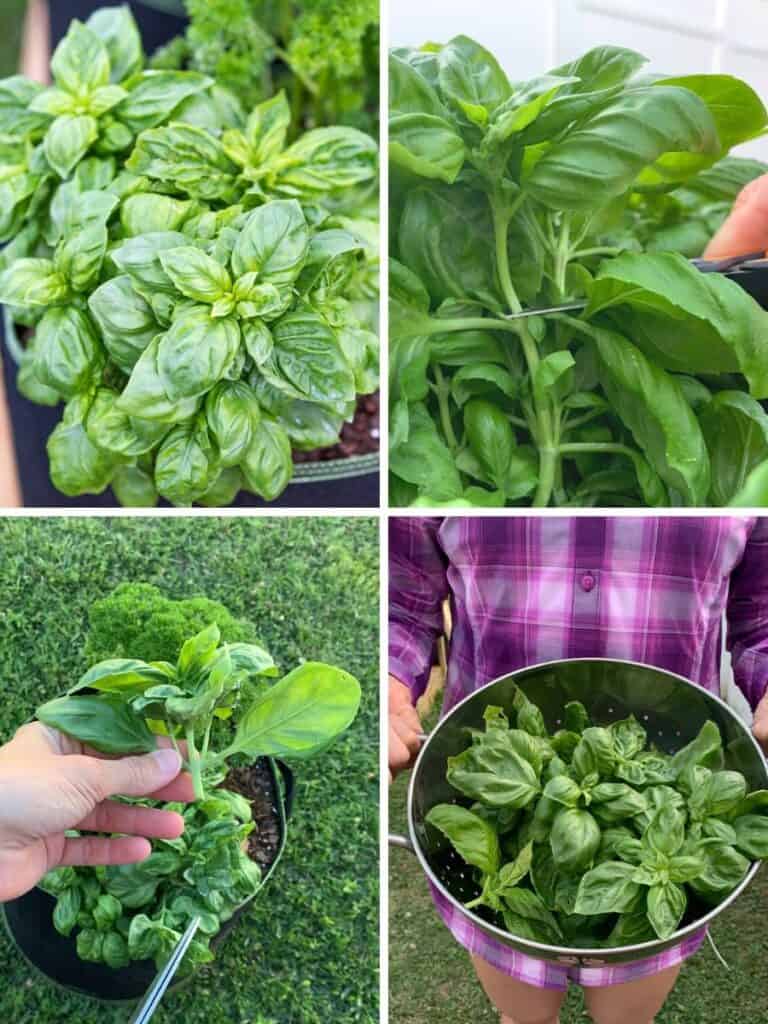
Harvest basil from the top down. In the video below, I gave a young basil plant its first haircut. Watch to see where to cut and how much of the plant to remove so you can harvest basil without killing it:
How to prune your basil for the first time
Set yourself up for a great harvest by pruning plants while they are still small. Pinching off the top of your basil when it’s 6-8 inches tall will set it up to become a nice, bushy plant. Otherwise, it will grow straight up and have fewer leaves.
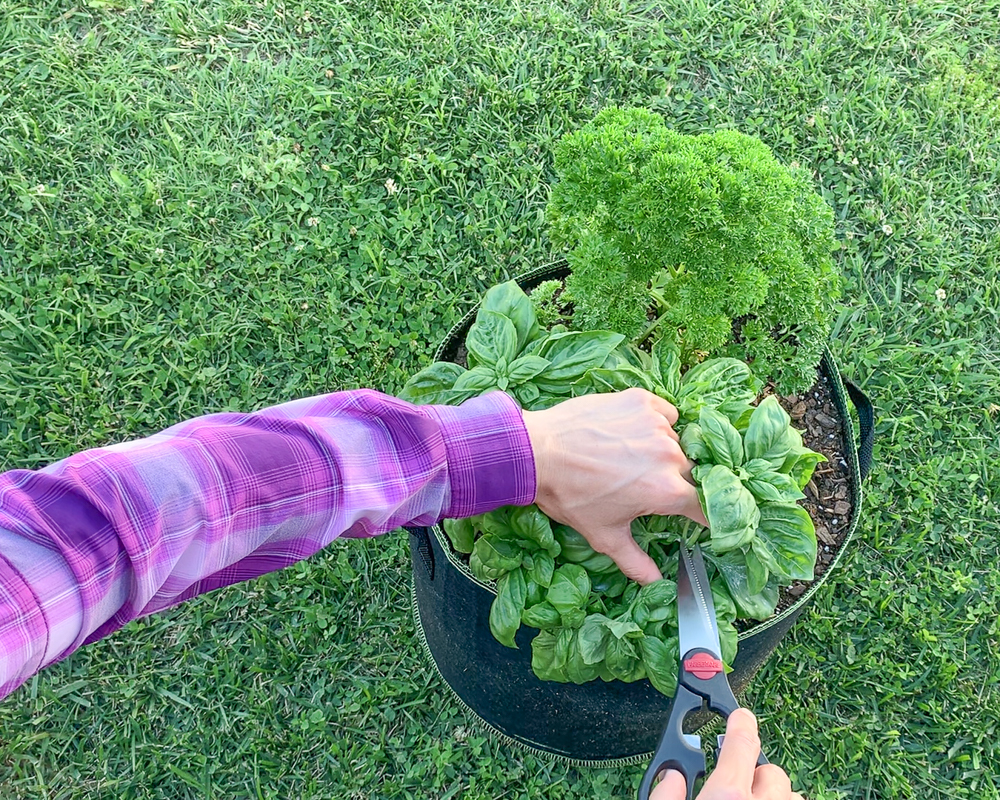
When there are a few sets of leaves on your plants, take the top section of each plant off right above a node. Garden clippers or scissors work great for this, but you can also pinch stems off with your fingers. I prefer to use my Fiskars micro snips (but I show kitchen scissors in the photo below).

- GARDENING ESSENTIAL: Steel blade micro-tip plant shears with sheath ideal for pruning flowers, herbs, and more to encourage overall lawn and garden...
- MAXIMUM POWER AND PRECISION: Micro-tip precise blades cut all the way to the tip for clean, healthy cuts on plants in tight spaces; Easy Action spring...
- LONG-LASTING AND RELIABLE: Non-stick blade coating helps reduce jamming; Steel blades stay sharp through heavy use and provide excellent durability...
How to harvest basil in pictures step-by-step
Are you nervous about finding the node where you need to trim your basil plants? Take a look at the picture below. Cut the basil right above the leaves, where the arrow is pointing:
After you cut, you'll have a bare stalk on the bottom of your harvested piece of basil.
The little leaves you leave behind on the plant will form new stalks for a nice, healthy basil bush and a bumper crop of basil. In a few days, you will see new leaves coming out right below where you cut, and your plants will start branching out.
Keep harvesting your basil for a bumper harvest
Once your basil plants start bushing out, keep harvesting regularly. You can take off single leaves as needed, but cutting off stems is what will keep new growth coming. Harvesting a leaf here and a leaf there won't prompt the same level for growth.
A good rule is to always keep ⅔ of the plant intact. In other words, you can harvest about ⅓ of the leaves on a single plant at a time. This helps your plants recover in between prunings.
Harvest any and all remaining leaves and stems before the first fall frost. Basil is very sensitive to cold weather and will be damaged at temps below 40°F. Make sure you get all the good leaves off before this happens so you don’t lose any!
Should you remove basil flowers?
As mentioned above, once your basil starts to flower, the leaves will lose flavor and color and become tougher, thicker, and more bitter.
To prevent this, pinch off flower heads when you see them starting to form. Regular harvesting will do a lot to prevent flowering, but some will likely sneak by and need cut off.
A thought to keep in mind is that bees love basil flowers. If you want to support your local pollinators, let a few plants flower and keep the rest as your harvesting plants.
How to store basil leaves
Now that you know how to harvest basil for a fabulous crop, you’ll likely end up with more leaves than you can use!
To keep your basil fresh for a week or more, do not remove the leaves from the stems. Place the stems of basil in a glass or jar of water, like a flower arrangement. Leave the jar on the counter - the fridge will turn your basil leaves black. Change the water periodically, like you would for a bouquet.
If you want to put your basil in the fridge, wash and dry the leaves. Place them in a single layer on a paper towel, roll the towel up, and seal it in a zip top bag. Just don't forget about it forget to use it!
If you have a whole lot of basil, you may want to preserve most of your harvest to save it for later.
How to preserve basil
There are several ways to preserve basil. Drying basil is an easy way to preserve it, and you’ll be able to keep enjoying your harvest over the winter months. It's probably the easiest way to preserve your basil, and dry basil is easy to use in recipes.
How to Dry Basil Leaves
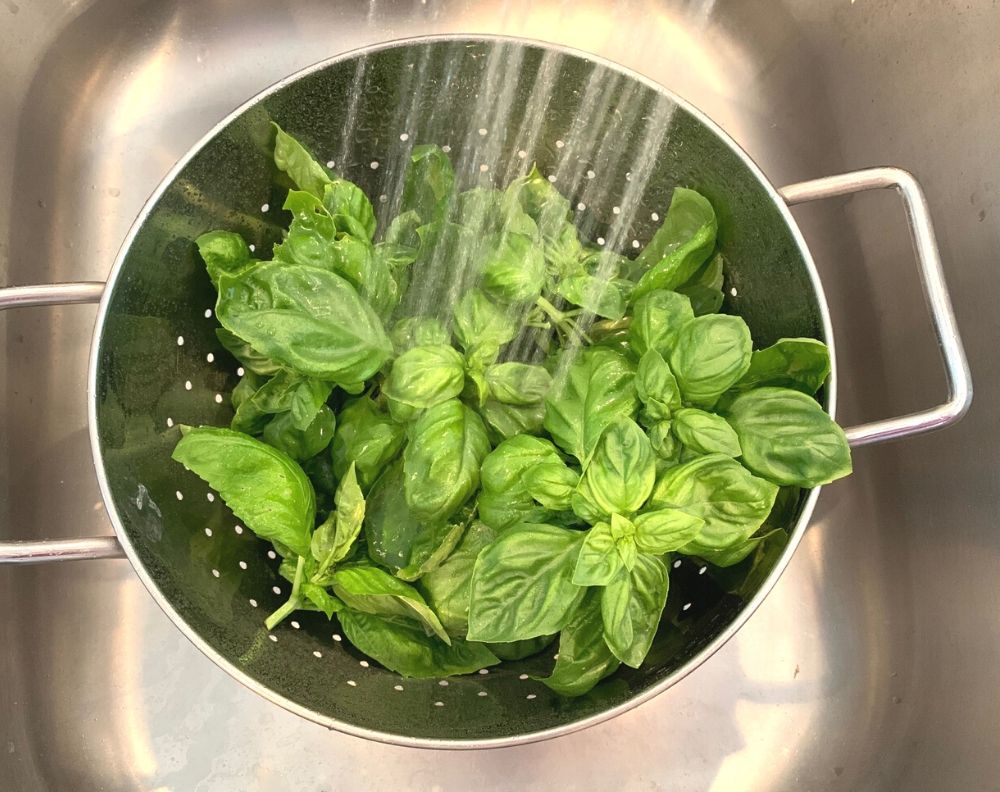
For drying purposes, you’ll want to harvest stems of basil that are 6-8 inches long. Bring them inside and rinse the leaves in a bowl or colander of cold water or under a gentle stream of water.
Pat the basil leaves dry with a towel and then spread the stems out in a single layer on a clean towel. Do not pick the leaves off the stems for this method of air drying basil. Leave them sit for 1-2 hours or until the surface moisture has evaporated. You can speed the process up by spinning them in your salad spinner before placing them out to dry.
Air drying herbs is the traditional method (plus it’s fun to see bundles of herbs hanging around), but there are ways to speed up the process. If you live in a humid area, air drying may not be a realistic possibility.
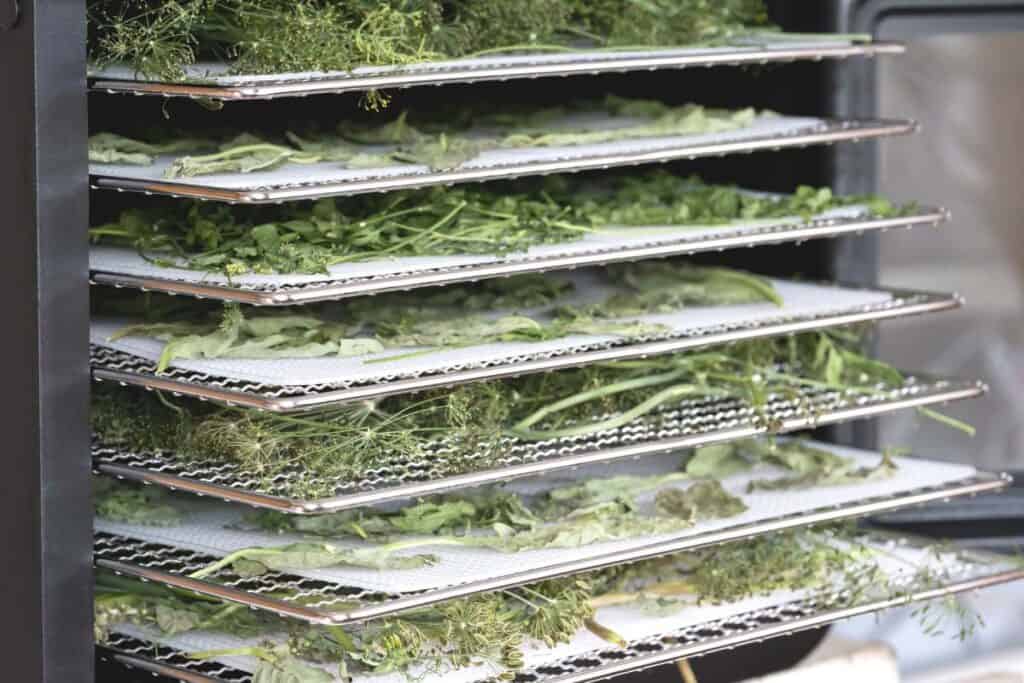
If you live in a humid area, like the Southeast, you'll need to use a dehydrator or your oven instead of the hanging method to dry your basil. It will likely mildew before it dries if the weather is humid. Your house will smell awesome while the dehydrator is running!
Dehydrating basil
If you have a food dehydrator, you can use it on a low setting for 12-24 hours to dry basil. Or you can use the lowest temperature on your oven to dry leaves in about 1-2 hours. Prop the oven door open with a wooden spoon handle to allow moisture to escape.
For dehydrating herb harvests from a backyard garden, a round, smaller dehydrator works fine. If you want to dehydrate more of your crops and experiment with dried tomatoes, crispy green beans, and other goodies, you'll want a larger dehydrator. I use an Excalibur dehydrator for virtually all of my dehydrating needs (and yogurt making!).

- Large Capacity: Equipped with 9 Excalibur dehydrator trays, this large food dehydrator boasts 15 square feet of drying space
- Versatile Uses: Features a 26-hour dehydrator timer and an adjustable thermostat with a range of 105 to 165 degrees F – low enough for fruits and...
- Low & Slow for Immune Boost: Cooking foods at no higher than 115-118 degrees in a dehydrator preserves nutrients; it's the perfect dehydrator for food...
How to store dry basil
Once leaves are fully dried you can strip them off the stems for easier storage but do not crush the leaves at this time.
Once the leaves are crushed, the volatile oils that give them their flavor start to dissipate. Your basil will retain its flavor for much longer if you keep leaves whole and only crumble them when you add them to a recipe. Lots of people don't realize this important basil storage tip so make sure to share it with your friends!
Glass containers are the best storage option for herbs. They should be clean, completely dry, and come with tight fitting lids.
A great way to preserve dried basil for longer is to store most of it in a container that doesn’t get opened very often and use a small glass spice jar for cooking that gets refilled when empty.
I personally store most of my basil in a mason jar that sealed with an electric jar vacuum sealer. You don't need a Food Saver - you can get a small, inexpensive sealer made just for jars.
No products found.
Store the containers somewhere dark and cool, since heat and light will degrade your dried herbs.
How to freeze basil
Frozen basil tastes delicious, but it does take a little more work than drying basil. There are two main ways to freeze basil: by itself and pureed in olive oil.
How to freeze basil leaves with blanching
- Wash your basil leaves in a metal colander.
- Find a pot big enough to insert your colander deeply enough to cover all your basil leaves with water. This may sound wacky if you've never blanched produce before, but trust me! Having a set of graduated colanders can make blanching easier.
- Fill your pot as much as necessary to be able to completely cover your basil with water when you dip the colander in.
- Bring water to a boil.
- While the water is boiling, prepare an ice bath. Again, ensure your colander can fit inside well enough to cover the basil.
- Dip the colander of basil into the boiling water for 3 seconds. (Some people say 2, other's say 5. Three works for me.)
- Remove the basil from the boiling water and immediately transfer it to the ice bath.
- Remove the basil leaves from the ice bath and dry in a salad spinner (or on a paper towel, but this can take a while).
- Place dry basil leaves in a single layer on a baking sheet.
- Freeze for 24 hours.
- Remove leaves from sheet and transfer to a freezer bag. You can use disposable or a large silicone zip top bag. Place a piece of parchment paper between each layer of leaves to make sure they don't stick together. I recommend the If You Care brand of parchment paper because it's compostable.
- Remove a few leaves of basil from the freezer whenever you want homegrown basil in a recipe!
Blanching is necessary for freezing most fruits, vegetables, and herbs. Blanching slows, or stops, enzyme action that degrades the herb/vegetable. Please read here for more information on blanching, including blanching times for common garden items.
How to freeze basil in olive oil
Freezing basil in olive oil is very simple and your basil/olive oil "ice cubes" make a delicious addition to tomato sauces and pestos.
- Remove your basil leaves from the stems, wash them, and spin them dry in a salad spinner.
- Use your food processor or blender to puree your basil leaves with olive oil. You only need 2 tablespoons of olive oil per loosely packed cup of basil leaves.
- Scrape your olive oil/basil puree into ice cube trays and freeze. Once frozen solid (I like to allow 24 hours), pop them out and store them in a freezer safe container.
Enjoy your bails harvest!
Fresh or dried, basil brightens up many recipes and can be used hundreds of ways.
However you choose to use and store it, knowing how to harvest basil the “right” way will ensure you get the best yield. With a little practice you’ll be enjoying basil for months!

Leave a Reply