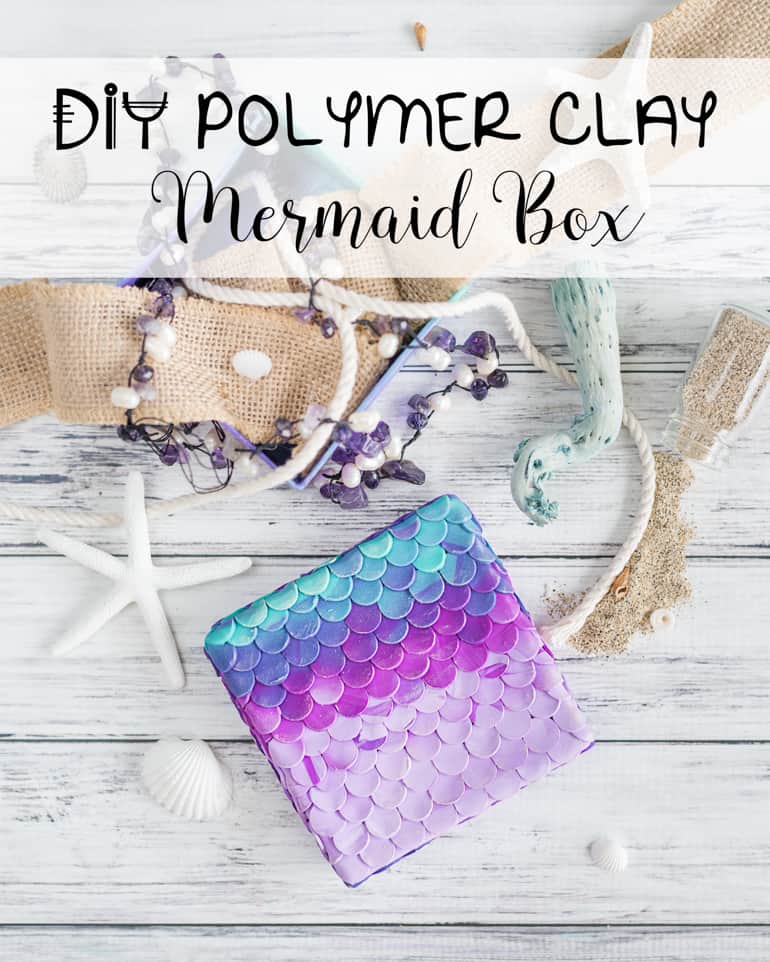
This polymer clay mermaid box is easy and fun to make! Learn how to make a mermaid scale box using polymer clay and basic clay techniques.
As a lifelong mermaid lover, I've enjoyed seeing mermaids gaining popularity in recent years.
There are so many more cute mermaid things available now then there used to be! In elementary school, I was probably the only blond kid who desperately wanted red hair (thanks to the Disney version of The Little Mermaid), and my mom made me mermaid costume, complete with a bag of sparkly gems, that I loved to play dress up in. I'm still playing mermaid dress up nearly 25 years later! Do you remember last fall's mermaid bra tutorial and all the photos of me splashing around in the water?
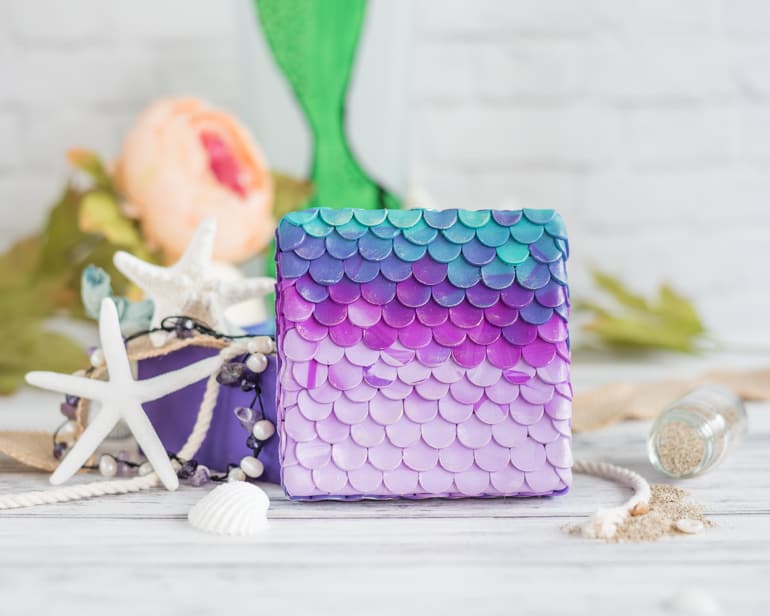
It's been a little while since I shared a mermaid-themed tutorial, so it felt like the right time to share this DIY polymer clay mermaid box. It's the perfect place to keep your sparkly mermaid gems and other sea treasures safe. 😉
This post may include affiliate links, which means I may make a commission on purchases made through these links at no additional cost to you.
Okay, let's be honest, I don't only play in the ocean while dressed as a mermaid! As you know if you follow me on Instagram, I frequently splash around in a dress. It's a whole lot of fun - I encourage you to try it!

Whether or not you're ready to take to the waves, you can bring a bit of ocean magic home with a polymer clay mermaid box.
Making a mermaid box requires very little specialized equipment, though a few pieces will make the job easier. Please don't be daunted by the size of the list! You probably already have many of these things at home, and the process truly isn't difficult.
Materials to make a mermaid box
- Polymer clay! There are several types and brands of polymer clay available, but whichever brand you choose I urge you to avoid the 'basic' line. For Sculpey, the brand I can find locally, this is the plain 'ole regular Sculpey. The basic version is more brittle and becomes almost mushy while you're working it. Instead, look for one of the higher-grade products, such as Premo! by Sculpey. It's easier to work with, more durable, and doesn't cost much more.
- A small circular cutter - mine was ½". You can find polymer clay cutter sets, or you can use fondant cutters. You can also find cutters with a built in plunger, which can be quite helpful.
- A paper mache box. I used a 5"x5" square box. These boxes are readily available at most craft stores for just a couple of dollars.
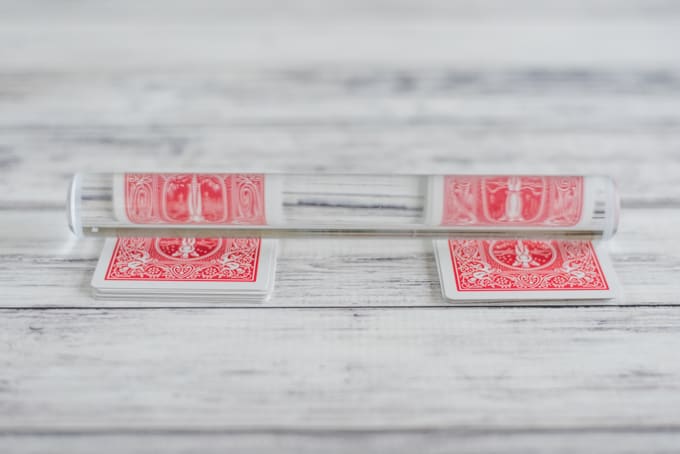
- A polymer clay rolling pin and a deck of cards -or- a pasta machine for polymer clay use. If you don't already have a pasta machine, you don't have to rush out to buy one for this project! Serious polymer clay-ers usually use 'real' pasta machines, but you can get an inexpensive one to start with for clay use for about $15.
- Liquid polymer clay, such as Bake and Bond -or- a high-quality PVA glue like Tacky Glue.
- A brush for spreading your liquid clay or glue.
- A pen, ball head, maker, or something else that fits inside your circle cutter to help push clay scales out.
- A very clean crafting mat, Teflon crafting sheet, or just a piece of parchment paper to protect your clay and work surface.
- Acrylic craft paints in mermaid colors & a brush
- Mica powders or DecoArt Metallic Lustre Wax (totally optional)
Choose whichever colors of clay feel mermaidy to you, or you can use white and paint it with craft paints after baking!
How to make a mermaid box
Break off sections of the clays you plan to use and condition them.
In other words, knead each piece around individually to warm it up and get it ready to use. The exact amount you'll need depends on the size of your box, but if I'd balled all my clay together the ball would have been about walnut sized. You're going to roll it out fairly thin, so a little goes a long way.
At this point, you can choose to blend your clays or roll them out individually - it's up to you.
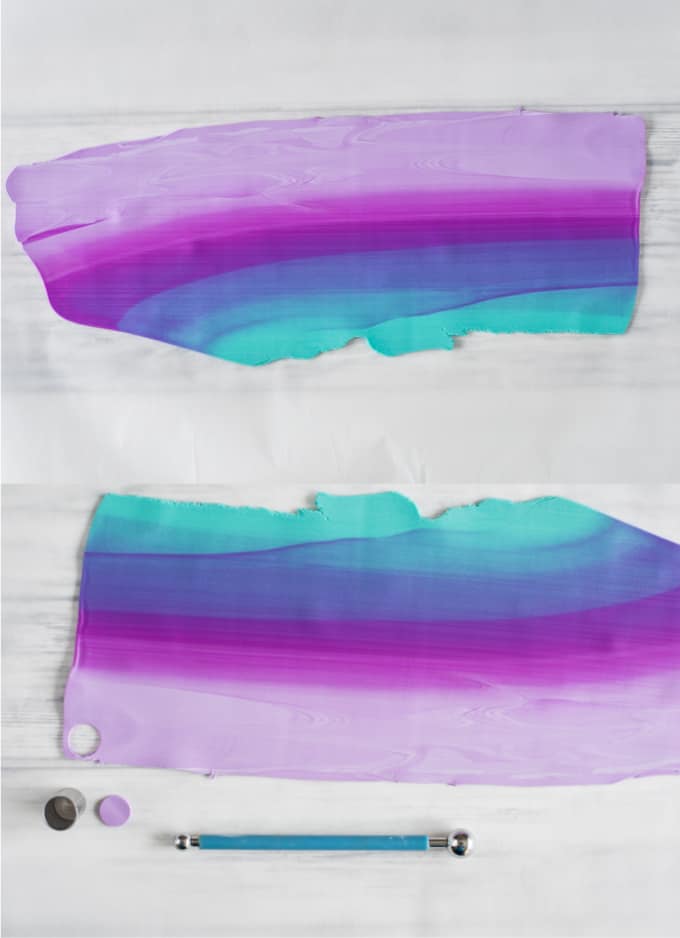
For a beautiful continuous color gradient, you can use the Skinner Blend method. It can take a little practice to perfect, so if this is your first time blending clay you might want to try something simpler.
I rolled out each piece on my thickest machine setting, then aligned all three pieces side by side and kept rolling it out thinner and thinner. The colors blended a little, but also left me with some distinct areas of single color - exactly the look I was going for.
If you don't have a pasta machine, count out two stacks of an equal number of playing cards and use the stacks as a guide for your roller. Decrease the stacks by one or two cards each time to make the clay thinner and thinner.
Roll out the clay until it's about 1/16" of an inch, or slightly less, then transfer it to your craft mat or parchment paper and get cutting!
Cut your scales as close together as possible, and keep them in order as you remove each from the circle cutter. I used a ball head to gently press each scale from the cutter.
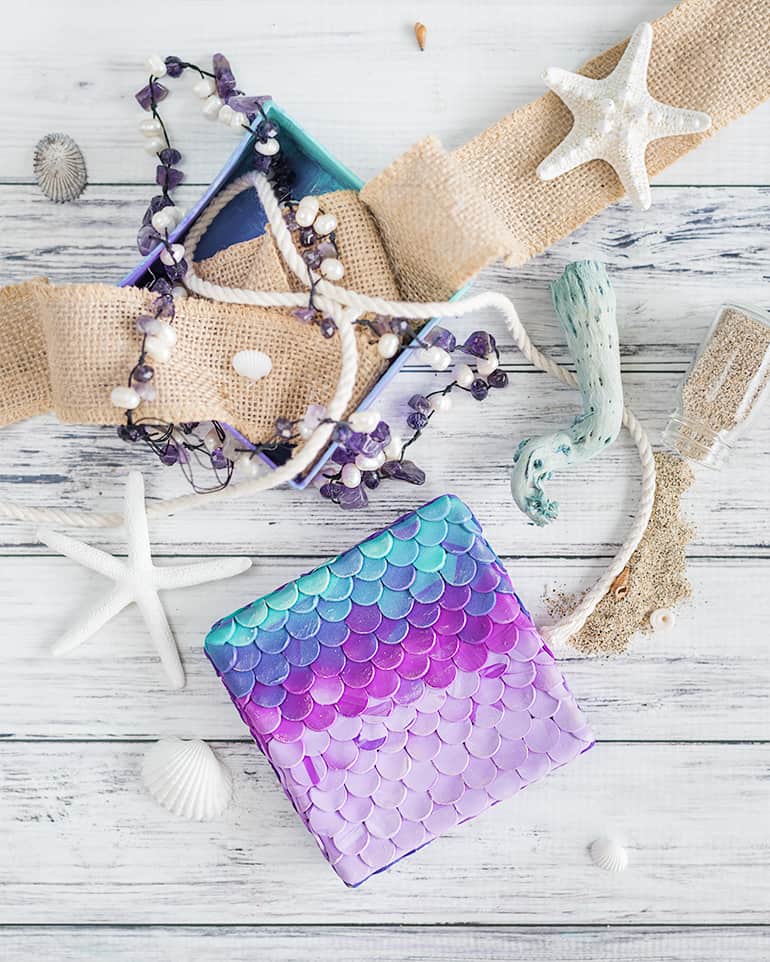
Once you have your scales cut, coat the box's lid with liquid polymer clay or PVA glue. Don't worry if you end up having not quite enough scales, you can always re-roll your scraps and cut more scales, if needed, just like baking cookies. =) Begin on one side by folding a row of scales over the edge of the box.
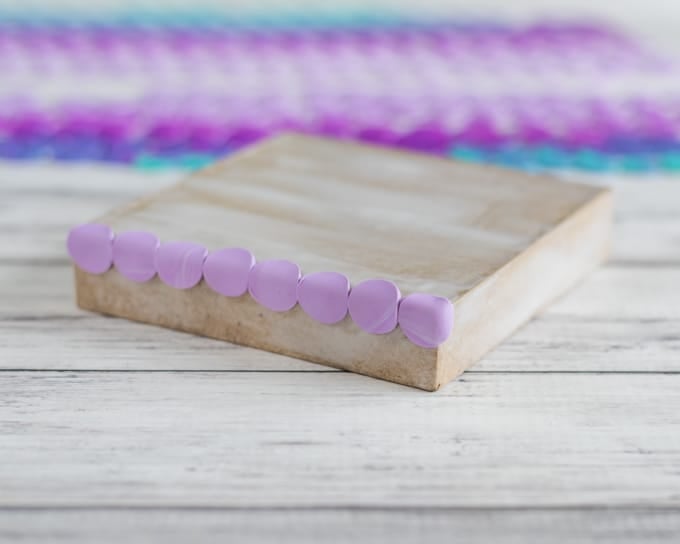
Add a second row, positioning the scales to overlap like this:
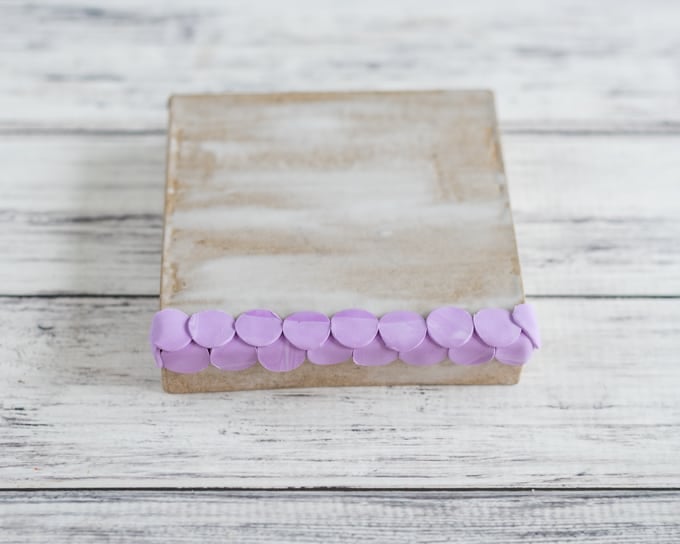
Keep on keeping on! Add overlapping scales (and don't forget the sides!) until the entire lid is covered. If you're using mica powder, dust the scales before baking to add shimmer.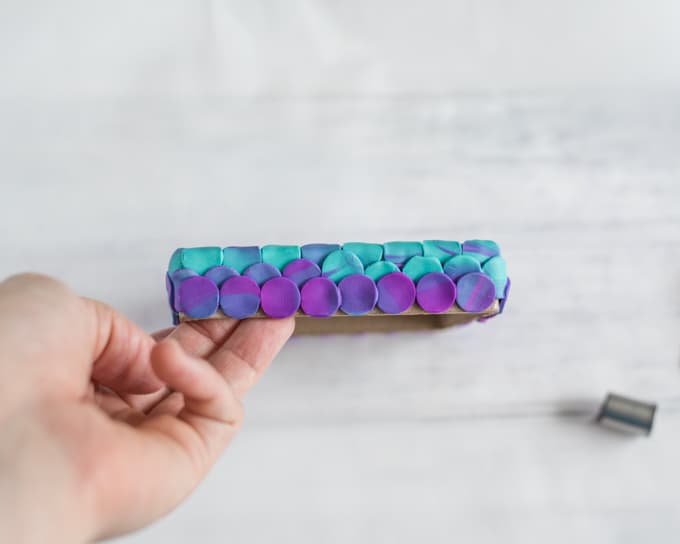
Bake the scaled box lid as directed by your particular type of clay. Times and temperatures vary, so please check your packaging or the manufacture's website.
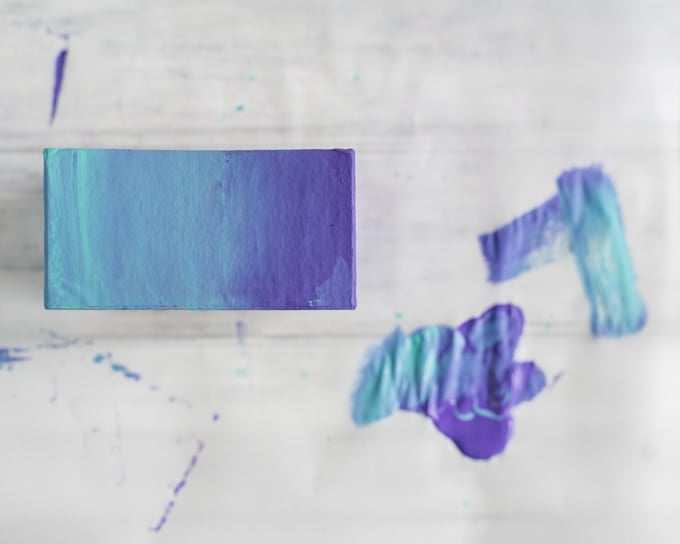
While the lid bakes and cools, paint your box! I used my easy ombre painting method outlined in this tutorial to create a lovely mermaid-y appearance, inside and out.
If you'd like, add sparkle to your box with Metallic Lustre Wax. I used "Champaign Ice."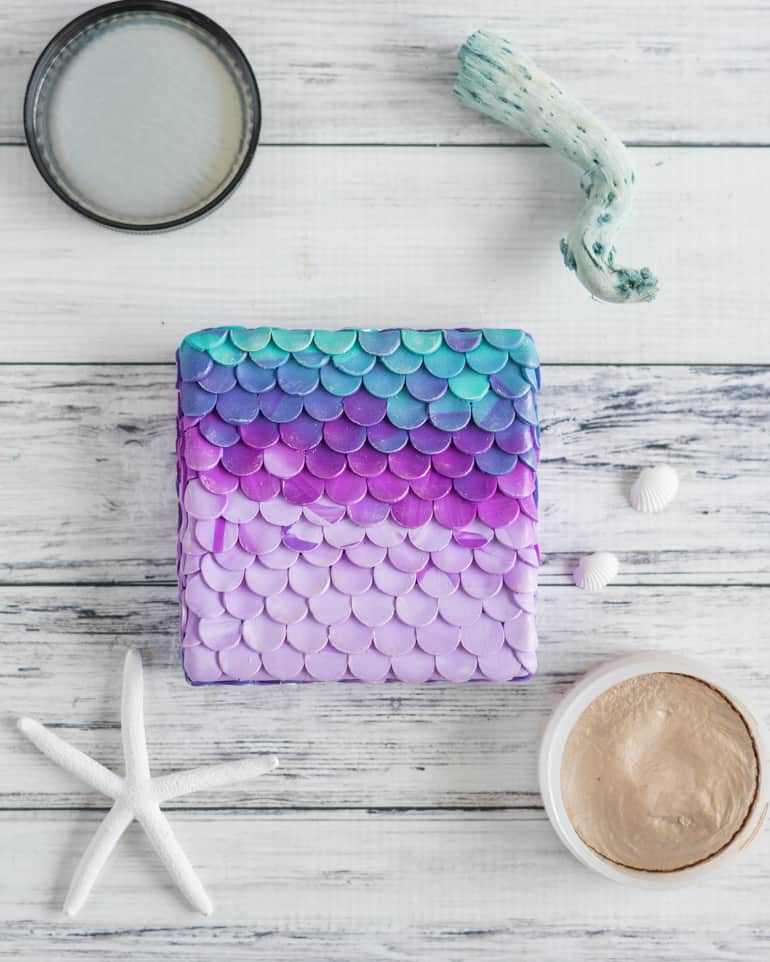
Use your new polymer clay mermaid box for storing your treasures, or make someone's day by using it as the most unique gift box ever!
Polymer clay can be surprisingly durable, so don't be afraid to use your mermaid box.
More mermaid craft tutorials
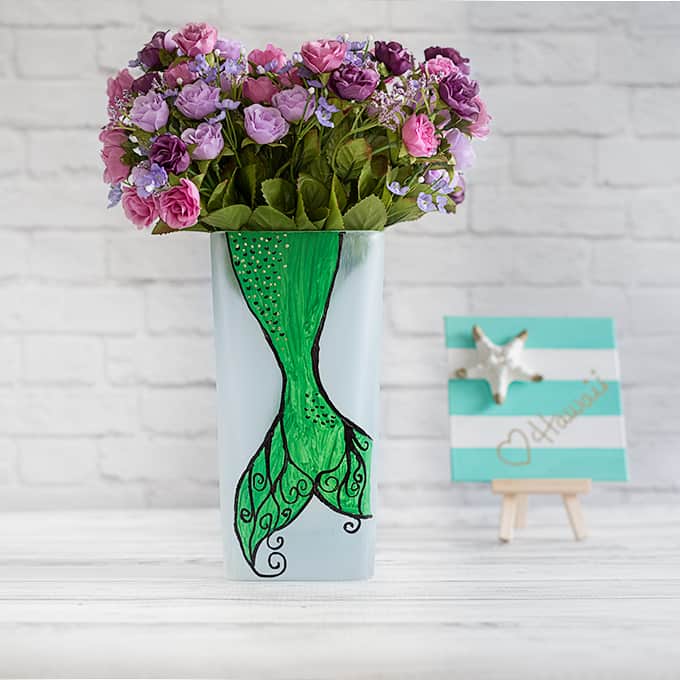
If you like mermaids, you may also enjoy this mermaid vase tutorial that's complete with a template for creating the tail!
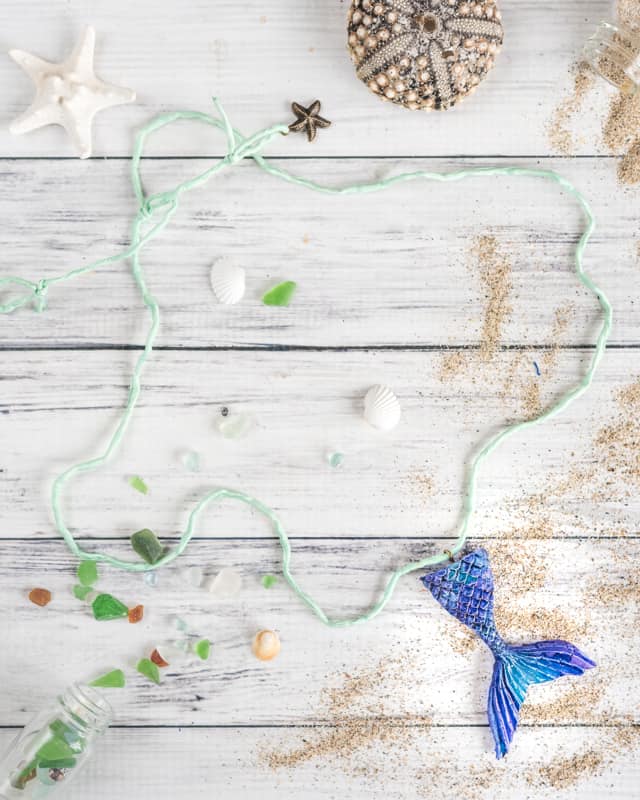
Mermaid tail necklace (made with hot glue!)
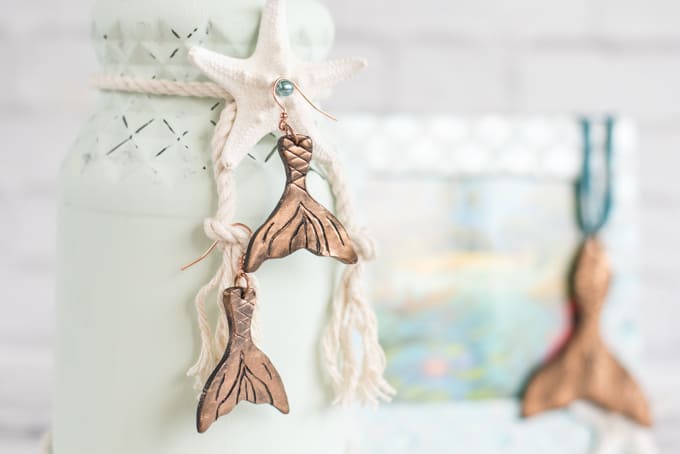
Polymer clay mermaid tail earrings
 Mermaid free printables
 Mermaid free printables
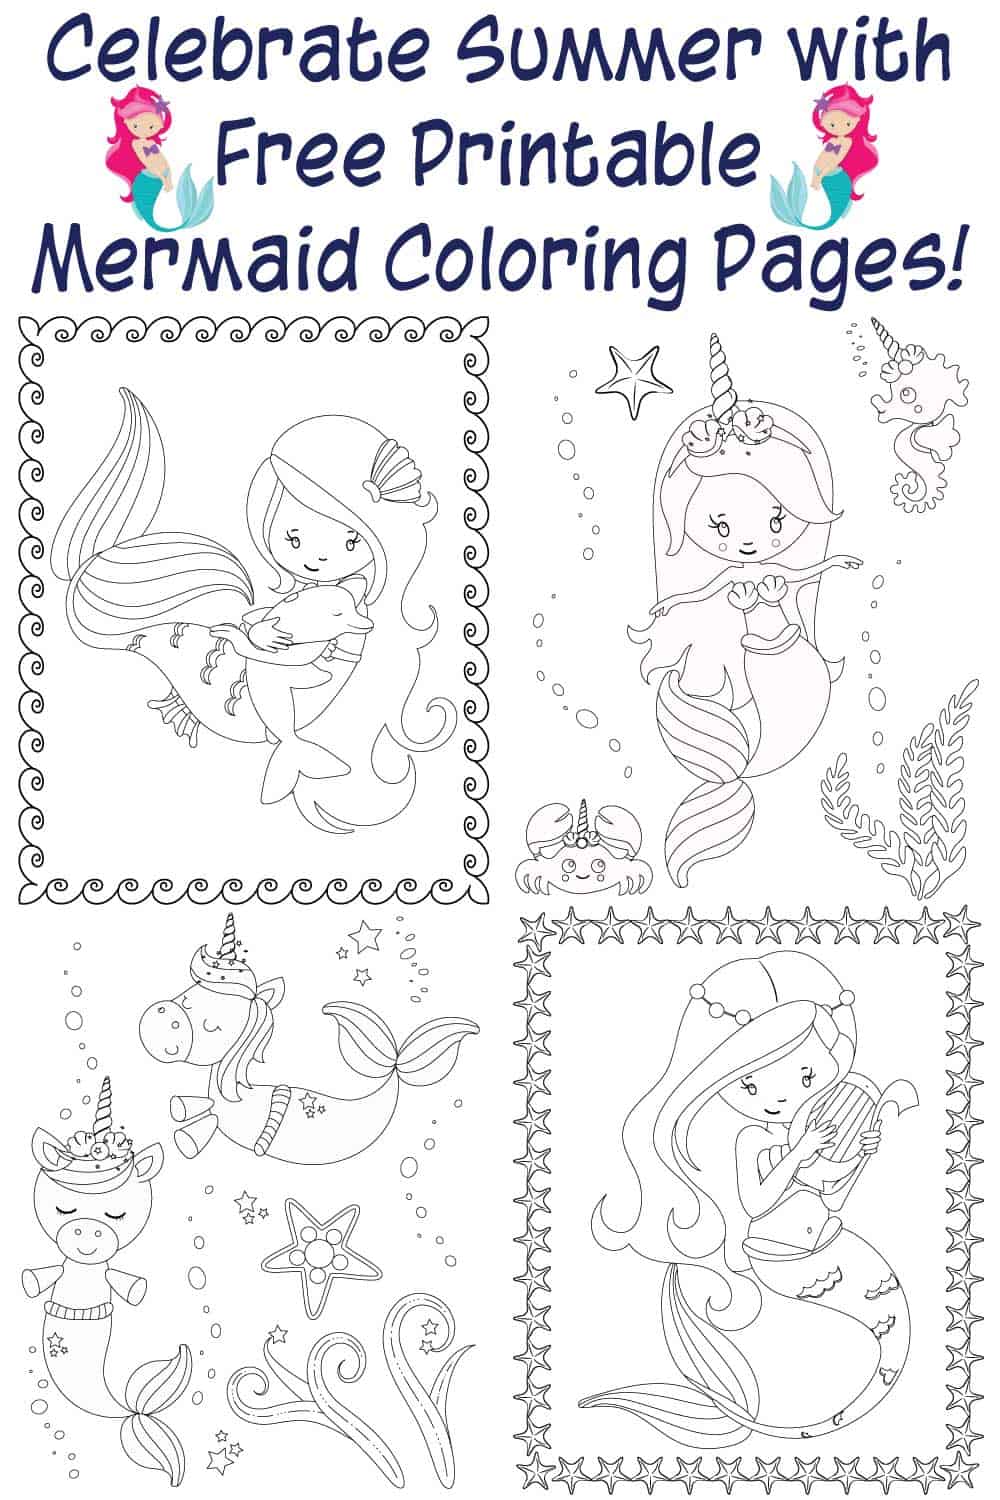

What treasures will you store in your polymer clay mermaid box?

More Related Posts
[pt_view id=“15d429e15n"]
[catlist search="tutorial" numberposts=4 orderby=rand excludeposts=this]
Julie
This is sooo cute! I love it! But knowing me, I definitely don't have the patience to do this, so umm... Send one my way?!? 😉 Hehe
Natashalh
The cool thing is that polymer clay doesn't dry up and it takes a very, very long time to become unusable. You can totally just work on a project in stages! I have one necklace I started on over a year ago - no joke. You just have to keep it covered or in a box so the clay doesn't get dusty and then come back to it whenever!