• Skip to primary navigation
  • Skip to main content
  • Skip to primary sidebar
  • Skip to footer
The Artisan Life
  • Dot Marker Pages
  • Valentine’s Printables
  • Journals & Planners
  • Preschool + K Printables
    • Alphabet Tracing Worksheets
    • Fine Motor Practice Pages
    • Spanish Preschool Pages
    • CVC & Sight Words
    • Dot Marker Pages
    • Preschool Math
    • Kindergarten Math Worksheets
    • Cut & Paste Puzzles
  • Coloring
  • Gardening + DIY
    • Gardening
    • DIY Cleaning Products
    • DIY Skincare Products
    • Craft Tutorials
  • Shop

How to Make Recycled Paper without a Mold or Deckle

1087 shares
  • Share

Discover how to make your own recycled paper the easy way with this tutorial. This is a fun craft to do with kids at home using materials you already have on hand. I hope you enjoy!

Did anyone else make paper at summer camp? I always loved making my own paper, but I don’t have a frame with screen in it and all that technical stuff. (The real names for the equipment you’re supposed to use are “mold and deckle.”)

I don’t have those items and my husband, the one who knows how to actually build things, is out to sea, so I decided to make my own paper using items I already had at home.
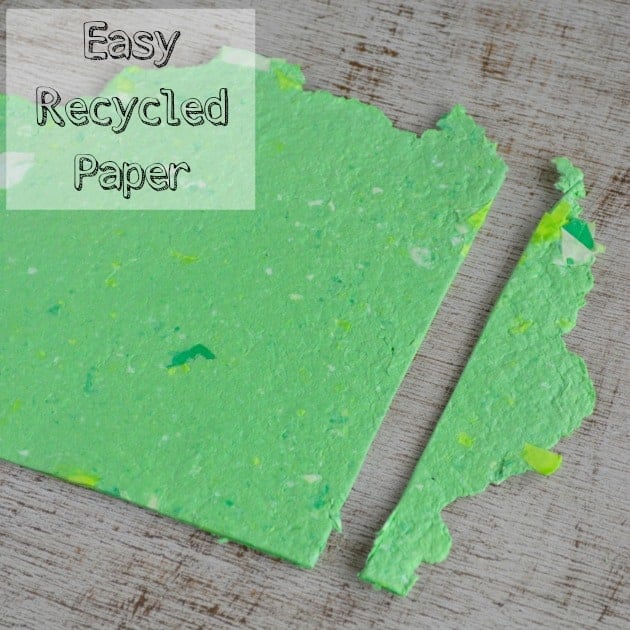
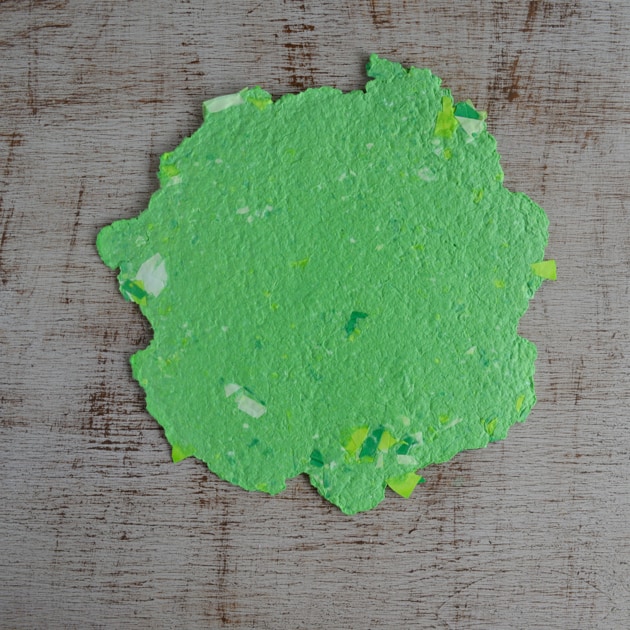
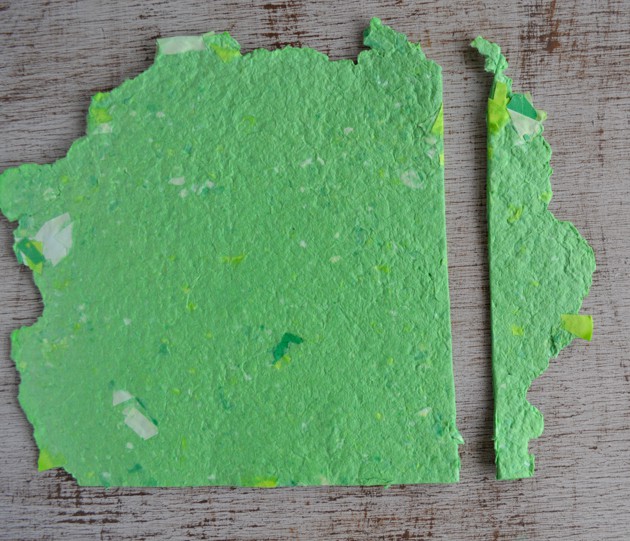
The paper isn’t as uniform in size or thickness as it would be with the ‘right’ equipment, but I like its rustic appearance and think it’s a great way to use some paper scraps!

text "easy homemade recycled paper" over the top of a piece of homemade green paper

This post may include affiliate links, which means I may make a commission on purchases made through these links at no additional cost to you. 

Supplies to Make Recycled Paper

  • Paper scraps
  • Scissors
  • A medium bowl
  • Water
  • A blender or immersion blender
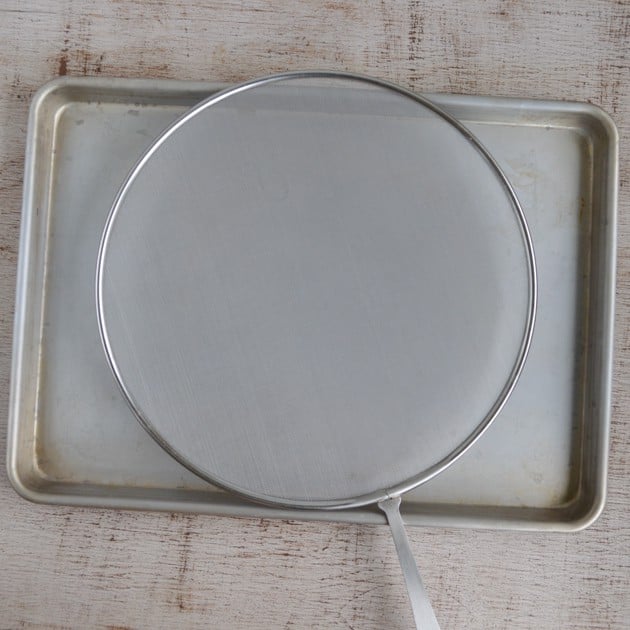
  • A grease splatter screen
  • A rimmed baking sheet
  • A pie pan or glass baking dish
  • A hair dryer (optional)
  • Add-ins like glitter, bits of ribbon, seeds, etc. (optional)
Package of 80,000 Wildflower Seeds - Hummingbird and Butterfly Wild Flower...
BergKoch Splatter Screen for Frying Pan - 13 Inch Stainless Steel Grease...
Amazon Basics Multipurpose, Comfort Grip, PVD coated, Stainless Steel...
Package of 80,000 Wildflower Seeds - Hummingbird and Butterfly Wild Flower...
BergKoch Splatter Screen for Frying Pan - 13 Inch Stainless Steel Grease...
Amazon Basics Multipurpose, Comfort Grip, PVD coated, Stainless Steel...
Package of 80,000 Wildflower Seeds - Hummingbird and Butterfly Wild Flower...
BergKoch Splatter Screen for Frying Pan - 13 Inch Stainless Steel Grease...
Amazon Basics Multipurpose, Comfort Grip, PVD coated, Stainless Steel...

How to make recycled paper

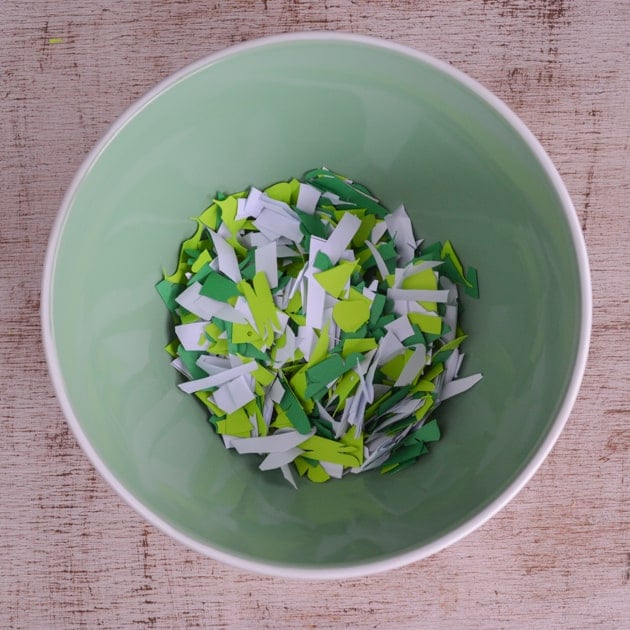
1. Cut or tear your paper scraps into small pieces. They don’t need to be super tiny, but try not to make them too big, either. Most of my pieces were about an inch long and maybe 1/4″ wide. My scraps were irregular, but mostly I just made little parallel cuts in the paper as if I were creating a fringe and then cut the fringe off to easily make small pieces. Place the pieces in a medium bowl as you cut them.

cut paper into little pieces

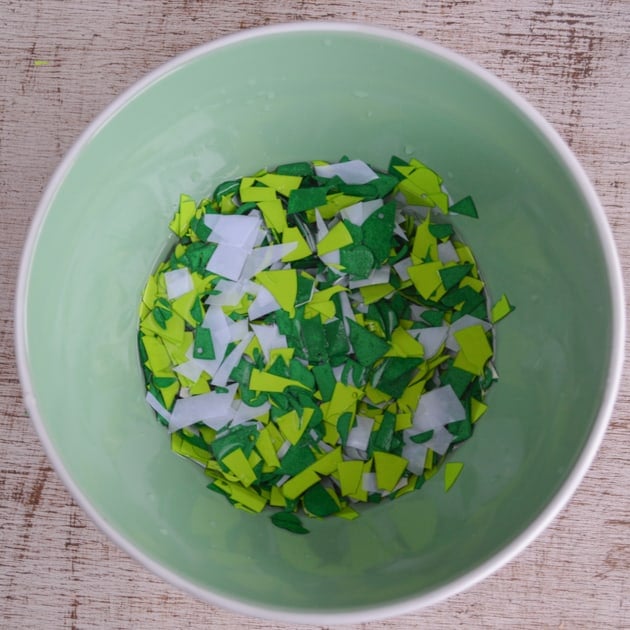
2. Pour enough cool water into your bowl to just cover your paper and push the scraps down into the water if it’s trying to float. Let the paper soak for a couple of hours, or until it’s soft and mushy. You can put the bowl in the fridge, if you’d like, but it really isn’t necessary unless it’s very warm in your house.

cover paper scraps with water

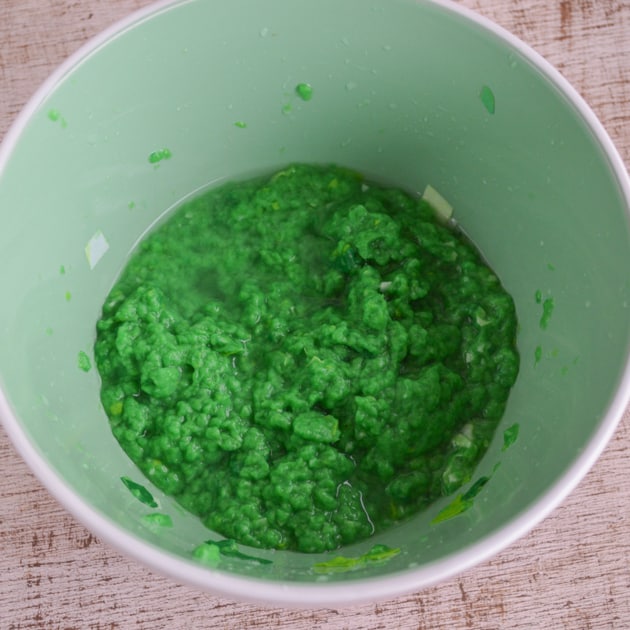
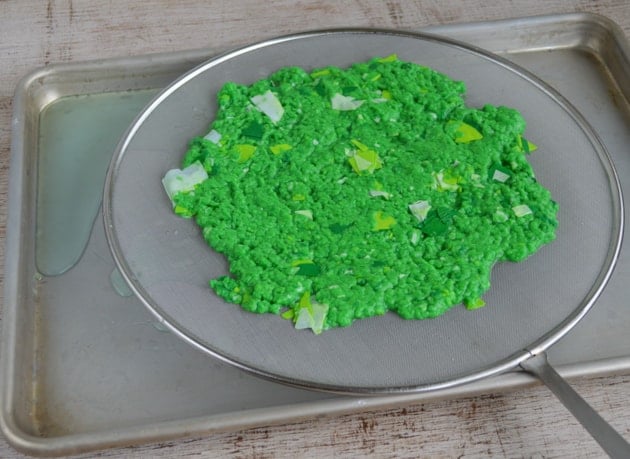
3. Once the paper is mushy, either transfer it to a blender or use an immersion blender to process it until it forms a thick pulp. I used my immersion blender and it worked just fine – I really liked that I could see how processed the paper was becoming and could leave some larger scraps intact. If the mixture is too dry to form a pulp, add a little extra water.

blended paperblended paper

4. Place your splatter screen on your cookie tray.

homemade paper draining on a screen

5. Scoop the paper pulp out of the bowl and spread it out on the splatter screen. You want to make the pulp layer thin enough that the paper isn’t super thick and lumpy, but thick enough that the paper can actually stick together without holes in it.

letting the paper drain

6. Once you’ve transferred all the pulp, use your hands, a spatula, or even a pie pan to carefully press out as much water as possible.

pressing out water

7. Pour out the excess water, if you’d like, and allow the paper to drain/air dry until it’s, well, dry! You can speed this up a little by using a hair dryer. It may take a day or two to dry fully if you don’t use a hair dryer and it’s particularly humid.  You can carefully use an iron *not* set to steam if you want to get a little extra moisture out. Just don’t burn your paper!

8. Use your paper for crafts, personalized notes, or whatever else you’d like! I enjoy the way it looks with natural edges, but you can trim them up, if you’d like.

homemade paper
trimming a green homemade piece of paper paper

I always feel awful about throwing away perfectly good paper scraps just because I can’t think of a way to reuse them. This project is the perfect way to put those totally cool bits and pieces to work!

Of course, it does result in a somewhat ‘rustic’ piece of paper. I have to admit that you do need the real equipment to make super ‘nice’ paper, but sometimes a homemade piece of paper that isn’t factory perfect is exactly what the situation calls for.

I think this paper would be great for personalized notes, scrapbooking, and even mixed media creations. This paper can be particularly beautiful if you include leaves, flowers, or even scraps of fabric or yarn.

Have you ever made your own paper? What inclusions are your favorite?

DIY body products on The Artisan Life

Take the guesswork out of creating safe, healthy, homemade body products for your family with these tutorials!

DIY Pumpkin Spice Body Wash

This pumpkin spice body wash is so creamy and smells like fall!

3 Nourishing Oatmeal Bath Salts Recipes for Dry Skin

3 nourishing oatmeal bath salts recipes to heal your dry skin.

Goat Milk Bath Soak Recipe

This lavender and goat milk bath soak recipe makes a great homemade gift idea.

Homemade Honey Almond Lip Sugar Scrub

This honey almond lip scrub is food safe and delicious!

DIY Charcoal Mask

Lavender Frankincense Pillow Mist Recipe

Drift off to dreamland with this pillow mist recipe.

Easy Melt & Pour Lavender Soap Recipe with Frankincense

This easy melt and pour lavender soap is a joy to use or gift!

Moisturizing Oatmeal Honey Soap for Dry Skin - The Artisan Life

Photo Credit: natashalh.com

This moisturizing honey oatmeal soap for dry skin is easy to make with a melt and pour soap base!

Lavender Mint Cooling After Sun Spray

This soothing after sun spray is perfect for wind or sun burned skin.

Sugar Scrub Recipe - DIY Invigorating Eucalyptus Mint Body & Hand Scrub

Pumpkin Face Mask for Dry Skin Recipe

This pumpkin and clay face mask rejuvinates dry skin.

1087 shares
  • Share

Buy me a coffee

Filed Under: craft tutorial, Uncategorized

Previous Post: « Homemade “Oreos” – Double Chocolate Sandwich Cookies
Next Post: How to Make a Wedding Veil – Easy DIY Bandeau Veil »

Reader Interactions

Comments

  1. Toni

    January 12, 2021 at 00:49

    Just ordered seeds to make paper note lets. Thank you for the idea

    Reply
    • Stacey

      December 7, 2021 at 17:47

      Your post, really spoke to me.

      My Dads a merchant Seafarer Mum and I ad libbed more than a few DIY type of things because Dad wasn’t home. ☺☺

      Also, this is how I am currently going to be making paper. Only, I put the “slurry” into a heap of water. And then kind of shake the screen under the water to catch the pulp.

      If that makes sense.

      Anyway, just thought I would stop by to leave an extremely long winded comment. And to let you know… hmm… I’m not too sure how to word it…

      That I feel you, with someone being away at Sea. I understand how it feels.

      Not a lot of people actually ever will/do.

      All the best

      Stacey
      xoxo

      Reply
« Older Comments

Leave a Reply Cancel reply

Your email address will not be published. Required fields are marked *

This site uses Akismet to reduce spam. Learn how your comment data is processed.

Primary Sidebar

natashalh - the artisan life

Hi, I’m Natasha! I’m so glad you’re here.

I’m a former classroom teacher with a Masters of the Arts in Teaching turned homeschooler & gardener. I share educational & planner printables and tips for making gardening with kids successful and affordable.

I also publish printed coloring & activity books. You can also find me on YouTube.

Let's be friends!

Search The Artisan Life

The Artisan Life is a participant in the Amazon Services LLC Associates Program, an affiliate advertising program designed to provide a means for sites to earn advertising fees by advertising and linking to Amazon.com.

The Artisan Life also uses affiliate links for other sites. For a full look at my policy, please visit its page here.

Buy me a coffee

Footer

Privacy Policy | Disclosure & Disclaimer | Terms and Conditions | Contact
COPYRIGHT © 2012 – 2023 The Artisan Life · ALL RIGHTS RESERVED
If you have any questions feel free to contact me directly here: natashalh(at)stalkingthewildsnark(dot)com. I do not accept guest posts and will not respond to unsolicited requests for guest posts or links. Stock images by Depositphotos

Copyright © 2023 The Artisan Life on the Foodie Pro Theme